
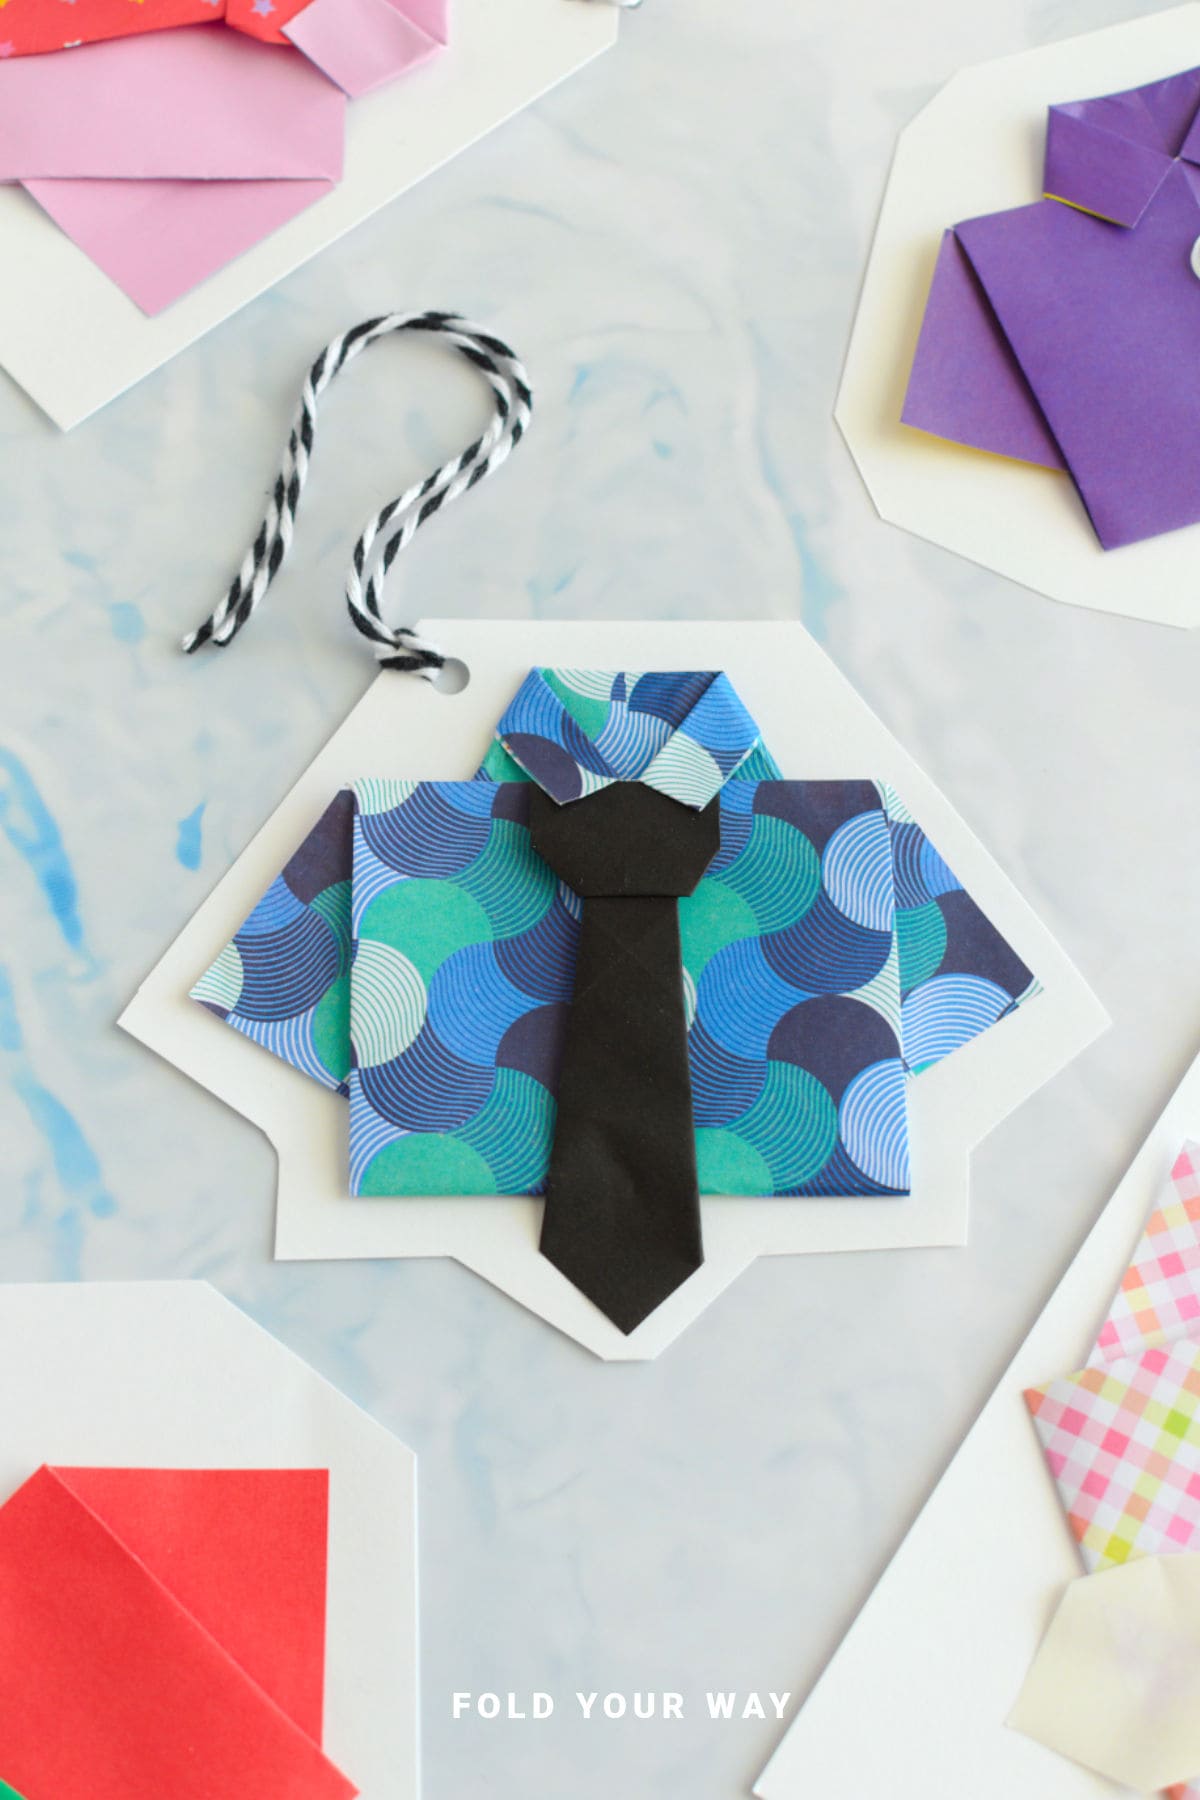
Add a fun handmade detail to your gifts with this diy shirt gift tag!
Made from just one sheet of paper, it's quick, creative, and perfect for birthdays, Father’s Day, teacher gifts, and more.
Jump to:
- Why You'll Love This Pattern
- Skill Level
- Materials Needed
- Instructions
- Tips For Success
- Common Mistakes & How To Avoid Them
- Color, Paper Ideas, and Variations
- FAQ
- Other Paper Crafts You Might Like To Try:
- Helpful Tips and Common Mistakes For Paper Crafts
- Stay Connected
- Other Patterns You Might Like To Try:
- Comments
If you’re looking for a simple way to make your presents stand out, this diy shirt gift tag is a clever and easy option.
Using just one sheet of paper, you’ll fold a mini paper shirt that can be customized in all kinds of fun ways—draw on buttons, add a sticker tie, or keep it plain and classic.
It’s a playful detail that’s especially perfect for Father’s Day, but also works well for teacher gifts, birthday presents, or even fun holiday wrapping.
You don’t need any fancy tools—just paper, scissors, glue, and string to attach it..
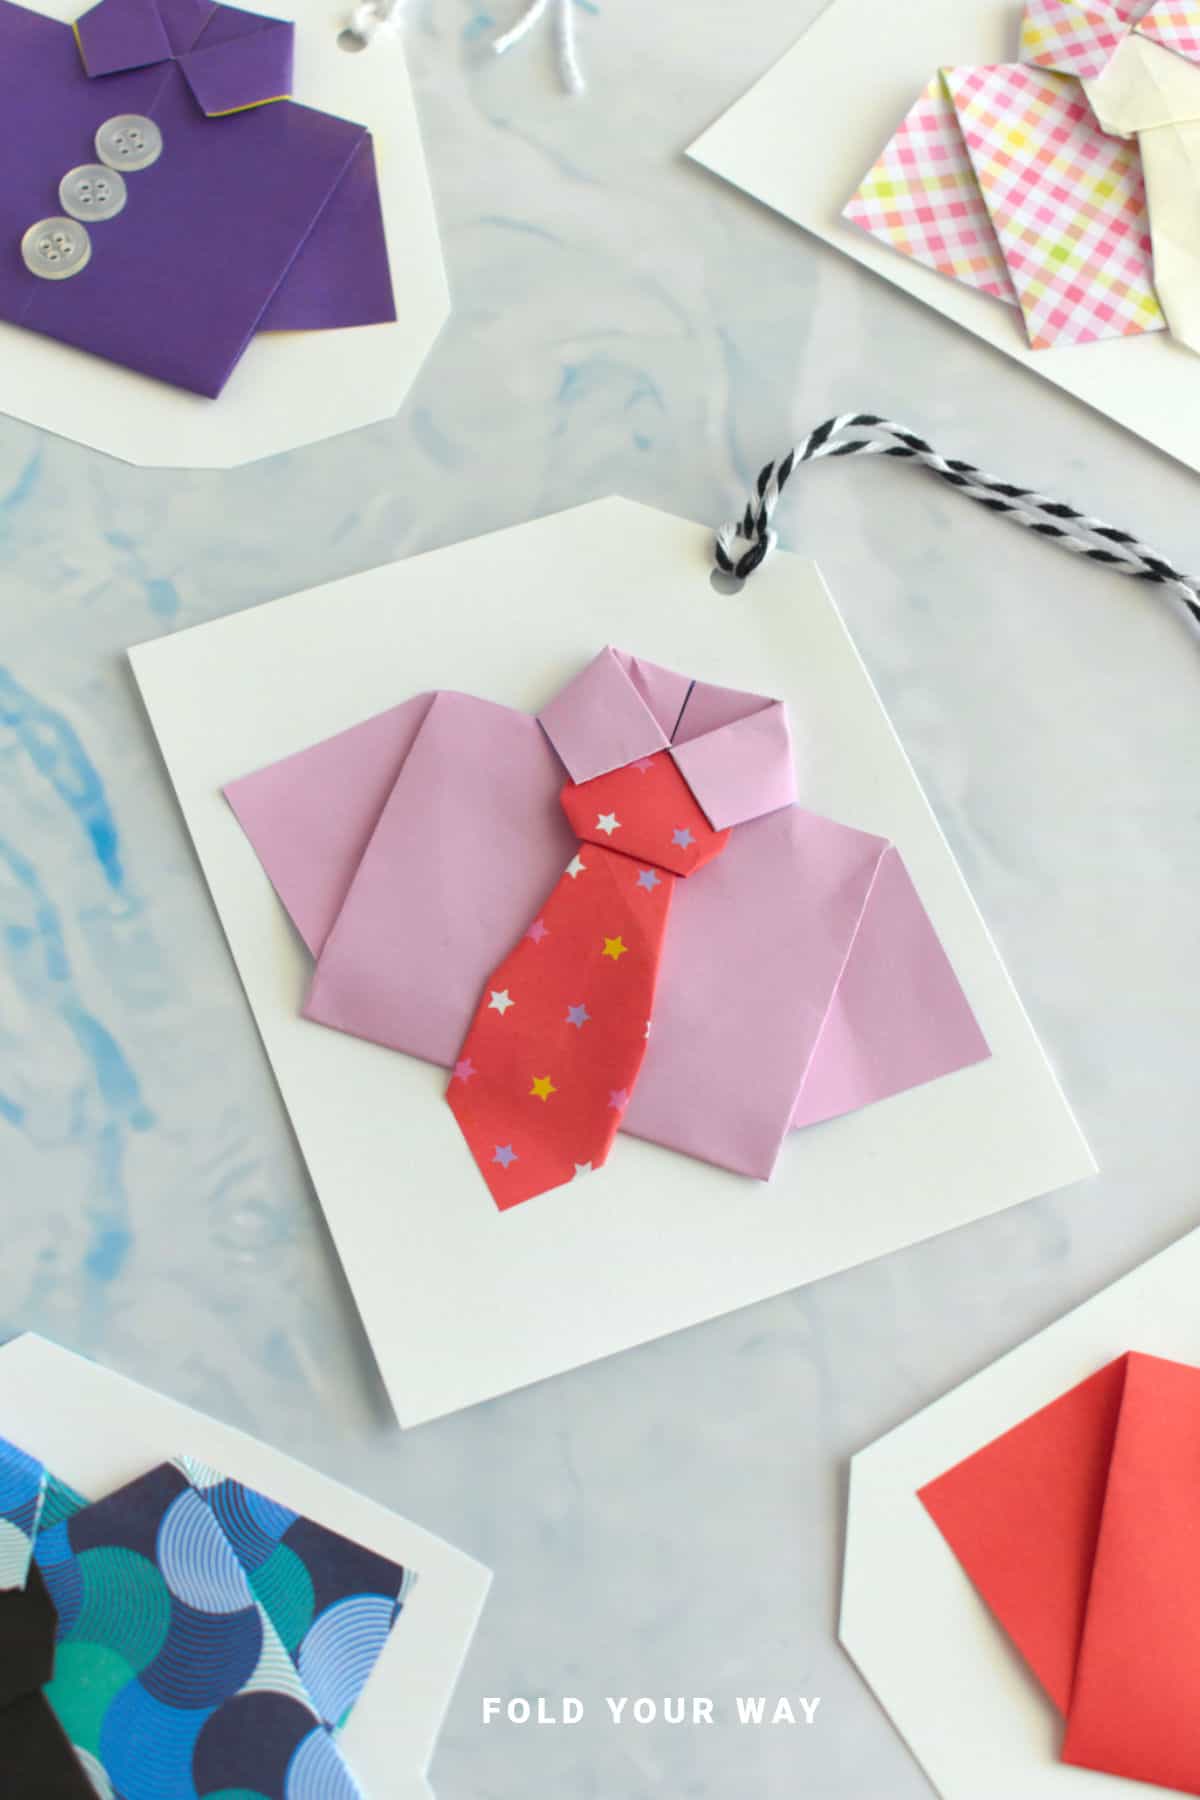
The final result is a compact, stylish tag that works well on gift bags, boxes, or even attached to baked goods and treats.
Whether you make a batch in advance or whip one up last minute, this tag adds personality and charm to any gift.
Why You'll Love This Pattern
- Quick and easy – Takes just a few minutes and uses minimal supplies.
- All occasions – Ideal for Father’s Day, birthdays, Christmas, teacher appreciation, and more
- Customizable – Add ties, buttons, or decorate it with markers or stickers.
- Kid-friendly – A great project for kids to help with or personalize.
- Pairs well with any gift – Attach it to shirts, books, treats, or gift cards.
Skill Level
★☆☆☆☆ (Very Easy)
Materials Needed
- 1 sheet of paper (origami or lightweight paper works best) for the shirt (see below for size guide)
- Hole punch
- String, twine, or ribbon (to tie the tag)
- Scissors
- Markers, stickers, or small paper scraps (optional for decorating)
- Glue
Instructions
Making the Origami Shirt
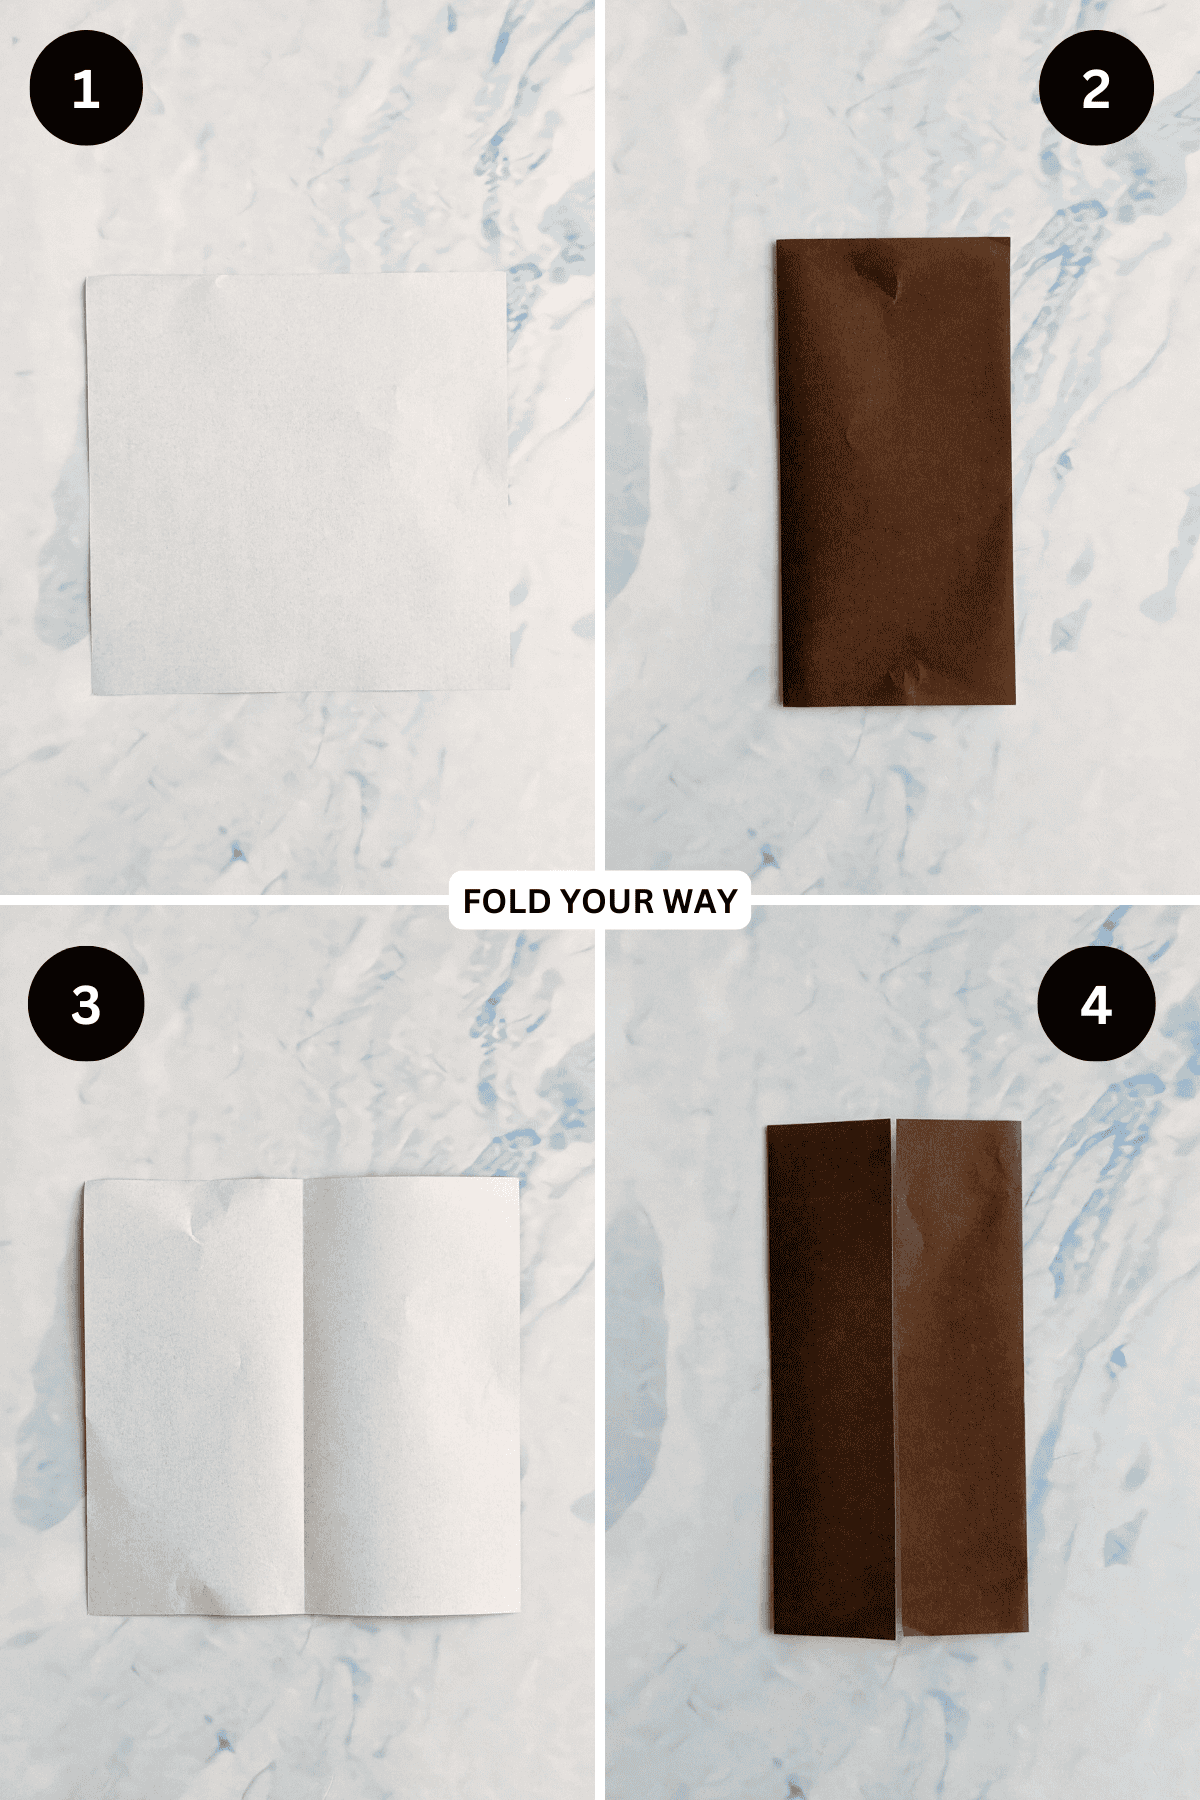
Step 1: Start with the color you want your shirt to be facing down.
Step 2: Fold your paper in half from left to right.
Step 3: Unfold previous step.
Step 4: Fold both the left and right edges in to meet the centre crease.
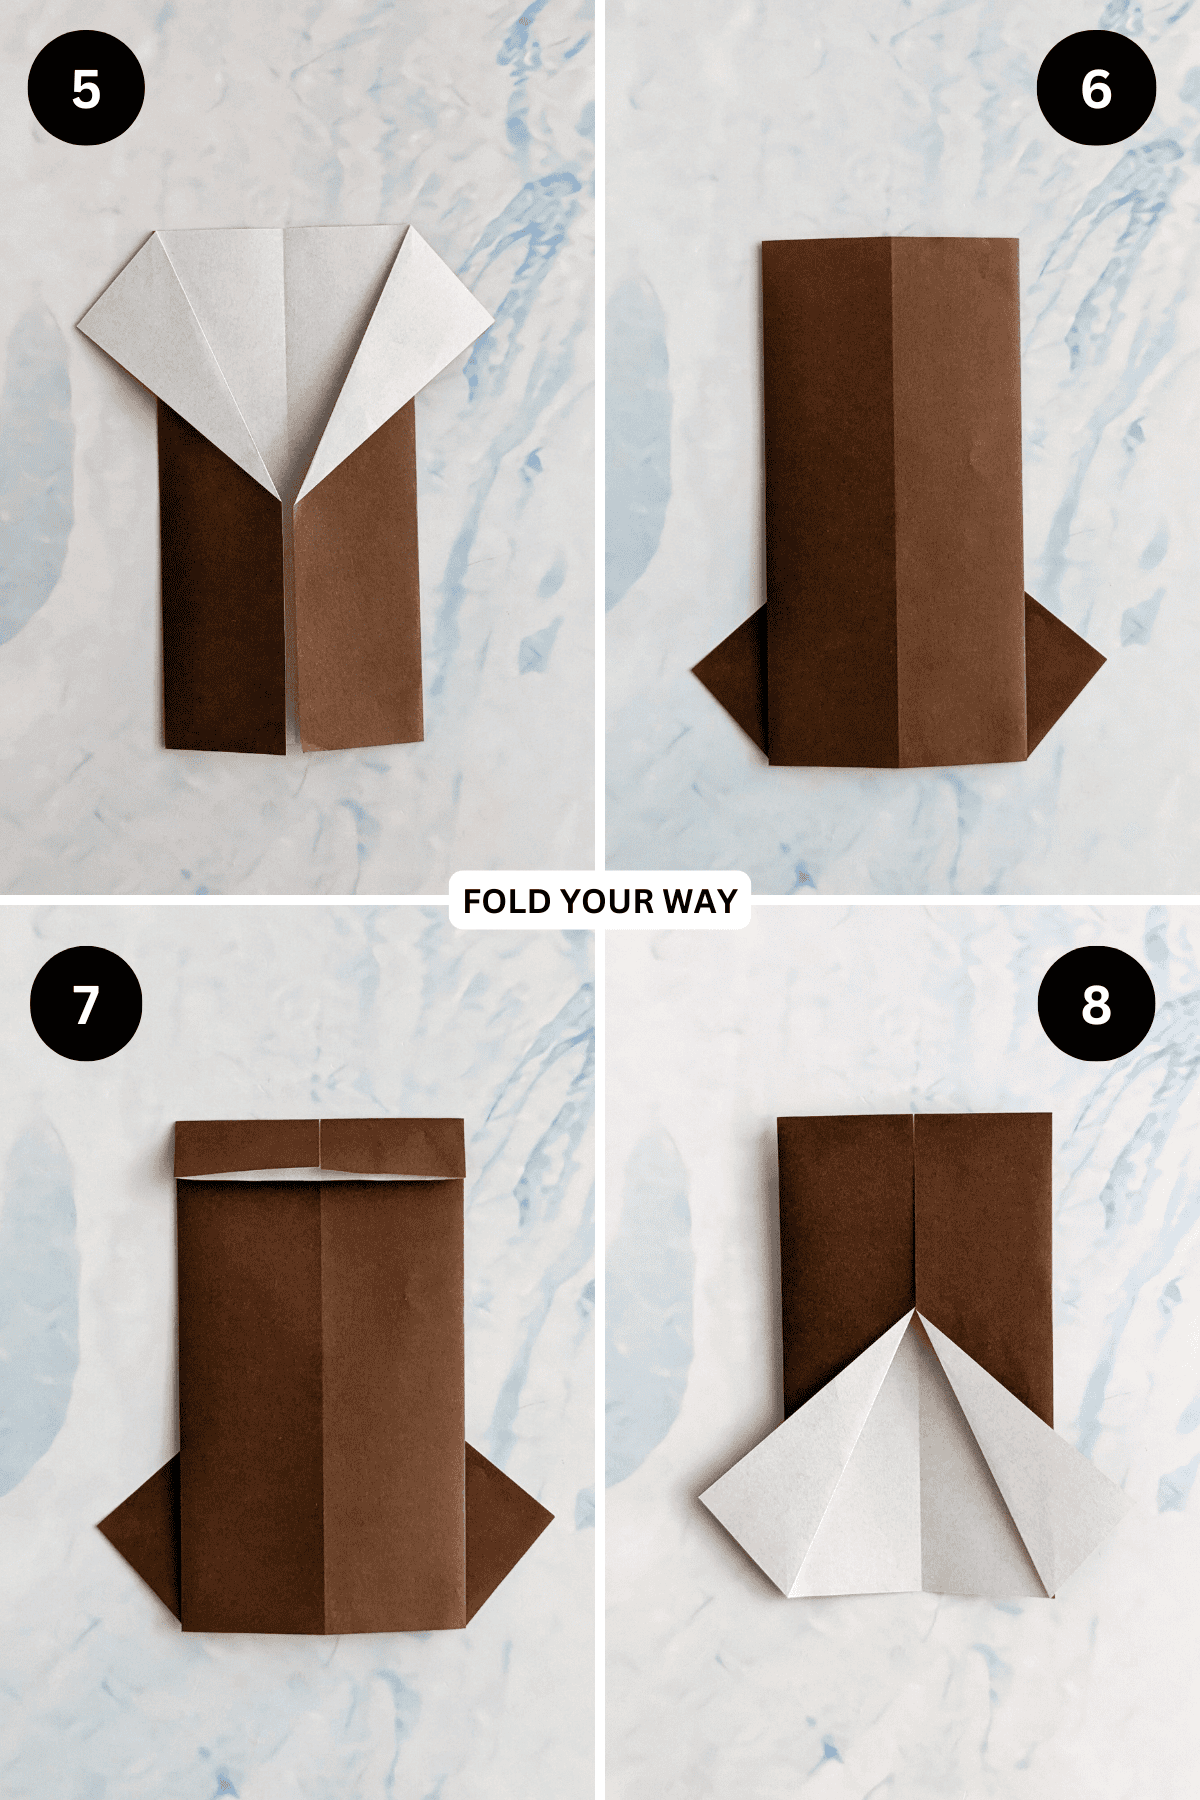
Step 5: Fold both the top left flap and top right flap out at an angle as shown.
Step 6: Flip your paper over from top to bottom.
Step 7: Fold the top edge down slightly. This will become the thickness of your collar.
Step 8: Filp your paper over from left to right.
✨ You're almost there! ✨
To unlock the final steps and complete your pattern, create a free account with Grow.me. below.
Make sure you tick the box to subscribe to our newsletter and stay up to date with the latest patterns, tips, and more!
Once you're signed up, you'll get instant access to finish your project and enjoy exclusive content in the future.
Already signed up? Hit the button below and select ‘Switch to Log In’ to pick up where you left off and finish your project!
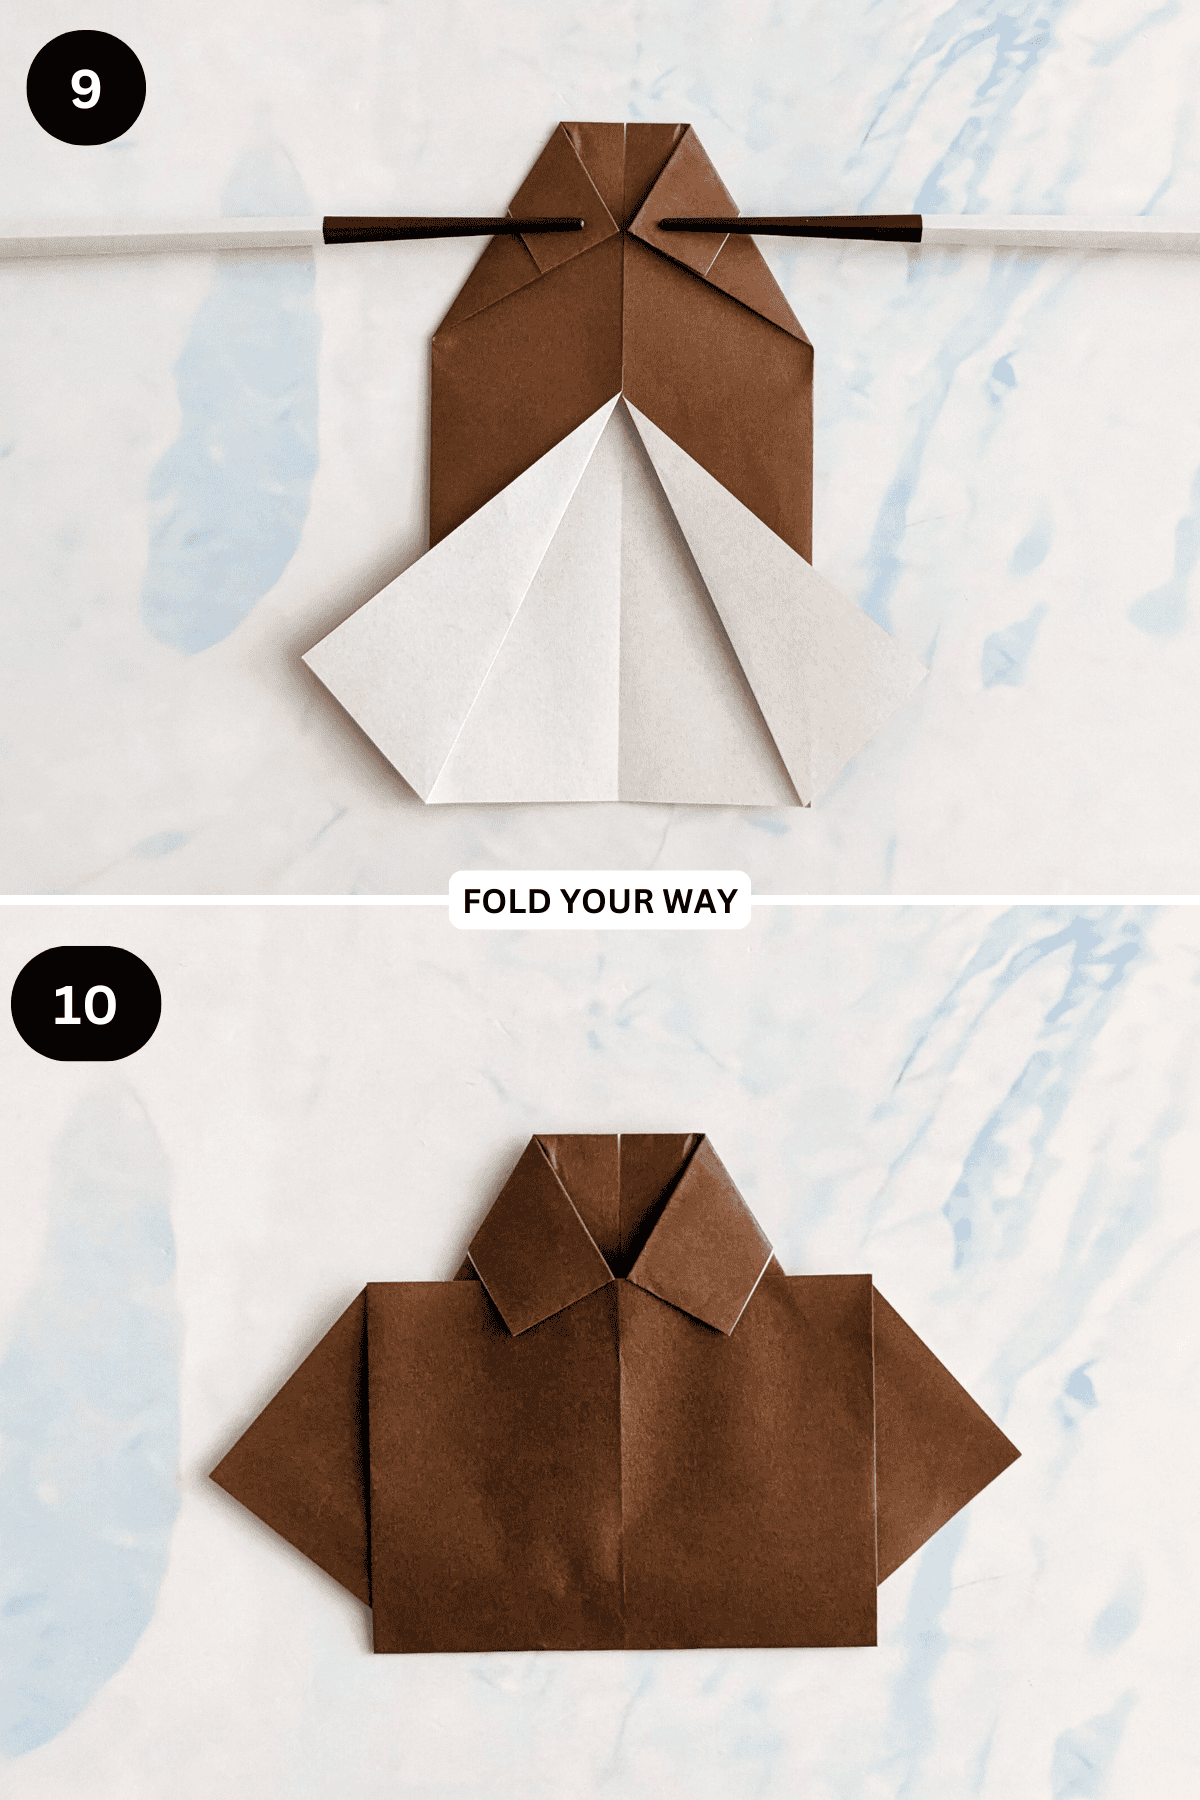
Step 9: Fold both the top left and top right corners in diagonally as shown (making sure the points touch the center crease), keeping the folds as symmetrical as possible.
Step 10: Fold the bottom edge up, slipping it under the flaps you folded in the previous step as shown, then crease.
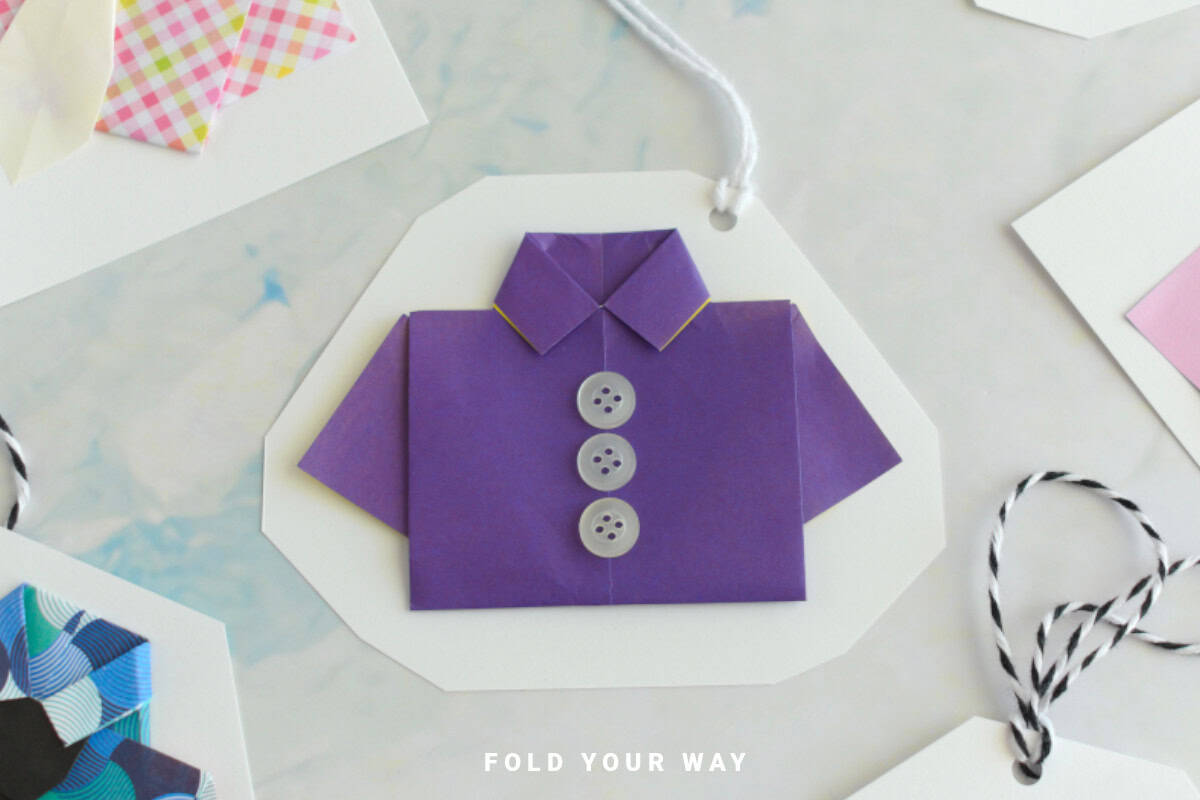
Completed shirt. You could leave your shirt plain, add buttons, or follow the steps for how to make an origami tie to add a tie to your shirt.
Making the DIY Gift Tag
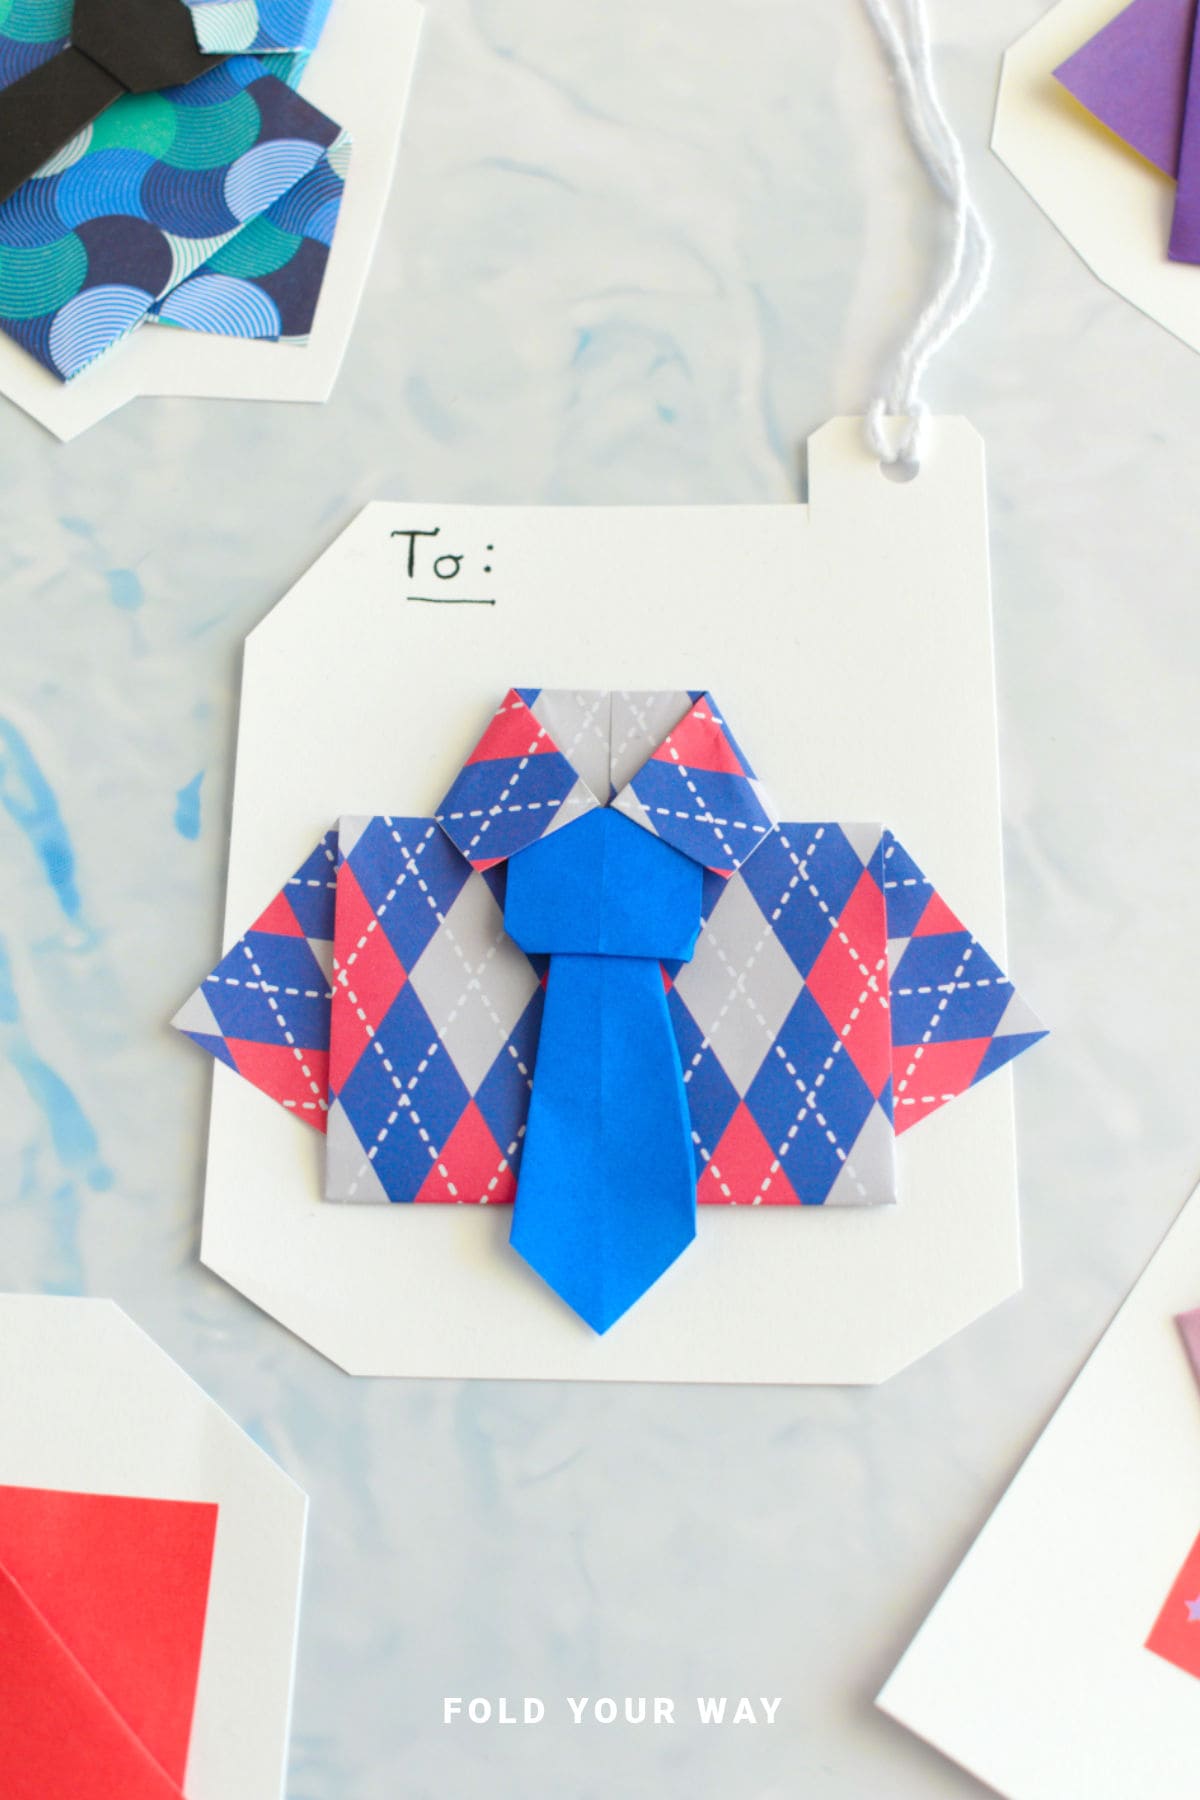
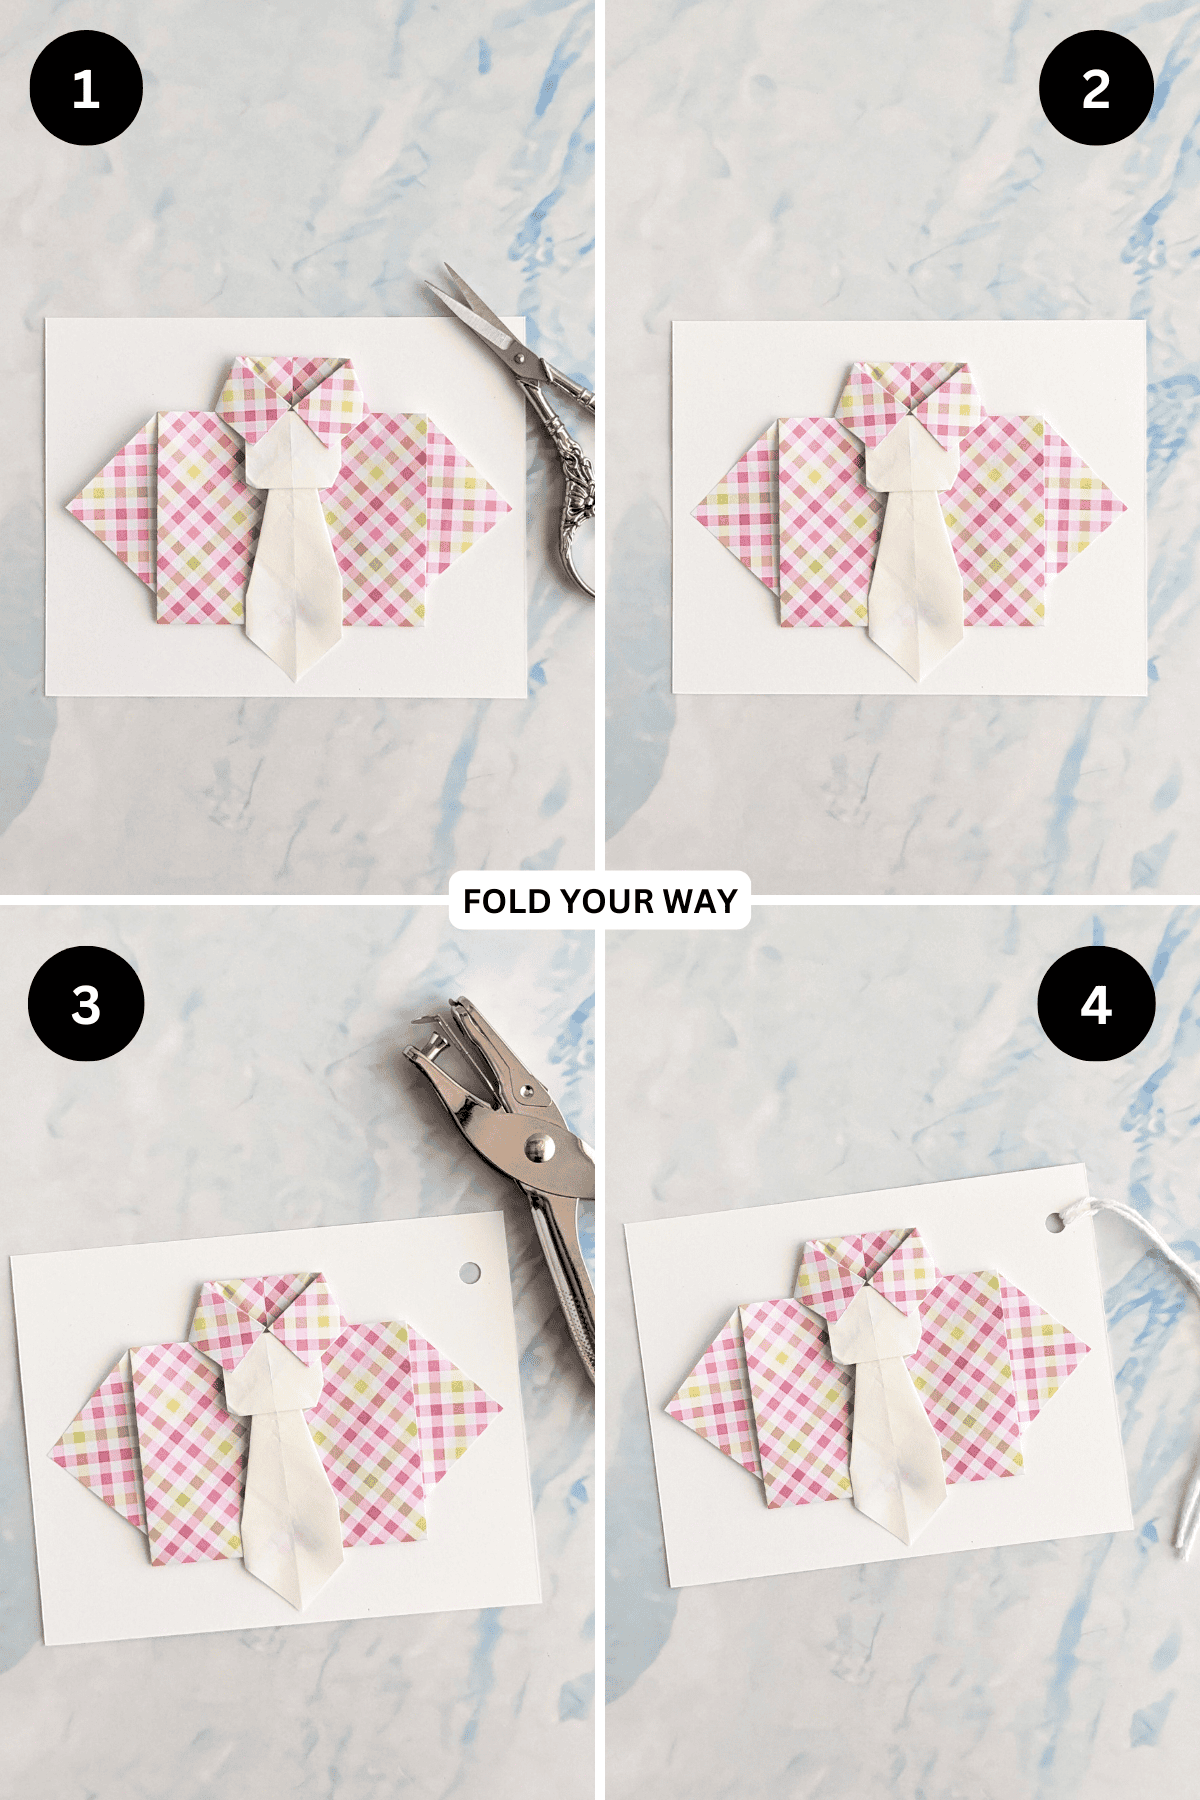
Step 1: Place your shirt onto a piece of cardstock and trace around it using a pencil.
It’s up to you how you trace around the shirt. You could keep it simple and trace a rectangle or square around it, or you could trace around the shape of the shirt.
Just make sure you leave at least a 0.40 inches (1 cm) border around the shirt and a bit more room along the top (as you will need to punch a hole into the cardstock later).
Once you are happy with it, cut out the cardstock.
Step 2: Glue the back of the shirt onto the cardstock.
Step 3: Using a hole punch, punch a hole on the top edge of the cardstock. The position of the hole is up to you.
Step 4: Thread some string through the hole. Completed shirt gift tag.
Tips For Success
- Use patterned paper – Stripes or checks give the “shirt” a more realistic look.
- Leave space for a note – Write a short message on the back of the tag before attaching it.
Common Mistakes & How To Avoid Them
Forgetting to leave space for the hole – Make sure to plan your design so you don’t punch through important parts.
Color, Paper Ideas, and Variations
- Plain white paper – Classic and crisp—great for adding your own drawings or tie details.
- Patterned origami paper – Gives the shirt a fun and finished look without extra decorating.
- Pastel colors – Perfect for spring occasions like Easter or baby showers.
- Muted tones – Ideal for more formal occasions or minimalist gifting.
- Craft paper with printed textures – Try gingham, denim, or flannel prints for added charm.
- Mini tie add-ons – Cut and glue a small paper tie or bow for extra detail.
FAQ
Lightweight cardstock may work, but regular paper folds more neatly for this project.
Other Paper Crafts You Might Like To Try:
Helpful Tips and Common Mistakes For Paper Crafts
Paper crafting and origami can be hard sometimes. Which is why we've made this printable PDF just for you.
It outlines helpful tips so that you can successfully complete your craft, and some of the most common mistakes people come across.
You can download the helpful tips and common mistakes for paper crafts printable PDF here.
Stay Connected
Made this pattern? Let us know how it went in the comments below!
Pin this post - Pin now to take your paper crafting skills to the next level.
Share on Instagram or Facebook - Capture the beauty of your finished paper craft project and share it on Instagram or Facebook! Tag us @foldyourway so we can see your work!
On the hunt for more paper crafts?
Try this paper desk organizer, origami clothes, cute origami, origami food, cube desk organizer, easy origami projects, Christmas gift wrapping ideas, bamboo letterfold, sanbo box, Santa box, candy box, egg, Thanksgiving origami, or wedding present wrapping ideas.
Other Patterns You Might Like To Try:
Looking for other easy patterns like this? Try these:


Comments
No Comments