
Looking for a fun and easy paper craft that’s perfect for autumn, harvest themes, or kitchen decor?
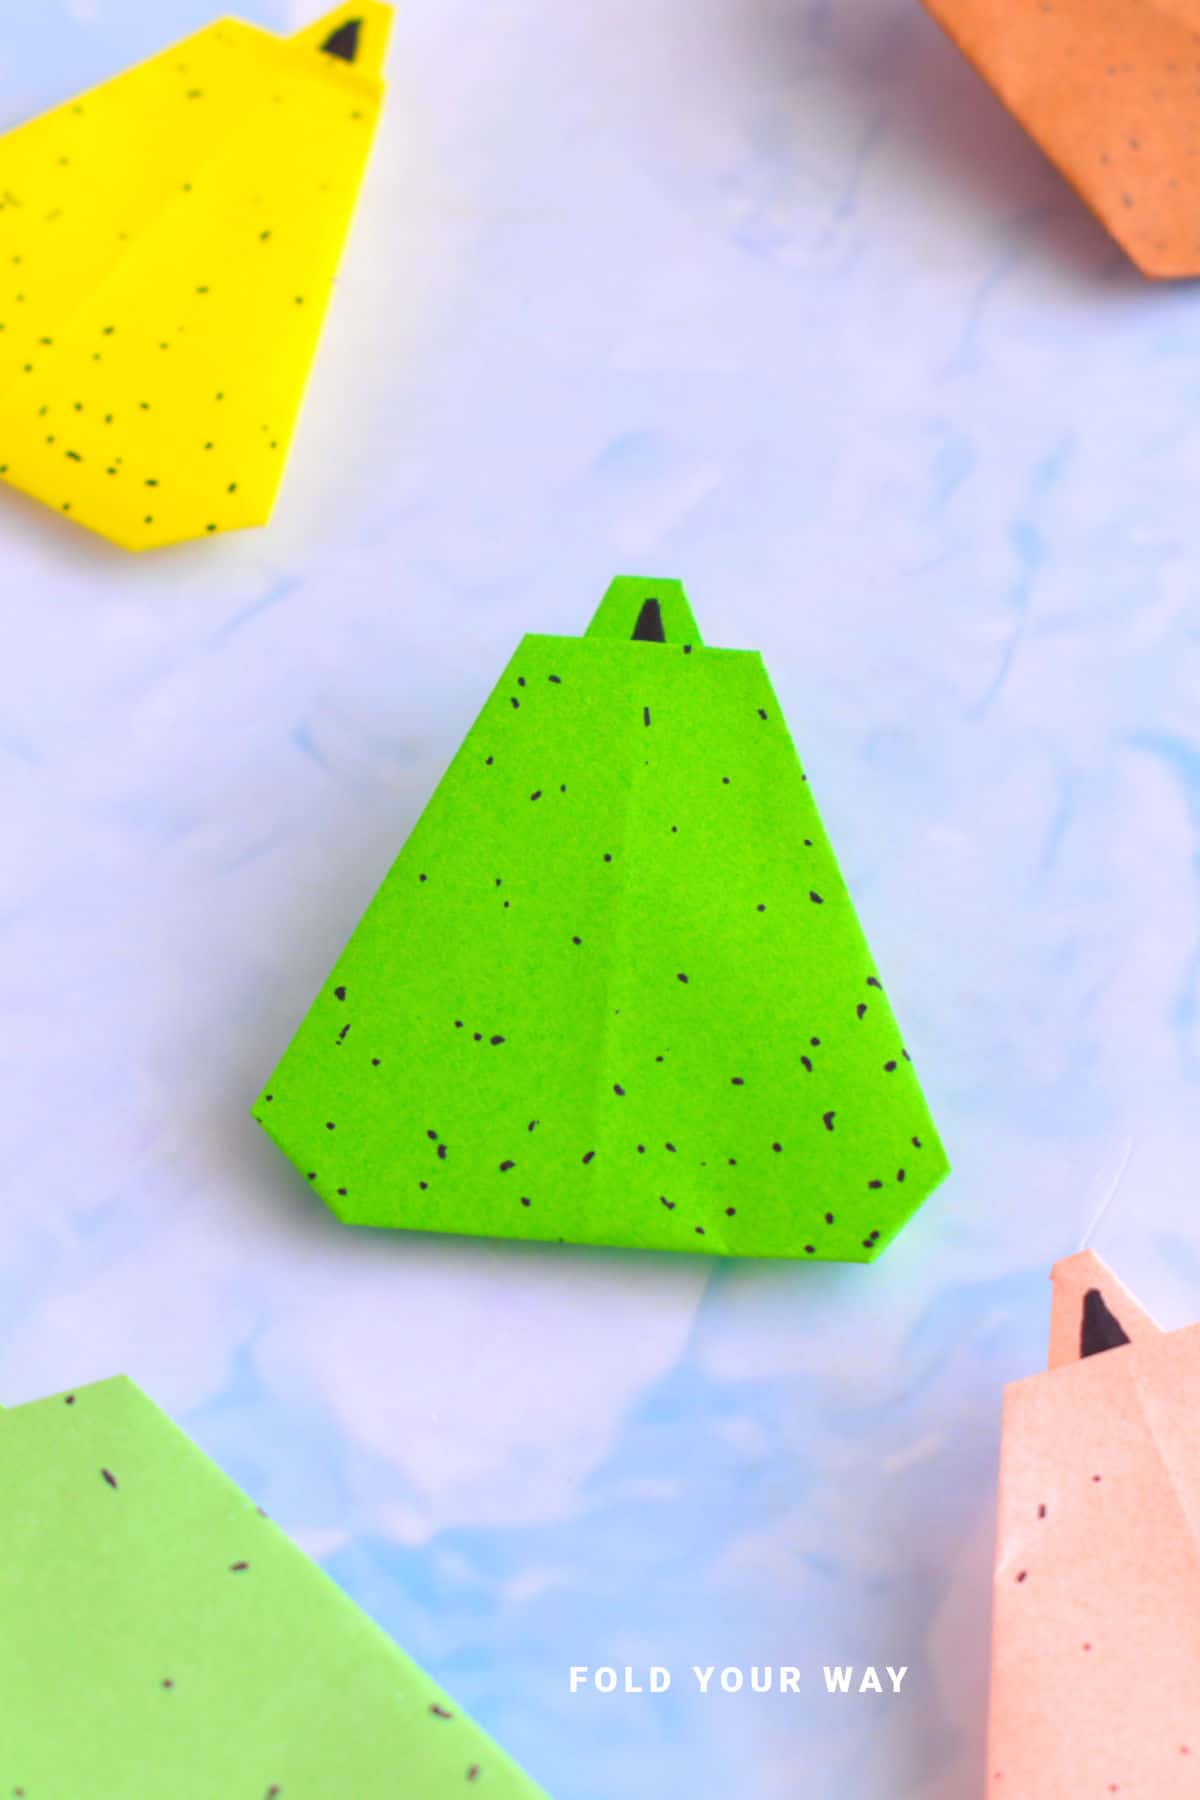
This guide on how to make an easy origami pear is a sweet and simple project that’s great for beginners and requires just one square sheet of paper.
Jump to:
If you're after a cute and simple paper project, this origami pear is a fantastic one to try. It’s perfect for celebrating the autumn season, adding a fruity touch to a DIY card, or decorating your table or shelf.
Like many fruit-inspired origami designs, this one strikes a great balance between charming and achievable.
It’s a fun activity for kids and adults alike and requires no cutting or glue—just a square piece of paper and a few folds.
This pear shape has a slightly rounded base and a gentle taper at the top, making it instantly recognizable.
Whether you're crafting decorations for a harvest-themed party, adding a handmade touch to a kitchen display, or putting together some seasonal decor for Thanksgiving or a teacher’s gift, this design fits right in.
It's also great for creative classroom projects and can be personalized in lots of different ways.
You can even string several pears together to make a cheerful fruit garland or mix them with other origami fruit like apples and strawberries.
They also make lovely place cards or handmade gift tags when made on smaller paper.
Add a little paper stem or leaf for extra charm, or draw on details with markers to make each pear unique.
Why You'll Love This Pattern
- A great beginner-friendly origami project.
- No scissors or glue needed—just one sheet of paper.
- Ideal for fall-themed decorations or Thanksgiving tables.
- Can be used for cards, garlands, or teacher gifts.
- A relaxing, satisfying craft for kids and adults alike.
Skill Level
★☆☆☆☆ (Very Easy)
Materials Needed
1 square sheet of paper (any size), lightweight origami paper works best
Instructions
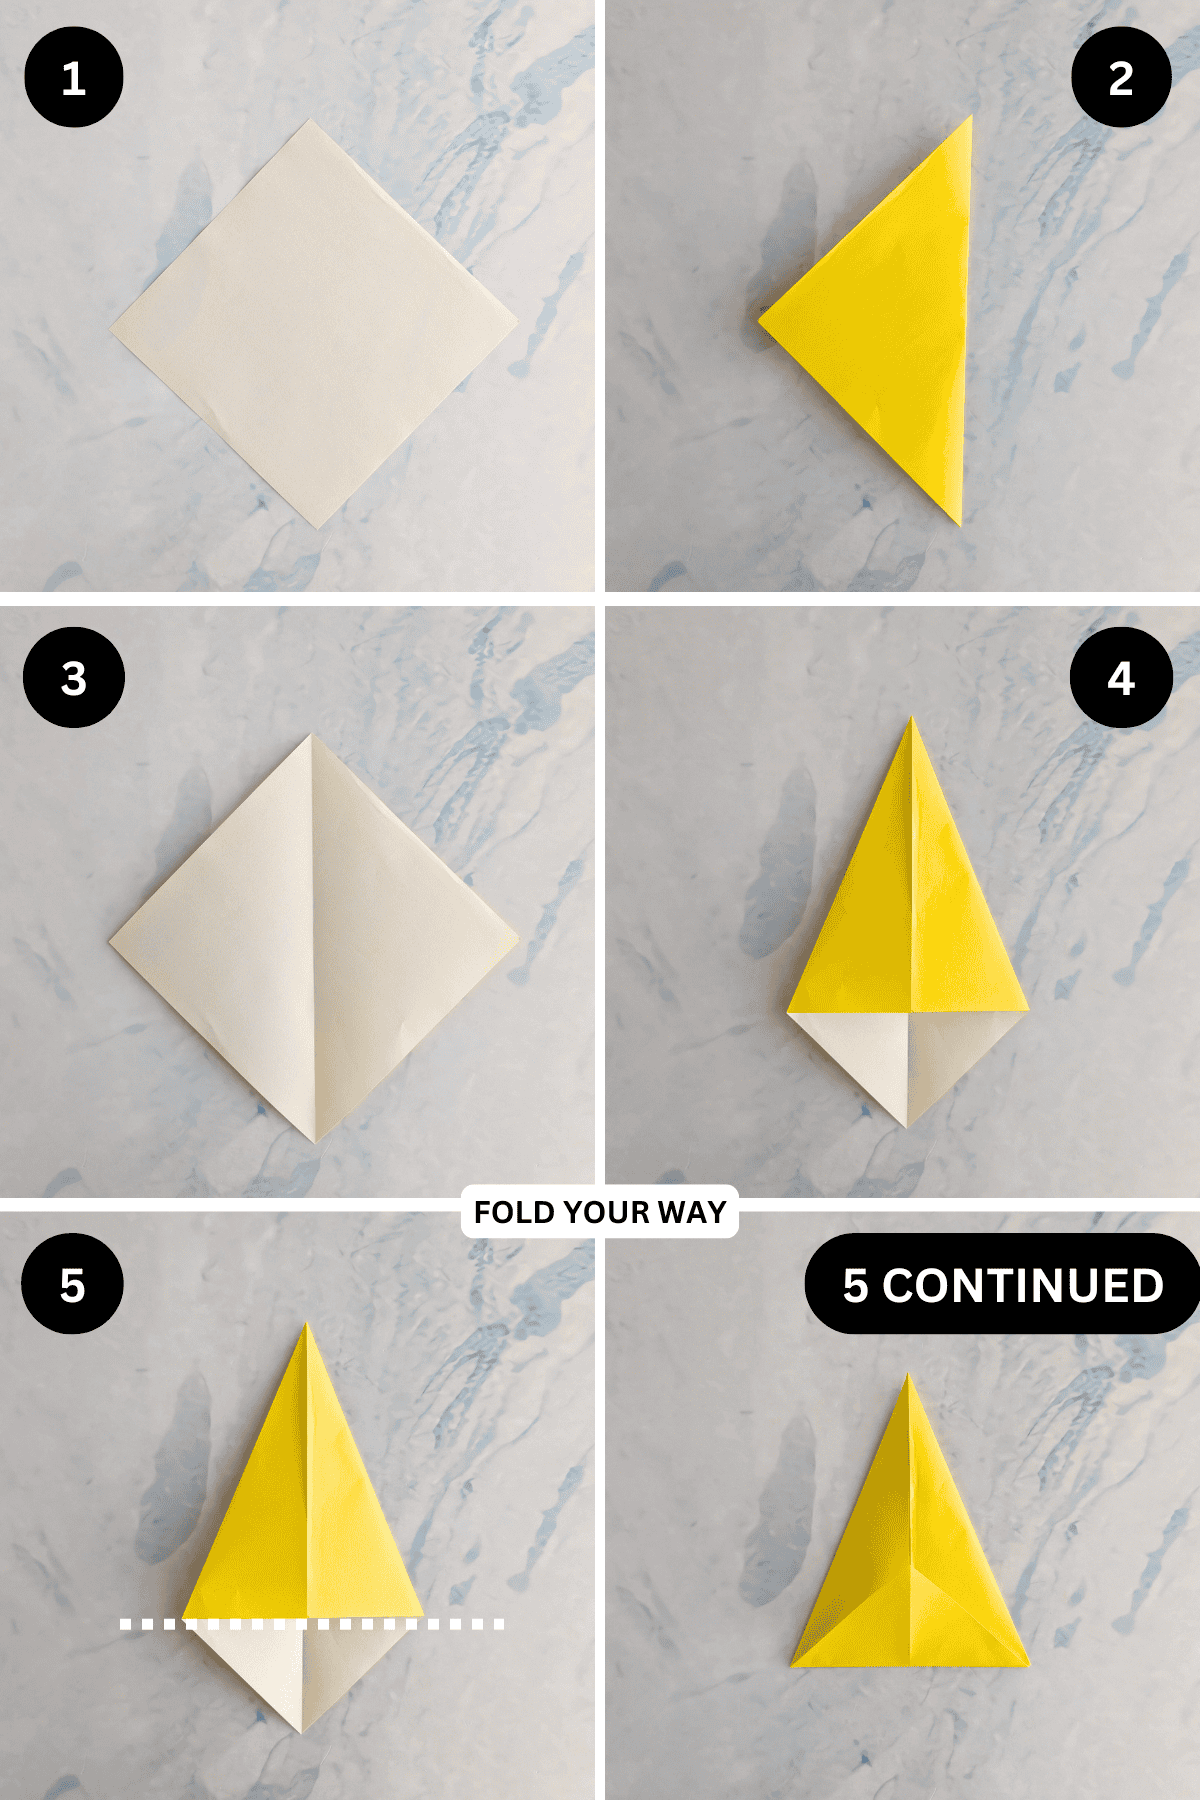
Step 1: Start with the color you want your pear to be facing down. Arrange your paper to sit like a diamond.
Step 2: Fold the right point to meet the left point.
Step 3: Unfold previous step.
Step 4: Fold both the top left and top right edges in to meet the middle crease.
Step 5: Fold the bottom point up along the line shown.
✨ You're almost there! ✨
To unlock the final steps and complete your pattern, create a free account with Grow.me. below.
Make sure you tick the box to subscribe to our newsletter and stay up to date with the latest patterns, tips, and more!
Once you're signed up, you'll get instant access to finish your project and enjoy exclusive content in the future.
Already signed up? Hit the button below and select ‘Switch to Log In’ to pick up where you left off and finish your project!
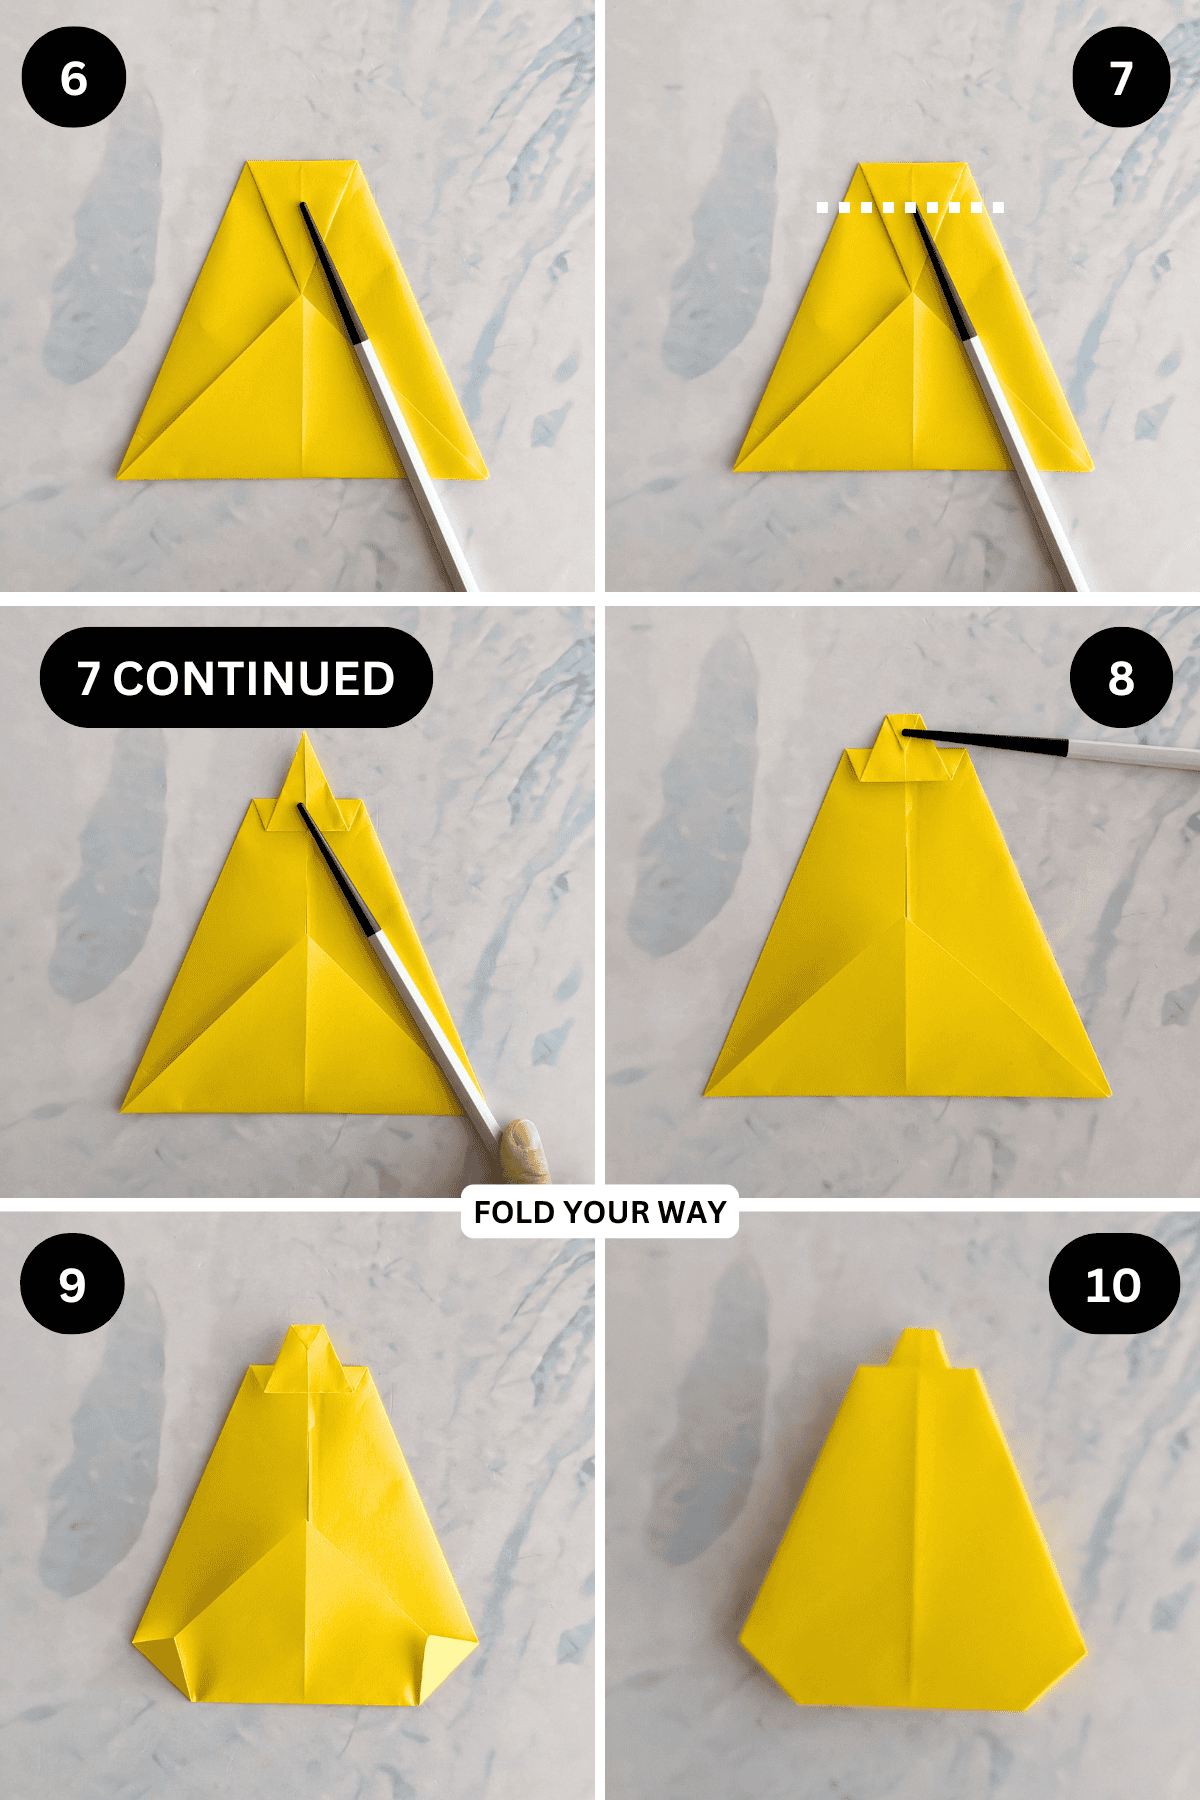
Step 6: Fold the top point down to meet the top point of the bottom triangle.
Step 7: Fold the same point up along the line shown.
Step 8: Once again, working on the same point, fold it down slightly.
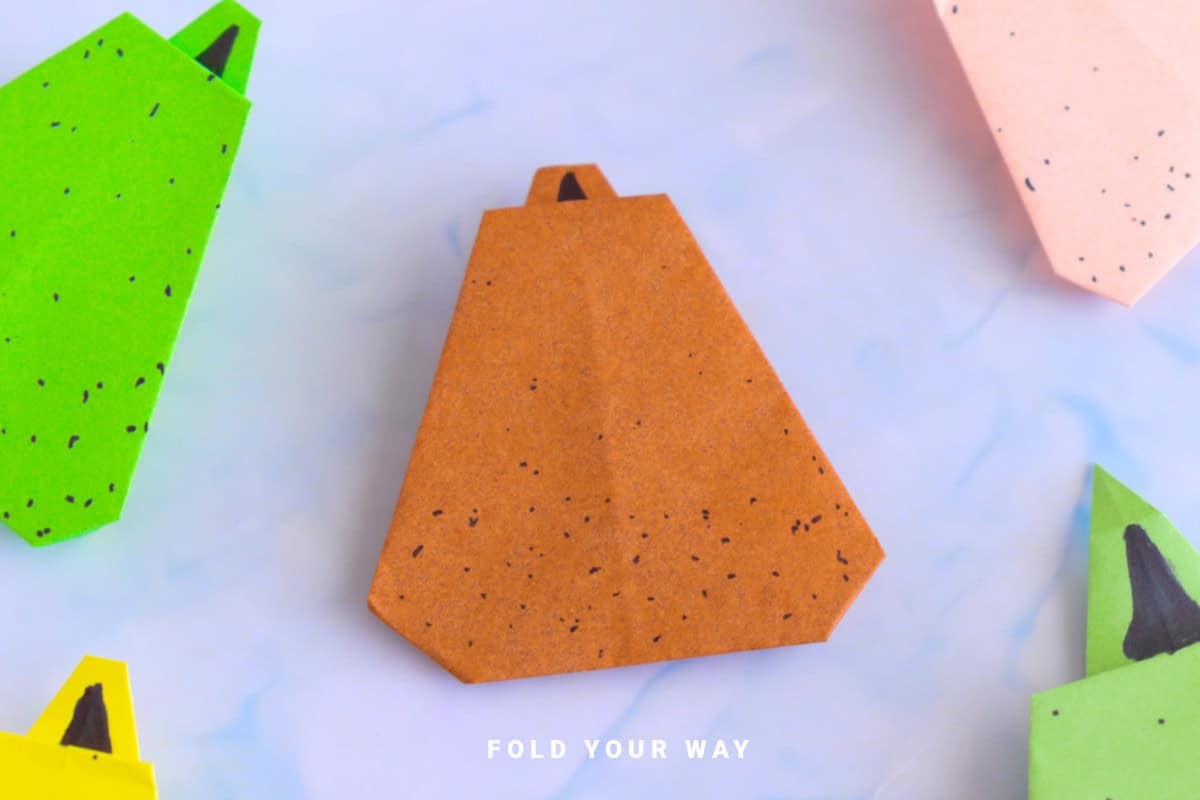
Step 9: Fold both the bottom left and right corners in slightly, keeping it as symmetrical as possible.
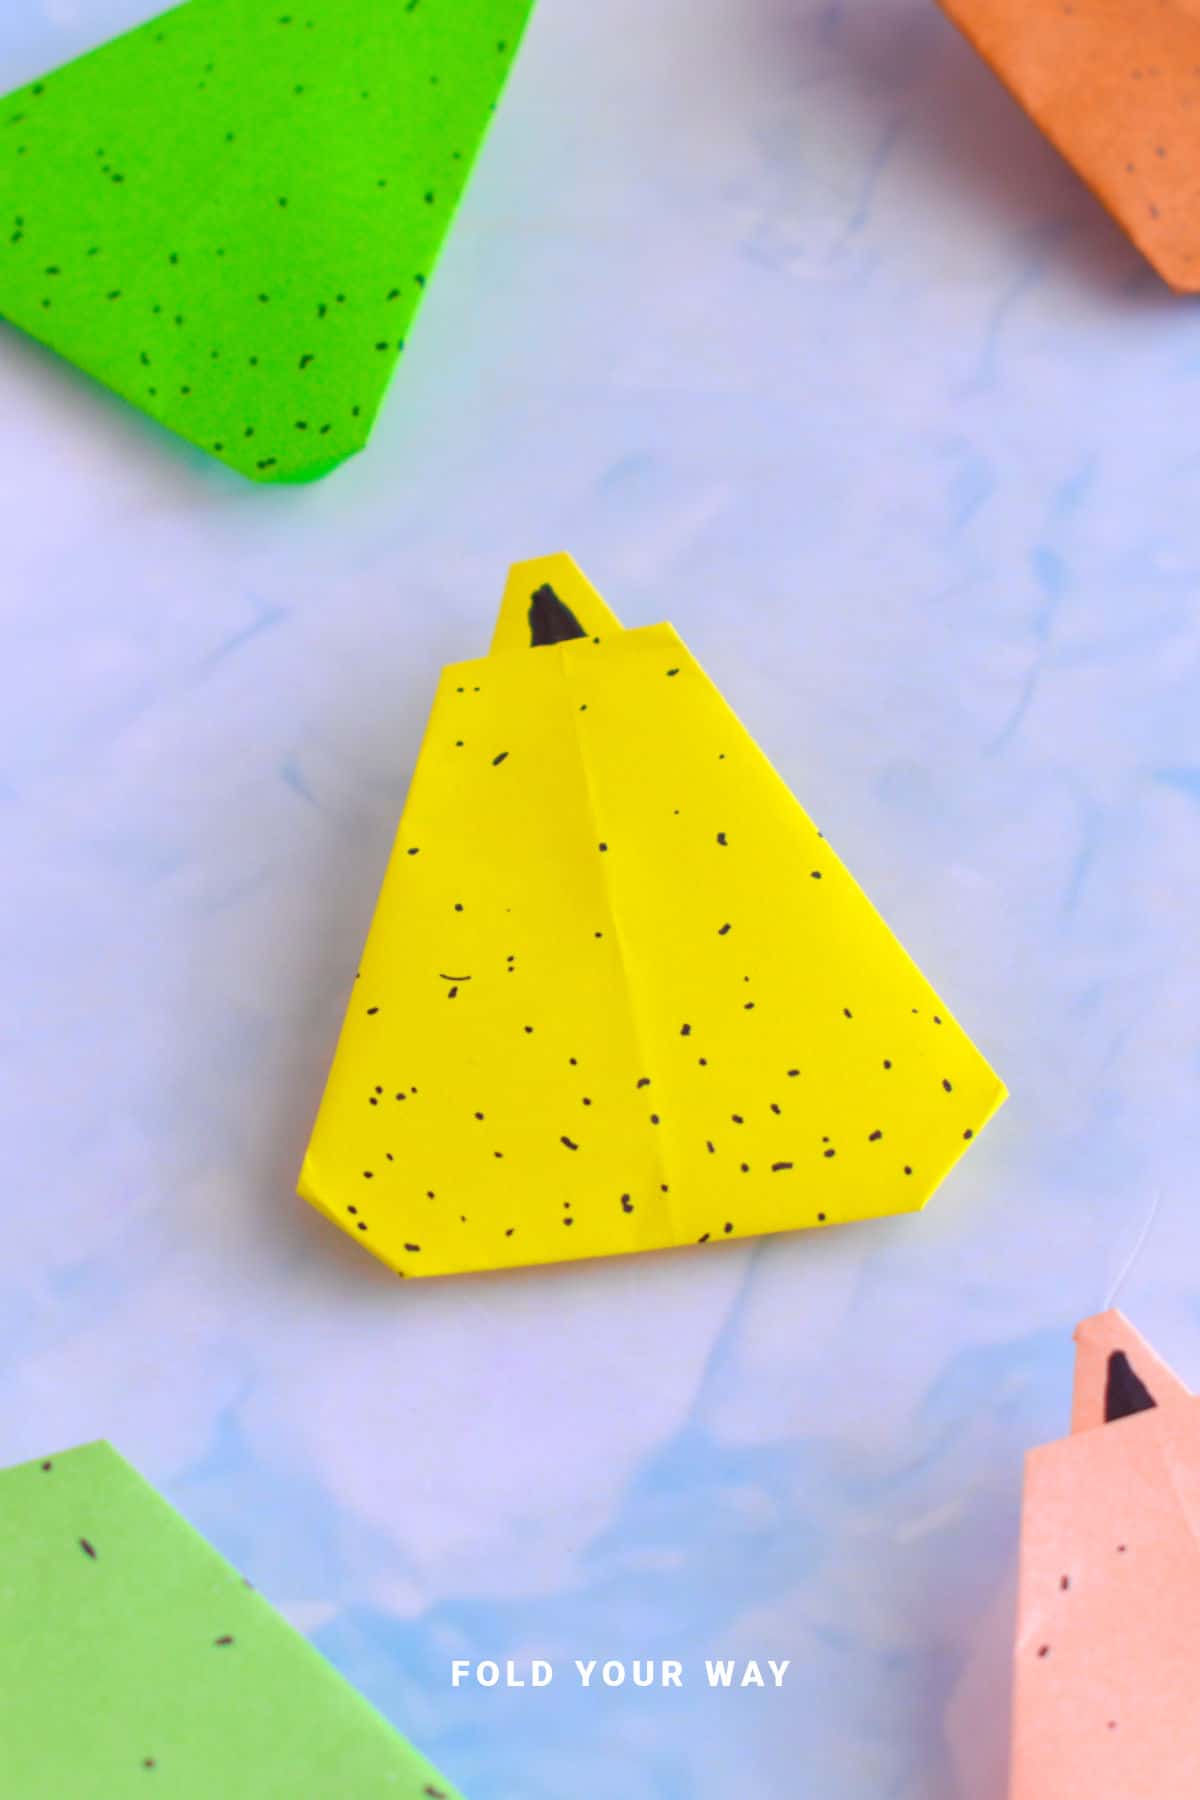
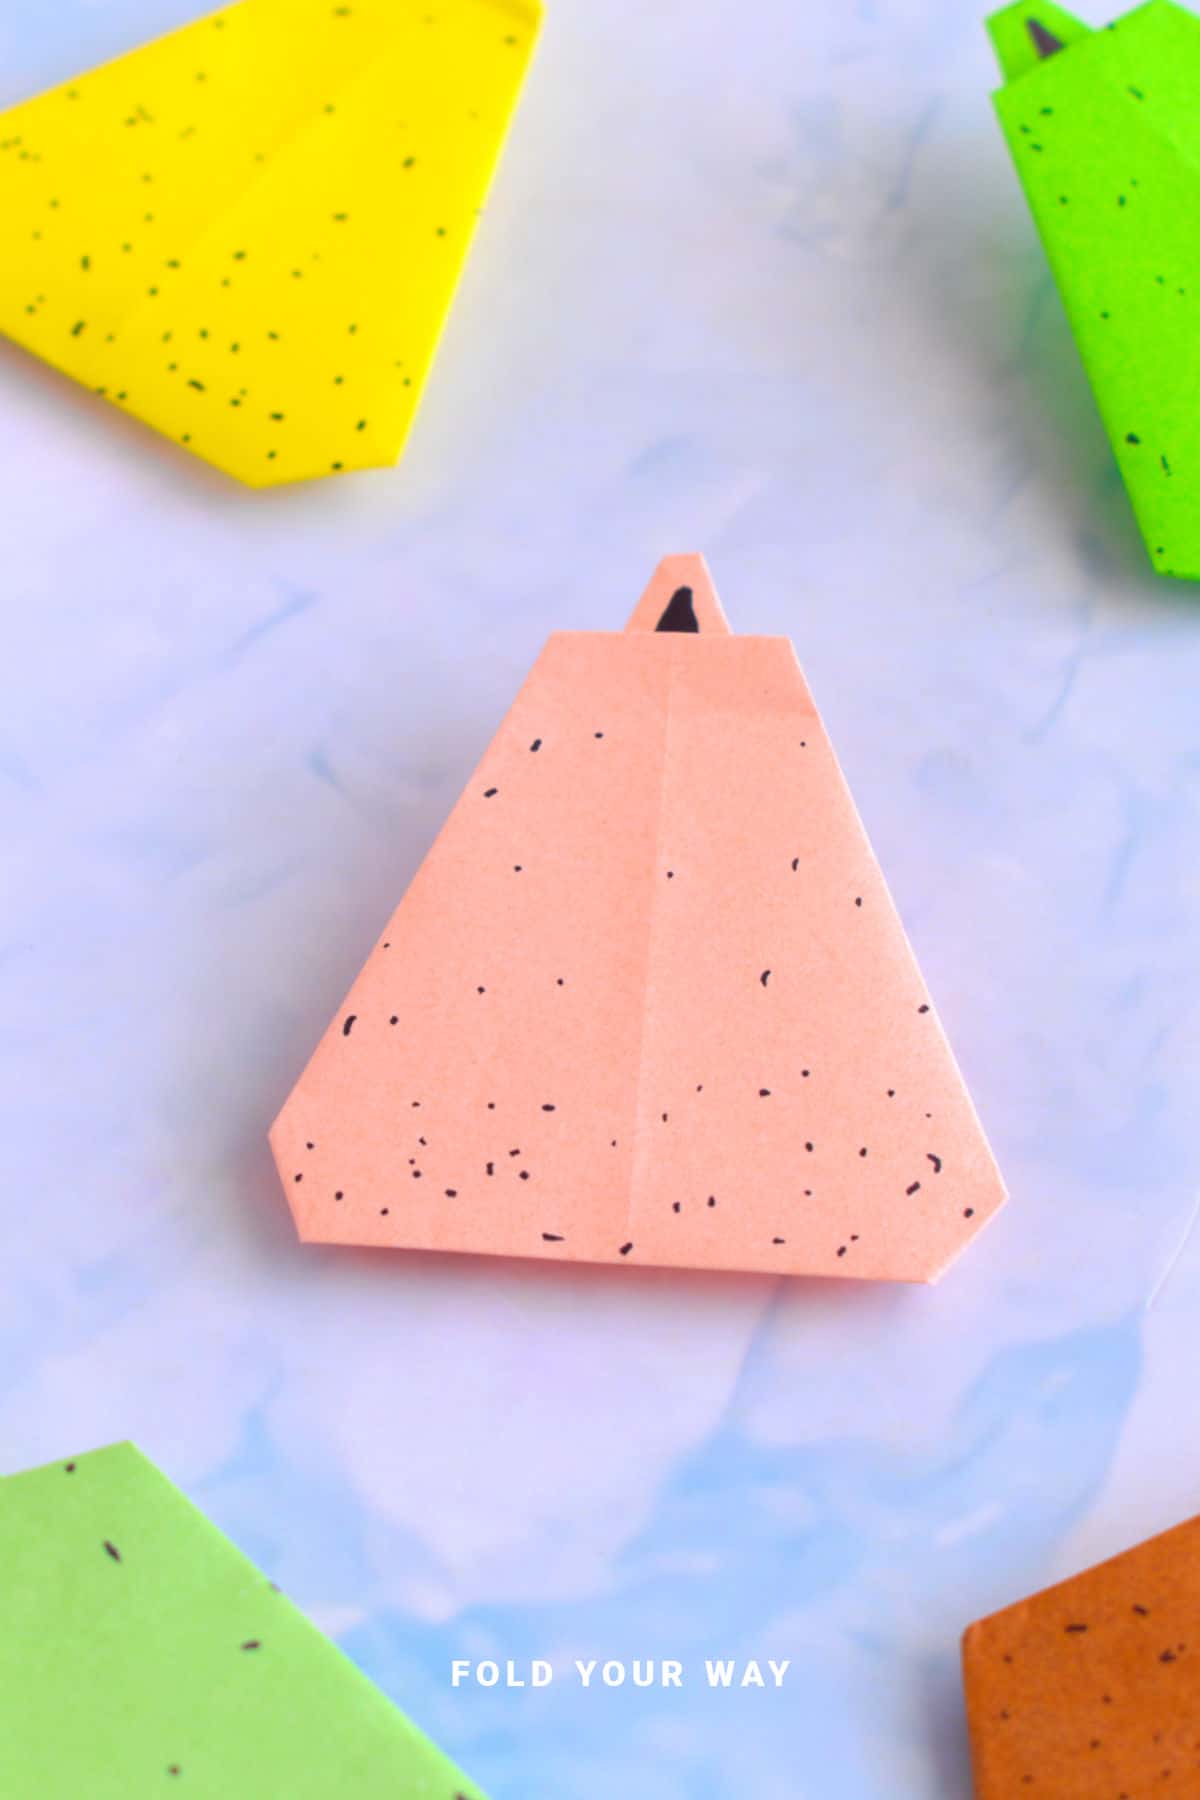
Step 10: Flip your pear over from left to right. Decorate with markers as you like. Completed pear.
Tips For Success
- Use a bone folder or the back of your fingernail to crease folds sharply.
- If your pear isn’t shaping well, refold the top to adjust the silhouette.
- Try using green or yellow paper for a classic pear look.
- Add a folded paper stem or draw on seeds or shading.
- Make a bunch in different shades for a playful paper fruit bowl.
Color, Paper Ideas, and Variations
- Classic green: Use light green or yellow-green paper for a realistic pear.
- Red pear: Try red or rose tones for a blush pear style.
- Patterned fruit: Polka dots or floral prints make for playful designs.
- Add a stem: Use a thin strip of brown or green paper for a stem.
- Draw a face: Make a cute character by adding eyes and a smile with markers.
FAQ
Yes! Just cut it into a square first.
Absolutely—either fold a tiny one or cut it from green paper and glue it on.
Yes, it's a simple project that’s great for kids with a bit of adult help if needed.
Other Paper Crafts You Might Like To Try:
Helpful Tips and Common Mistakes For Paper Crafts
Paper crafting and origami can be hard sometimes. Which is why we've made this printable PDF just for you.
It outlines helpful tips so that you can successfully complete your craft, and some of the most common mistakes people come across.
You can download the helpful tips and common mistakes for paper crafts printable PDF here.
Stay Connected
Made this pattern? Let us know how it went in the comments below!
Pin this post - Pin now to take your paper crafting skills to the next level.
Share on Instagram or Facebook - Capture the beauty of your finished paper craft project and share it on Instagram or Facebook! Tag us @foldyourway so we can see your work!
Other Patterns You Might Like To Try:
Looking for other easy patterns like this? Try these:


Comments
No Comments