
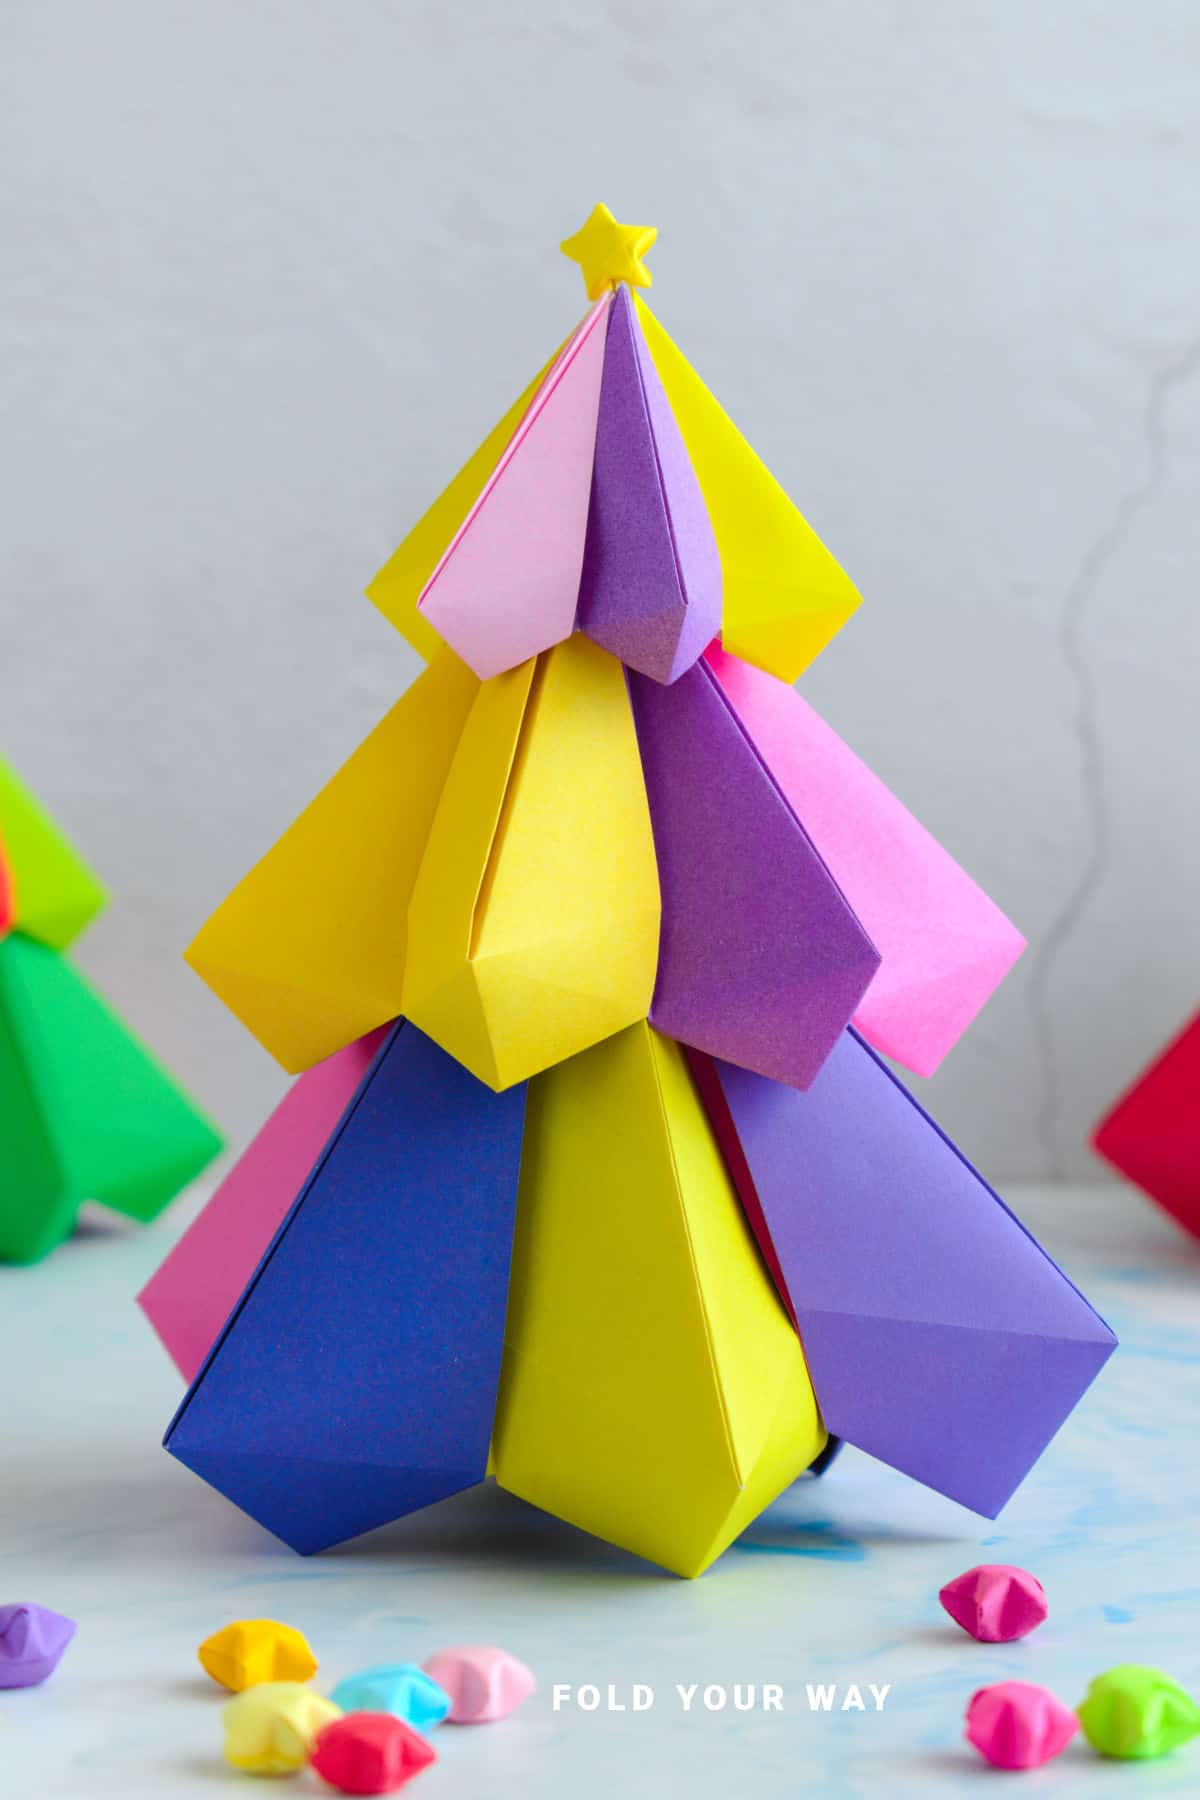
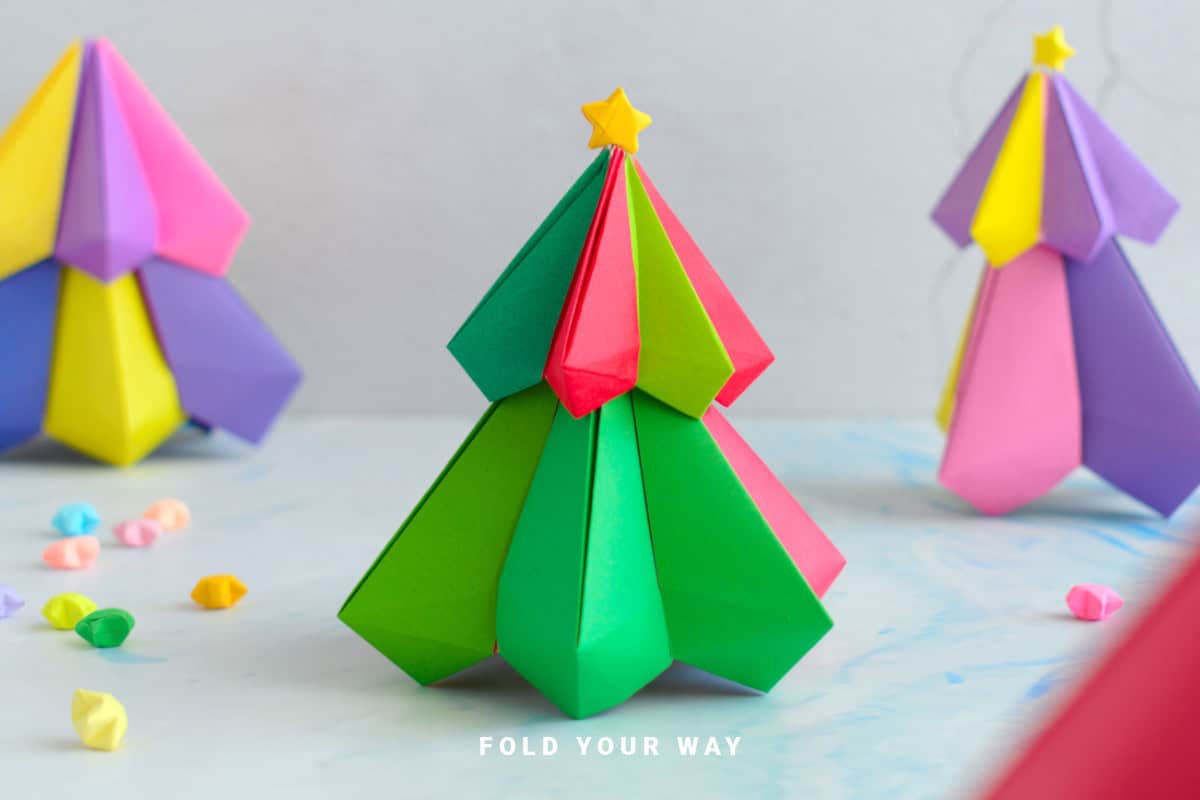
This 3D origami Christmas tree is a stunning centerpiece made from simple folds—no glue needed, just paper and a little patience!

Jump to:
Looking for a festive paper craft that makes a real impact?
This 3D origami Christmas tree is a beautiful, handmade decoration you can proudly display during the holidays—or gift to someone special.
Built using modular origami, the tree is formed by assembling multiple units together without any glue. It’s an elegant example of how simple folds can come together to create something truly eye-catching.
Despite its intricate appearance, this tree is beginner-friendly and easy to assemble once you get the hang of the repeating fold.
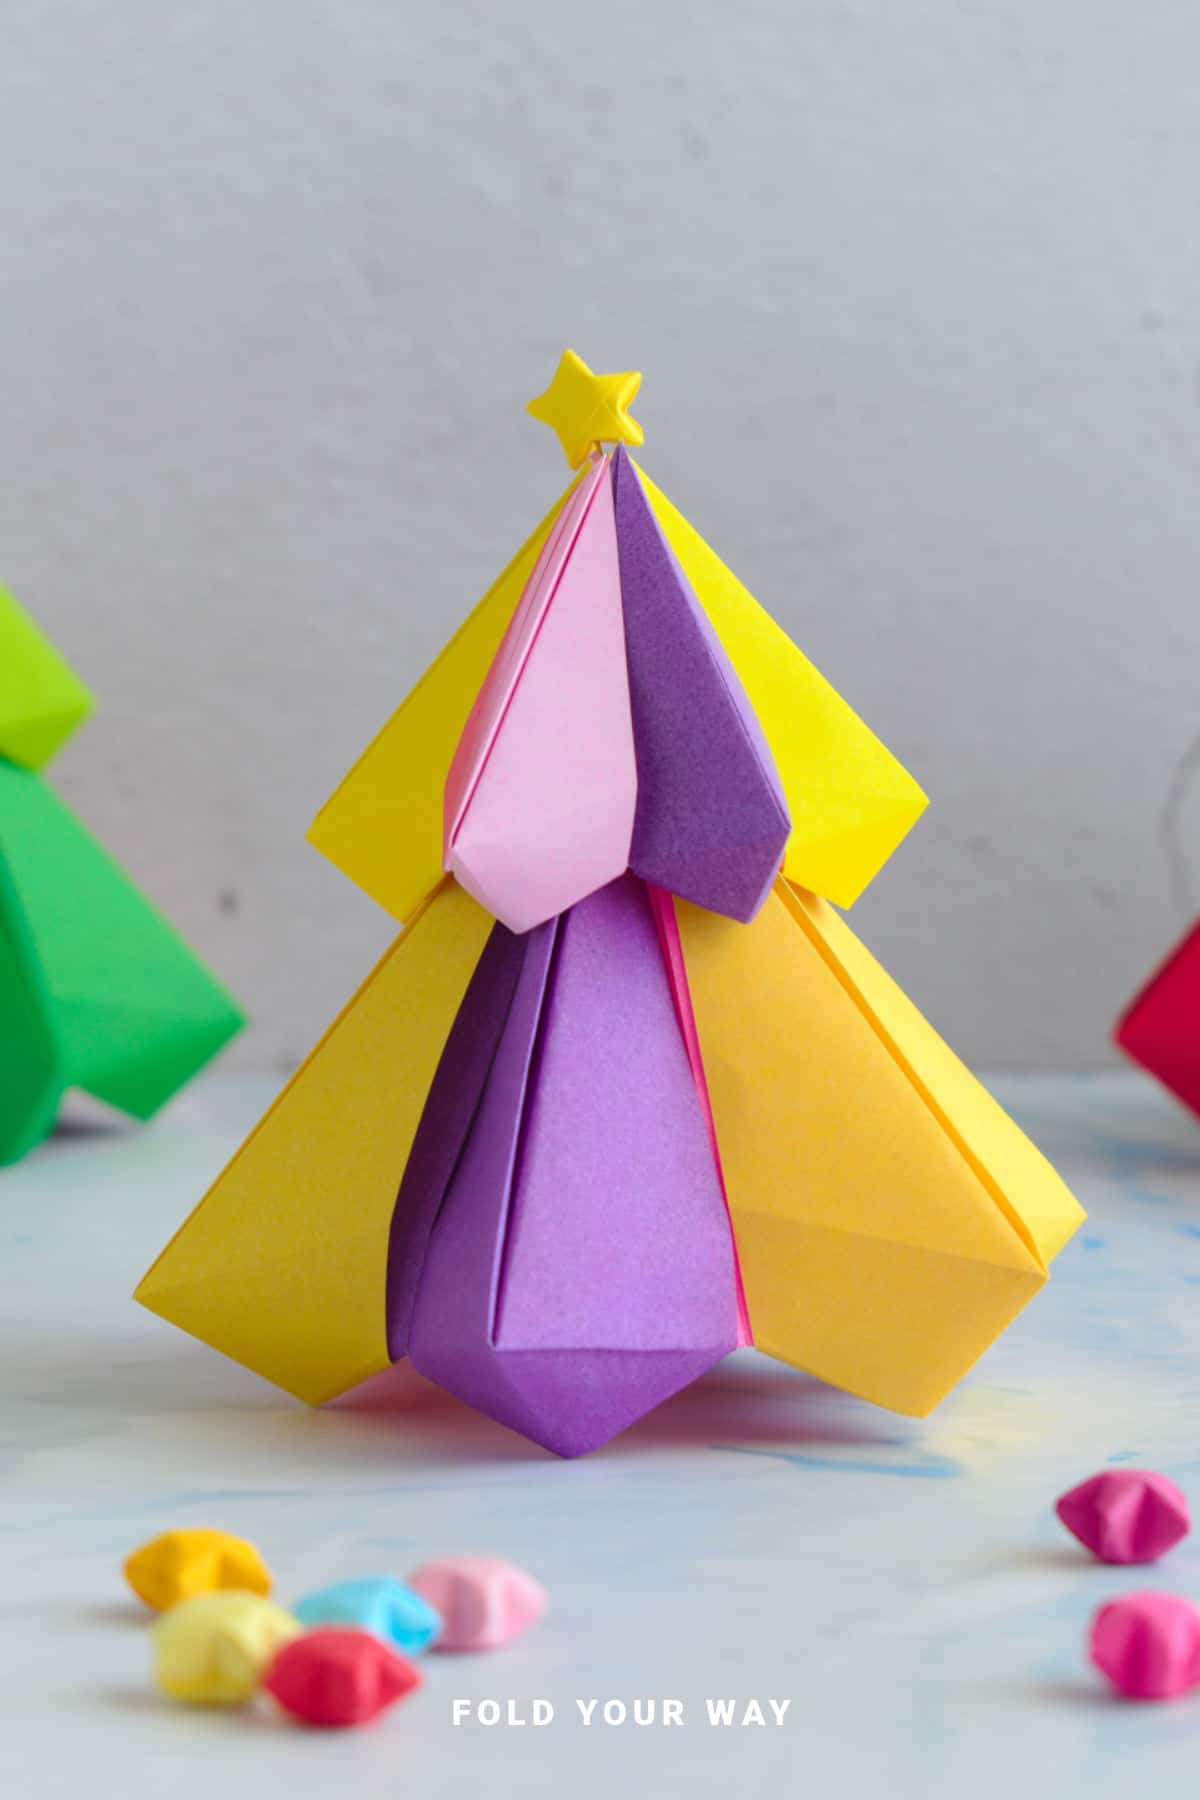
It’s also wonderfully adaptable—you can scale it up or down depending on the size of your paper, decorate it with tiny origami stars, or add glitter, stickers, or sequins for a magical holiday touch.
Perfect for table settings, festive garlands, Christmas trees, or mantel décor, this 3D paper tree is a fun craft to make solo, with kids, or even as a holiday group project.
Why You'll Love This Pattern
- Beautiful, festive decoration made entirely of paper
- No glue required—pure origami
- Can be customized with paper stars, glitter, and more
- Kid-friendly and fun to make with family
- Makes a great handmade gift or party decoration
- This origami Christmas tree is perfect to decorate your Mantle, as a table centrepiece, and more!
Skill Level
★★☆☆☆ (Easy)
Materials Needed
18 square origami sheets:
- 6 pieces of 3 inch x 3 inch (7.5 cm x 7.5 cm) square origami paper
- 6 pieces of 4.5 inch x 4.5 inch (11.5 cm x 11.5 cm) square origami paper
- 6 pieces of 6 inch x 6 inch (15 cm x 15 cm) square origami paper
Note: A three tiered Christmas tree is about 7 inches (18 cm) tall and 6 inches (15 cm) wide.
Instructions
In this tutorial, we will show you how to make one of the tiers of the tree. So, for the following steps, choose the paper you want for the base tier. This will be your largest paper size.
Then, when you want to make the smaller tiers, use your smaller pieces of paper and repeat the steps.
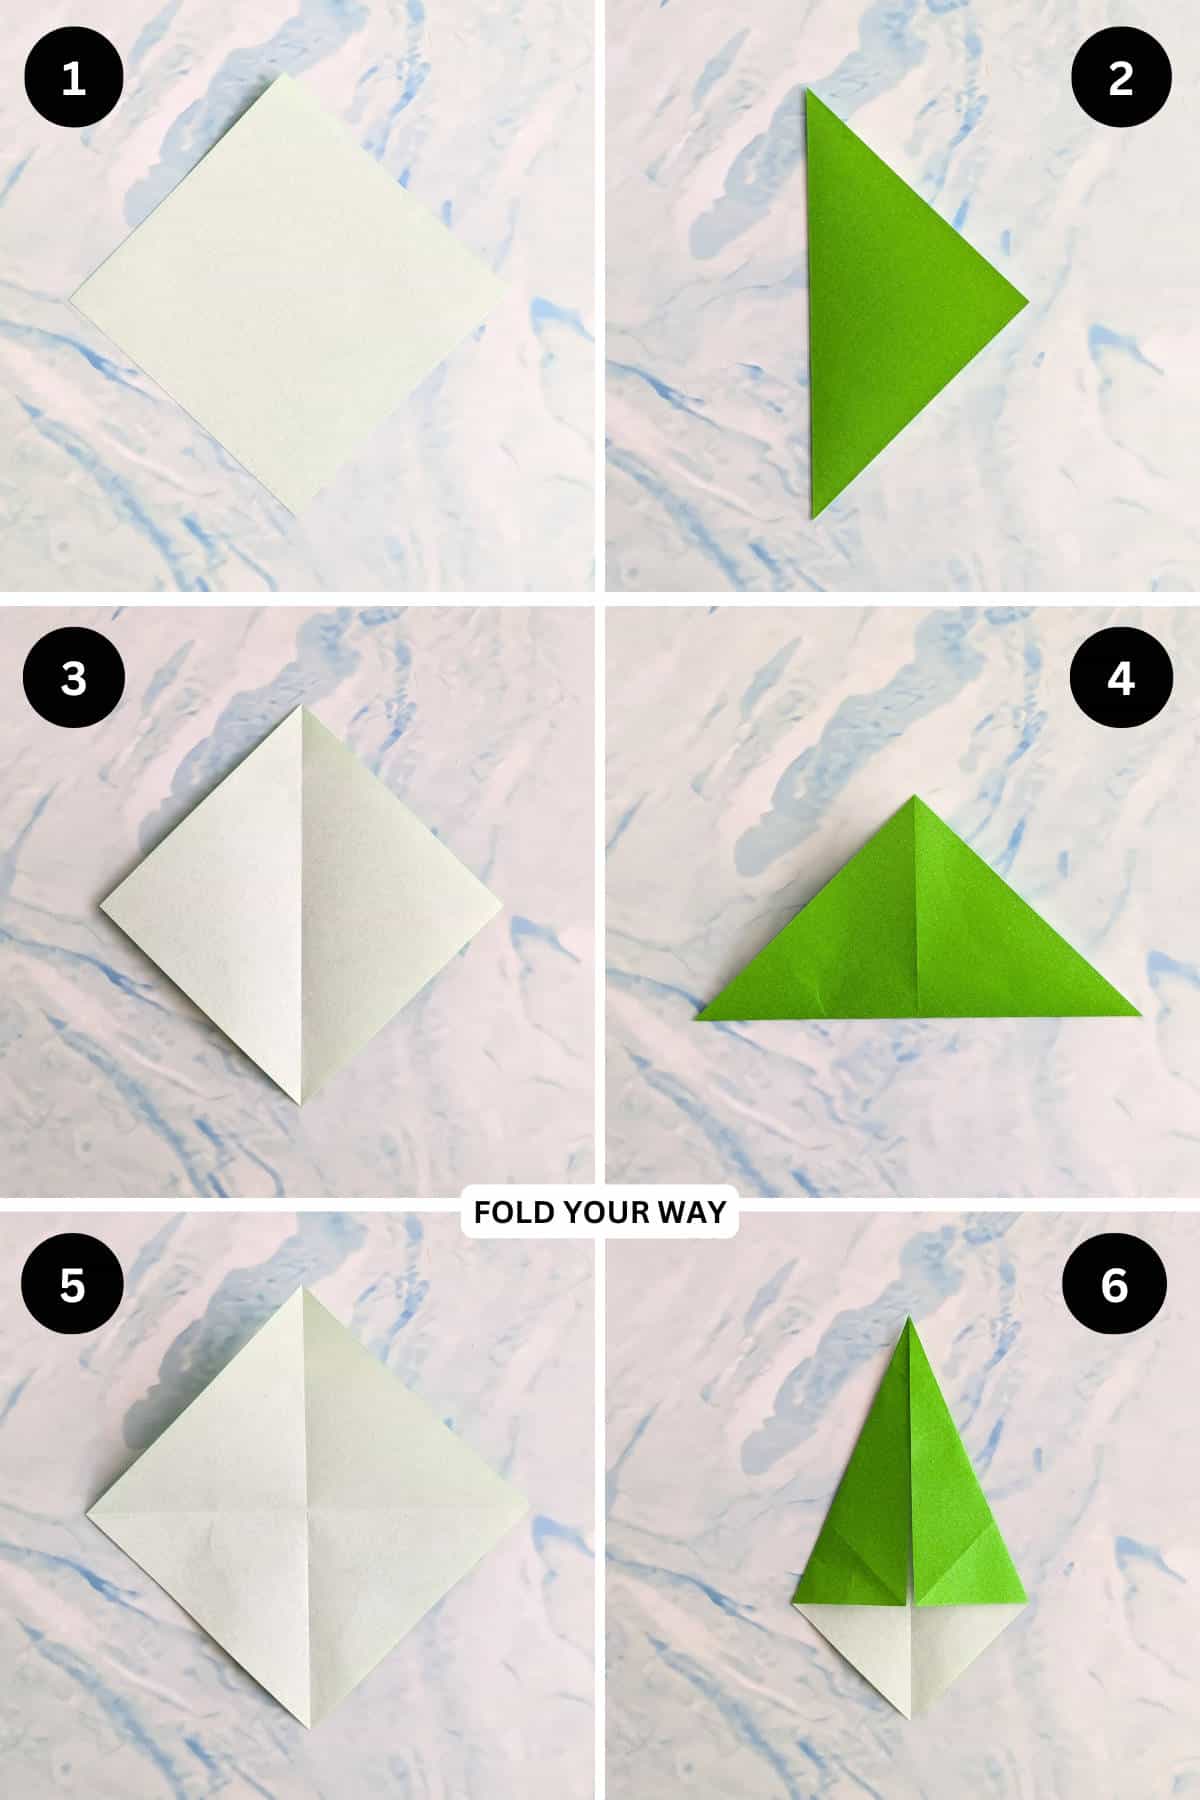
Step 1: Let’s start with one of your papers. Start with the color you want your tree to be facing down. Arrange the paper to sit like a diamond shape.
Step 2: Fold the left point to meet the right point.
Step 3: Unfold previous step.
Step 4: Fold the bottom point up to meet the top point.
Step 5: Unfold previous step.
Step 6: Fold both the upper left and upper right edges in to meet the middle vertical crease.
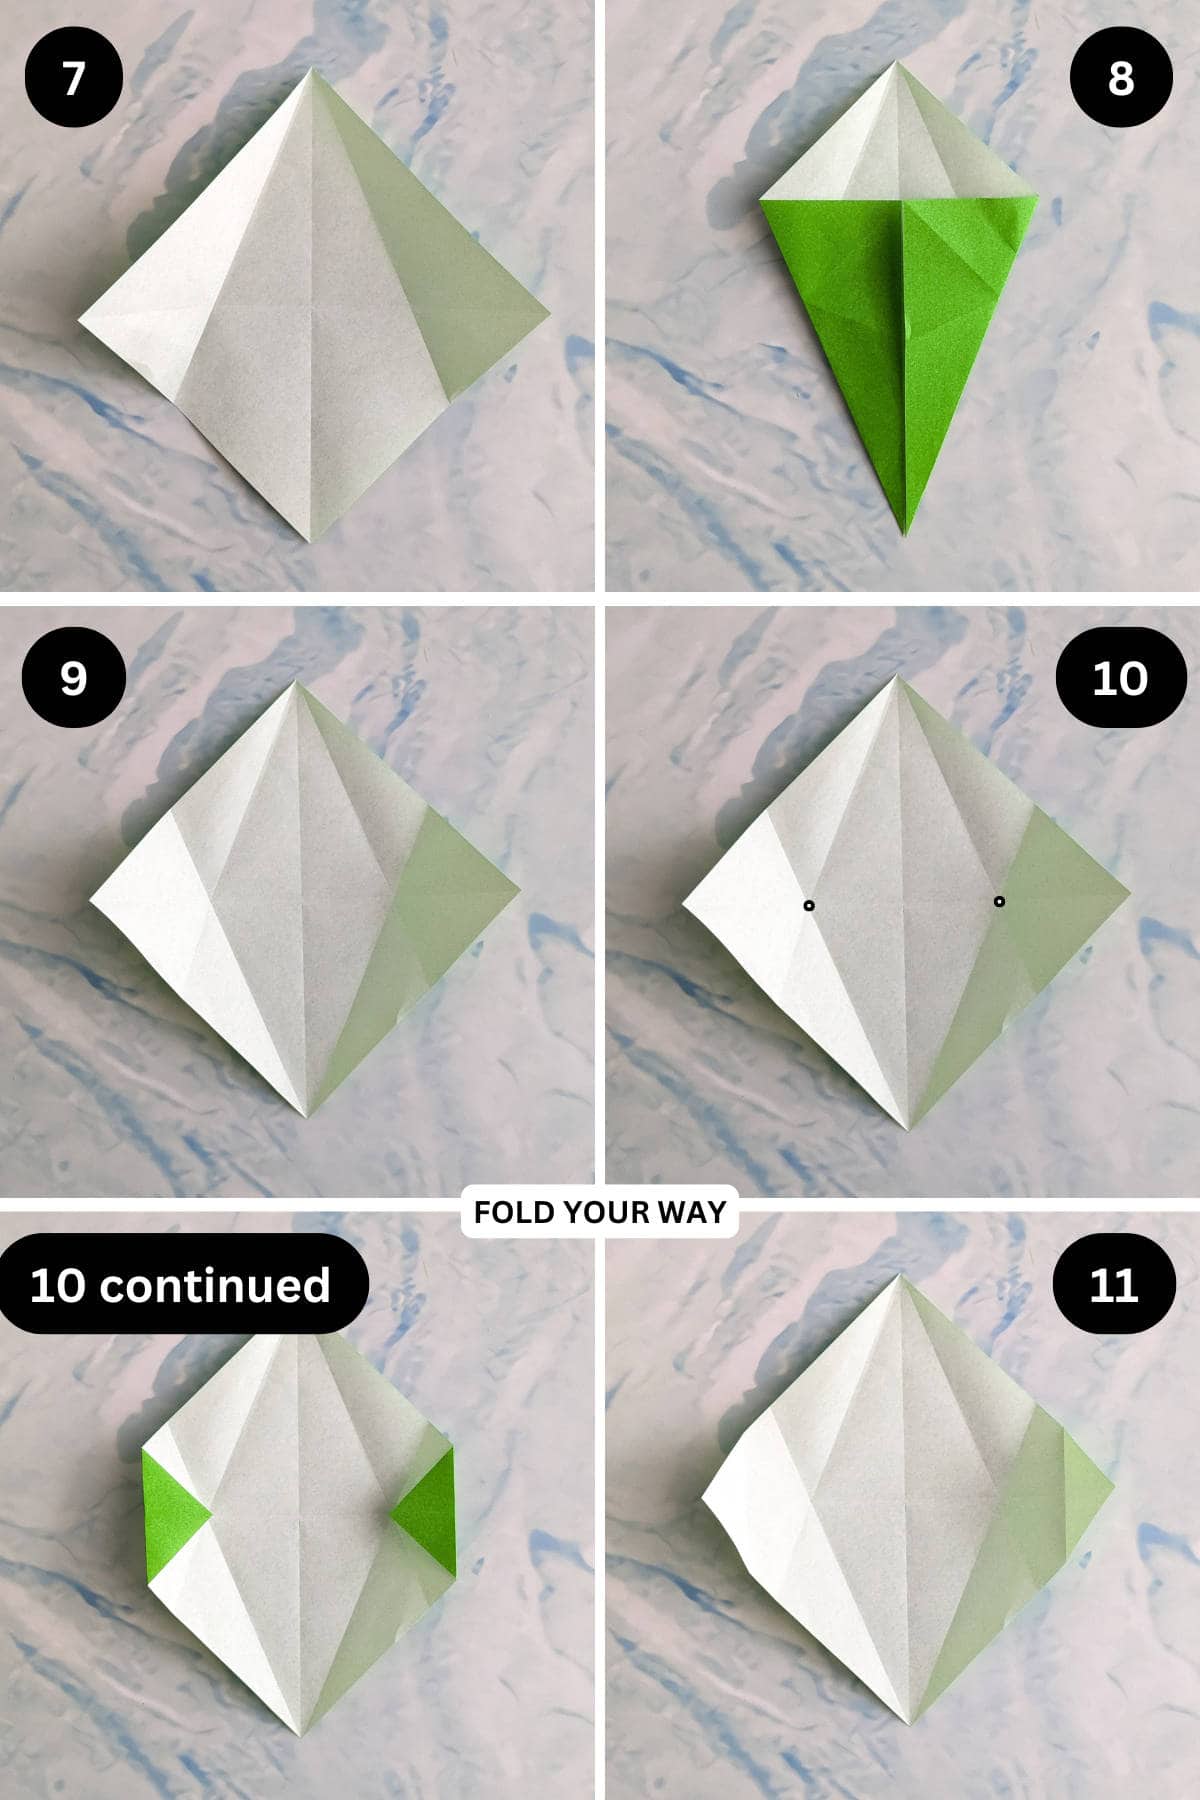
Step 7: Unfold previous step.
Step 8: Now, fold both the bottom left and bottom right edges in to meet the vertical crease.
Step 9: Unfold previous step.
Step 10: Fold both the left and right points in to meet the points shown.
Step 11: Unfold previous step.
✨ You're almost there! ✨
To unlock the final steps and complete your pattern, create a free account with Grow.me. below.
Make sure you tick the box to subscribe to our newsletter and stay up to date with the latest patterns, tips, and more!
Once you're signed up, you'll get instant access to finish your project and enjoy exclusive content in the future.
Already signed up? Hit the button below and select ‘Switch to Log In’ to pick up where you left off and finish your project!
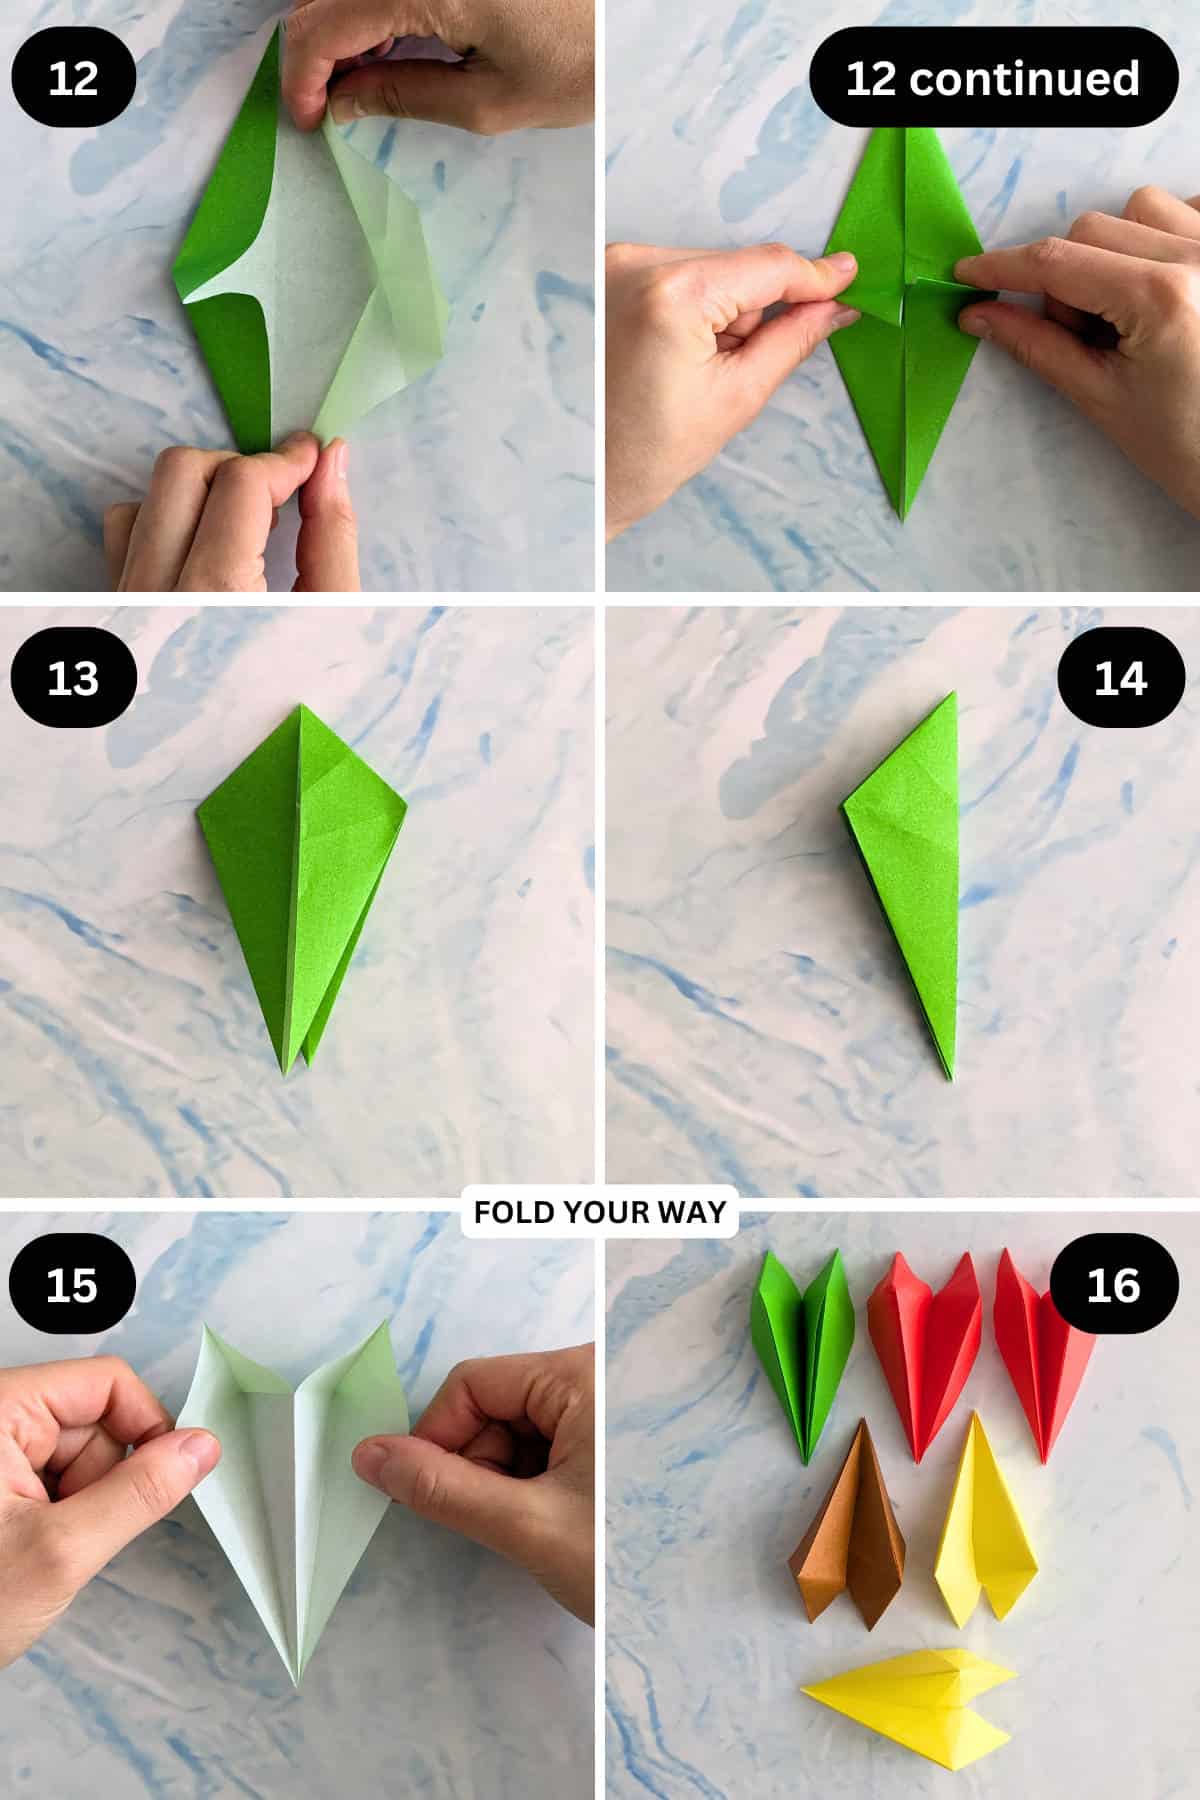
Step 12: Bring all four edges up along the existing creases. Then, press them down and inwards, making the left and right corners stand.
Step 13: Fold the top section backwards along the middle crease.
Step 14: Fold the paper in half from right to left.
Step 15: Rotate your paper 90 degrees so it stands upright and it shows the inside of the paper. Open it out slightly.
Step 16: Repeat steps 1 to 15 for the remaining base tier papers. You will end up with 6 folded pieces of the same size.
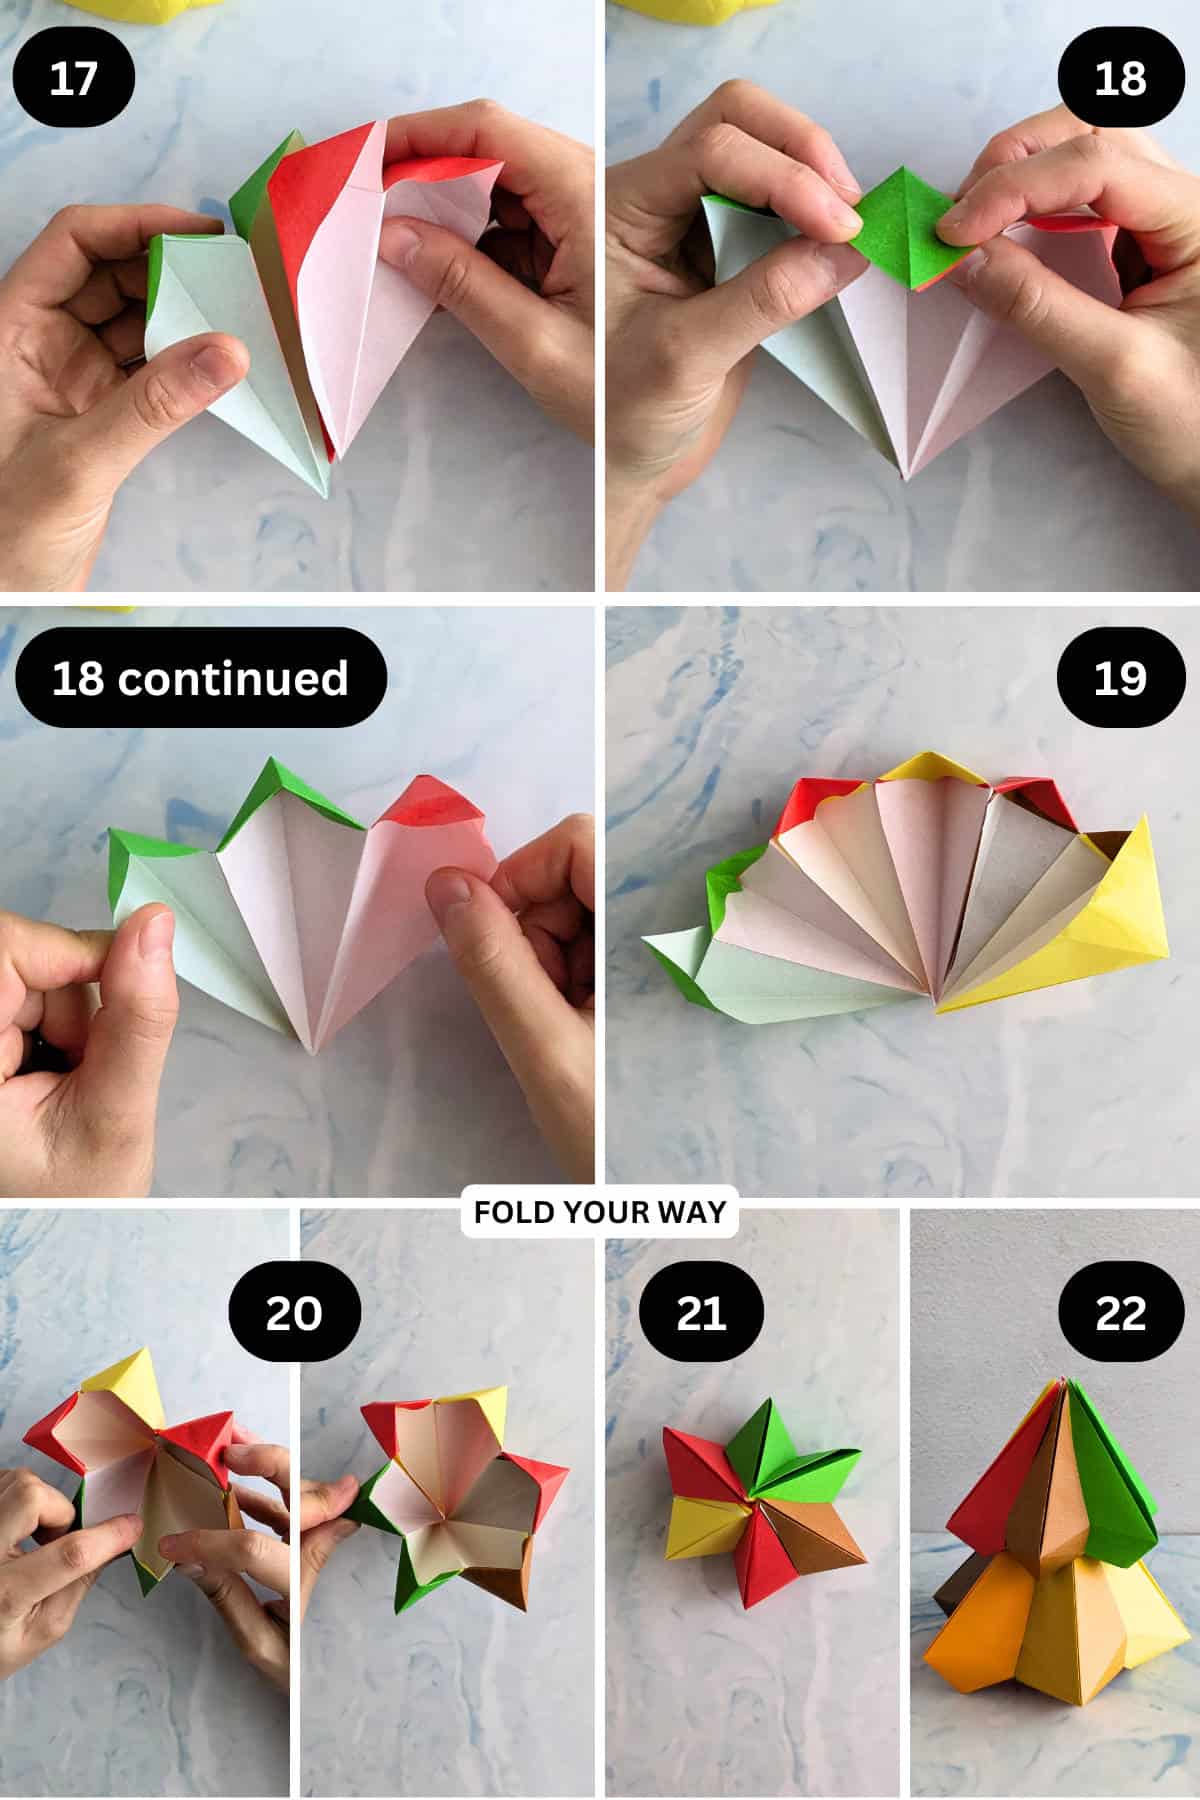
Step 17: We will now join the pieces together. Take two of the folded pieces and place them side by side. Then, place the left section of the right piece into the right part of the left piece.
Step 18: On those same pieces, fold down the top point in the middle. This will lock the pieces together.
Step 19: Combine the remaining pieces the same way you did in steps 17 and 18.
Step 20: Form the pieces together in a circle by overlapping the two ends, like you did before. Then, lock the pieces together as you did before.
Step 21: Flip your model over, completed tier.
Step 22: Repeat steps 1 to 21 for the remaining tiers, using the size chart above as a guide for paper size.
You can choose how many tiers you want to make. You could make it 2 tiered, 3 tiered, or even more!
Just make sure you use different paper sizes on each tier.
Tips For Success
- Fold all units with sharp creases so the tree holds its shape
- If you want a smaller tree, you can make it a two tiered tree instead.
- If you want an even bigger tree, add an extra tier by either adding a tier on top (with smaller paper) or an extra tier on the bottom (using bigger paper).
Color, Paper Ideas, and Variations
- Classic green paper for a traditional look
- Metallic gold or silver for a modern, glamorous tree
- Red and white for a peppermint-candy vibe
- Add a lucky origami star to the top for a final festive touch
- Create a forest of trees in different colors for a striking table centerpiece
FAQ
Yes, while not required, a dot of glue between layers can help keep it sturdy if displaying for a long time.
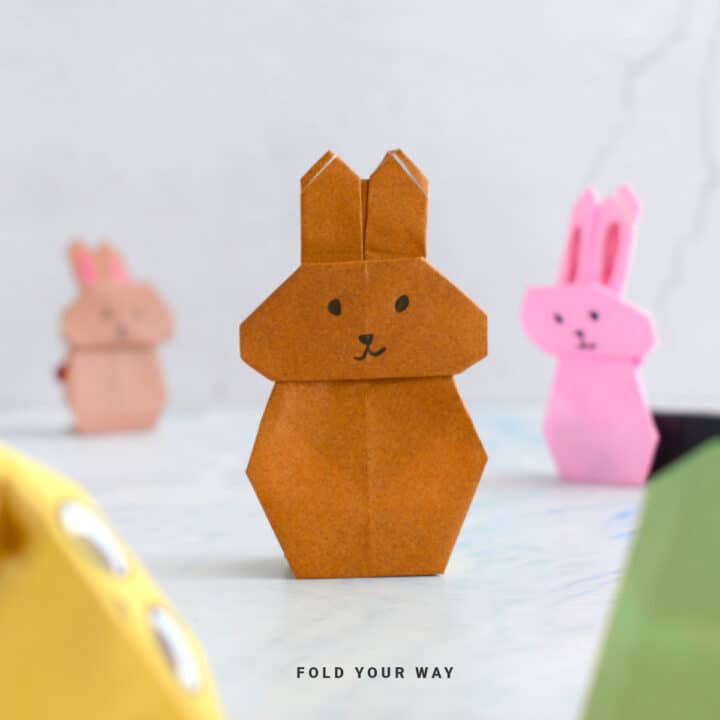
Other Paper Crafts You Might Like To Try:
Helpful Tips and Common Mistakes For Paper Crafts
Paper crafting and origami can be hard sometimes. Which is why we've made this printable PDF just for you.
It outlines helpful tips so that you can successfully complete your craft, and some of the most common mistakes people come across.
You can download the helpful tips and common mistakes for paper crafts printable PDF here.
Stay Connected
Made this pattern? Let us know how it went in the comments below!
Pin this post - Pin now to take your paper crafting skills to the next level.
Share on Instagram or Facebook - Capture the beauty of your finished paper craft project and share it on Instagram or Facebook! Tag us @foldyourway so we can see your work!
Other Patterns You Might Like To Try:
Looking for other easy patterns like this? Try these:


Comments
No Comments