
Need a quick way to package small gifts without buying bulk favor bags?
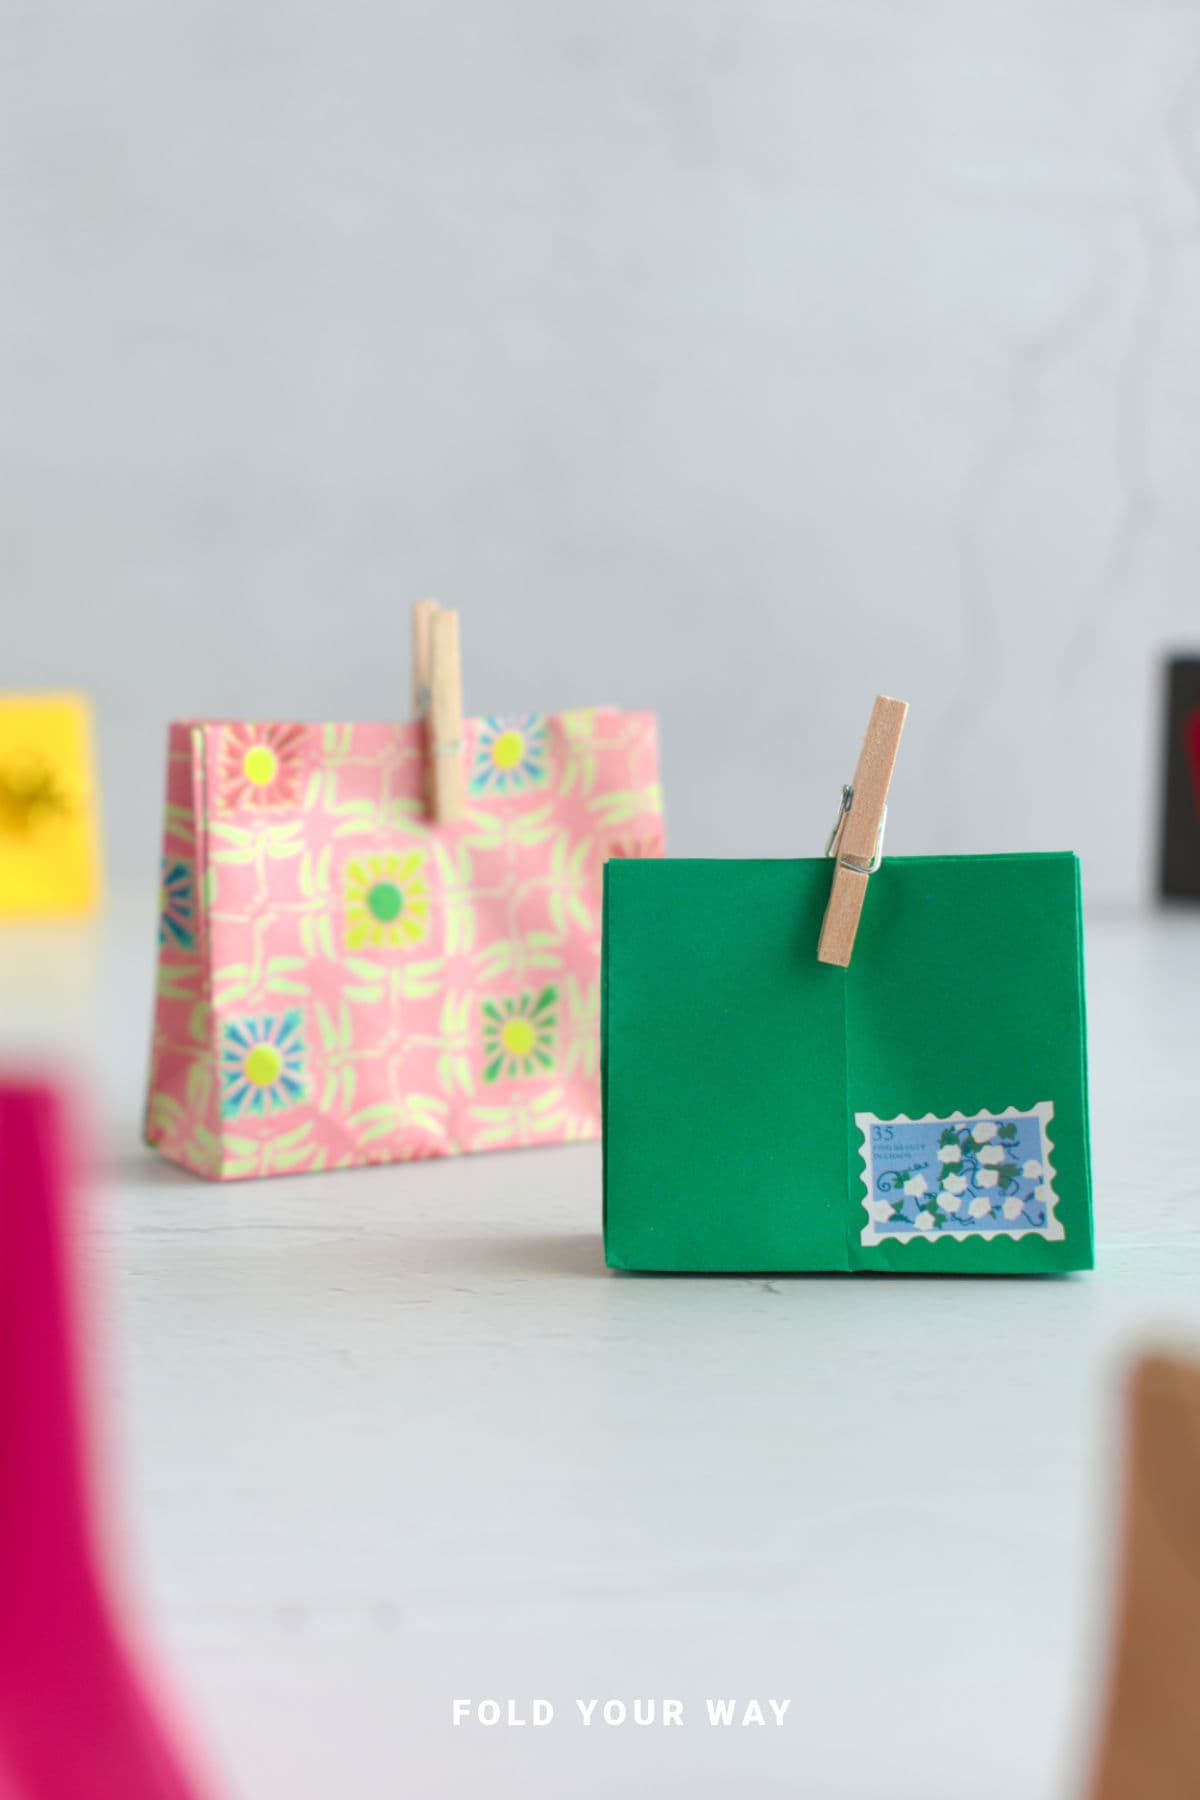
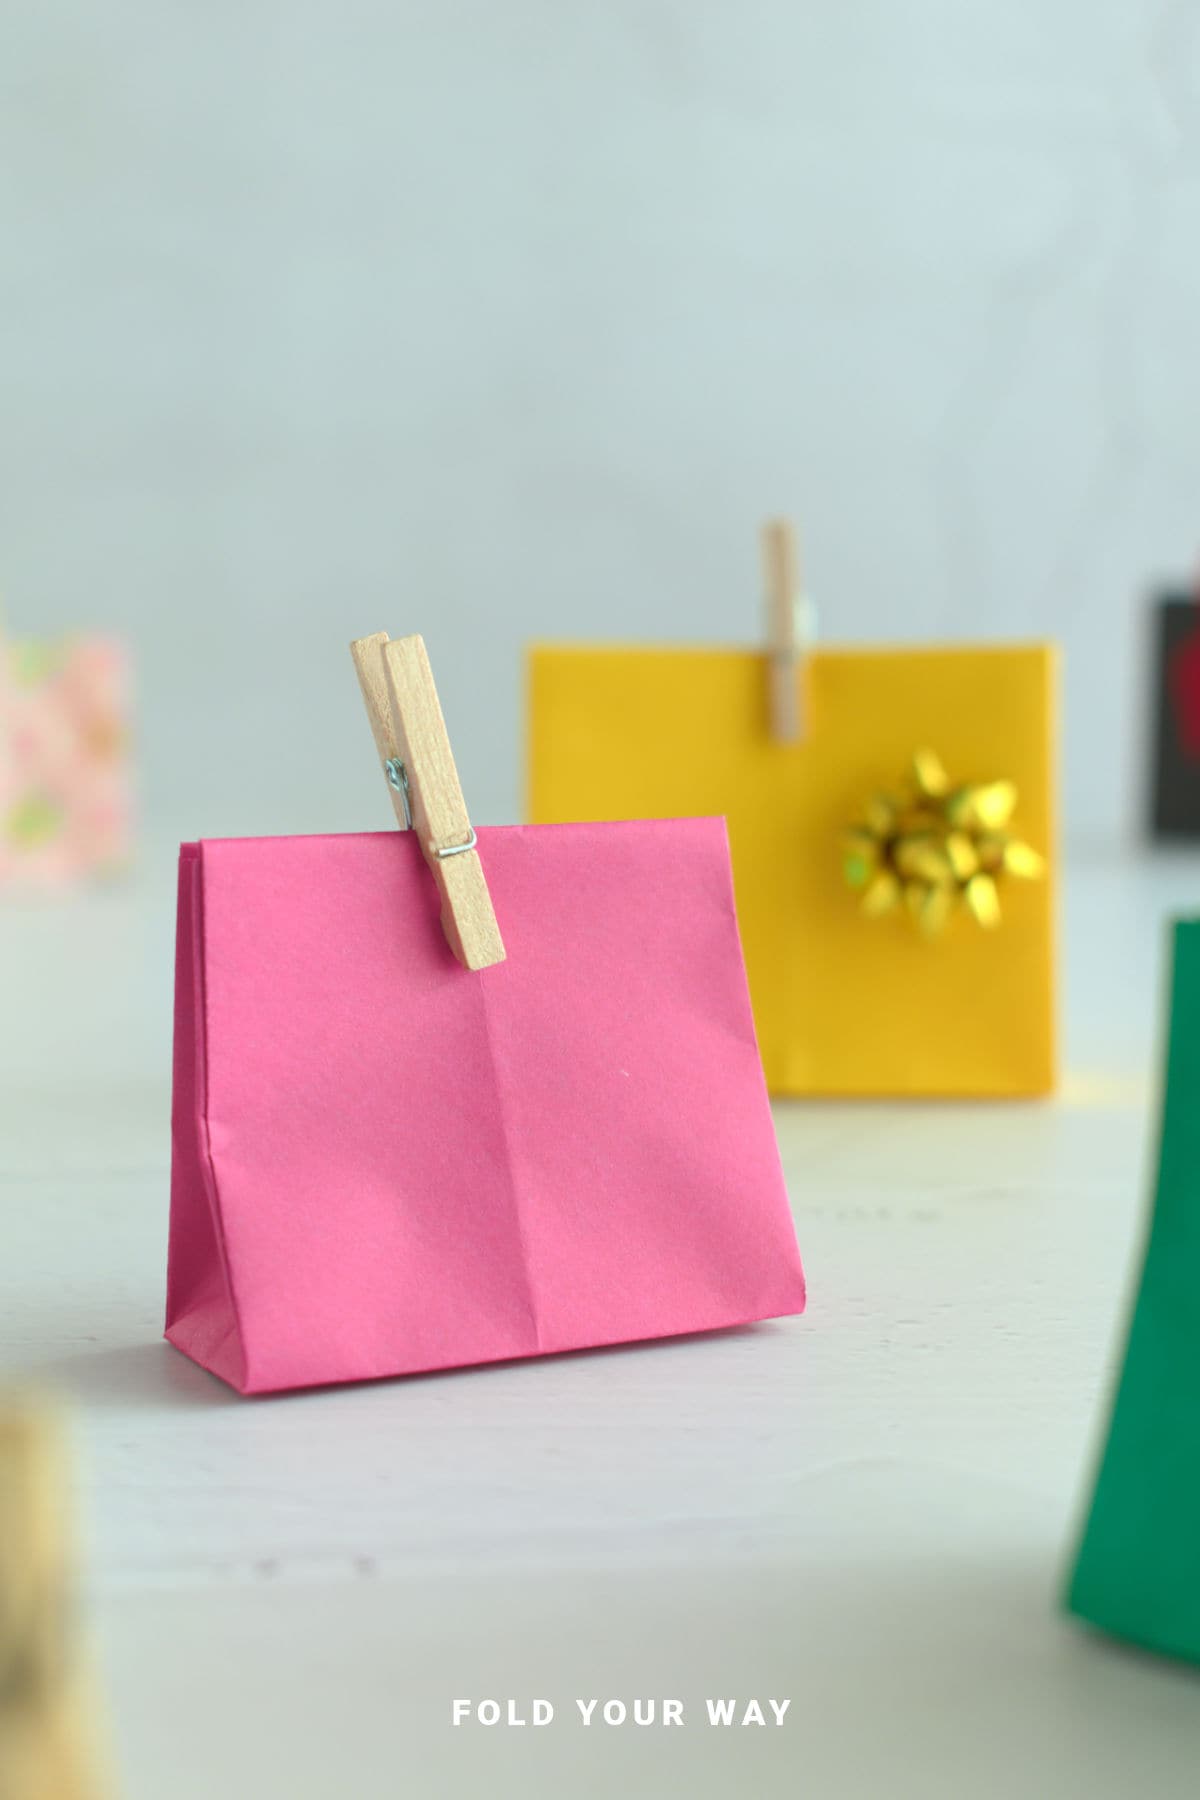
These cute DIY mini paper gift bags are made from square paper and come together with simple folds.
You can seal them with a mini peg, a sticker, or even a hole punch and ribbon depending on the look you’re going for.
Perfect for party favors, weddings, little thank-you gifts, or handmade treats.

Jump to:
Small gifts can be surprisingly tricky to wrap.
A full-size gift bag feels oversized, tissue paper looks messy, and envelopes don’t always feel special enough.
That’s where these cute mini paper gift bags come in.
Made from a single square sheet, they’re neat, structured, and just the right size for chocolates, jewelry, handwritten notes, or tiny keepsakes.
One of the best things about these cute mini paper gift bags is how flexible they are.
Want something playful for a birthday party? Add a bright sticker.
Going for rustic wedding favors? Use a mini wooden peg.
Prefer something elegant? Punch two small holes and thread ribbon through for a soft, gathered closure.
You’re not locked into one finishing style — you get to decide what suits the occasion.
Because they’re folded rather than glued, the process feels clean and straightforward.
No drying time. No sticking fingers together.
Just crisp folds that create a tidy little bag you’ll probably want to make in batches.
If you’ve got an event coming up and need packaging that feels thoughtful without being complicated, these cute mini paper gift bags are a smart solution.
Why You'll Love This Pattern
- You can fold a whole stack of these in one evening. They are quick to make.
- These gift bags are perfect for last minute gifts – great for thank you gifts, Christmas gifts, or even party favors.
- You can customize these bags to how you want them to look.
- Not sure how you want to close them yet? Peg, sticker, or ribbon — you can decide at the very end.
- Perfect for every occasion - from weddings to baby showers, small thank you gifts to Christmas.
Skill Level
★☆☆☆☆ (Easy)
Materials Needed
- 1 x square sheet of paper, e.g. origami paper. Example sizes below
- Closure of your choice - e.g. mini wooden peg, sticker, double sided tape, hole punch and ribbon
| Paper Size | Final Bag Size | |
| Small Paper Gift Bag | 6 inches x 6 inches (15 cm x 15 cm) | 2 inches x 1.75 inches x 1 inch (5 cm x 4.5 cm x 2.5 cm) |
| Large Paper Gift Bag | 10 inches x 10 inches (25 cm x 25 cm) | 3.5 inches x 3 inches x 1.25 inches (3 cm) (9 cm x 7.5 cm) |
Instructions
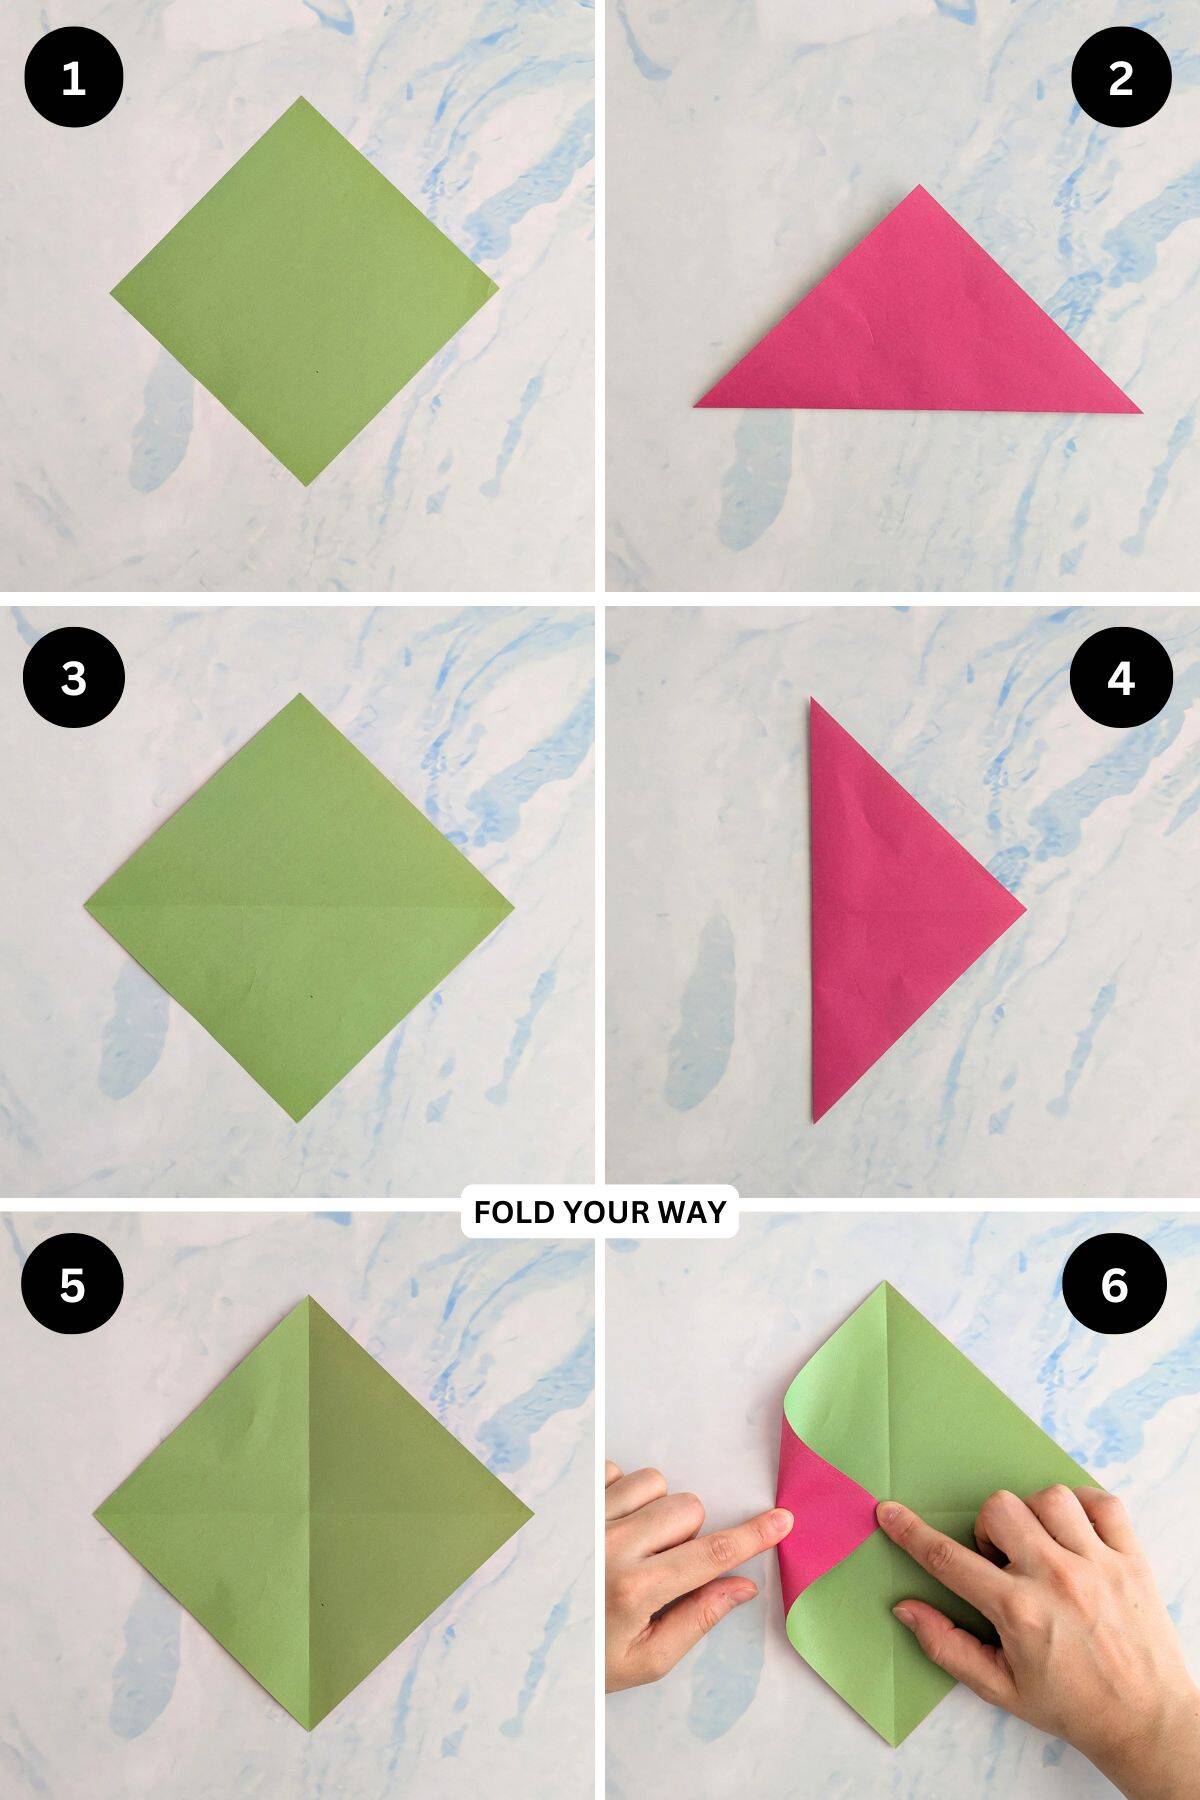
Step 1: Start with the color you want your gift bag to be facing down. Arrange your paper to sit like a diamond shape. In this case my gift bag will be pink and the inside will be green.
Step 2: Fold the bottom point up to meet the top point.
Step 3: Unfold previous step.
Step 4: Fold the left point to meet the right point.
Step 5: Unfold previous step.
Step 6: Fold the left point to meet the middle but only creasing in the middle of the fold to leave a mark.
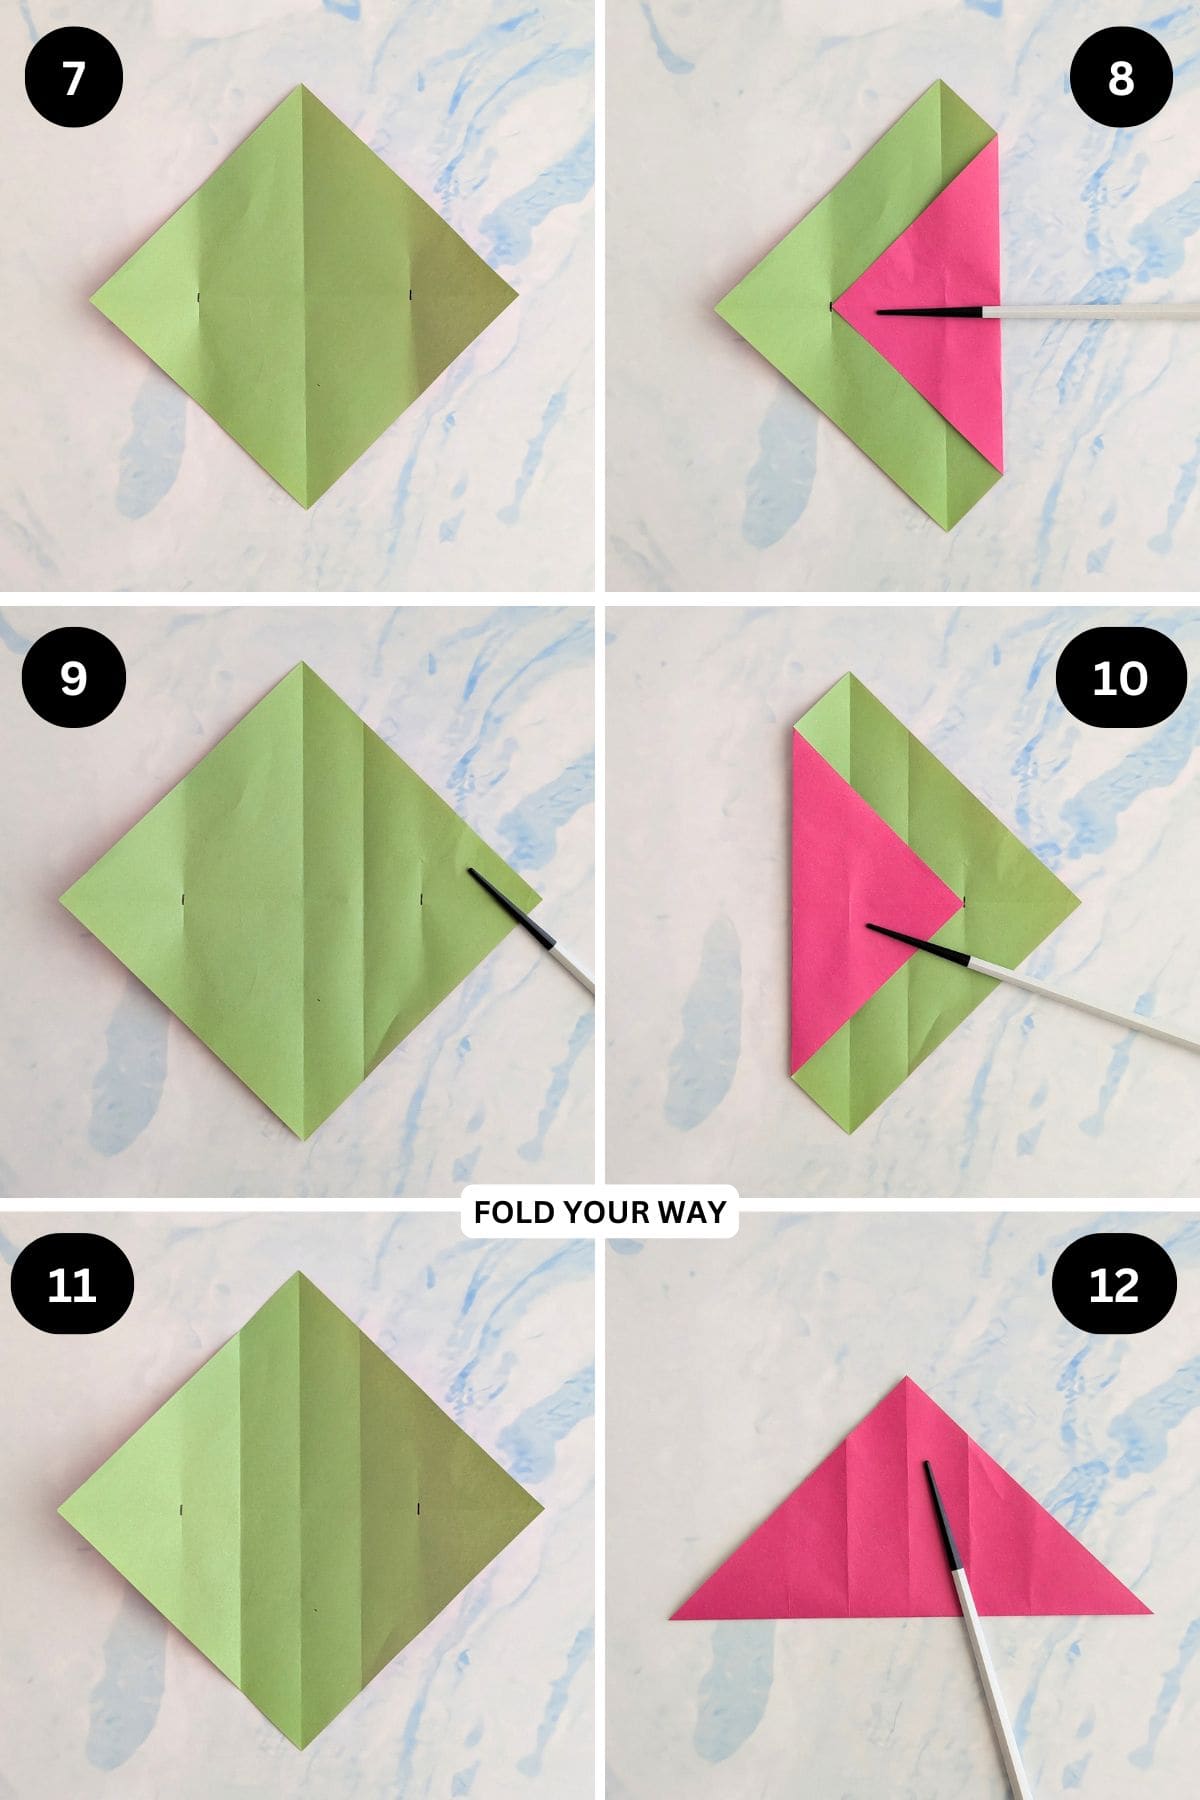
Step 7: Unfold previous step and repeat for the right point. You should now have 1 small crease mark on both the left and right sides of your paper.
Step 8: Fold the right point to meet the crease mark on the left.
Step 9: Unfold previous step.
Step 10: Fold the left point to meet the crease mark on the right.
Step 11: Unfold previous step.
Step 12: Refold the bottom point to meet the top point.
✨ You're almost there! ✨
To unlock the final steps and complete your pattern, create a free account with Grow.me. below.
Make sure you tick the box to subscribe to our newsletter and stay up to date with the latest patterns, tips, and more!
Once you're signed up, you'll get instant access to finish your project and enjoy exclusive content in the future.
Already signed up? Hit the button below and select ‘Switch to Log In’ to pick up where you left off and finish your project!
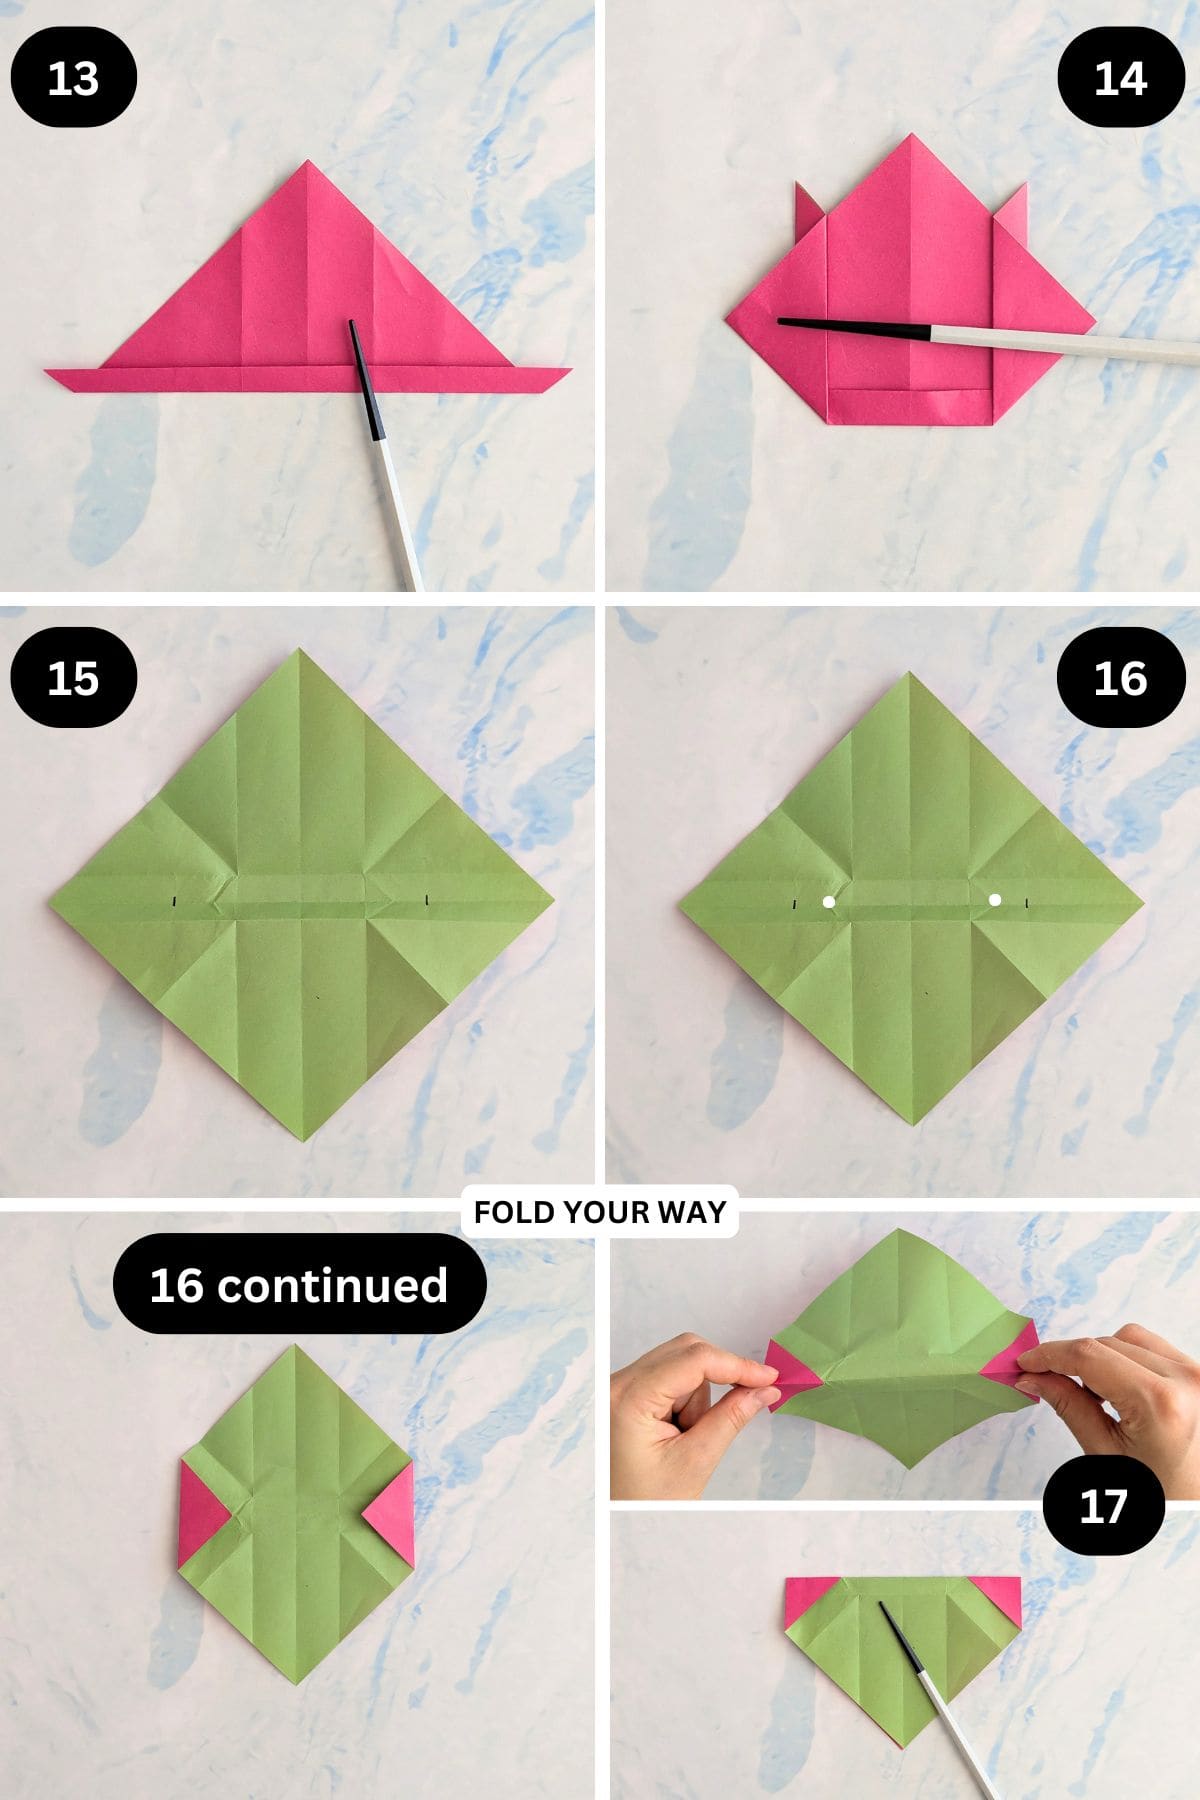
Step 13: Fold the bottom edge up slightly. This will form the base of your bag.
Step 14: Fold both the left and right points up on a diagonal, matching their edges along the sides of the paper and existing creases.
Step 15: Unfold your paper completely.
Step 16: Fold both the left and right points in to meet the points shown.
Step 17: Fold the paper behind along the existing middle crease. This is known as a mountain fold.
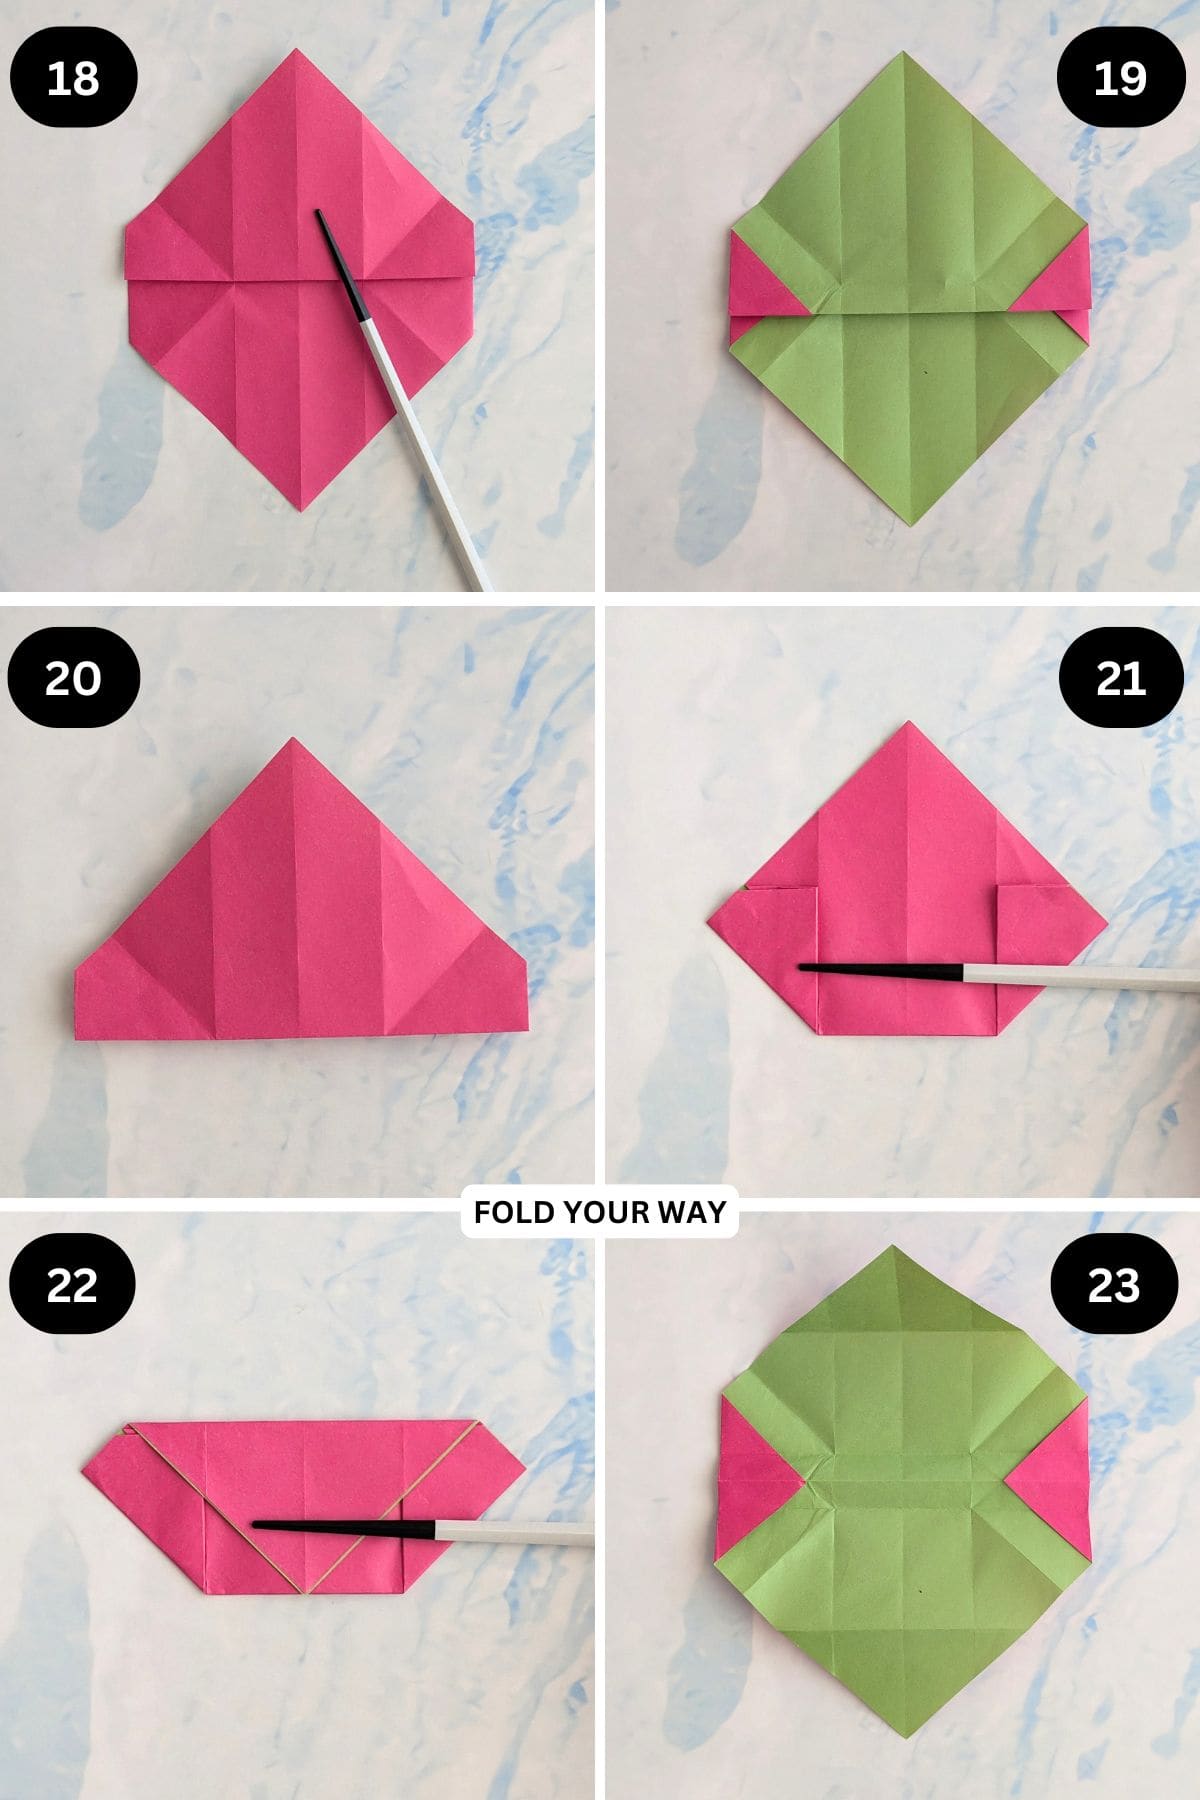
Step 18: Fold the bottom point up along the existing horizontal crease line.
Step 19: Flip your paper over from top to bottom.
Step 20: Fold the bottom point up to meet the top point (use the existing horizontal crease line).
Step 21: Once again, fold the left and right points up on a diagonal, matching their edges along the edges of the paper and using the existing crease lines.
Step 22: Fold the top point down to meet the bottom edge.sCrease well.
Step 23: Open out your paper but keeping the left and right points folded as shown.
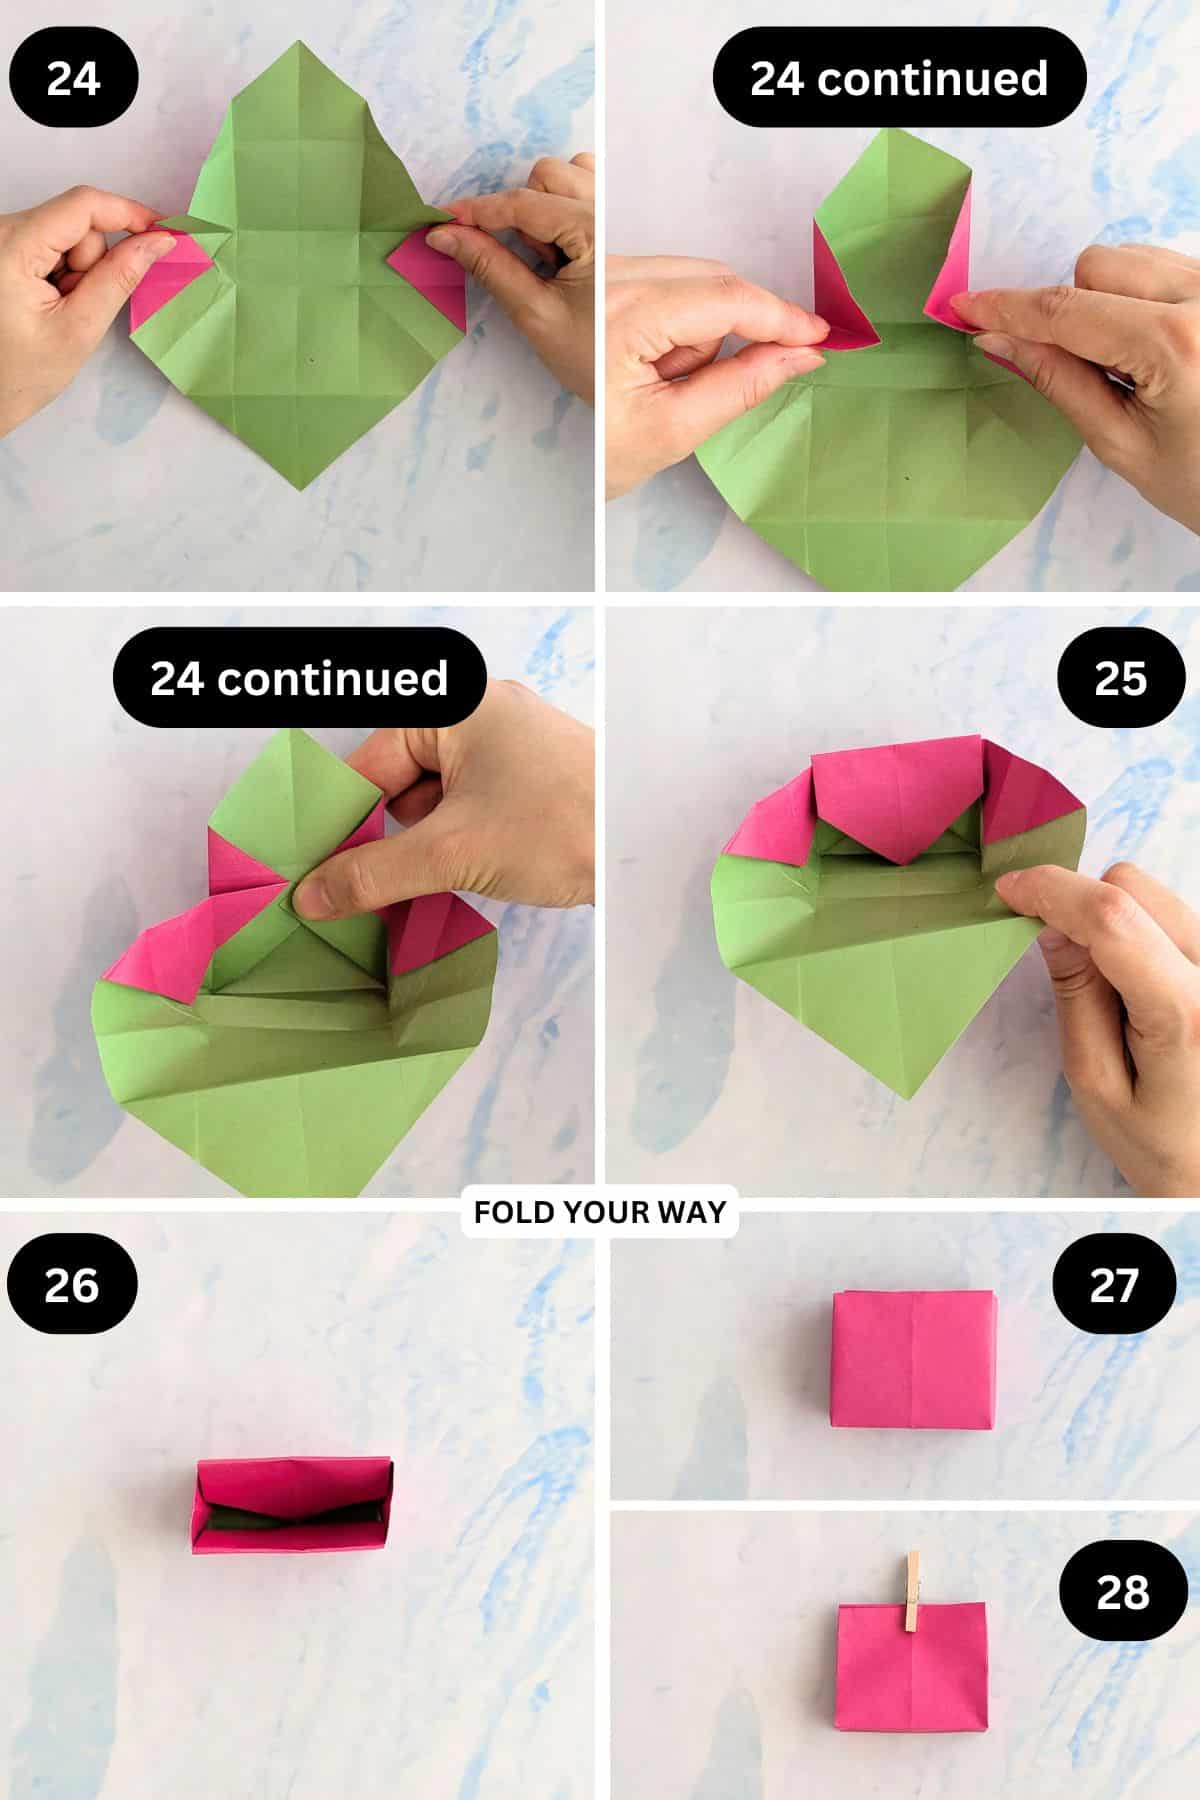
Step 24: Working on the top side of your paper, hold both the left and right edges and collapse the paper in along the existing crease lines. The sides will collapse onto themselves.
Step 25: Still working on the top side, fold the fold point down into the paper.
Step 26: Repeat previous 2 steps for the bottom side.
Step 27: Re crease along the edges to make your bag look neater.
Step 28: Completed gift bag.
Tips For Success
- Use slightly thicker paper so the bag stands nicely once filled.
- Crease firmly — sharp folds make the structure stronger.
- If adding ribbon, punch holes evenly so the closure sits neatly.
- Test-fill one bag before making a batch to check sizing.

Color, Paper Ideas, and Variations
- Pastel paper for baby showers.
- Metallic or pearlescent paper for weddings.
- Kraft paper with twine for rustic events.
- Bold patterns for birthday party favors.
- Red, green, or gold for Christmas gifting.
- You can also mix finishes — for example, patterned paper with a plain sticker, or neutral paper with a bright ribbon.
FAQ
Medium squares create ideal favor-size bags. Larger squares will give you more room for small gifts.
Not at all. Stickers, ribbon, or even decorative clips work beautifully.
Even a paper clip could work!
Absolutely. Once you’ve folded one, the rest come together quickly.
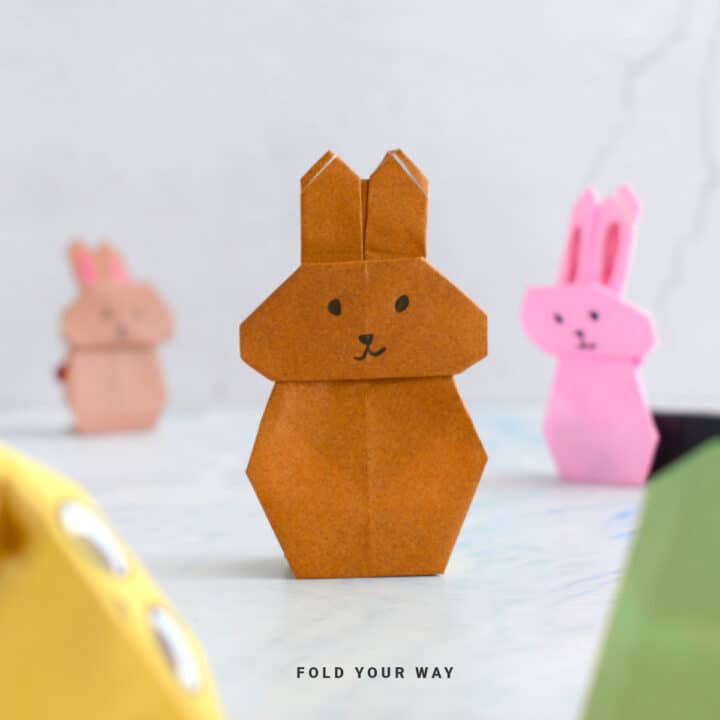
Other Paper Crafts You Might Like To Try:
Helpful Tips and Common Mistakes For Paper Crafts
Paper crafting and origami can be hard sometimes. Which is why we've made this printable PDF just for you.
It outlines helpful tips so that you can successfully complete your craft, and some of the most common mistakes people come across.
You can download the helpful tips and common mistakes for paper crafts printable PDF here.
Stay Connected
Made this pattern? Let us know how it went in the comments below!
Pin this post - Pin now to take your paper crafting skills to the next level.
Share on Instagram or Facebook - Capture the beauty of your finished paper craft project and share it on Instagram or Facebook! Tag us @foldyourway so we can see your work!
Other Patterns You Might Like To Try:
Looking for other easy patterns like this? Try these:


Comments
No Comments