
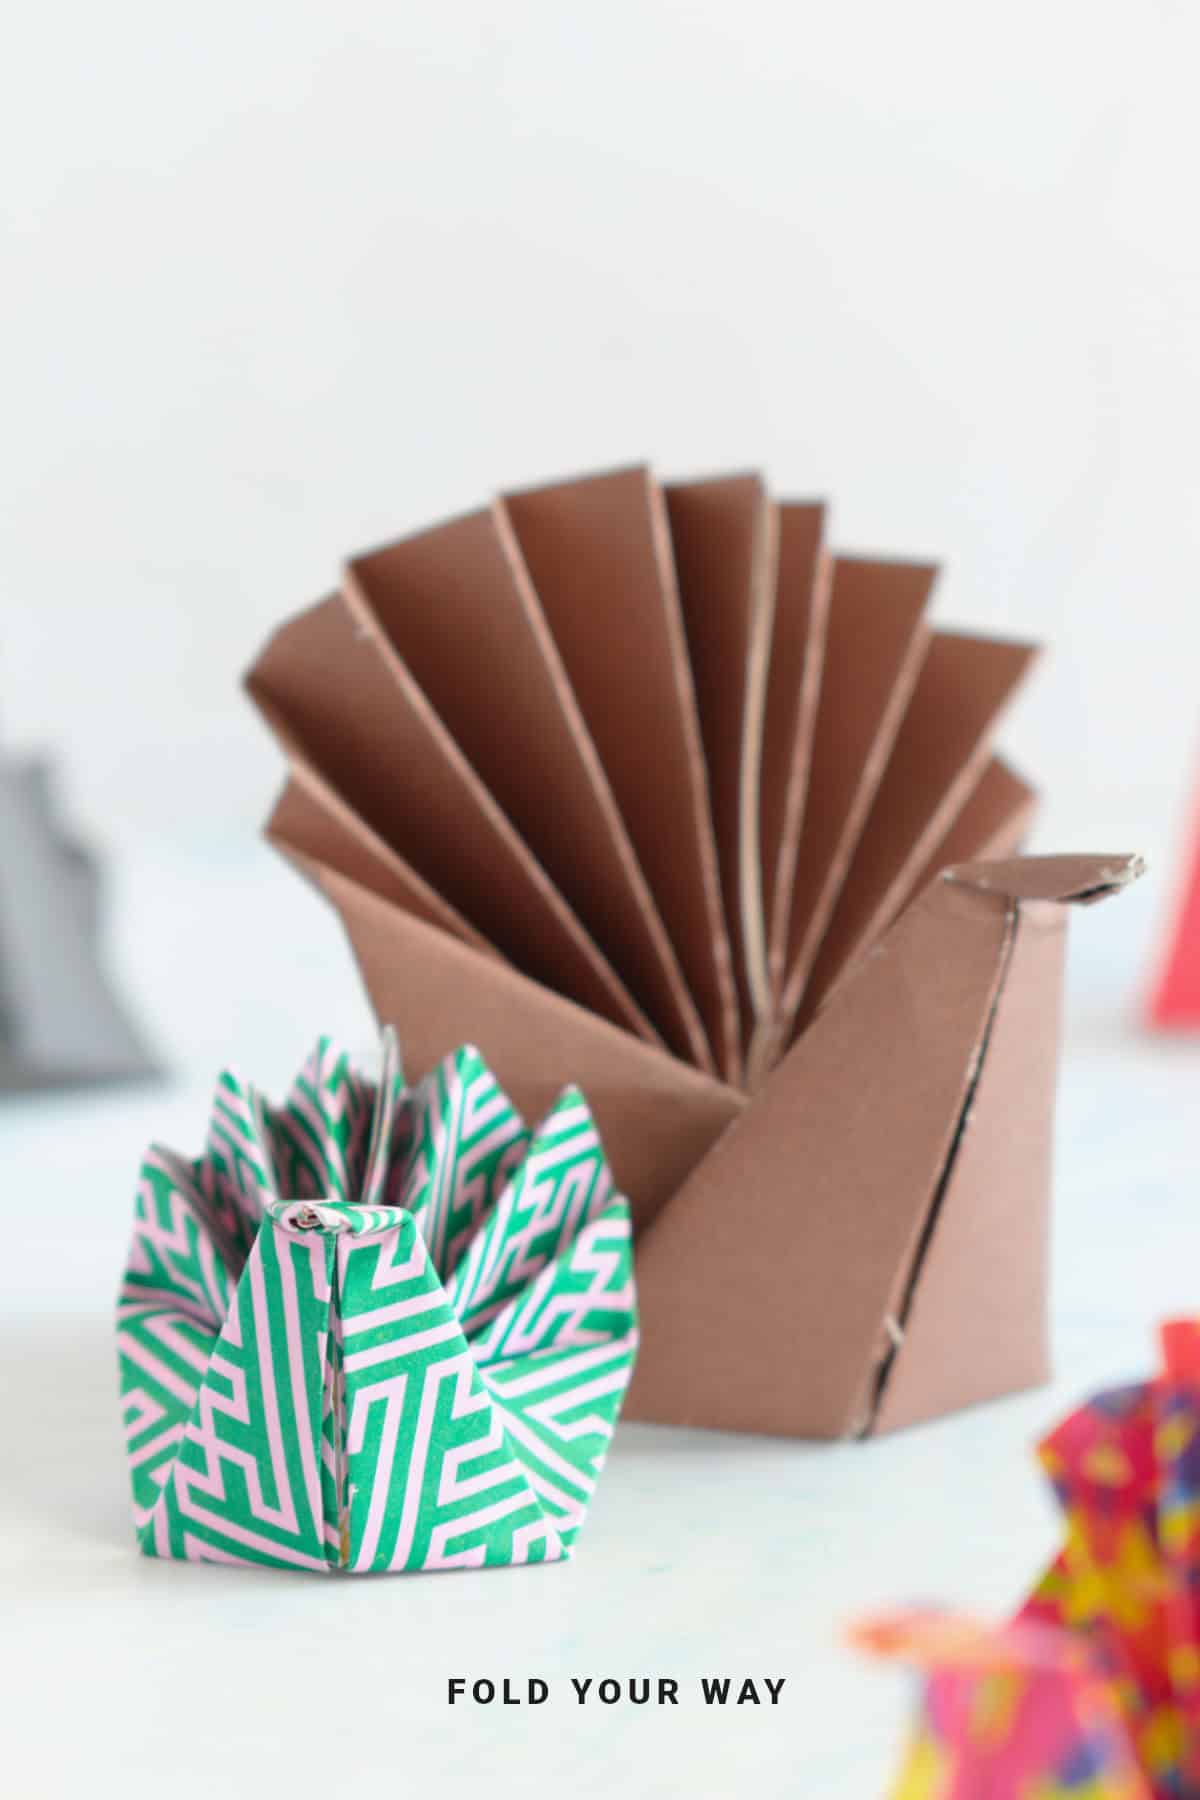
This 3d origami turkey is a fun and festive paper craft that’s perfect for Thanksgiving or autumn-themed decorations.
With just a sheet of paper and a touch of glue or double-sided tape, you’ll have a turkey that stands proud on any table or shelf.
Jump to:
When it comes to Thanksgiving crafts, there’s something extra satisfying about creating a cute 3D decoration from just a simple sheet of paper.
This 3d origami turkey is a charming, easy project that adds personality and fun to your seasonal décor.
Whether you’re crafting with kids, prepping for a classroom project, or looking for a last-minute table centerpiece, this little guy fits right in.
It’s a no-fuss, low-mess activity that requires only a square piece of paper and a hint of glue or double-sided tape to hold its shape.
Because it’s a freestanding model, it makes a great addition to Thanksgiving tables, windowsills, or even place settings.
You can write names on the turkey and use them as name cards, or add a loop and turn them into hanging decorations.
While it’s most popular around Thanksgiving, this paper turkey is also a fun project for fall festivals, harvest parties, and even educational craft sessions that explore autumn themes.
And the best part? It’s completely customizable—just choose your colors or patterned paper to create your own flock of turkeys in every shade of fall.

Why You'll Love This Pattern
- Great for Thanksgiving table settings or seasonal displays
- Easy to customize with patterned or colored paper
- Freestanding design makes it perfect for decoration
- Kid-friendly (with a little help on the final steps)
- Requires minimal materials and no cutting
- A relaxing paper craft that comes together quickly
Skill Level
★★☆☆☆ (Easy)
Materials Needed
- 1 square sheet of paper
- Glue stick or double-sided tape
- Optional: markers or pens for eyes/details
Instructions
Step 1: Start with the color you want your turkey to be facing down.
Step 2: Fold the paper in half from left to right.
Step 3: Unfold previous step.
Step 4: Fold both the left and right edges in to meet the middle crease.
Step 5: Fold both the top left and top right corners in to meet the middle, aligning the top edge with the middle crease.
Step 6: Once again, fold both the top left and top right edges in to meet the middle.

Step 7: Flip your paper over from left to right.
Step 8: Fold the paper in half from bottom to top.
Step 9: Unfold previous step.
Step 10: We will now accordion fold the bottom part of the paper until the middle crease line (from step 8).
Fold the bottom edge up slightly. Then, flip your paper over from left to right. Fold the bottom edge up again, at the same width you made on the other side.
Flip your paper over once again and repeat folding and flipping until you have reached the middle crease line.
You should have your final accordion fold crease on the top (the side you started the accordion folds with) facing up.

✨ You're almost there! ✨
To unlock the final steps and complete your pattern, create a free account with Grow.me. below.
Make sure you tick the box to subscribe to our newsletter and stay up to date with the latest patterns, tips, and more!
Once you're signed up, you'll get instant access to finish your project and enjoy exclusive content in the future.
Already signed up? Hit the button below and select ‘Switch to Log In’ to pick up where you left off and finish your project!
Step 11: Fold the top tip back slightly. This will form the turkey’s head.
Step 12: Fold the top edge down to meet the edge of the accordion folds as shown.
Step 13: Flip your paper over from left to right.
Step 14: Once again, fold the top edge down to meet the edge of the accordion folds. But this time you want it to form a “v” like shape (similar to the accordion folds). Do not crease the neck of the turkey.
Step 15: Flip your paper over from left to right.
Step 16: Fold the paper in half from left to right.

Step 17: Hold the paper as shown, and while holding firmly on the turkey’s body (under the head), lift up the tail section (accordion folds), slightly.
Step 18: Apply a bit of glue or double sided tape to where the accordion folds meet.
Step 19: Open out your turkey. Completely origami turkey. Adjust the folds as you like.
If you find your turkey doesn’t stand very well, you may need to adjust the folds or use something small like an eraser to hold it up. It may not stand well because your tail is too heavy.

Tips For Success
- Use thicker origami or craft paper to help the turkey hold its shape.
- If your paper isn’t double-sided, consider coloring one side before folding for extra contrast.
- A bone folder or ruler can help make crisp folds, especially for the tail.
- For younger kids, pre-fold some of the trickier steps to simplify the project.
- You can add a beak, wattle, and eyes with tiny paper pieces or markers for extra detail.

Color, Paper Ideas, and Variations
- Traditional brown: Stick with classic brown and red for a realistic turkey look.
- Fall patterns: Use scrapbook or seasonal origami paper with leaves, acorns, or pumpkins.
- Mini turkeys: Try making smaller versions for cupcake toppers or napkin decorations (they go great with these pumpkin napkin folds!)
- Bright and bold: Let kids go wild with bright colors—turkeys don’t always have to be brown!
- Metallic accents: Add shimmer with gold or bronze paper for a more elegant centerpiece.
FAQ
Yes, though origami or craft paper holds its shape better. If using printer paper, consider adding a dab of glue to reinforce the folds.
Yes! With a little help for the shaping and finishing touches, kids can definitely join in on this project.
Other Paper Crafts You Might Like To Try:
Stay Connected
Made this pattern? Let us know how it went in the comments below!
Pin this post - Pin now to take your paper crafting skills to the next level.
Share on Instagram or Facebook - Capture the beauty of your finished paper craft project and share it on Instagram or Facebook! Tag us @foldyourway so we can see your work!

Other Patterns You Might Like To Try:
Looking for other easy patterns like this? Try these:


Roland says
This was so easy to follow, thanks