
Turn one square sheet of paper into a functional origami cube desk organizer—no scissors, no glue.
A simple, foldable way to hold pens, pencils, or small tools.
Jump to:
Need a quick and practical paper craft that actually helps you stay organized?
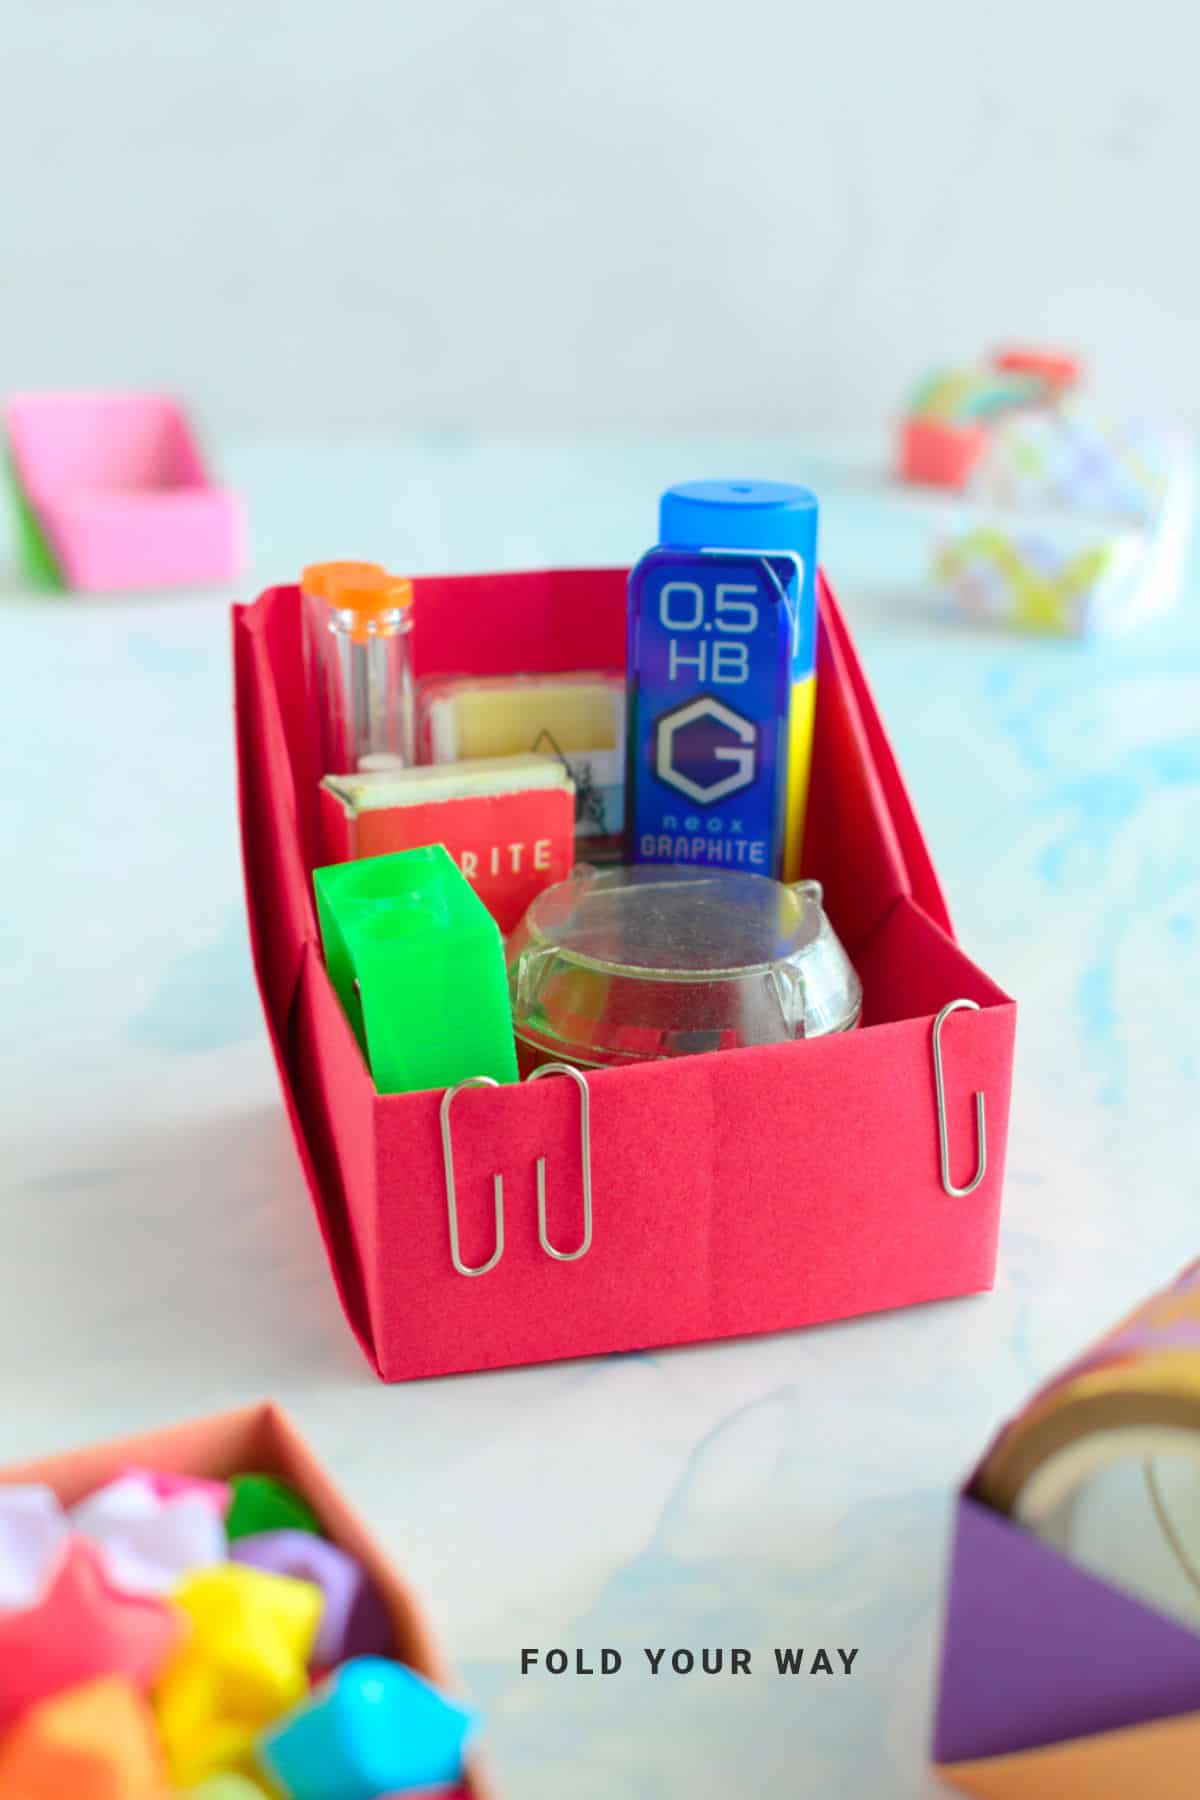
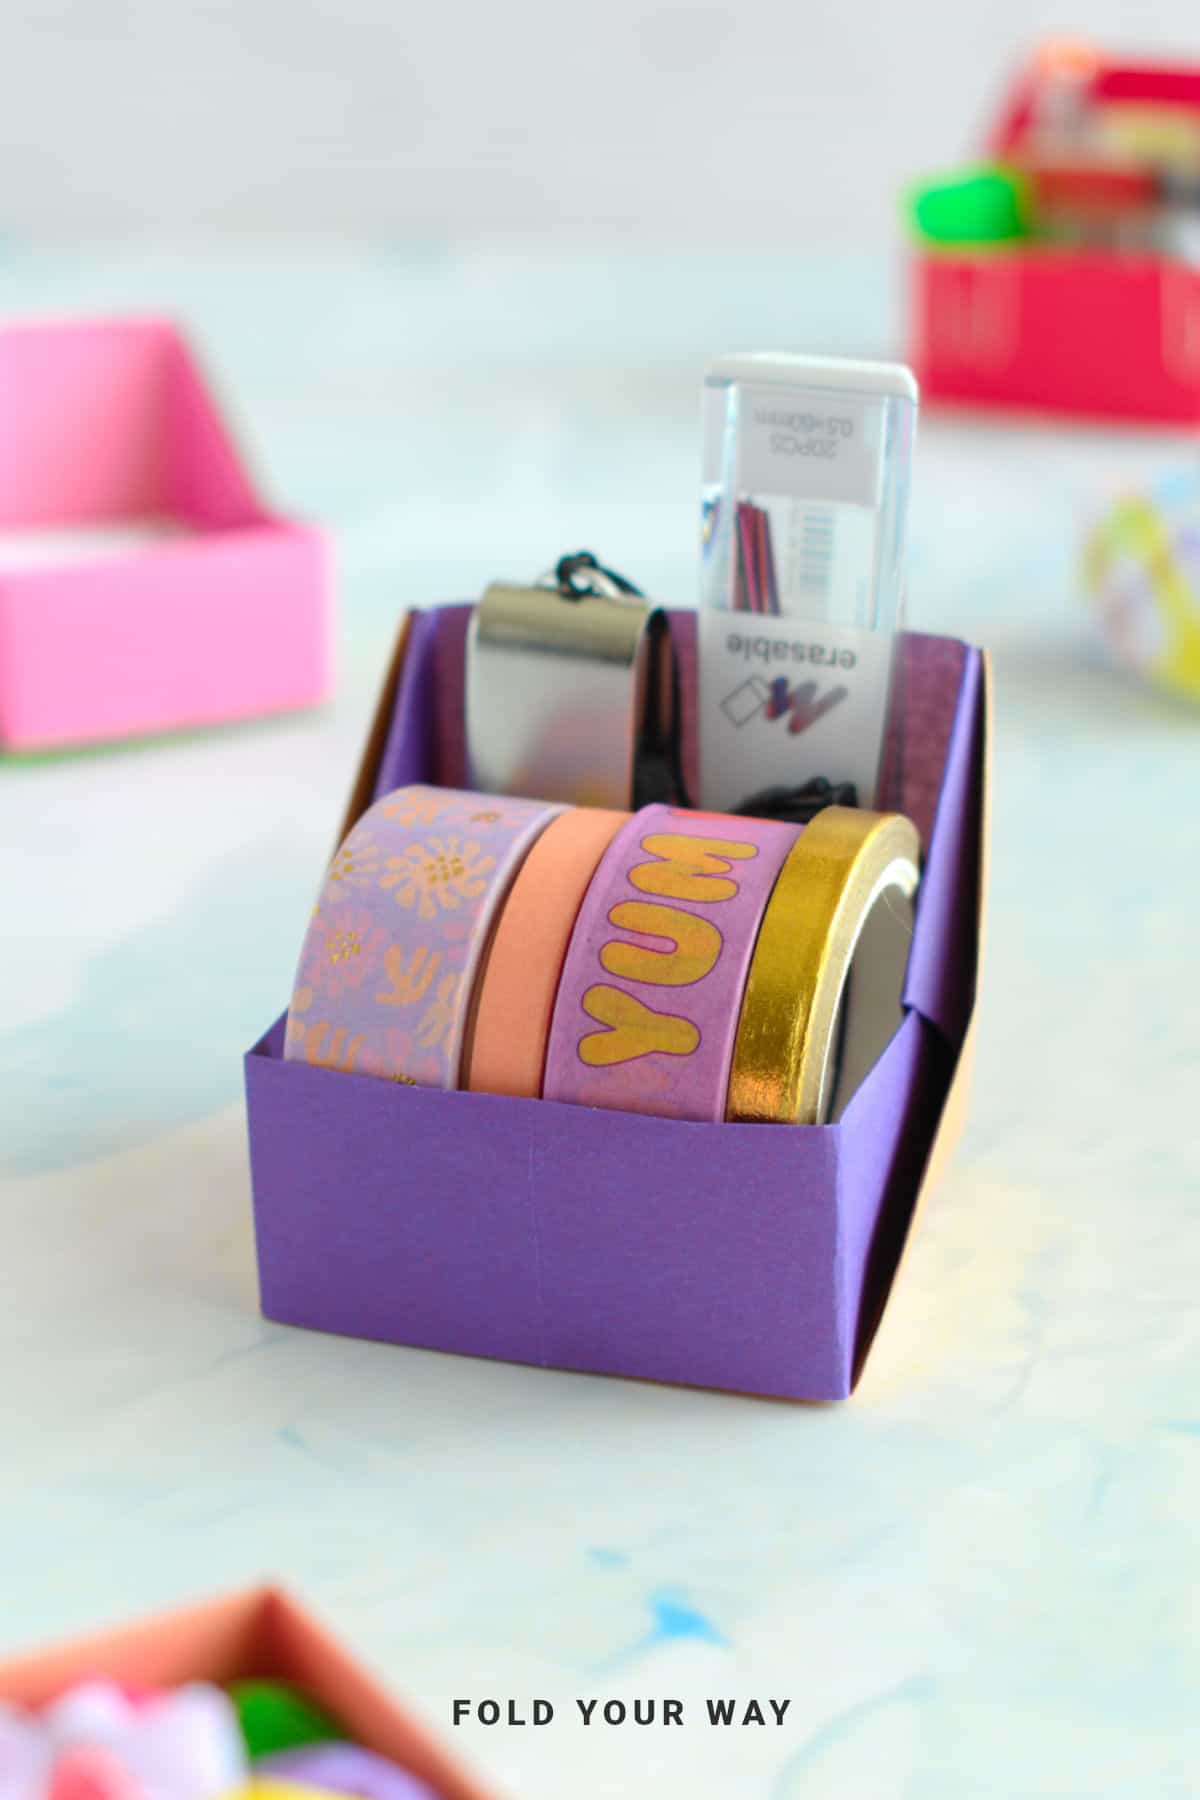
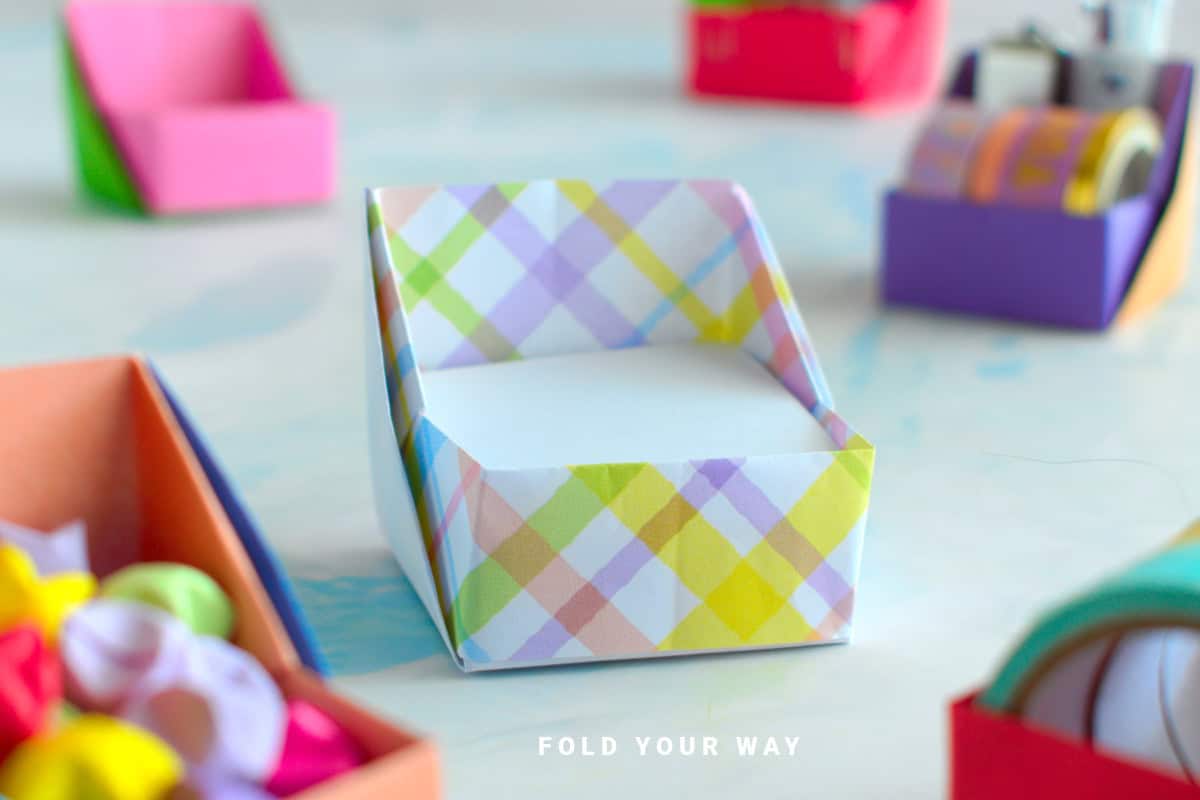
Try this easy origami cube desk organizer made from a single sheet of square paper.
It’s completely glue-free, holds its shape well, and can sit right on your desk to store pens, pencils, scissors, or other supplies.
The cube design feels modern, geometric, and tidy—perfect for minimalist desks or colorful workspaces.
And because it’s built from just folds, it’s collapsible and easy to recycle or remake if it gets worn out.
This is a great easy DIY tutorial to fold with kids, too—especially if they want to customize their own organizers for school or art supplies.
If you're into origami furniture ideas for the workspace or just a useful origami project, this project is a great place to start.
It adds a handmade touch and helps reduce clutter—all using nothing but paper.
Why You'll Love This Pattern
- Only one square sheet needed—no cutting, no glue
- Can hold lightweight tools and stationery
- Looks clean and geometric on any desk
- Beginner-friendly folds
- Makes a great desk organizer or gift box
- Easy to flatten and remake when needed
Skill Level
★☆☆☆☆ (Very Easy)
Materials Needed
1 square sheet of paper
| Paper Size | Final Origami Desk Organizer Size (inner box) | |
| Small Desk Organizer | 6 inches x 6 inches (15 cm x 15 cm) | 2 inches x 2 inches (5 cm x 5 cm) |
| Large Desk Organizer | 8 inches x 8 inches (20 cm x 20 cm) | 3 inches x 3 inches (7.5 cm x 7.5 cm) |
Instructions
Step 1: Start with the color you want your desk organizer to be facing down. The color facing up will be on the inside of your organizer.
Step 2: We will need to divide the paper into even thirds. To do this, you could use a ruler and mark the points and then crease your paper. Or you could:
Hold your paper and arrange it so that it forms an even “S” like shape. Then, pinch the top of the paper together to make 2 small creases where the curves of the “S” are.
Place your paper back onto the table.
Fold the left edge of the paper to the right, matching its edge with the small crease (closest to the right edge). Then, if you have divided it evenly, the right edge should fold to meet the left edge without overlapping the left edge. Unfold. You have now divided your paper into thirds.
Step 3: Rotate your paper so the creases are sitting horizontally.
Step 4: Once again, divide your paper into thirds. You will end up with a grid of 9 squares.
Step 5: Fold the bottom left corner up to meet the top right corner.

Step 6: Unfold previous step.
Step 7: Fold the bottom right corner up to meet the top left corner.
Step 8: Unfold previous step.
Step 9: Fold the bottom edge up to meet the top edge.
Step 10: Unfold previous step.
Step 11: Fold the left edge to meet the right edge.

✨ You're almost there! ✨
To unlock the final steps and complete your pattern, create a free account with Grow.me. below.
Make sure you tick the box to subscribe to our newsletter and stay up to date with the latest patterns, tips, and more!
Once you're signed up, you'll get instant access to finish your project and enjoy exclusive content in the future.
Already signed up? Hit the button below and select ‘Switch to Log In’ to pick up where you left off and finish your project!
Step 12: Unfold previous step.
Step 13: Flip your paper over from left to right.
Step 14: Fold the bottom edge up to meet the 1st horizontal crease from the bottom.
Step 15: Flip your paper over from left to right, keeping the folded edge at the bottom.
Step 16: Fold the bottom left edge up to meet the 1st horizontal crease from the top, creasing only along the line shown, allowing the middle to stand up.
Step 17: Fold the bottom right edge up to meet the 1st horizontal crease from the top, creasing only along the line shown.

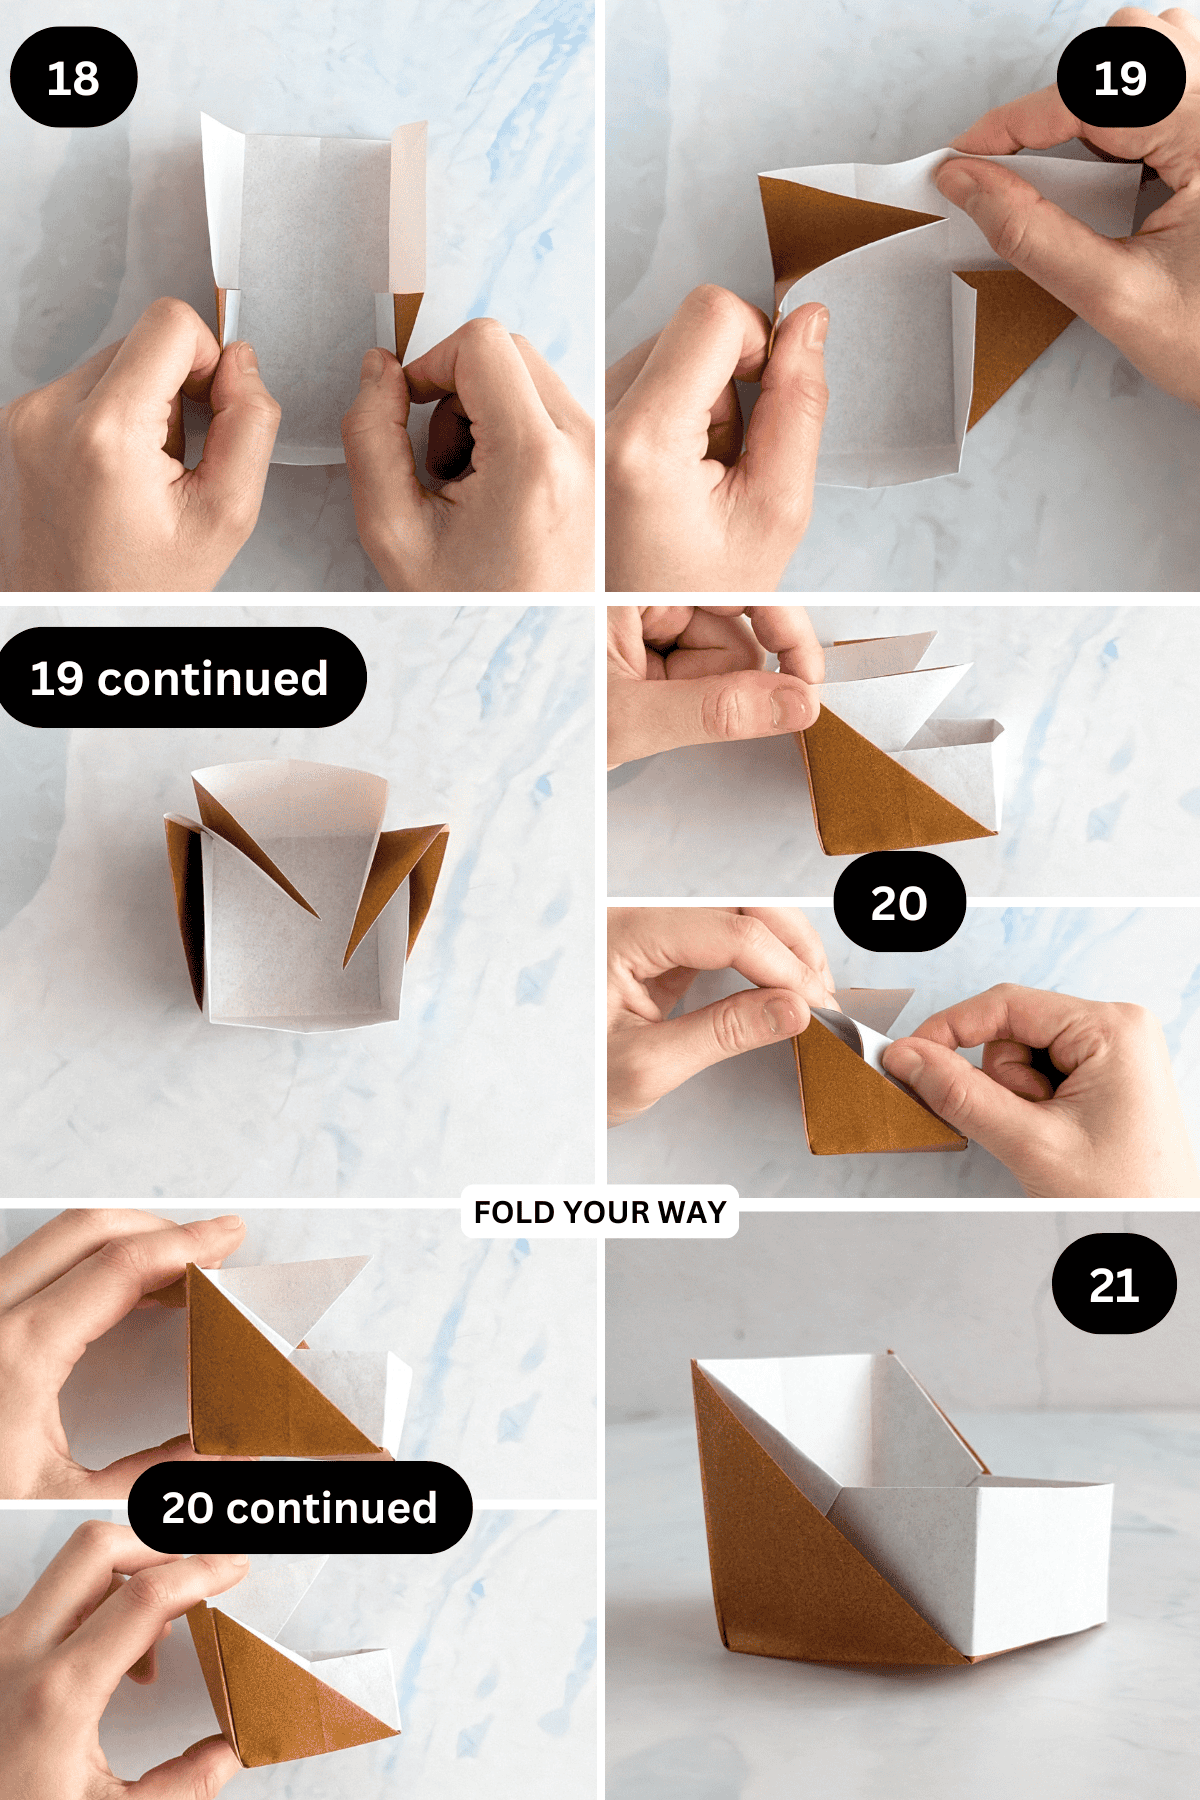
Step 18: Lift both the left and right sides of the paper so they stand upright along the existing creases.
Step 19: Collapse the top edge of the paper so that it can stand upright (the upper left and upper right corners should collapse into the box along the existing crease lines).
Step 20: Tuck both the upper left and upper right flaps into the sides of the box respectively.
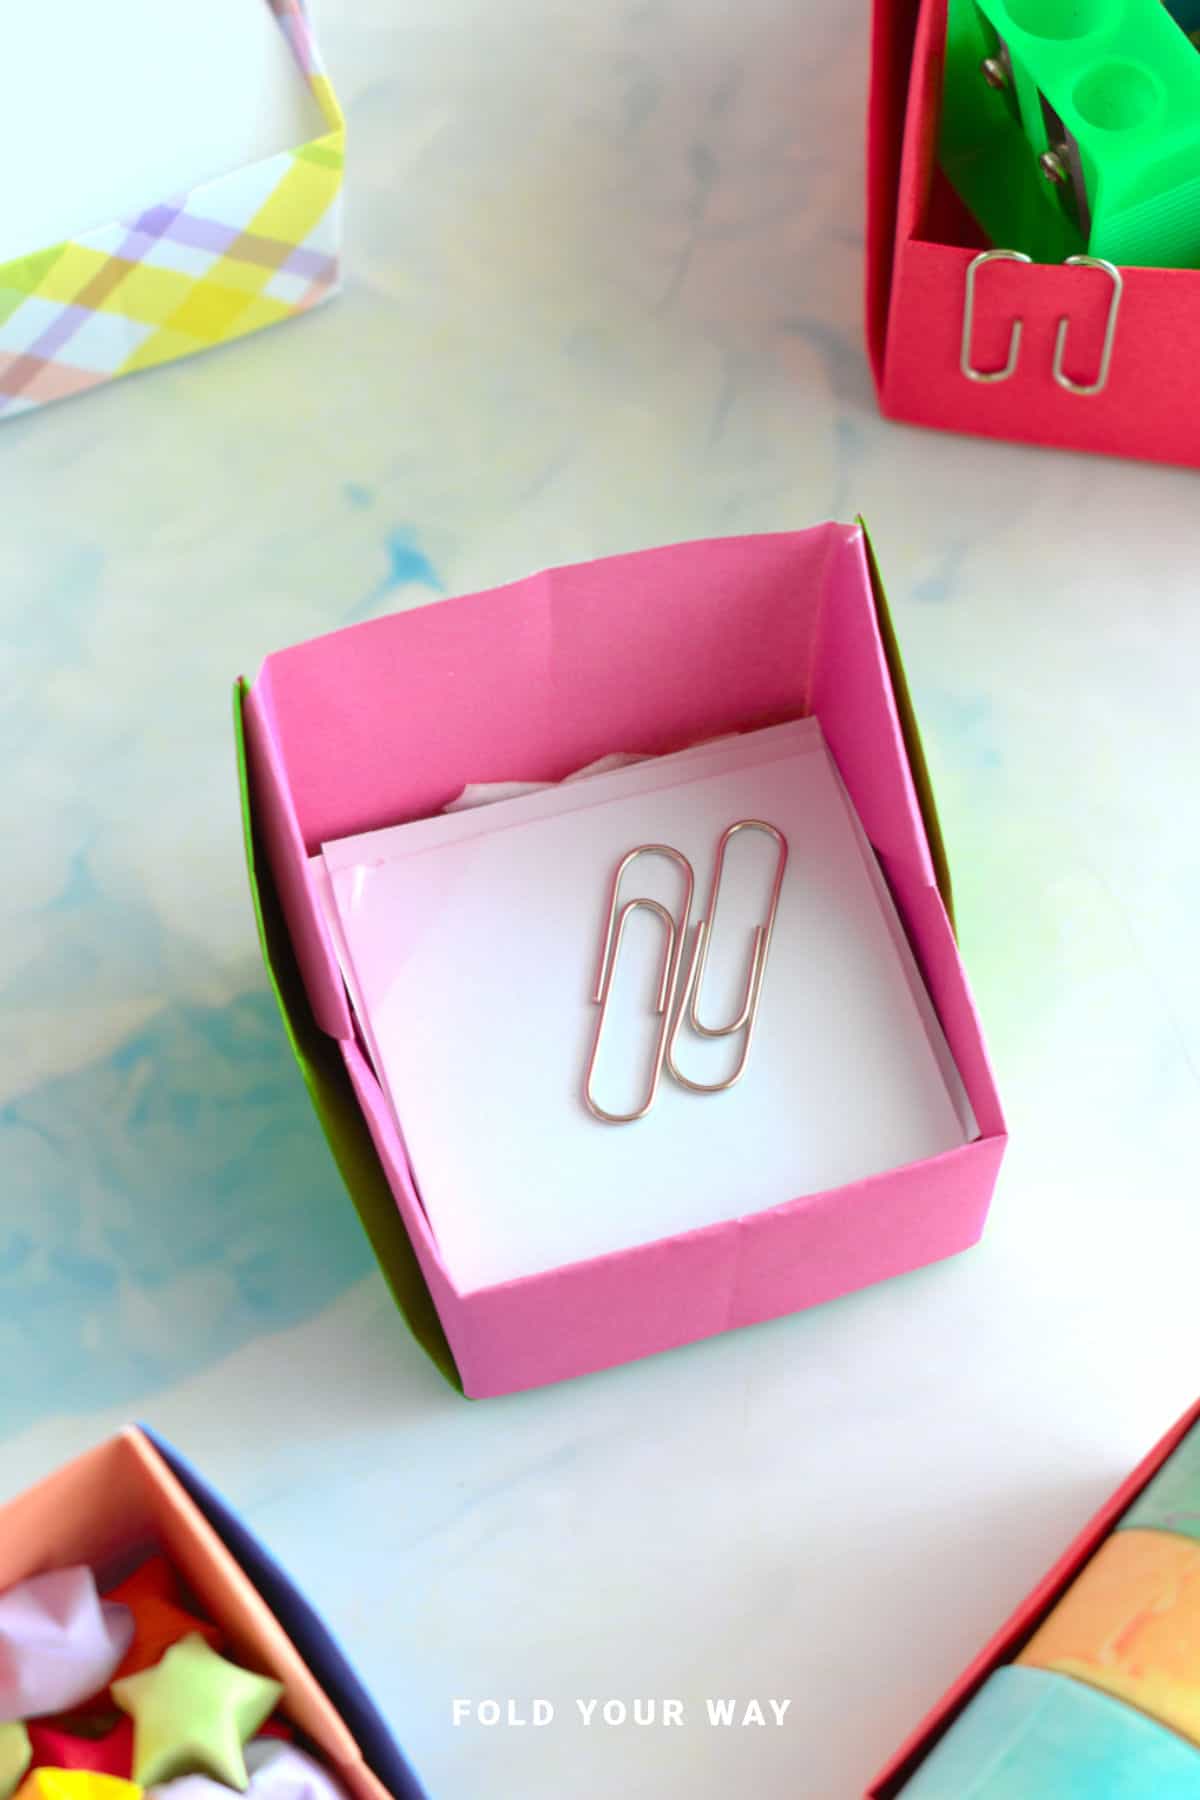
Step 21: Re crease along the edges as needed. Completed desk organizer.
Tips For Success
- Use thicker origami paper or light cardstock for a sturdy cube
- Make folds sharp to help it stand upright
- Use a bone folder or ruler edge to crease neatly
- Add a label or sticker to identify contents
- Make multiple cubes in matching colors for an organized look
- Fill with small stationery or paper flowers for display
Common Mistakes & How To Avoid Them
- Collapsed sides – Press the final creases firmly to strengthen the walls
- Corners pop open – Re-fold any weak creases and make sure tabs are tucked tightly.
Color, Paper Ideas, and Variations
- Neutral tones – Great for modern workspaces
- Bright colors – Perfect for kids’ desks or classrooms
- Patterned origami paper – Adds flair to functional storage
- Kraft or recycled paper – Eco-friendly and rustic look
- Mini cubes – Use smaller paper for paper clips or thumb tacks
- Labeled organizers – Add labels with washi tape or stickers
FAQ
Yes, just cut it into a square first.
It holds its cube shape, but you can unfold and refold it as needed.
Other Crafts You Might Like To Try:
Helpful Tips and Common Mistakes For Paper Crafts
Paper crafting and origami can be hard sometimes. Which is why we've made this printable PDF just for you.
It outlines helpful tips so that you can successfully complete your craft, and some of the most common mistakes people come across.
You can download the helpful tips and common mistakes for paper crafts printable PDF here.
Stay Connected
Made this pattern? Let us know how it went in the comments below!
Pin this post - Pin now to take your paper crafting skills to the next level.
Share on Instagram or Facebook - Capture the beauty of your finished paper craft project and share it on Instagram or Facebook! Tag us @foldyourway so we can see your work!
Other Patterns You Might Like To Try:
Looking for other easy patterns like this? Try these:


Comments
No Comments