
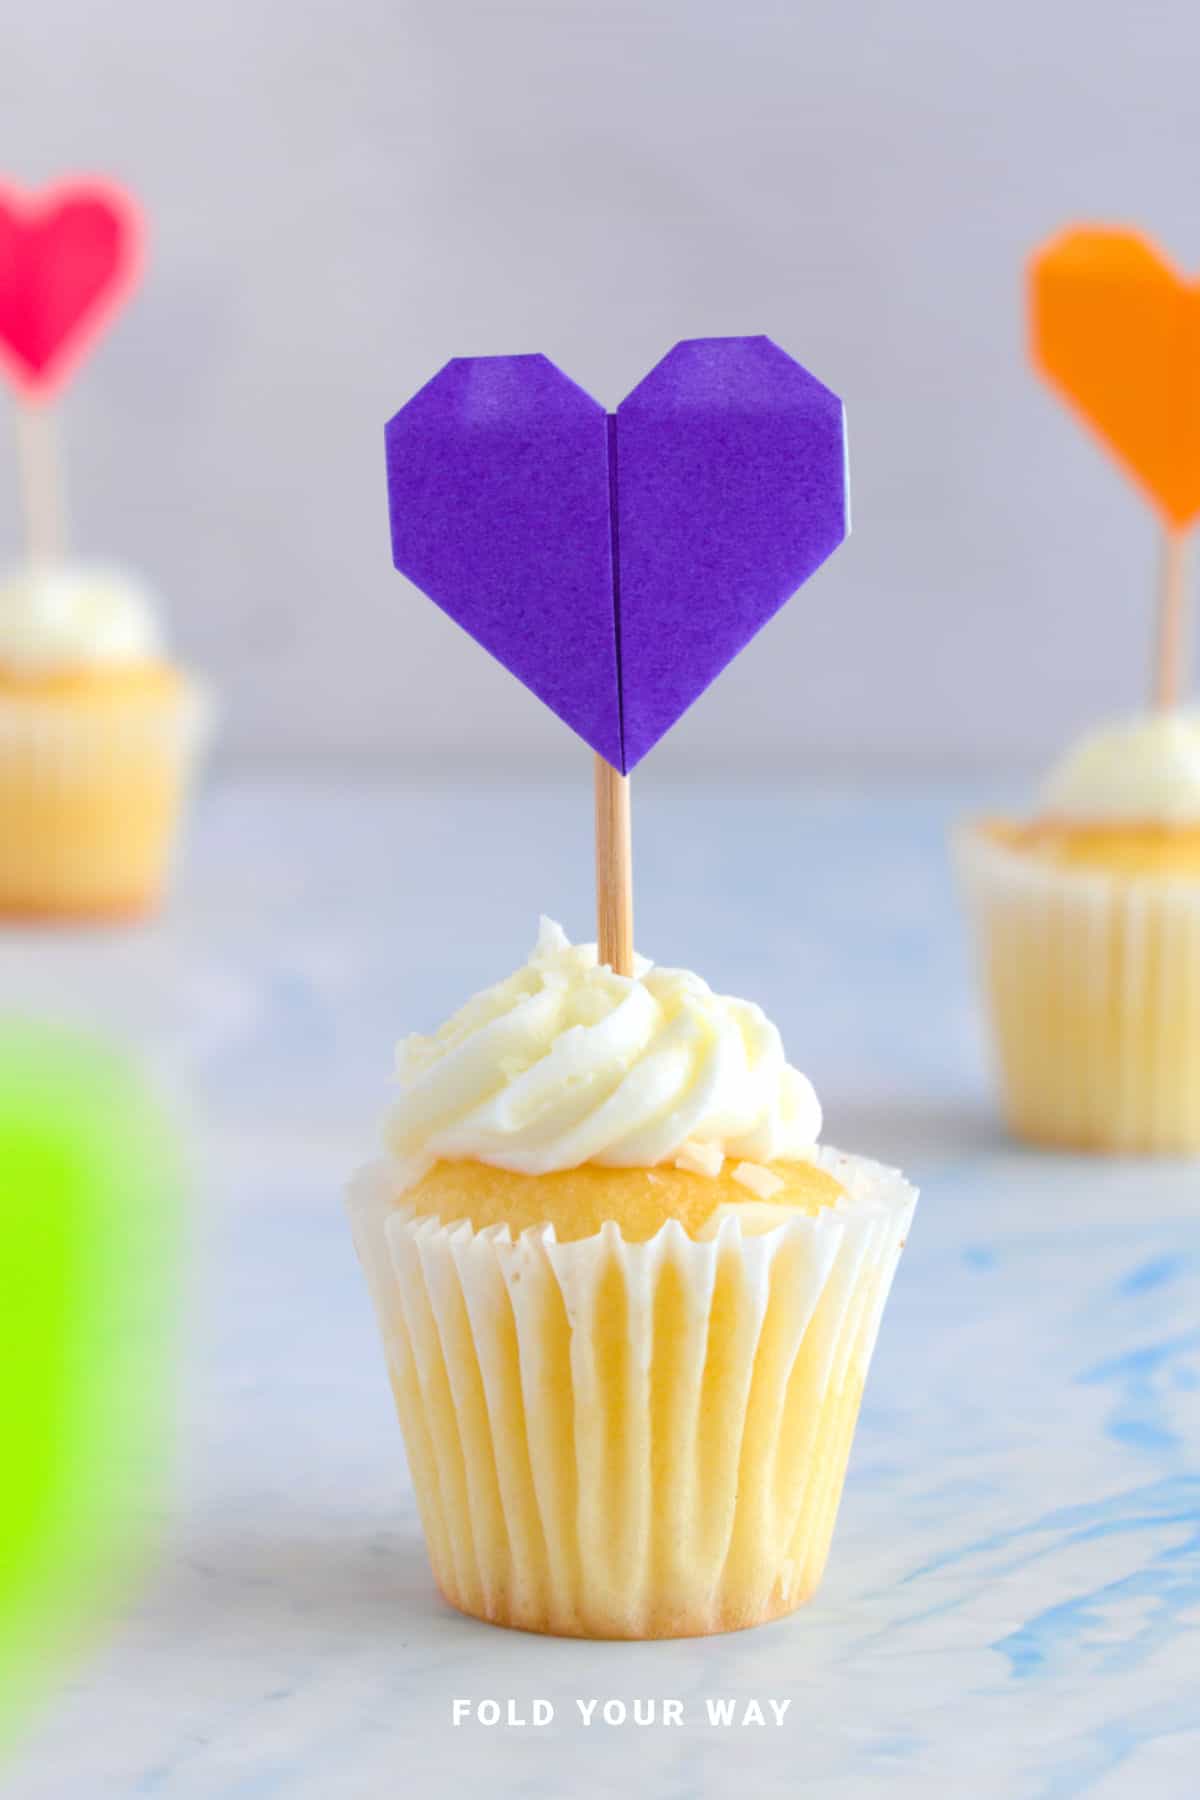
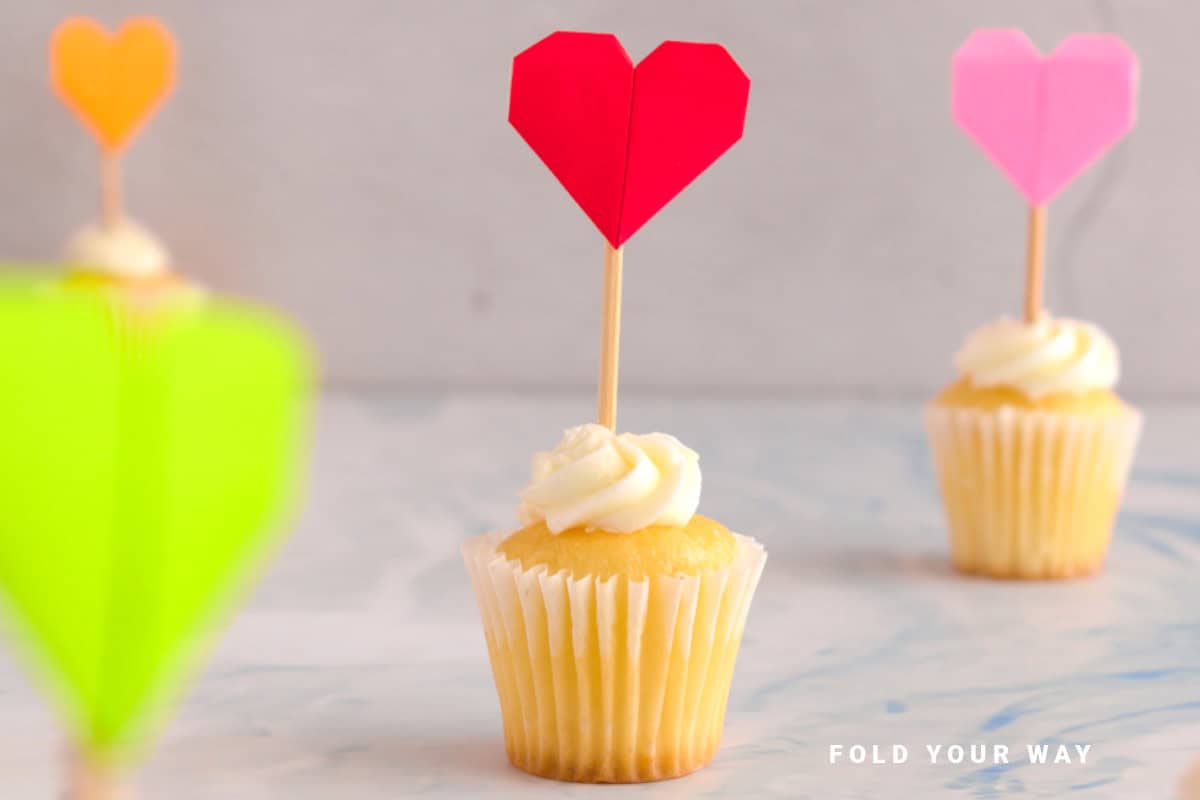
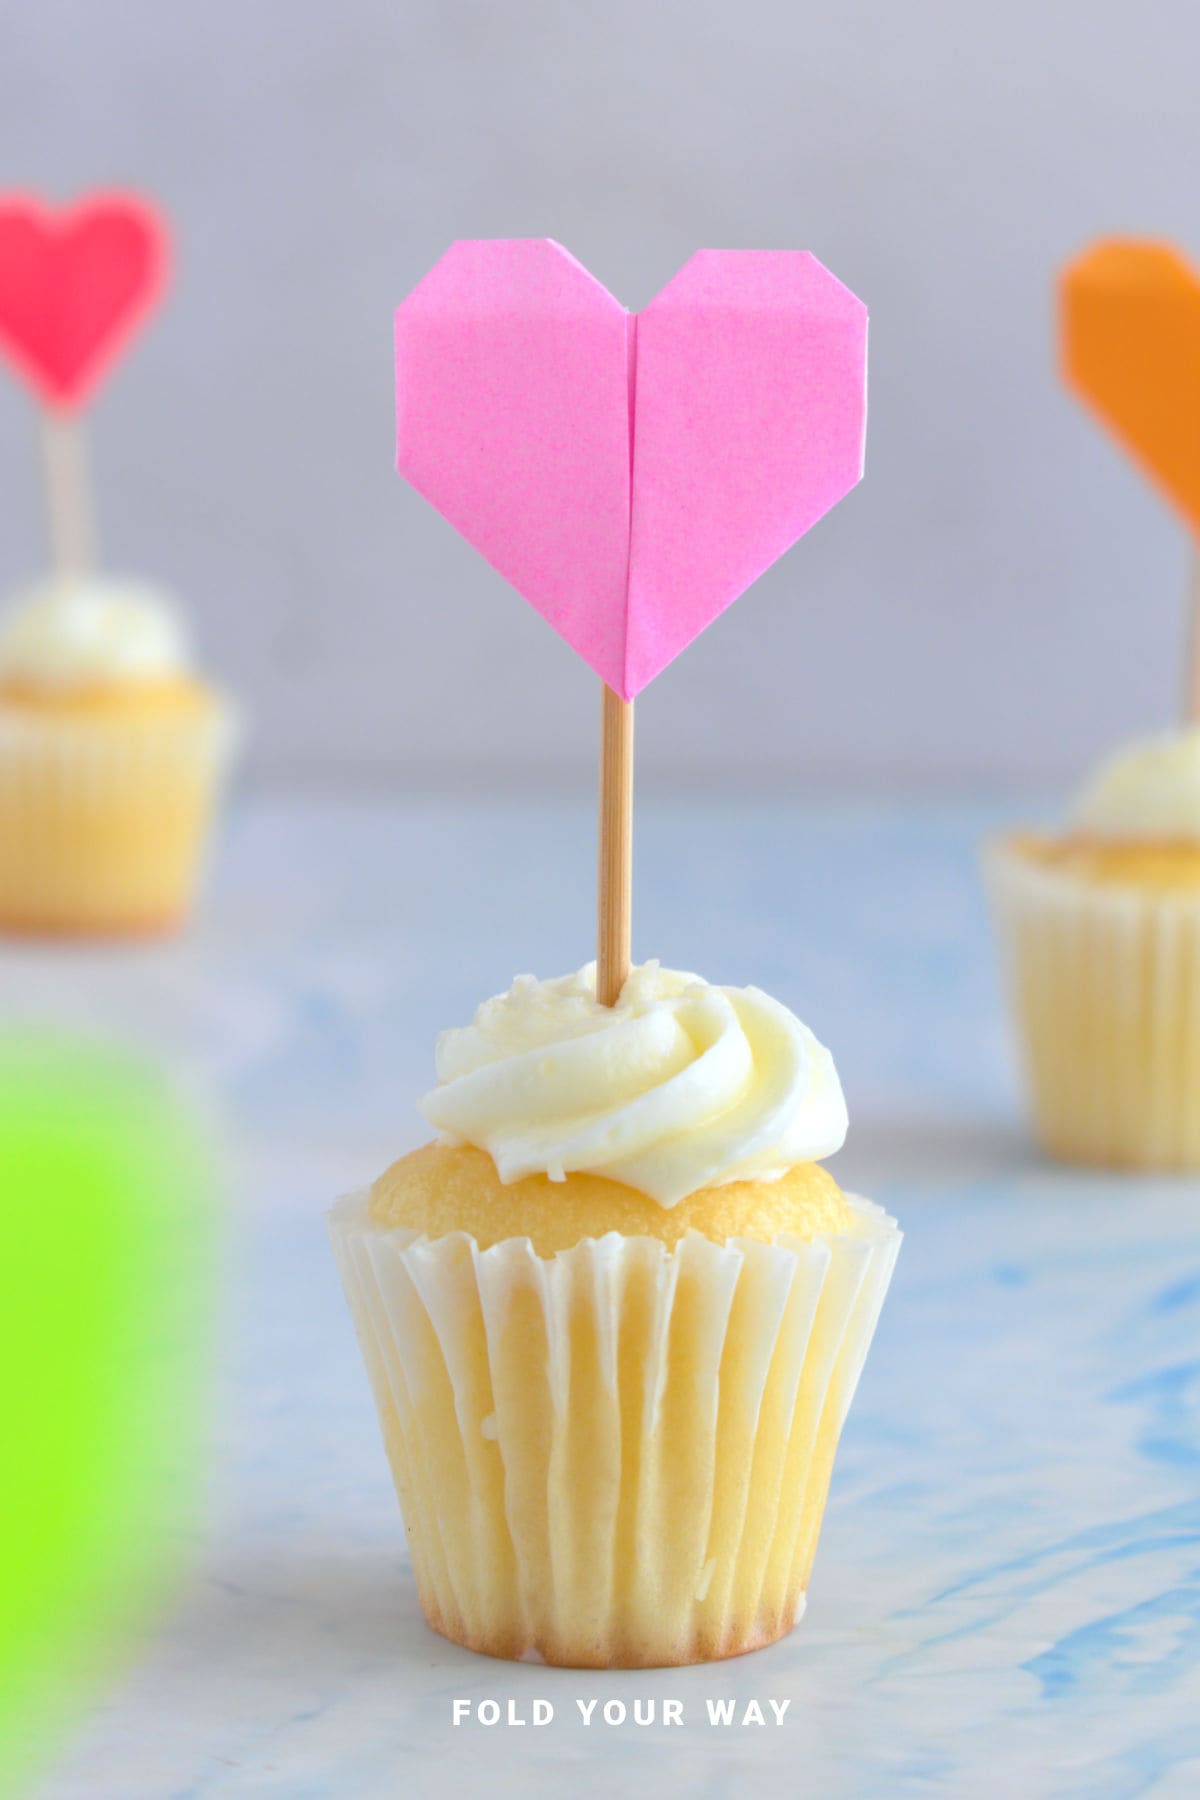
Add a sweet, handmade touch to your desserts with these adorable DIY heart cake toppers!
Made using a single sheet of origami paper and a toothpick, they're the perfect way to dress up cakes, cupcakes, or party treats for Valentine’s Day, weddings, anniversaries, or any love-filled celebration.
They're easy, charming, and completely customizable to suit your theme!
Jump to:
There’s something about adding a handmade touch to your celebration that instantly makes it more personal.
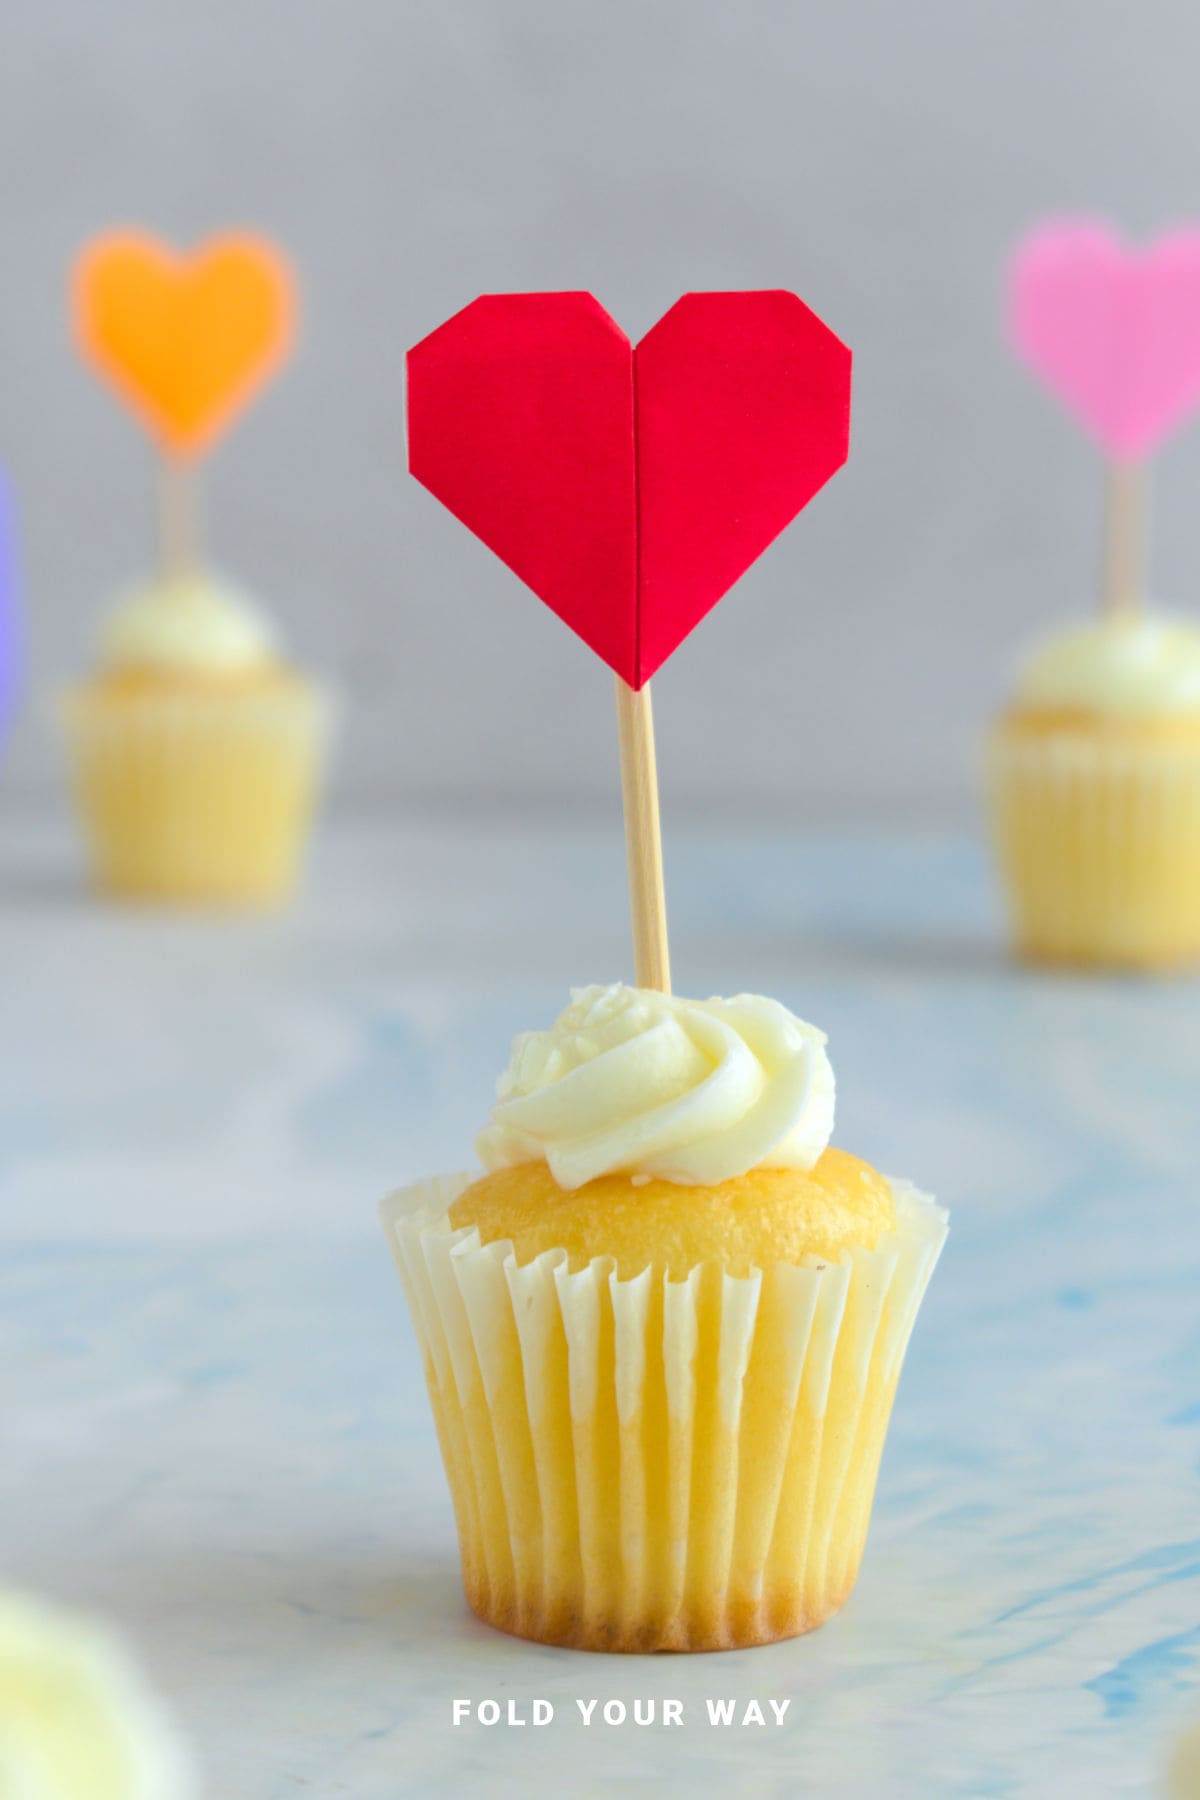
These easy DIY heart cake toppers do just that—they’re simple, stylish, and made using the magic of origami.
Whether you're decorating cupcakes for Valentine's Day, a wedding, or a loved one’s birthday, these toppers bring charm and care to your dessert table.
Plus, they’re quick to assemble with materials you likely already have: a square sheet of paper, a toothpick, and a dab of glue or tape.
The best part? These toppers are totally customizable. Choose colors to match your party theme, use patterned or metallic paper for extra flair, or let the kids help fold them for a fun pre-party craft session.
And because they’re lightweight and low-cost, you can make a whole set in no time.
From romantic dinners to spring celebrations, these little hearts can fit right in—one of those small details guests always notice and appreciate.
If you're new to paper folding, don't worry—the heart shape is beginner-friendly and requires only a few steps.
Let’s get started!
Why You'll Love This Pattern
- Quick to make—perfect for last-minute party prep
- Only needs a few basic supplies
- Great beginner-friendly origami fold
- Easy to customize for different themes or color palettes
- Lovely for Valentine’s Day, Christmas, weddings, anniversaries & more
- Make these cake toppers in advance.
Skill Level
★☆☆☆☆ (Very Easy)
Materials Needed
- 1 sheet of square paper, recommended to use 3 inch x 3 inch (7.5 cm x 7.5 cm)
- Toothpick or skewer
- Glue or tape
A cake topper made with 3 inch x 3 inch (7.5 cm x 7.5 cm) will make a heart cake topper that is about 3 inch (8 cm) long and 2 inch (4 cm) wide.
Instructions
Making the Heart
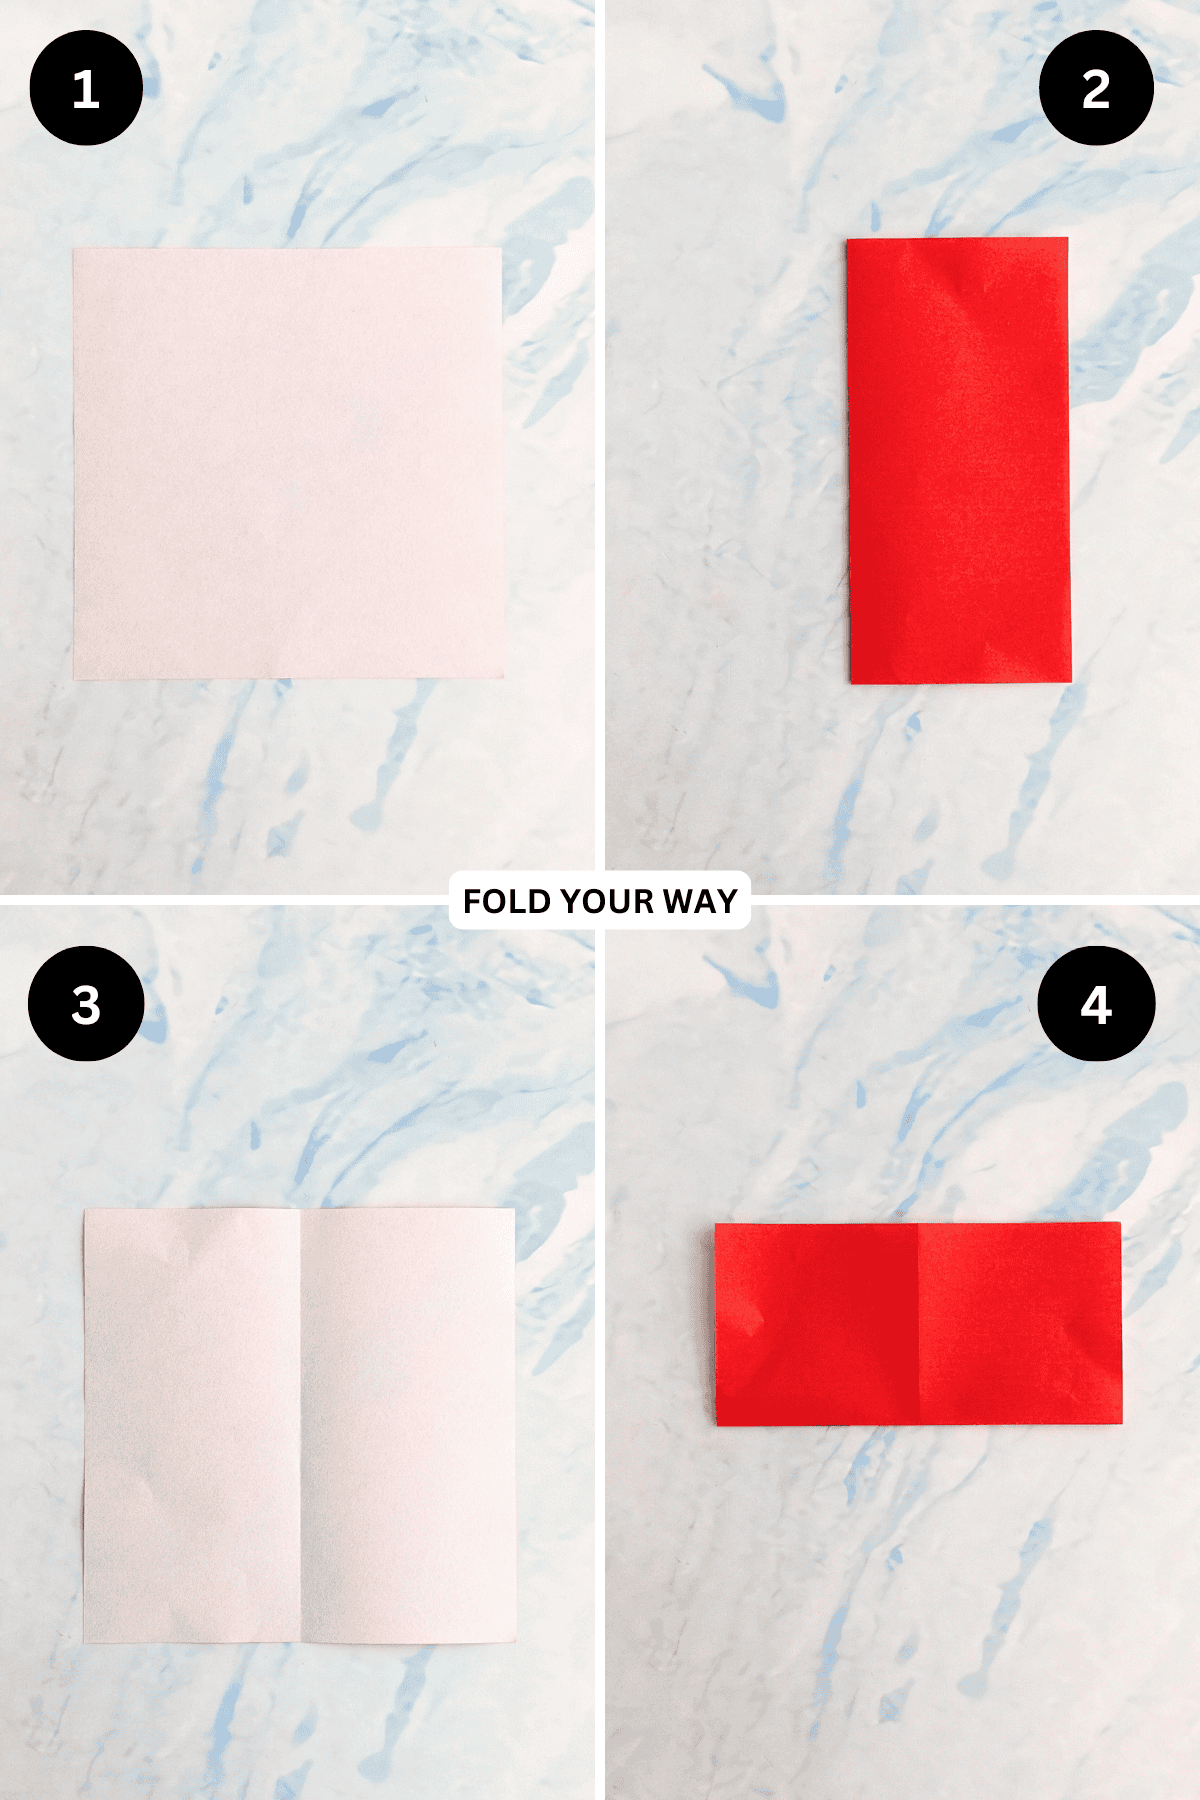
Step 1: Arrange your paper as shown, making sure the color you want your heart is facing down.
Step 2: Fold the left edge to meet the right edge.
Step 3: Unfold previous step.
Step 4: Fold the bottom edge to meet the top edge.
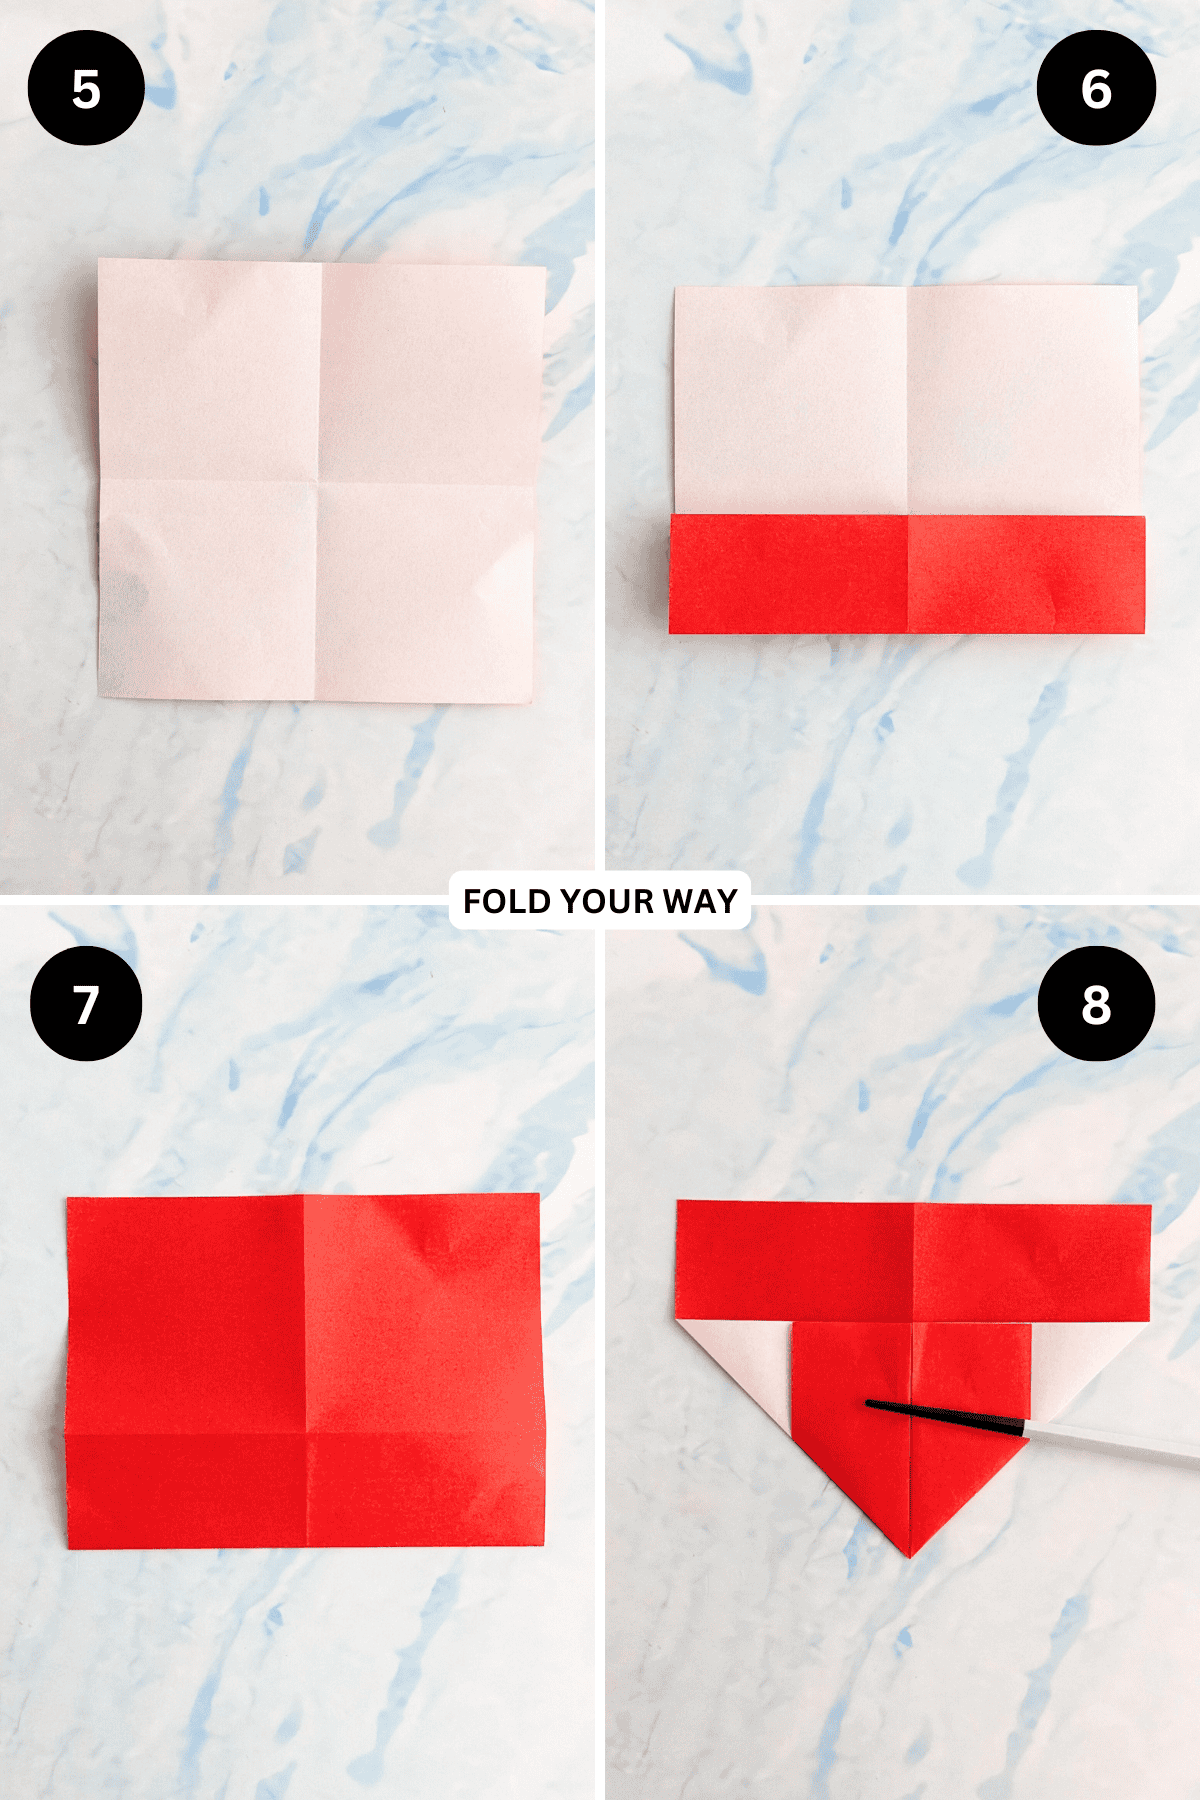
Step 5: Unfold previous step.
Step 6: Fold the bottom edge up once more, but this time to meet the centre crease.
Step 7: Flip your paper over from left to right.
Step 8: Fold the bottom left and right corners up diagonally, lining them up with the vertical crease line.
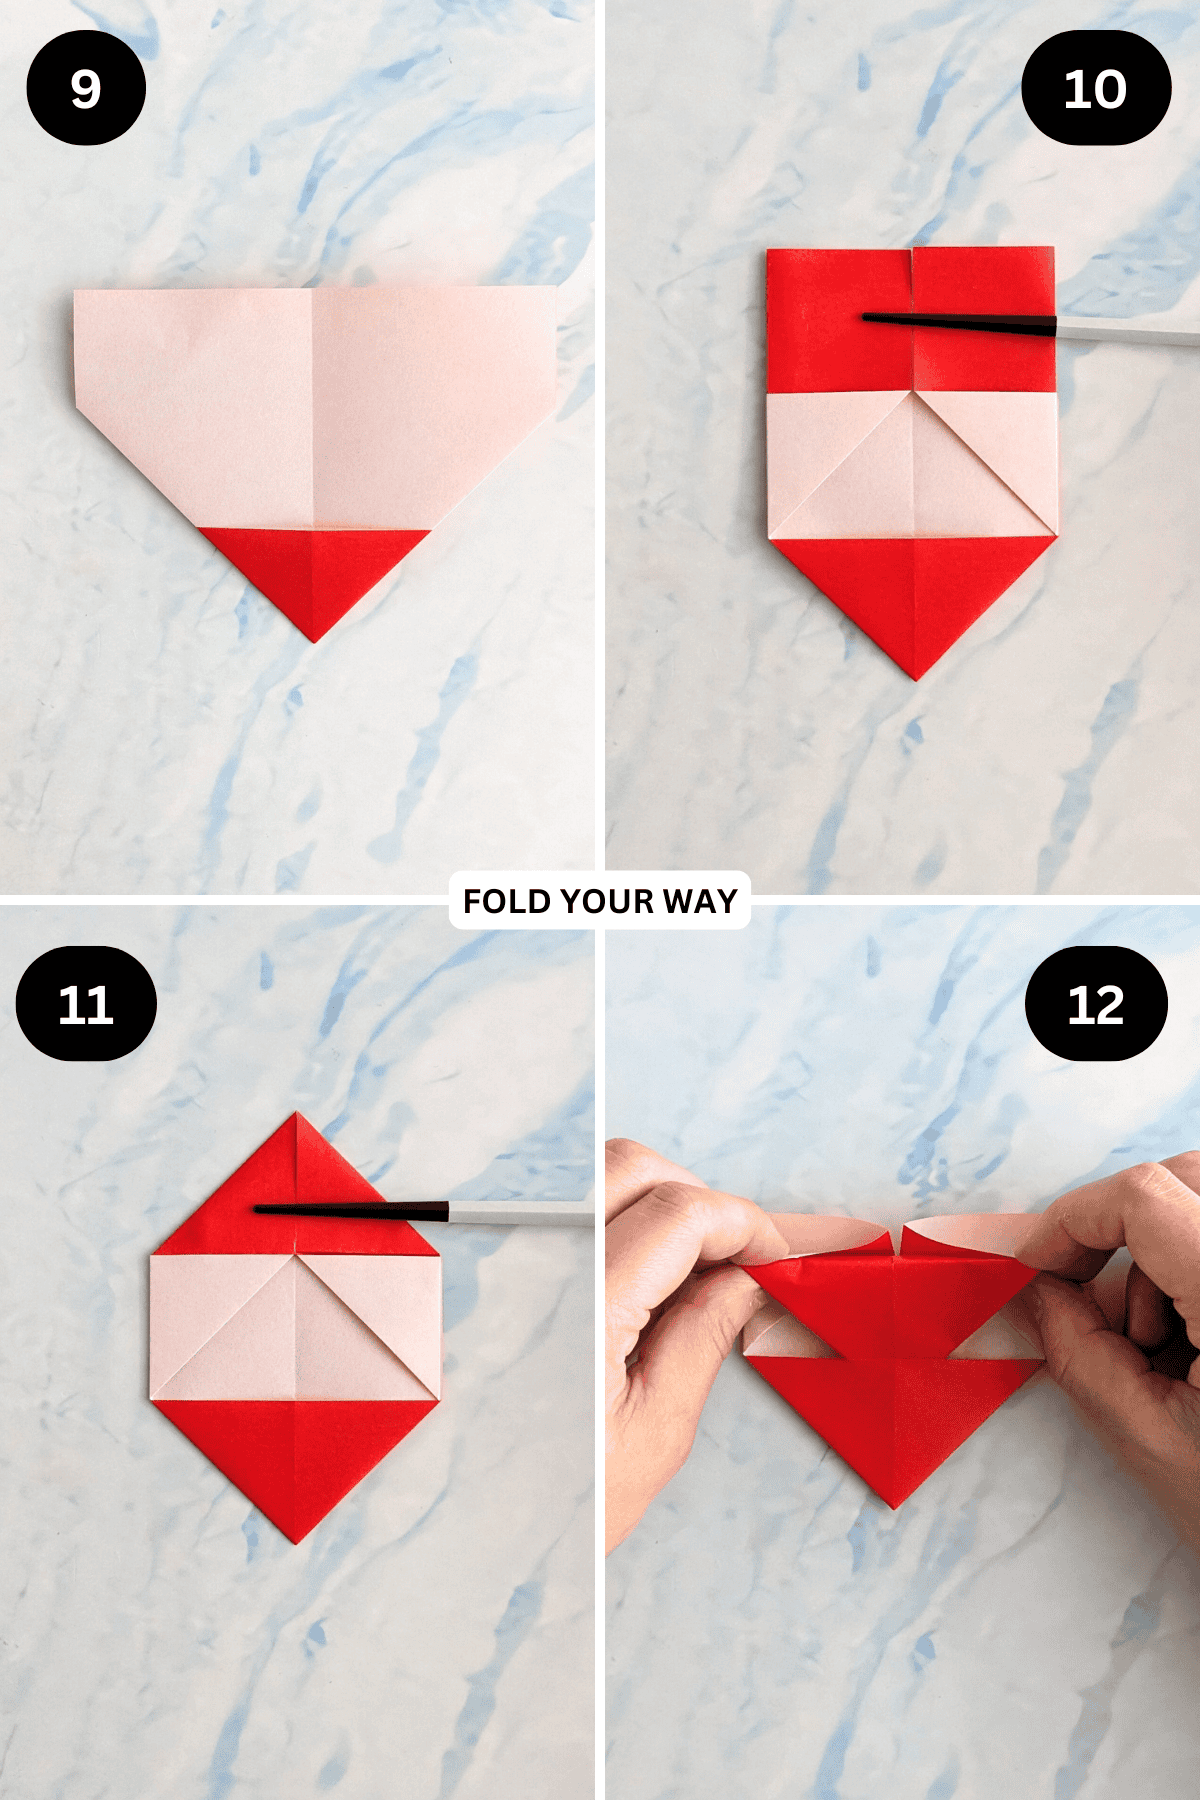
Step 9: Flip your paper over from left to right.
Step 10: Fold the right and left edges of the paper to meet the middle crease.
Step 11: Fold both the top left corner and top right corner inwards diagonally.
Step 12: Bring the top point towards the bottom, slipping it into the little pocket found at the top edge of the bottom triangle. Once in line, crease.
✨ You're almost there! ✨
To unlock the final steps and complete your pattern, create a free account with Grow.me. below.
Make sure you tick the box to subscribe to our newsletter and stay up to date with the latest patterns, tips, and more!
Once you're signed up, you'll get instant access to finish your project and enjoy exclusive content in the future.
Already signed up? Hit the button below and select ‘Switch to Log In’ to pick up where you left off and finish your project!
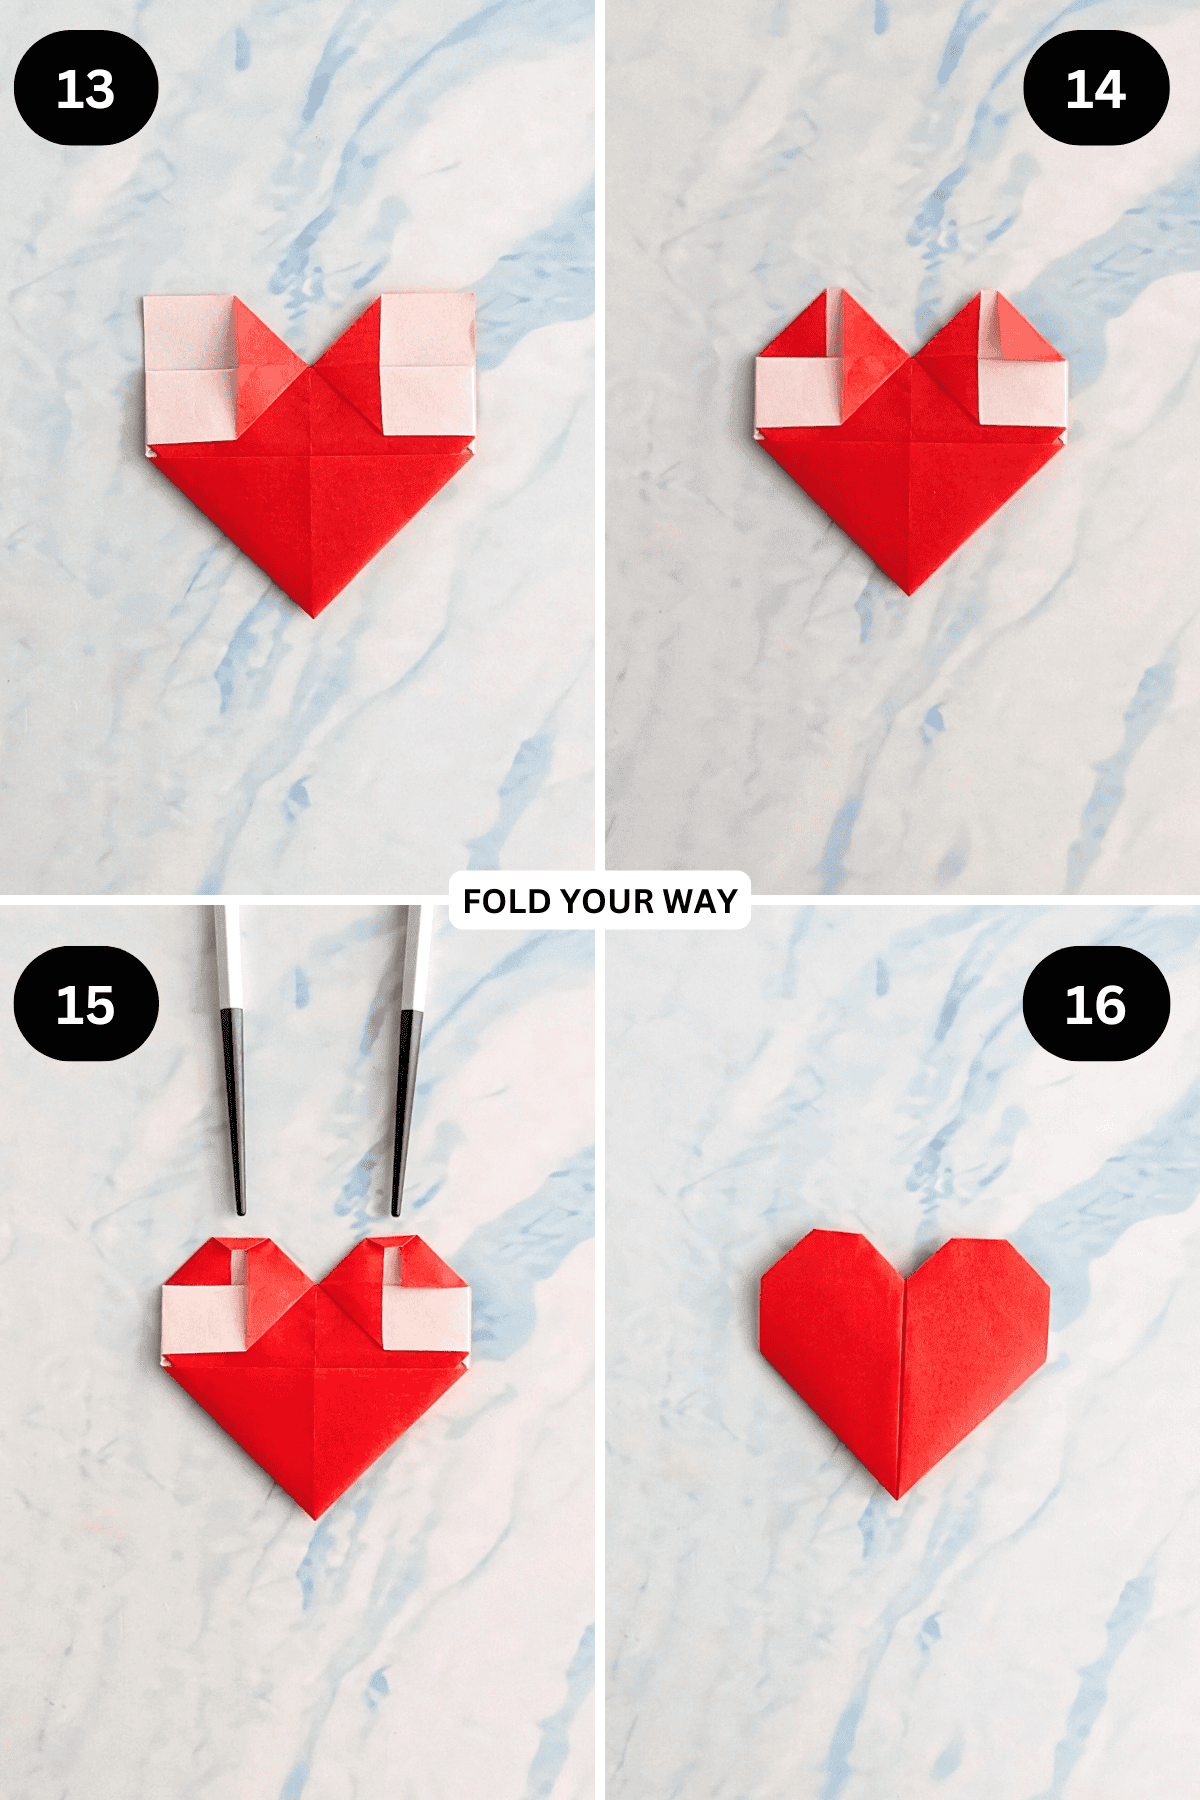
Step 13: Flatten both the top left and top right section of the heart.
Step 14: Fold both the top right and left corners inwards diagonally.
Step 15: Fold the top point of the left side and right side of the heart down a little.
Step 16: Turn your heart over. Completed heart.
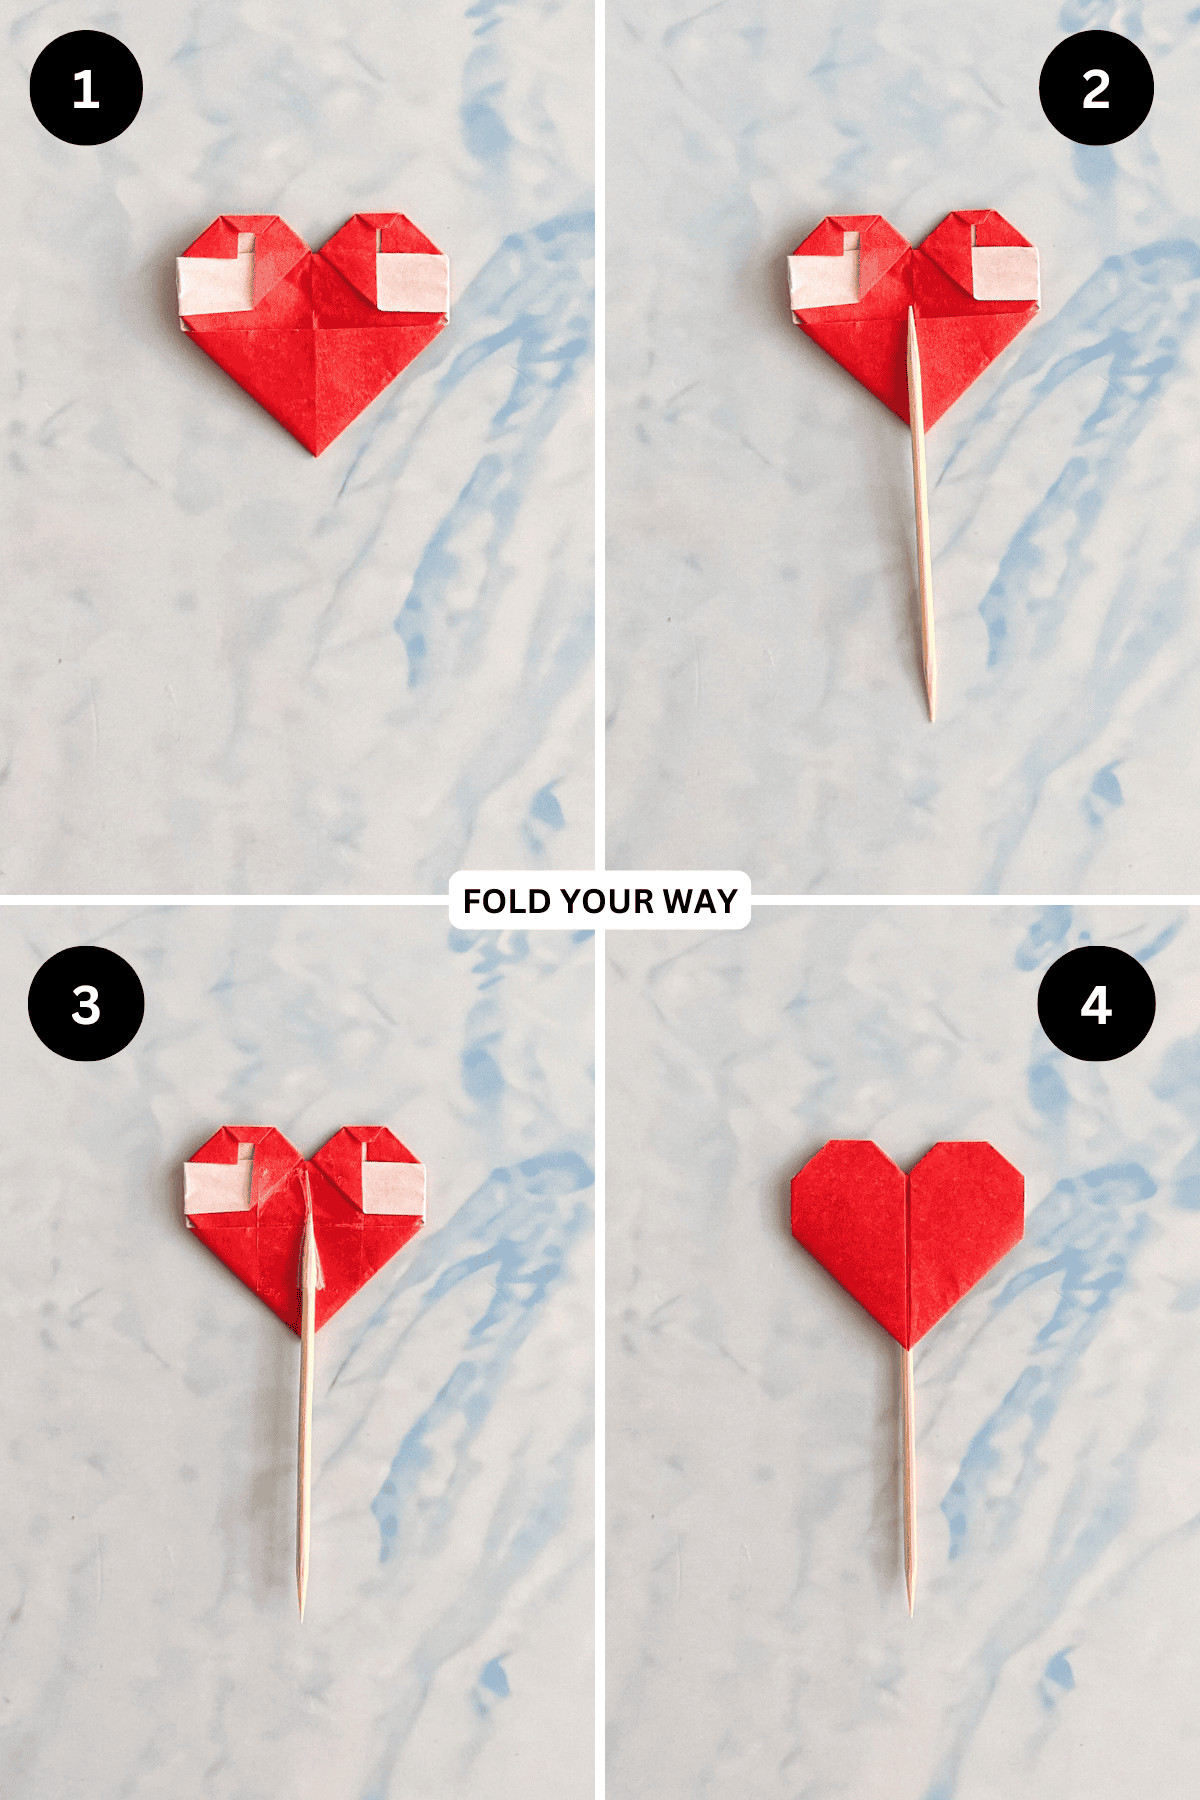
Making the cake topper
Step 1: Place your heart facing down.
Step 2: Place the toothpick on the back of the heart.
Step 3: Glue or tape the toothpick to the heart.
Step 4: Completed heart cake topper.
Tips For Success
- Press folds firmly for a neat finish.
- Tape works well if you want a fast, no-mess stick attachment.
Common Mistakes & How To Avoid Them
- Uneven folds: Align your paper carefully before creasing.
- Heavy paper: Avoid thick cardstock as it’s harder to fold.
Color, Paper Ideas, and Variations
- Use soft pastels for baby showers and spring parties
- Metallic paper adds elegance for weddings or anniversaries
- Red or pink paper is perfect for Valentine’s Day
- Mix and match patterns to create a cheerful, whimsical set
- Let kids decorate plain hearts with stickers or glitter
FAQ
Yes! Store them in a box until ready to use.
Definitely—it's a quick and tidy option.
Yes, just make sure the paper doesn't touch frosting directly
Other Paper Crafts You Might Like To Try:
Stay Connected
Made this pattern? Let us know how it went in the comments below!
Pin this post - Pin now to take your paper crafting skills to the next level.
Share on Instagram or Facebook - Capture the beauty of your finished paper craft project and share it on Instagram or Facebook! Tag us @foldyourway so we can see your work!
Other Patterns You Might Like To Try:
Looking for other easy patterns like this? Try these:


Comments
No Comments