
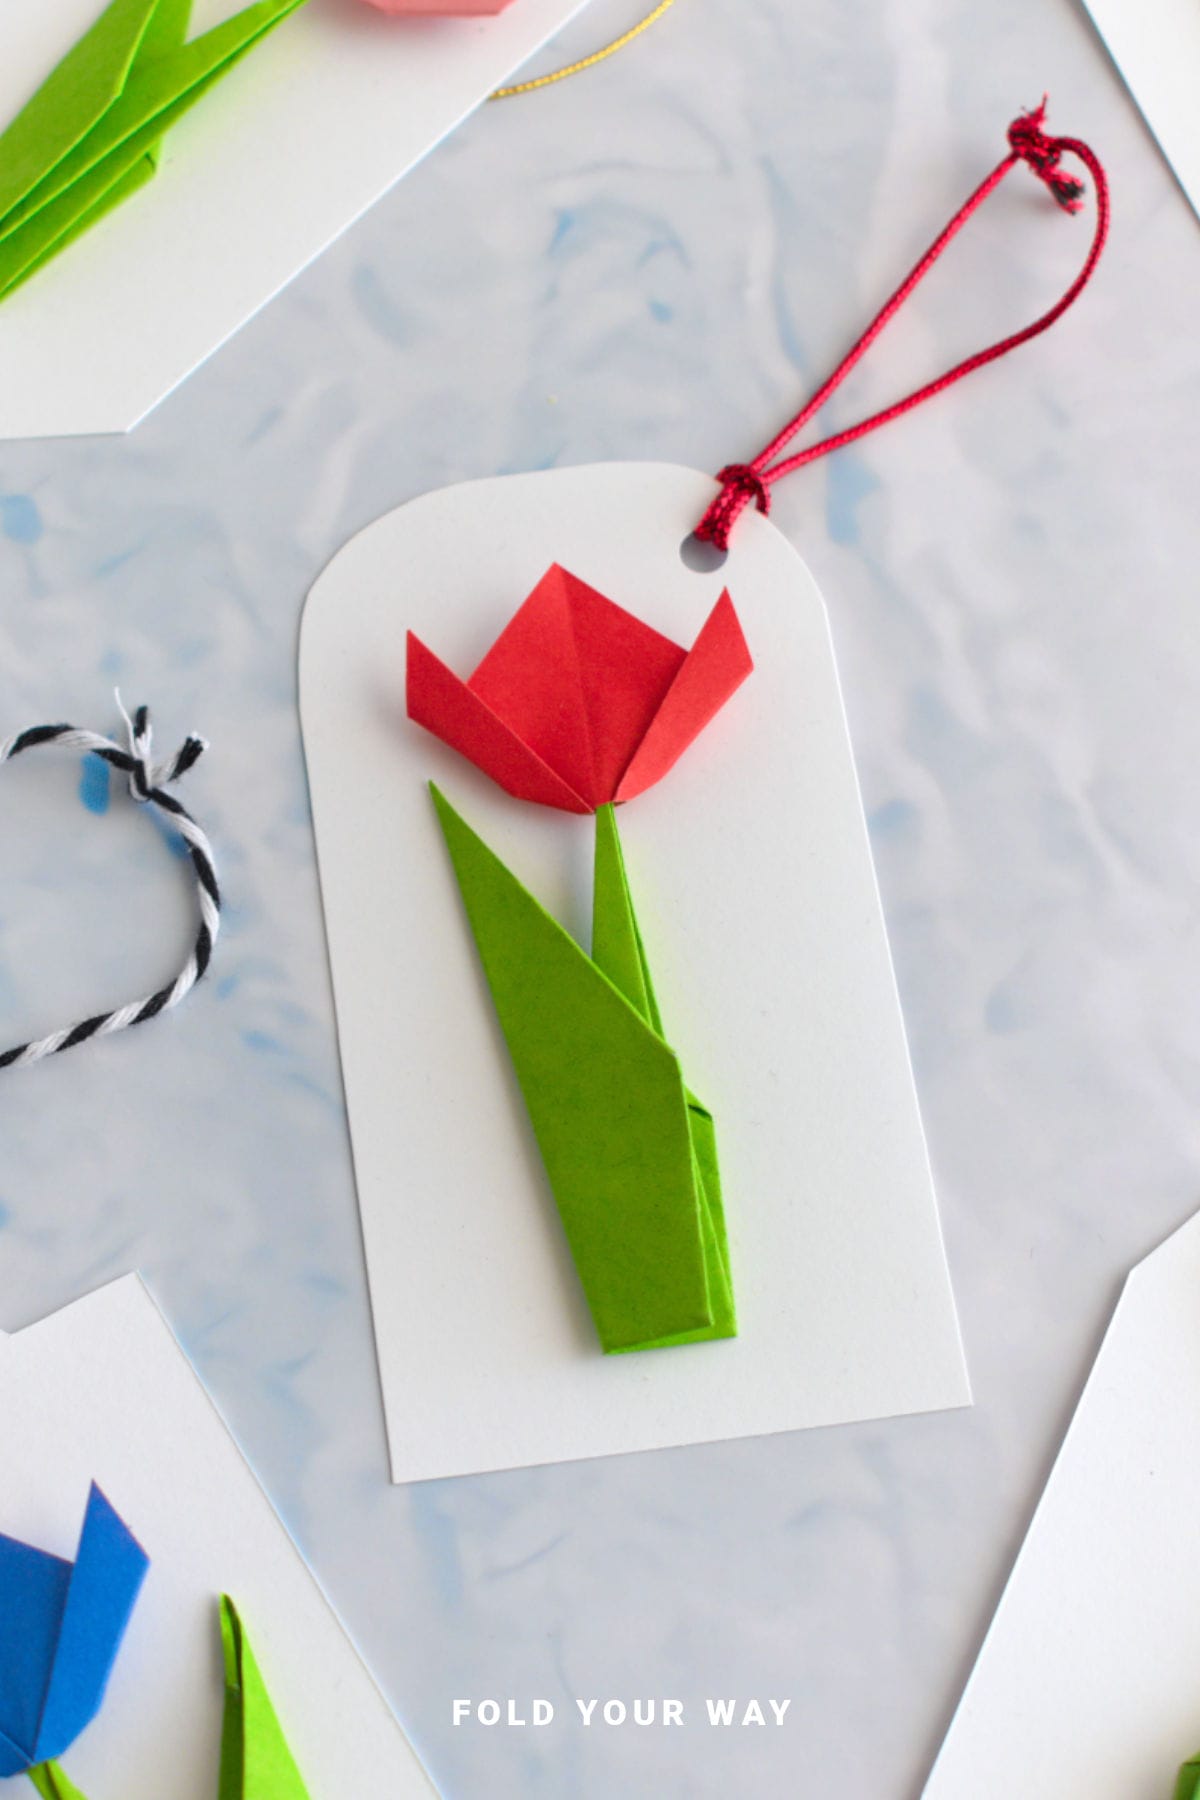
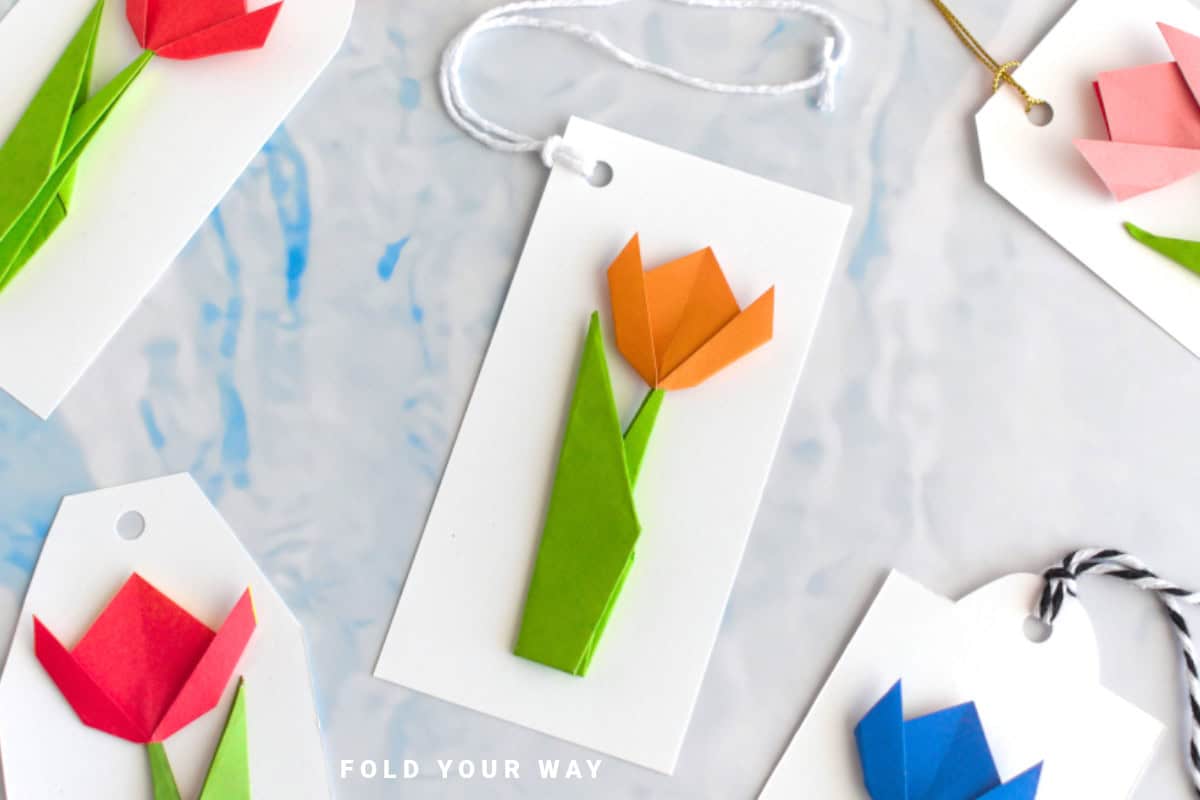
Add a handmade touch to your gifts with this charming diy tulip gift tag!
Made with cardstock, string, and a cute paper tulip, it’s perfect for any occasion—from Mother’s Day and Valentine’s to Christmas and birthdays.
Jump to:
- Why You'll Love This Pattern
- Skill Level
- Materials Needed
- Instructions
- Tips For Success
- Common Mistakes & How To Avoid Them
- Color, Paper Ideas, and Variations
- FAQ
- Other Paper Crafts You Might Like To Try:
- Helpful Tips and Common Mistakes For Paper Crafts
- Stay Connected
- Other Patterns You Might Like To Try:
- Comments
If you’re looking for a sweet and simple way to make your gifts feel extra special, this diy tulip gift tag is a lovely idea to try.
It’s easy, fun, and perfect for all kinds of occasions—Mother’s Day, Valentine’s Day, Christmas, birthdays, teacher gifts, and even weddings.
Whether you're wrapping a small treat or a larger present, this handmade tag adds a beautiful personal touch that makes your gift stand out.
All you need is cardstock for the base, string or ribbon to attach it, and a lightweight paper tulip made from origami (don't worry, we've include the easy instructions below).
This little tulip is surprisingly easy to create, especially using origami paper, but regular lightweight paper works just as well.
Glue it onto your tag, punch a hole, and you’re ready to swing it onto any gift or treat bag.
You can prep a whole bunch at once and keep them ready for whenever you need a thoughtful tag.
Plus, this project is great for kids and adults alike—whether you're crafting solo or as part of a family activity.
Why You'll Love This Pattern
- Works for any occasion – A tulip fits right in on gifts for Mother’s Day, birthdays, Christmas, or spring celebrations.
- Easy and fun – No complicated steps—just some folding, gluing, and a bit of creativity.
- Budget-friendly – Uses basic supplies you probably already have.
- Customizable – Change colors and paper types to match your wrapping or theme.
- Reusable option – Use sturdy cardstock and heavier paper to make it last longer.
- Kid-friendly – A perfect beginner paper craft for little hands (with a bit of help on the folding).
Skill Level
★☆☆☆☆ (Very Easy)
Materials Needed
- Cardstock or thick paper (for the tag base)
- Scissors
- Hole punch
- String, twine, or ribbon (to tie the tag)
- 2 square sheets of Lightweight paper (or origami paper) – see below for size guide
- Glue
Tulip Paper Size Guide
Paper Size (Stem) | Paper Size (Flower Head) | Final Flower Size | |
| Small Origami Tulip | 4 inches x 4 inches (10 cm x 10 cm) | 2 inches x 2 inches (5 cm x 5 cm) | 3.5 inches x 1 inch (9 cm x 3.5 cm) |
| Medium Origami Tulip | 6 inches x 6 inches (15 cm x 15 cm) | 4 inches x 4 inches (10 cm x 10 cm) | 6 inches x 3.5 inches (15.5 cm x 9 cm) |
| Large Origami Tulip | 8 inches x 8 inches (20 cm x 20 cm) | 6 inches x 6 inches (15 cm x 15 cm) | 8.5 inches x 4 inches (22 cm x 12 cm) |
Instructions
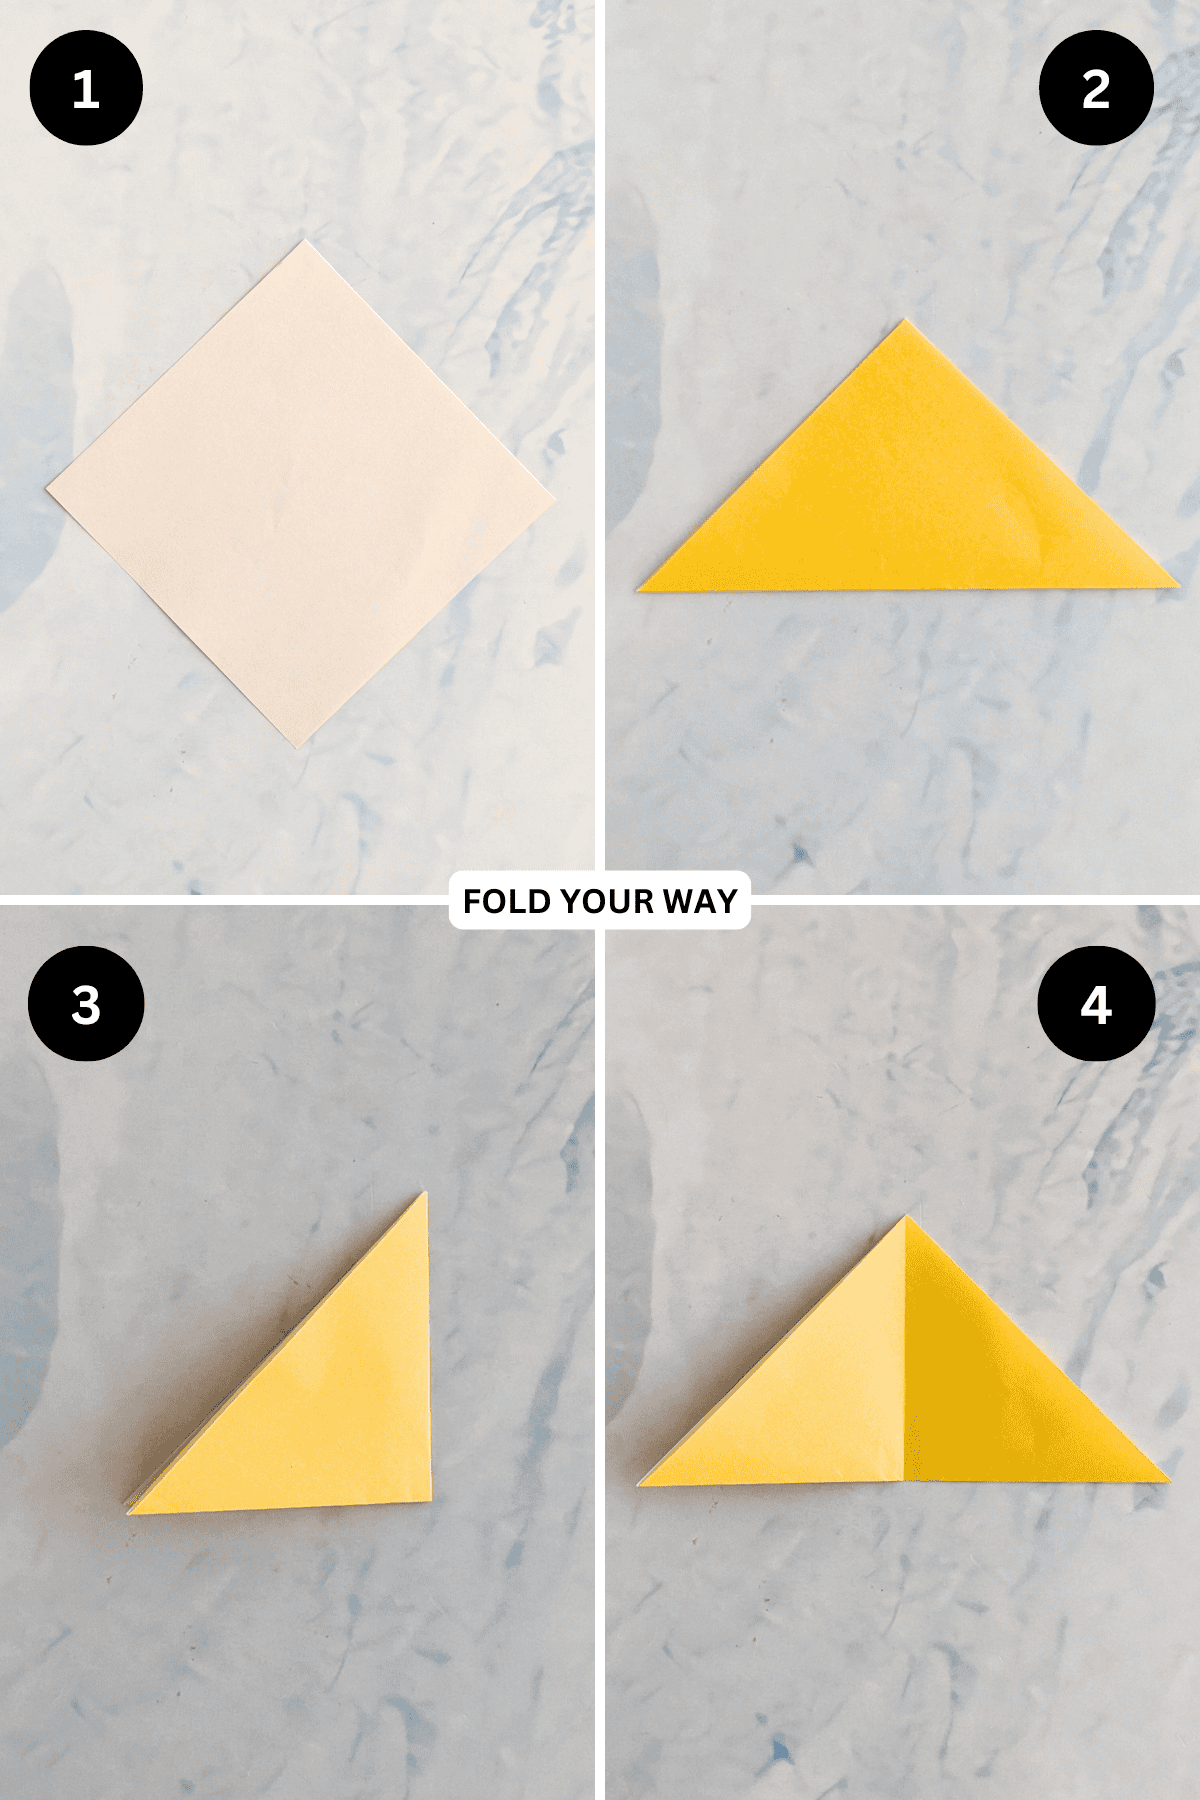
To Make The Tulip Head
Using your colored paper.
Step 1: Arrange your paper to sit like a diamond shape and have the color you want your tulip head to be facing down.
Step 2: Fold the bottom point up to meet the top point.
Step 3: Fold the right point to meet the left point.
Step 4: Unfold previous step.
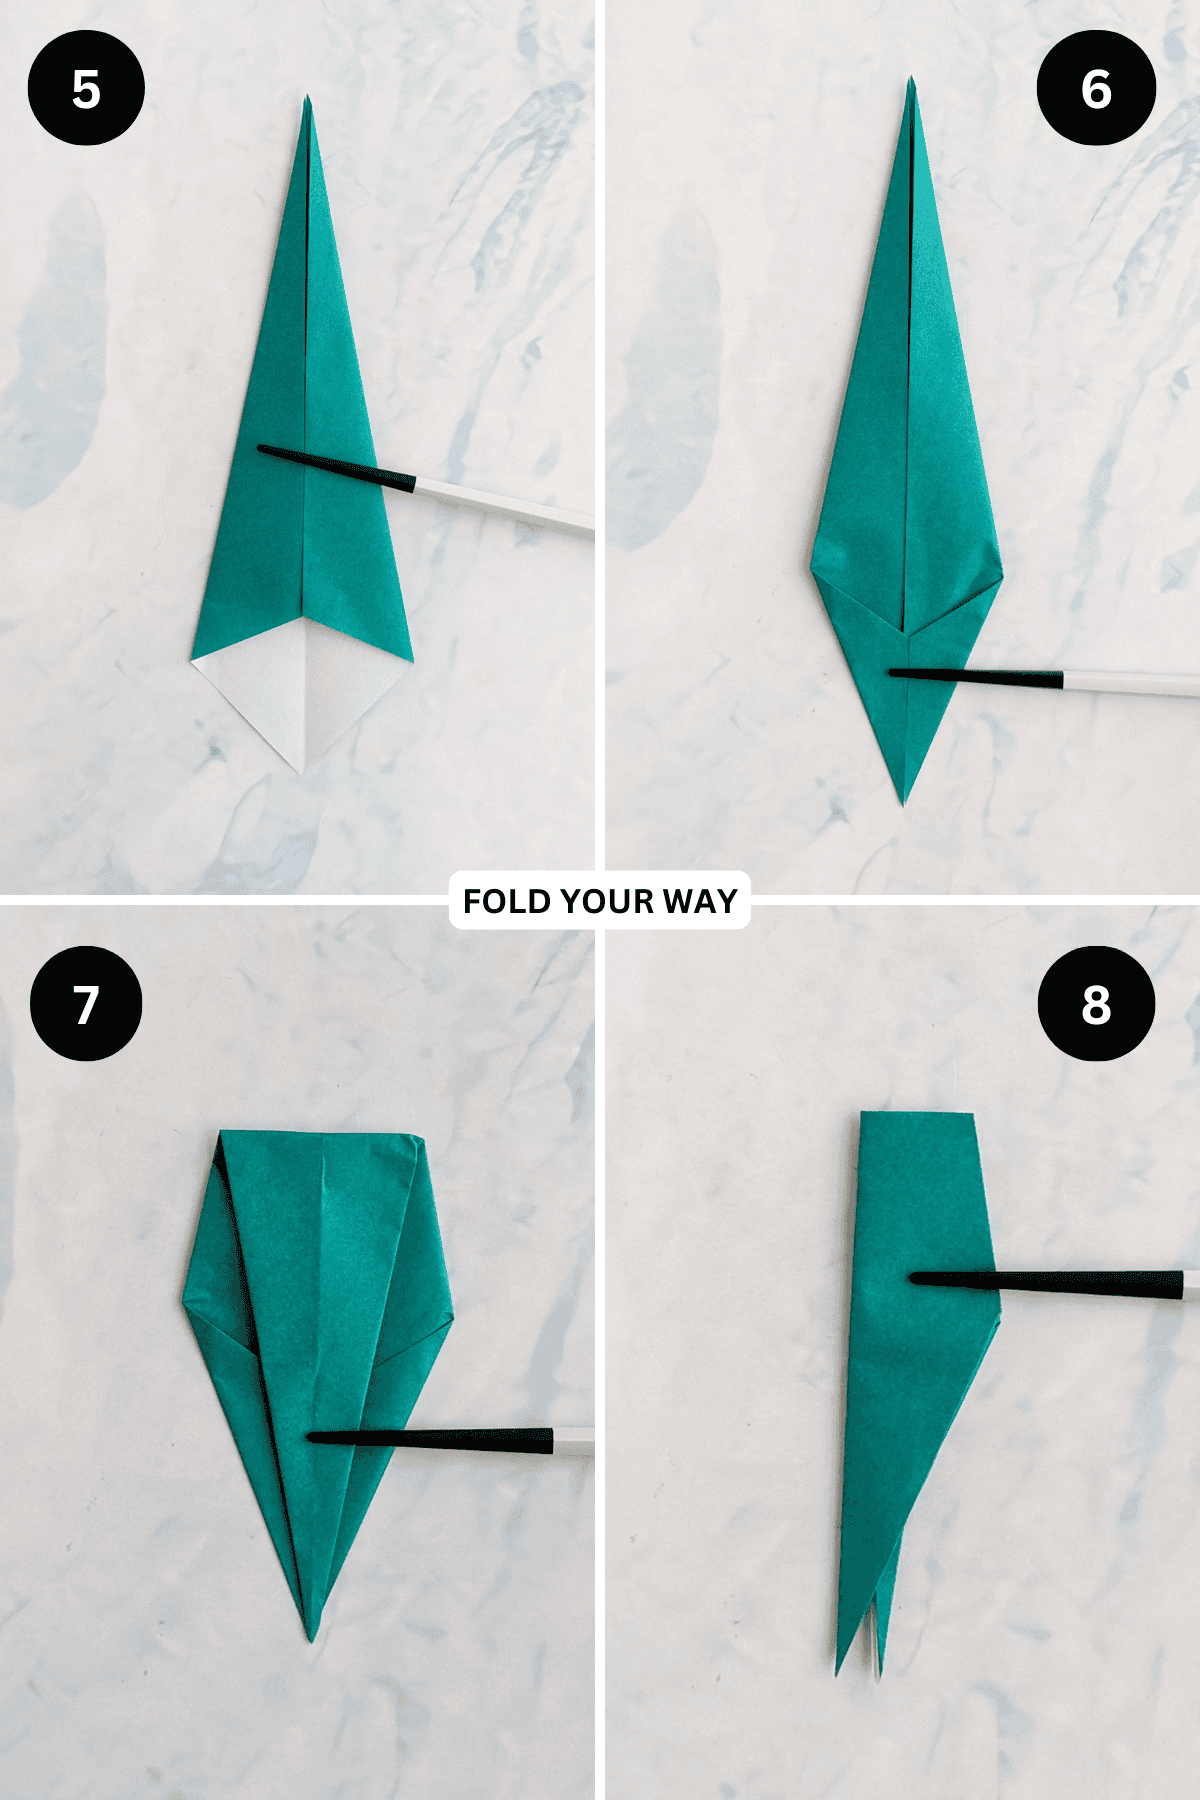
Step 5: Fold both the left and right points up along the lines shown.
Step 6: Flip your paper over from left to right.
Step 7: Fold both the bottom left and right corners in a little, keeping it as symmetrical as possible.

Step 8: Flip your paper over from left to right. Completed tulip head.

✨ You're almost there! ✨
To unlock the final steps and complete your pattern, create a free account with Grow.me. below.
Make sure you tick the box to subscribe to our newsletter and stay up to date with the latest patterns, tips, and more!
Once you're signed up, you'll get instant access to finish your project and enjoy exclusive content in the future.
Already signed up? Hit the button below and select ‘Switch to Log In’ to pick up where you left off and finish your project!
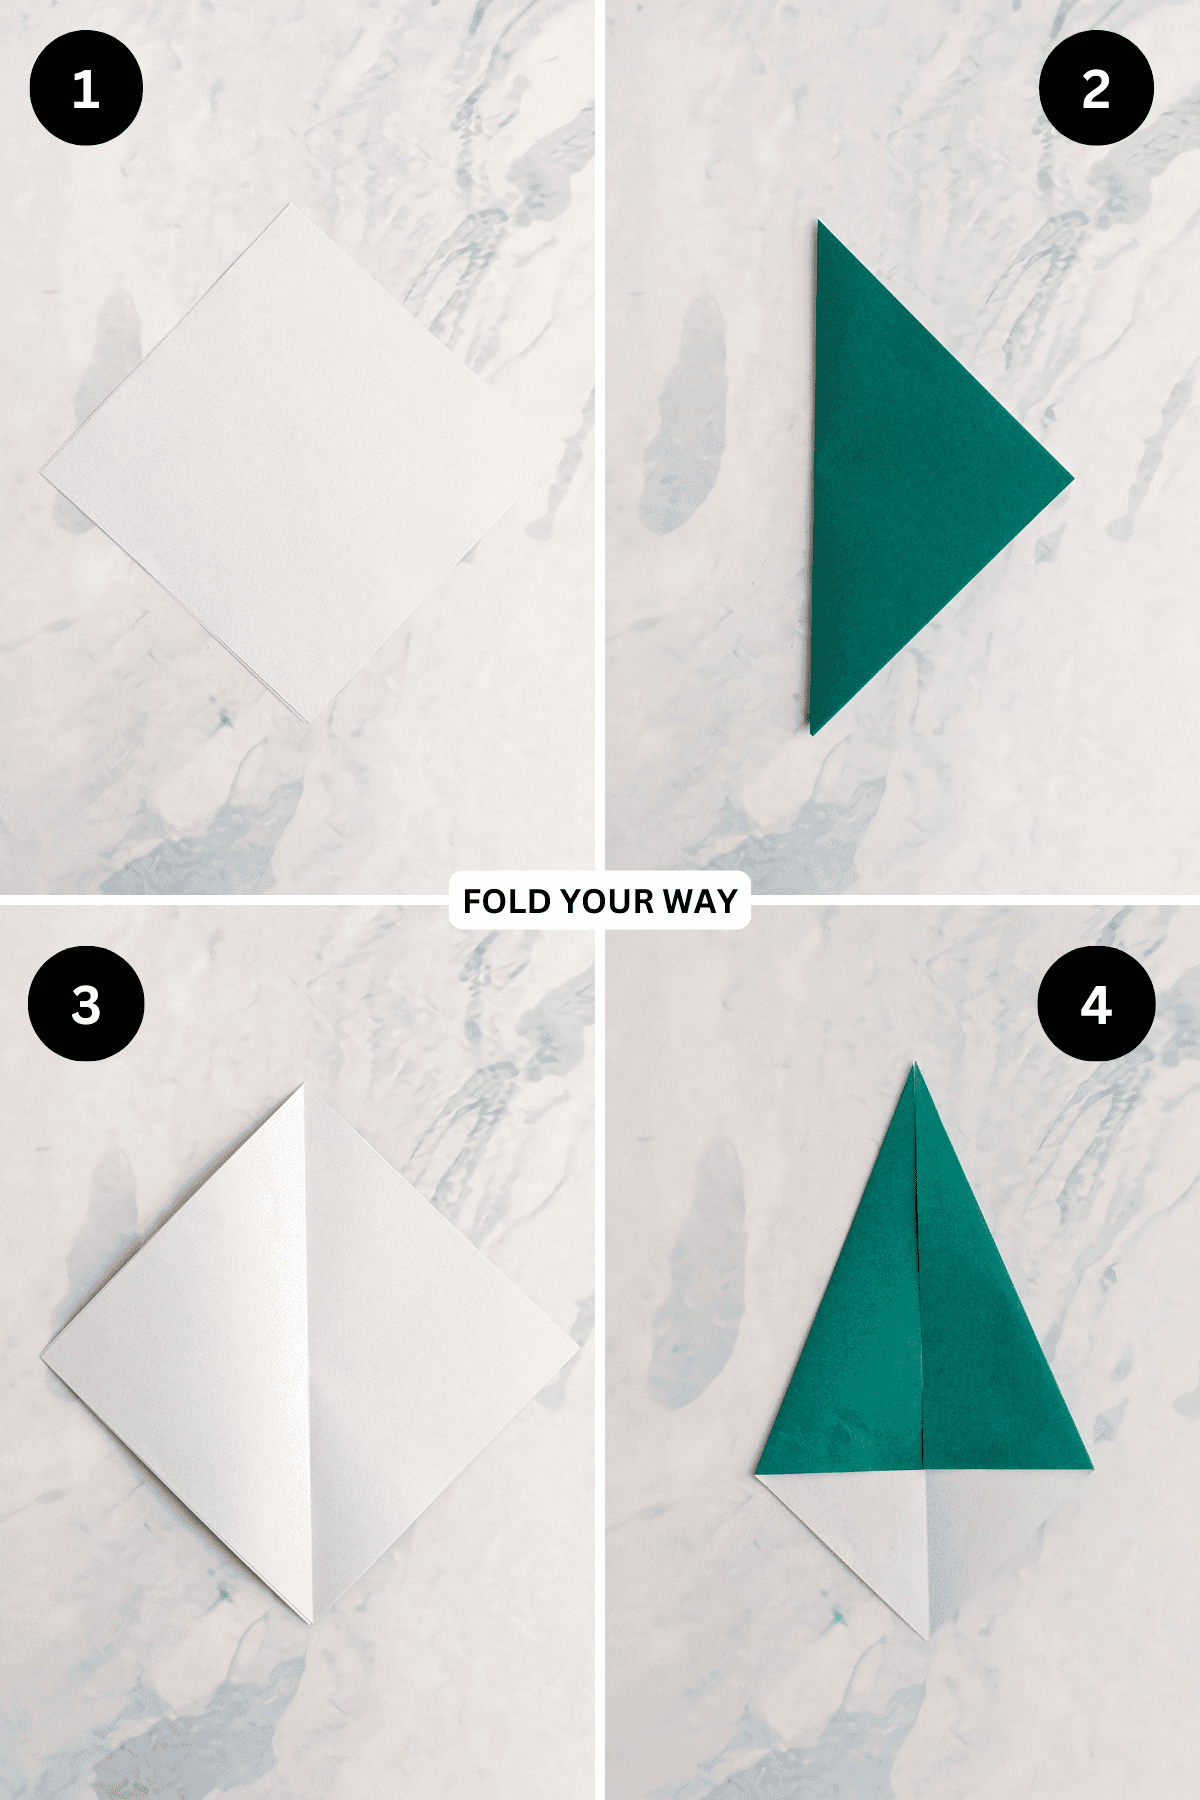
To Make the Stem
Using your green sheet of paper.
Step 1: Arrange your paper so it sits like a diamond and the stem color is facing down.
Step 2: Fold the left point to meet the right point.
Step 3: Unfold previous step.
Step 4: Fold both the upper left and upper right edges in to meet the middle crease.
Step 5: Once again, fold both the upper left and right edges in to meet the middle crease.
Step 6: Fold the bottom left and right edges in to meet the middle crease.
Step 7: Fold the top point down to meet the bottom point.
Step 8: Fold the paper in half from left to right.
Step 9: Rotate your paper 180 degrees.
Step 10: Gently pull the top two corners apart. Completed stem.

Putting The Origami Tulip Flower Together
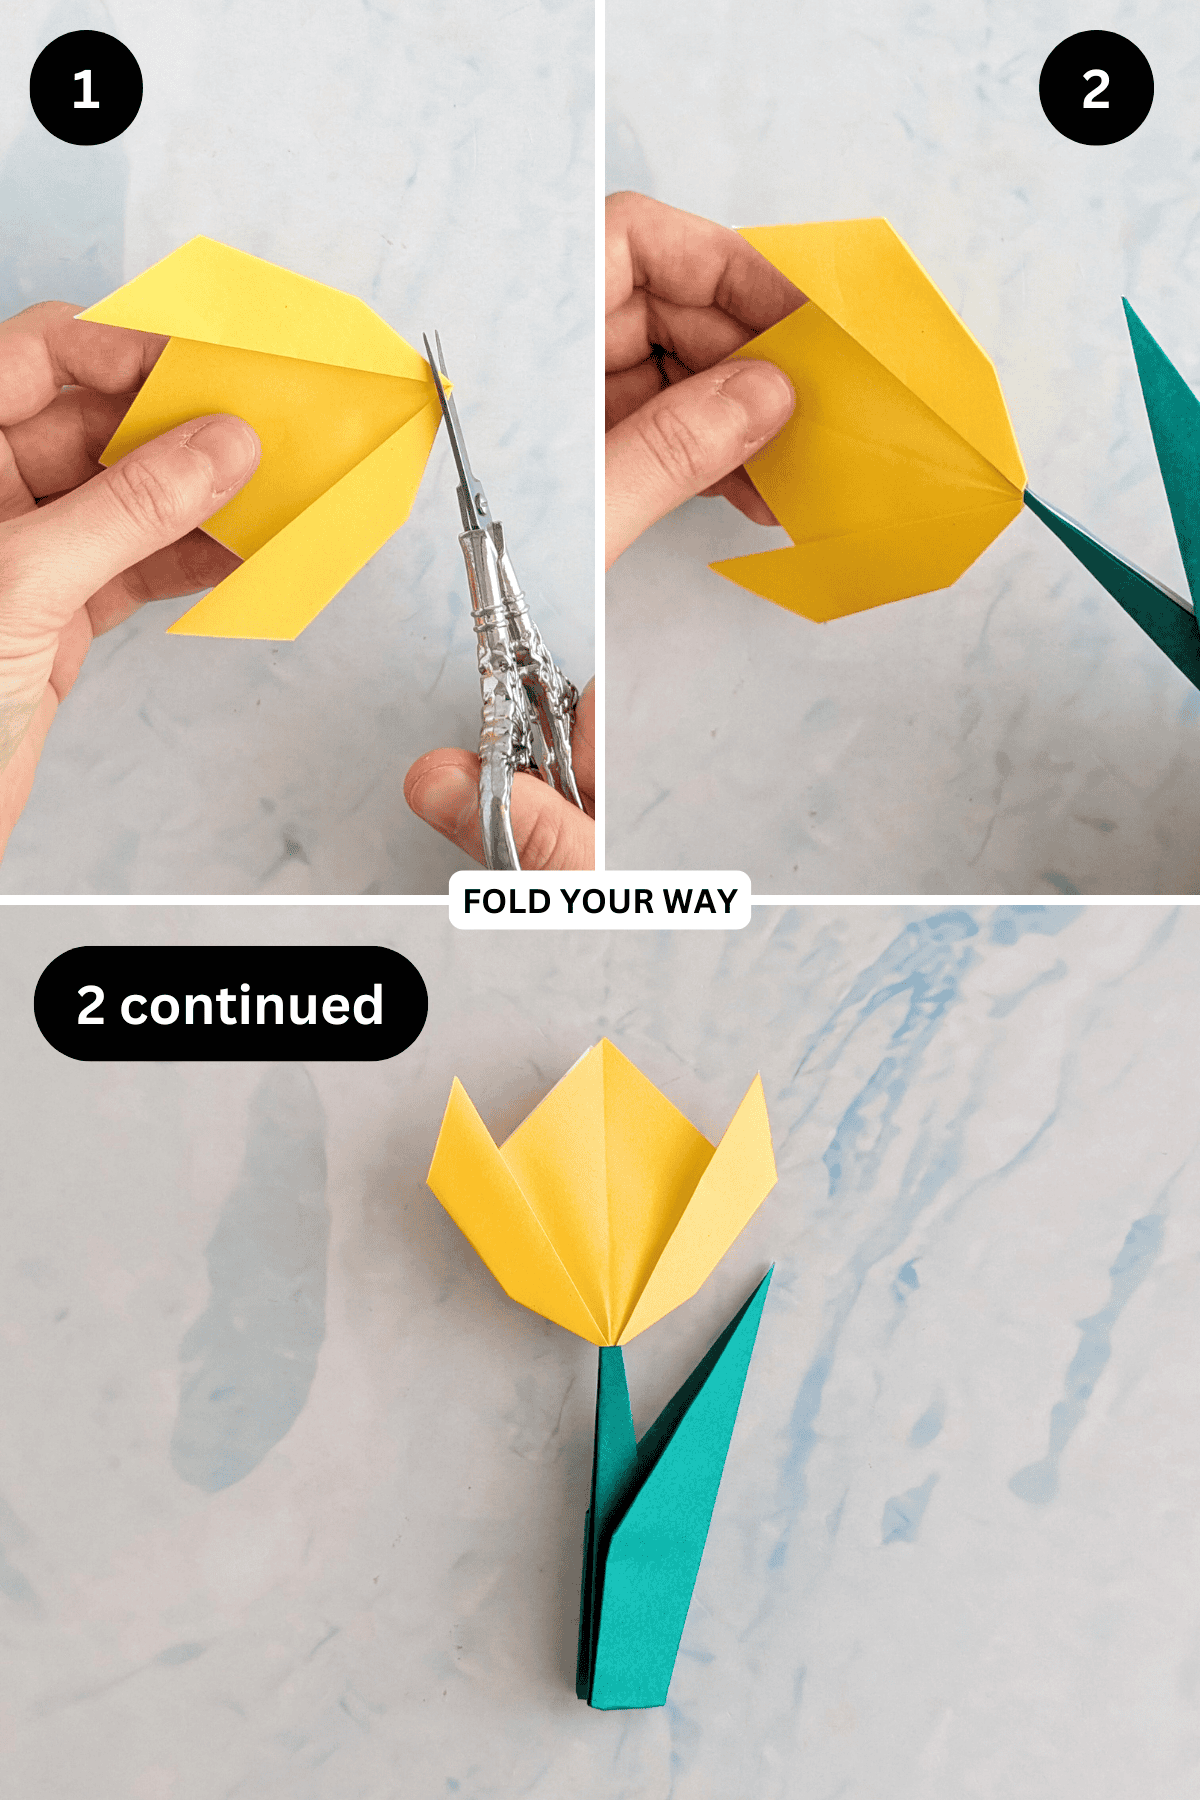
Step 1: Cut a small part off the bottom of your tulip head. This will be where you insert your stem.
Step 2: Insert the thin upper part of the stem into the bottom of the flower (where you just cut it in the previous step). You will need to open out your tulip head slightly.
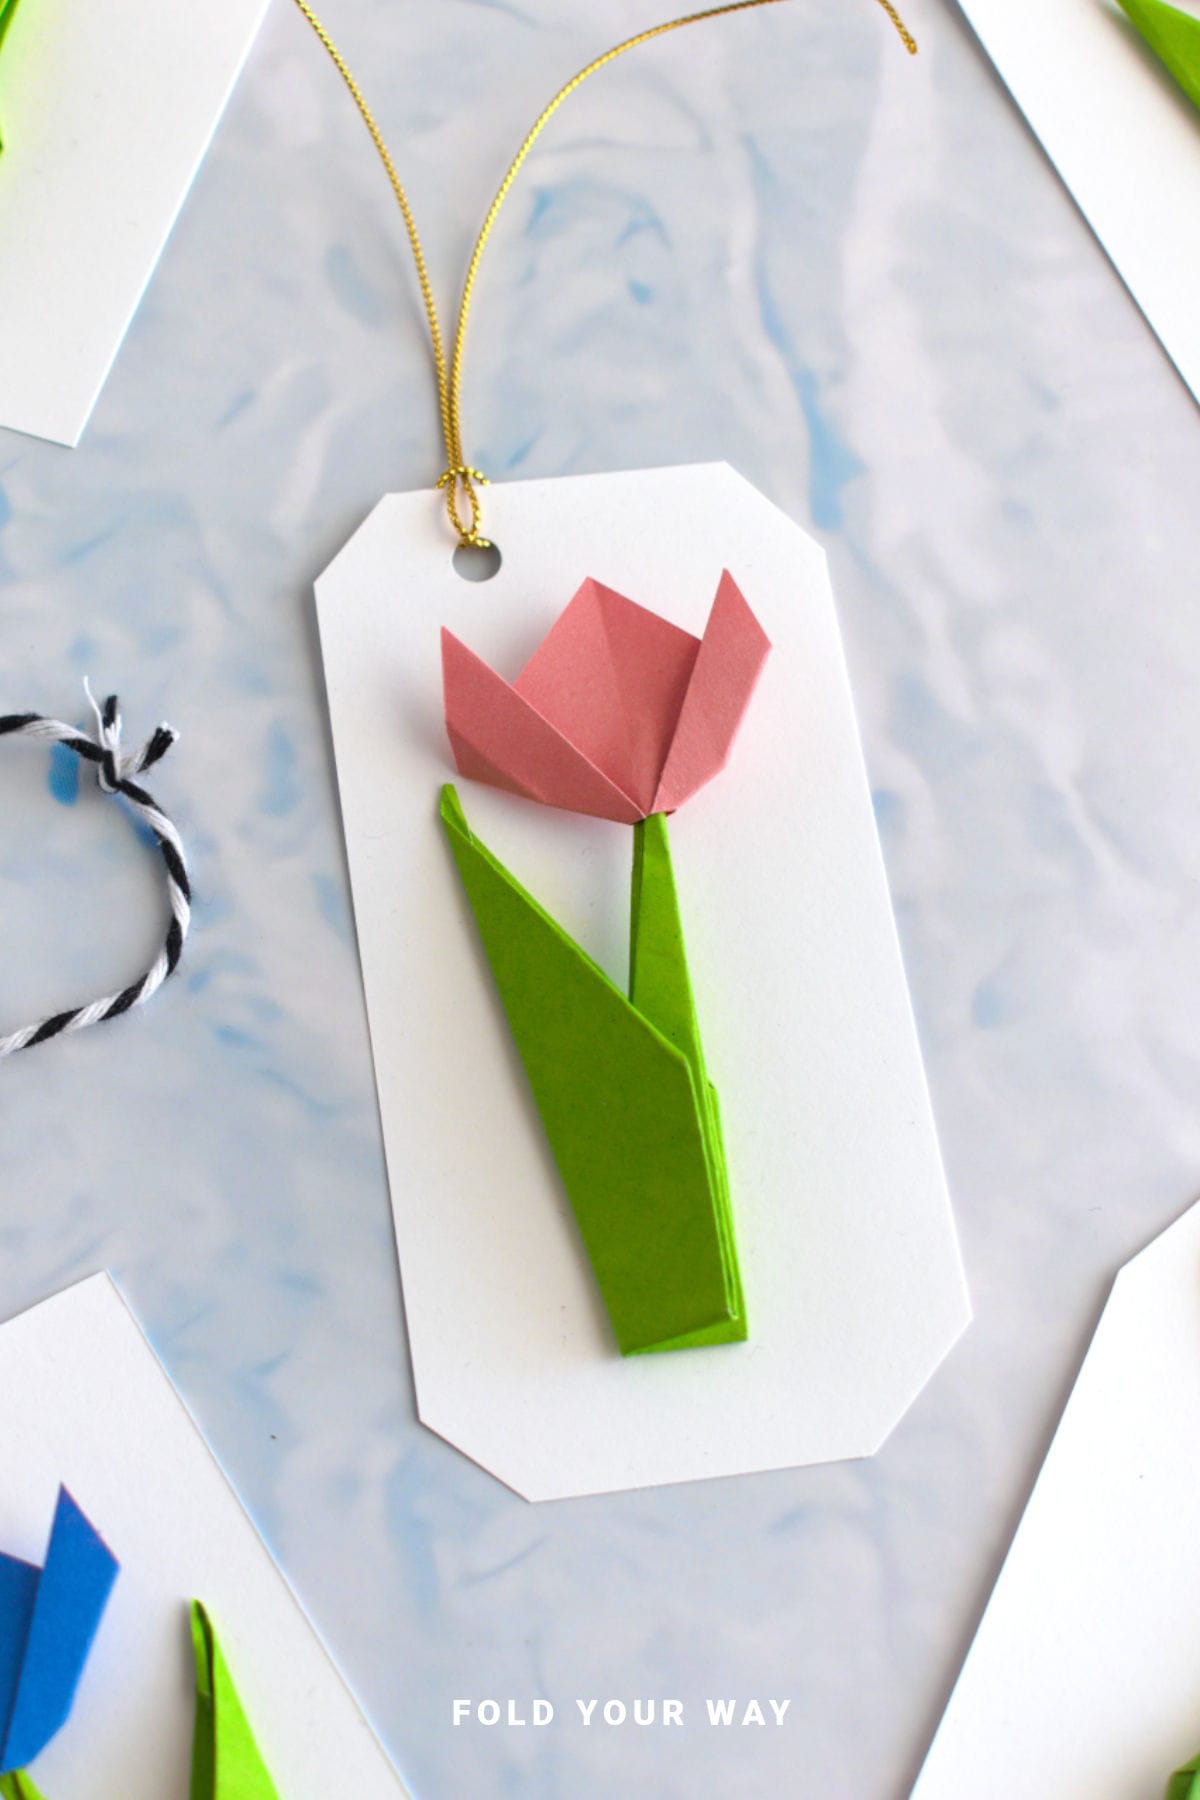
Completed origami tulip with stem.
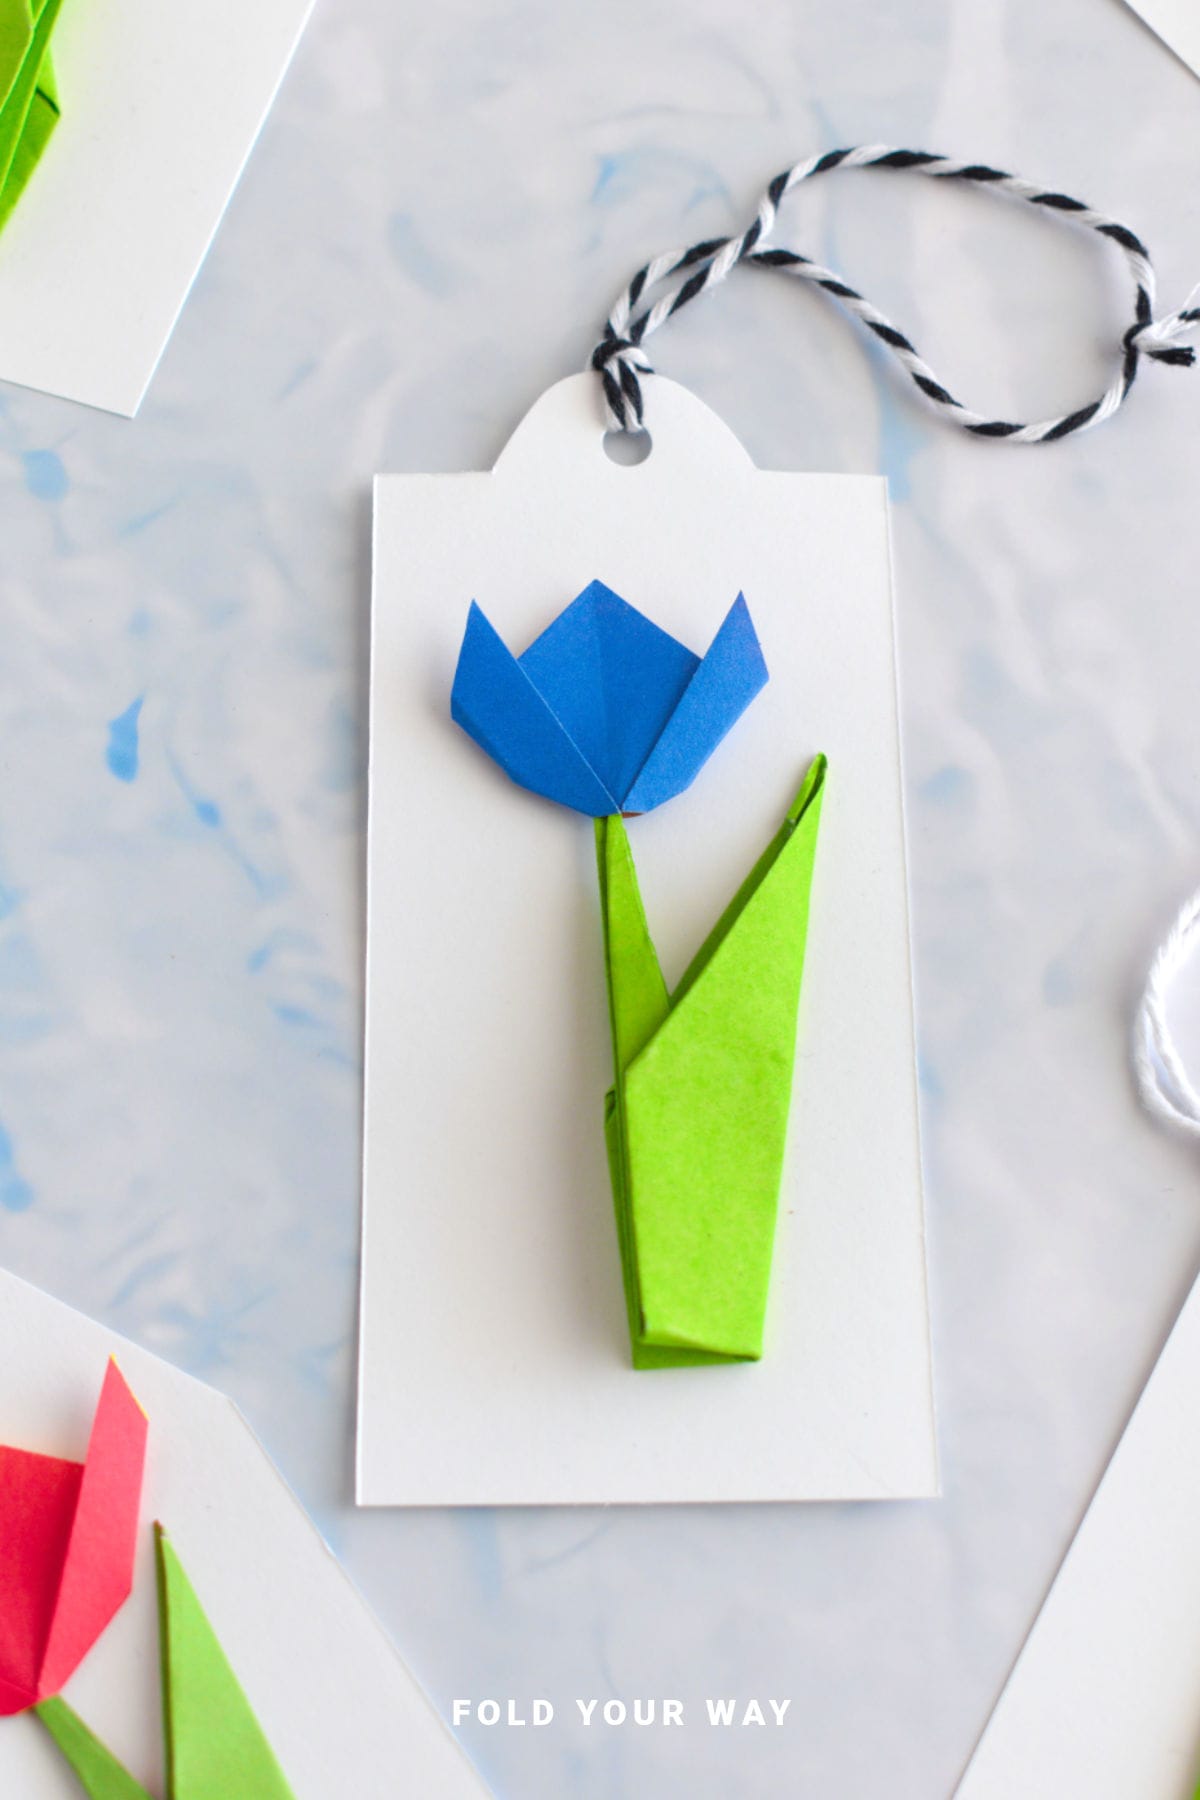
Making the DIY Gift Tag
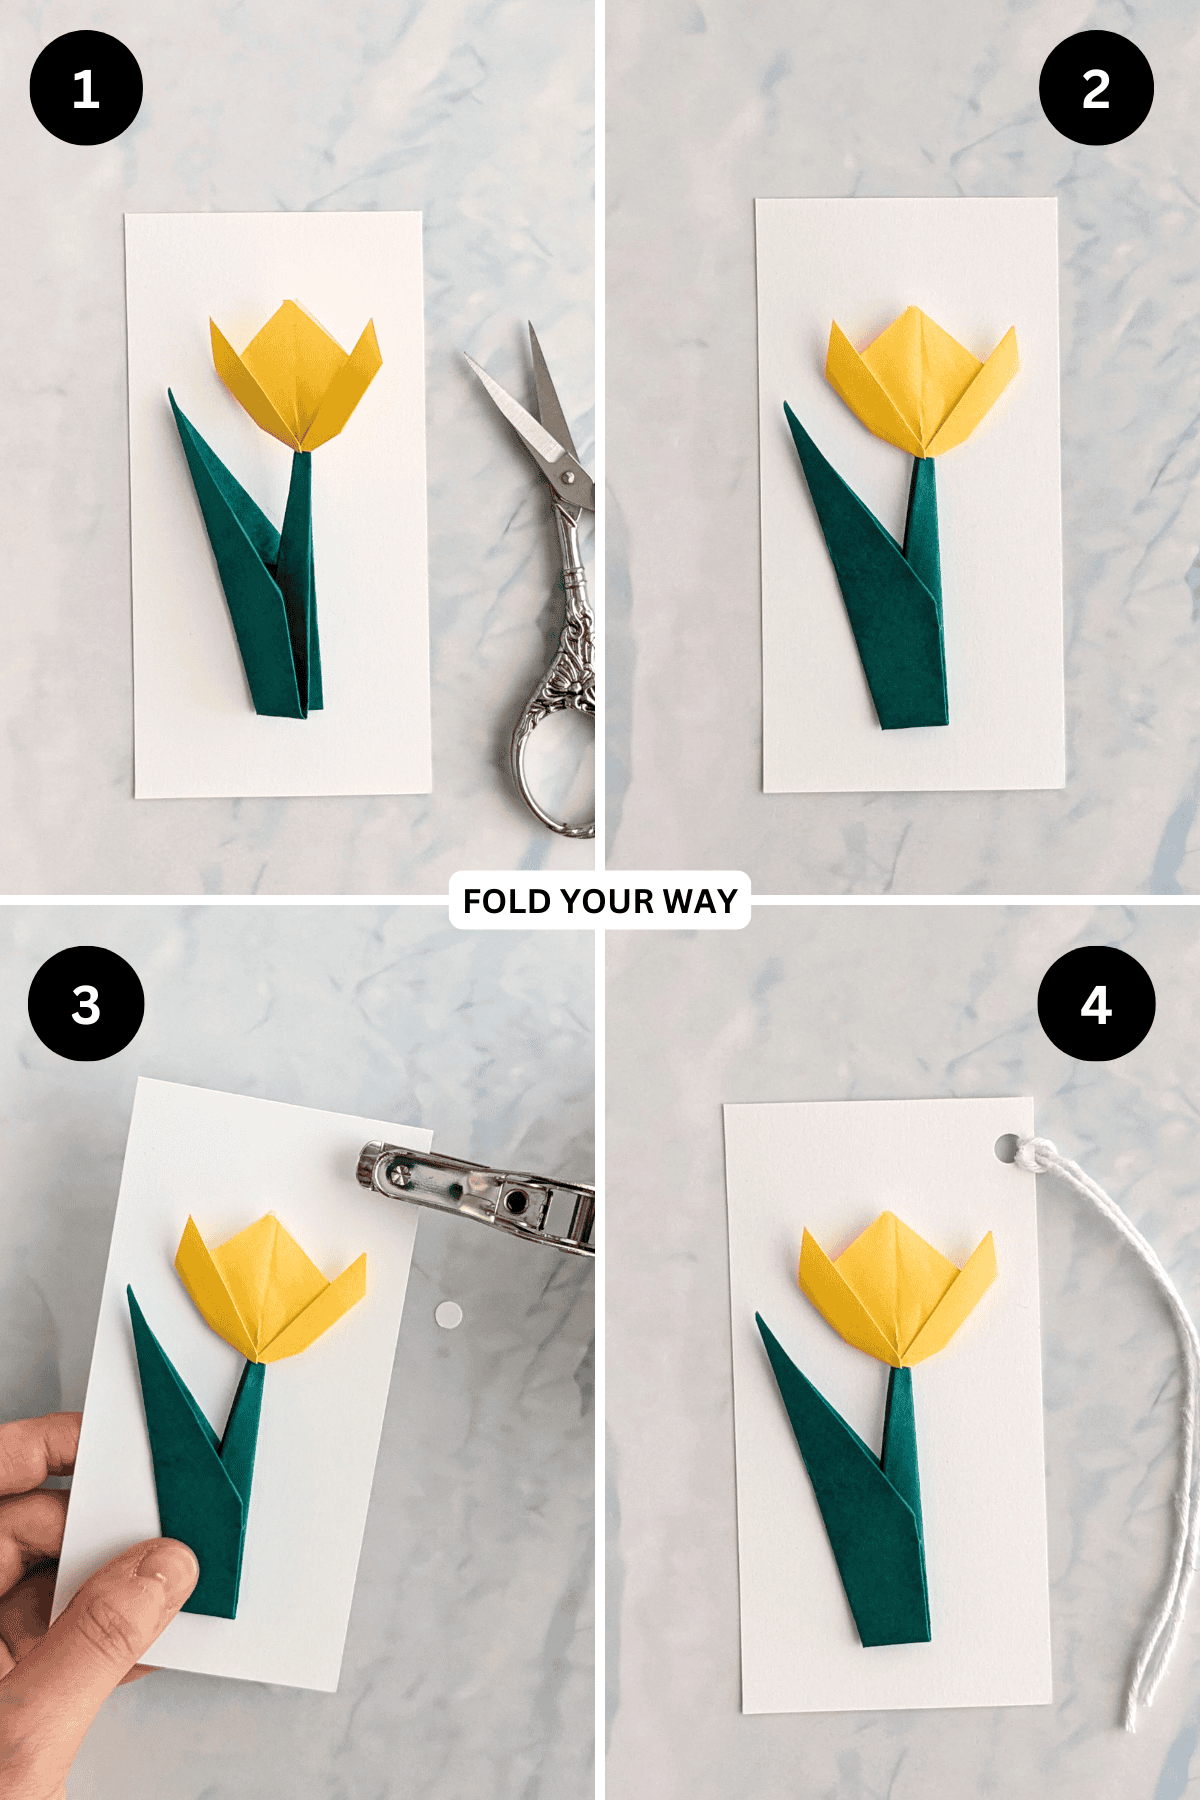
Step 1: Place your tulip onto a piece of cardstock and trace around it using a pencil. For this, you could trace a rectangle around it, trace the shape of the tulip, etc. It’s up to you.
Just make sure you leave at least a 0.40 inches (1 cm) border around the tulip and a bit more room along the top (as you will need to punch a hole into the cardstock later).
Once you are happy with it, cut out the cardstock.
Step 2: Glue the back of the tulip onto the cardstock.
Step 3: Using a hole punch, punch a hole on the top edge of the cardstock. The position of the hole is up to you.
Step 4: Thread some string through the hole. Completed tulip gift tag.
Tips For Success
- Coordinate with your wrapping – Match your tulip and cardstock colors to your gift wrap or the occasion.
- Make in batches – Prepare several tulips in advance so you can assemble tags quickly when needed.
- Try metallic string – It adds a festive touch, especially for holidays like Christmas.
- Add a name or message – Leave space on the tag to write the recipient’s name or a quick note.
Common Mistakes & How To Avoid Them
- Using heavy paper for the tulip – This makes folding tricky. Stick to lightweight or origami paper.
- Not securing the tulip well – Make sure to glue the base of the flower securely to the tag so it doesn't lift.
- Punching the hole too close to the edge – Give yourself enough margin so the hole doesn’t tear when you attach the string.
- Using too much glue – A little goes a long way—use a small amount and press gently to avoid wrinkling.
Color, Paper Ideas, and Variations
- Soft pastels – Perfect for spring, Easter, and Mother’s Day gifts.
- Bold reds and pinks – Lovely for Valentine’s Day or romantic gifts.
- Classic green and white – Great for minimalist designs or winter celebrations.
- Gold and silver cardstock – Ideal for adding a festive touch to Christmas gifts.
- Patterned paper – Use florals or polka dots for the tulip to add some fun flair.
- Mini tags – Scale down the tag and tulip for smaller gifts or treat bags.
FAQ
Yes! As long as it’s lightweight enough to fold easily, construction paper works well.
Absolutely!
Just skip the hole punch and write the name directly on the tag—perfect for dinner parties or special events.
If you use durable paper and attach the tag with a slip knot, you might be able to reuse it—especially if you don’t write on it!
Other Paper Crafts You Might Like To Try:
Helpful Tips and Common Mistakes For Paper Crafts
Paper crafting and origami can be hard sometimes. Which is why we've made this printable PDF just for you.
It outlines helpful tips so that you can successfully complete your craft, and some of the most common mistakes people come across.
You can download the helpful tips and common mistakes for paper crafts printable PDF here.
Stay Connected
Made this pattern? Let us know how it went in the comments below!
Pin this post - Pin now to take your paper crafting skills to the next level.
Share on Instagram or Facebook - Capture the beauty of your finished paper craft project and share it on Instagram or Facebook! Tag us @foldyourway so we can see your work!
Other Patterns You Might Like To Try:
Looking for other easy patterns like this? Try these:


Comments
No Comments