
Looking for a fun and festive Halloween or fall project?
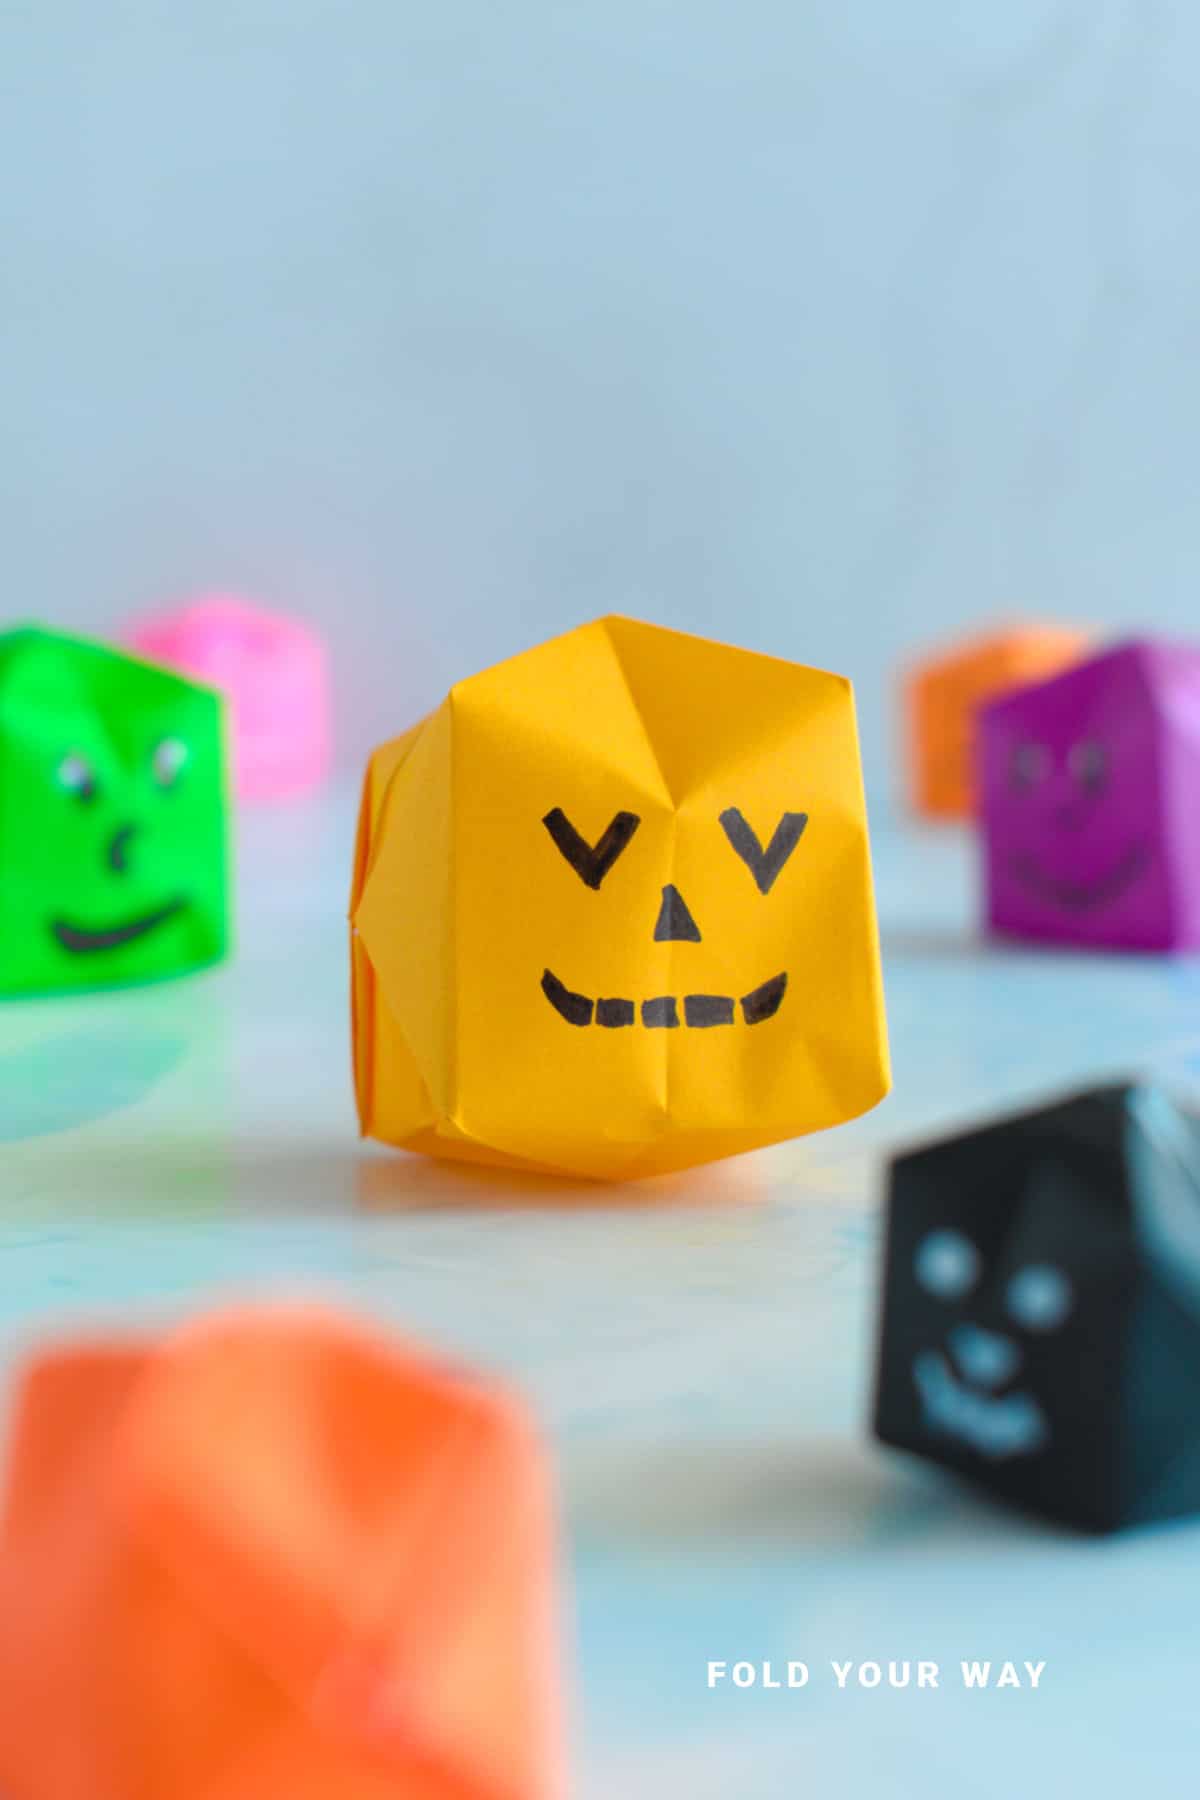
This easy 3D origami pumpkin is made from just one square sheet of paper and inflates into shape—no glue needed!
Great as a table decoration, party favor, or even strung together for a garland.
Jump to:
If you’re in the mood for a cute Halloween or autumn craft that’s easy, mess-free, and surprisingly satisfying, this 3D origami pumpkin is a must-try.
Made with just one square sheet of paper, this pumpkin inflates into shape—yes, really!
It's fun for kids, adults, and anyone who loves hands-on projects with a touch of magic.
You don’t need any special tools or materials, and the finished pumpkin can be used in all kinds of creative ways. Place one on a table, tuck it into a gift basket, or turn a whole bunch into a garland or hanging ornament.
This project is especially great around Halloween or Thanksgiving, but you can also adapt the colors for a fun autumn display or even a quirky touch for a birthday party. Pair it with other paper decorations for a cohesive seasonal look.
Whether you're crafting solo, with kids, or in a classroom setting, this inflatable origami pumpkin offers a little bit of everything: a fun folding process, a cute final result, and the option to personalize it however you’d like.
Plus, since it only needs one sheet of paper, it’s the kind of project you can make anywhere—no glue, no scissors, and no fuss.

Why You'll Love This Pattern
- Made from just one sheet of square paper – no glue or cutting
- Inflates into a 3D shape for instant satisfaction
- Great for Halloween, Thanksgiving, or autumn-themed decorations
- Can be made with kids or in groups
- Works well as a standalone piece or as part of a garland
- Easy to personalize with drawing, painting, or patterned paper
Skill Level
★☆☆☆☆ (Very Easy)
Materials Needed
- 1 square sheet of paper (orange, or decorate your own)
- Optional: markers or pens for adding a face or lines
Note: An origami pumpkin made with 6 inches x 6 inches (15 cm x 15 cm) paper makes a paper pumpkin that is about 1.60 inches x 1.60 inches (4 cm x 4 cm).
Instructions
Step 1: Start with the color you want your pumpkin to be facing up.
Step 2: Fold the left side to meet the right side.
Step 3: Unfold previous step.
Step 4: Fold the bottom edge up to meet the top edge.
Step 5: Unfold previous step.
Step 6: Flip your paper over from left to right.

Step 7: Fold the bottom left corner to meet the top right corner.
Step 8: Unfold previous step.
Step 9: Fold the bottom right corner up to meet the top left corner.
Step 10: Unfold previous step.
Step 11: Hold the left and right sides of the paper and bring the sides inwards and then down. Flatten the paper into a triangle shape. This is known as an origami water bomb base.

Step 12: Fold the bottom left and right corners (top layer only) up to meet the top point.
Step 13: Fold the top left flap down to meet the bottom edge, making a small crease only in the centre.
Step 14: Unfold previous step.
Step 15: Fold the left and right points of the inner flaps to meet the crease you made in step 13.
Step 16: Fold the top 2 points down to align with the flaps your made in the previous step.
Step 17: Fold the same flaps outward on a diagonal.

✨ You're almost there! ✨
To unlock the final steps and complete your pattern, create a free account with Grow.me. below.
Make sure you tick the box to subscribe to our newsletter and stay up to date with the latest patterns, tips, and more!
Once you're signed up, you'll get instant access to finish your project and enjoy exclusive content in the future.
Already signed up? Hit the button below and select ‘Switch to Log In’ to pick up where you left off and finish your project!
Step 18: Unfold previous step.
Step 19: Tuck the top left loose flap into the pocket of the left triangular flap.
Step 20: Repeat previous step for the top right flap.
Step 21: Flip your paper over from left to right. Then repeat steps 15 to 20.
Step 22: Fold the left side of the paper over to the right like turning a page in a book.
Step 23: Repeat previous step for the other side.

Step 24: Rotate your pumpkin 180 degrees. This will ensure you have a small hole at the top tip of your pumpkin.
Step 25: Fold the bottom point up as shown.
Step 26: Unfold previous step.
Step 27: Draw a face on your pumpkin using a marker. Do not go below the crease line you made in step 25. Keep the face as centered as possible.
Step 28: Pick up your pumpkin. You will notice on the top of the pumpkin there will be a small hole. Gently open out the pumpkin slightly as shown. Then, blow through the hole in the pumpkin to inflate it. We recommend not putting your mouth directly onto the paper as it can become soggy. You could alternatively use a straw.
Step 29: Once inflated, adjust the folds as you like. Completed pumpkin.

Tips For Success
- Use lightweight origami paper so the pumpkin inflates easily
- If you're decorating your own paper, let ink or paint fully dry before folding
- Practice the inflation technique on scrap paper if you’re new to it
- Add a stem by taping on a green paper twist or curled pipe cleaner
- Draw faces or textures to give your pumpkin personality

Common Mistakes & How To Avoid Them
Pumpkin looks uneven: Take time with each fold to keep things symmetrical. Precise folding helps the pumpkin keep its round shape.
Color, Paper Ideas, and Variations
- Classic orange: Keep it simple with a traditional pumpkin color.
- Patterned paper: Use seasonal designs or Halloween-themed prints for added fun.
- DIY coloring: Start with white paper and draw your own pumpkin design before folding.
- Make a jack-o'-lantern: Draw or glue on a little face once inflated.
- Mini pumpkins: Try smaller paper sizes for tiny tabletop versions or garlands.
- Paper choice: Origami paper is ideal, but lightweight gift wrap or even recycled magazine pages can work well too.
FAQ
Yes, but it’s best to cut it into a perfect square and ensure it’s not too thick, or it may be harder to inflate.
You can string a needle and thread through the top point, or tape on a loop once it’s done.
Yes! It’s a fun and simple project, though younger kids may need help with the final inflation step.
Other Paper Crafts You Might Like To Try:
Stay Connected
Made this pattern? Let us know how it went in the comments below!
Pin this post - Pin now to take your paper crafting skills to the next level.
Share on Instagram or Facebook - Capture the beauty of your finished paper craft project and share it on Instagram or Facebook! Tag us @foldyourway so we can see your work!

Other Patterns You Might Like To Try:
Looking for other easy patterns like this? Try these:


Comments
No Comments