
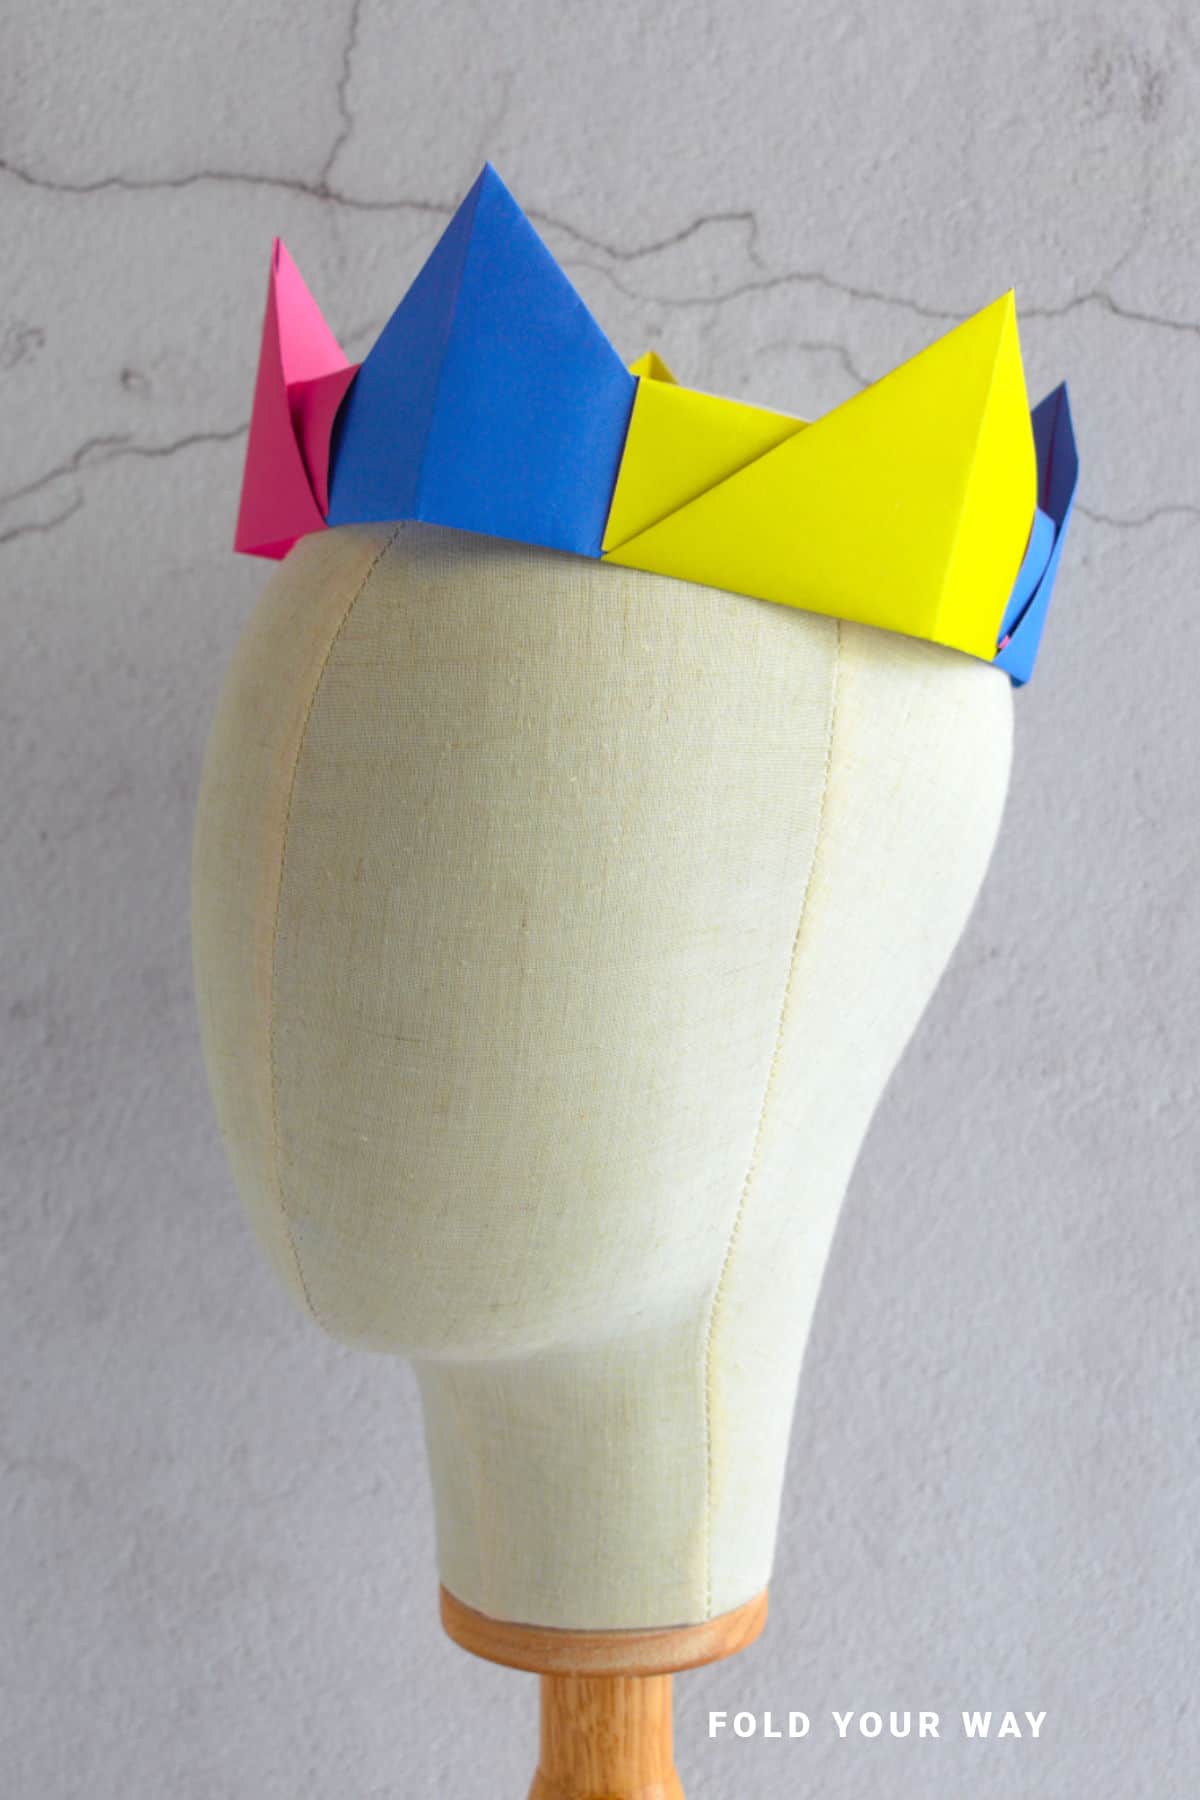
This easy origami crown is a fun, wearable paper craft for kids and parties—made from multiple sheets, no glue needed.
Add more pieces to make it bigger for any head size!
Jump to:
Looking for a fun paper craft that’s wearable, great for groups, and beginner-friendly? This easy origami crown checks all the boxes.
It’s made using a modular folding technique—so you’ll use multiple sheets of paper, but there’s no cutting or glue involved.
Each unit folds the same way, and they all connect together to form a circular crown that actually fits on your head.
Kids especially love this project, whether they’re making it during a birthday party, in a classroom activity, or just for fun on a rainy afternoon.
It feels like a real crown when it’s done, but it’s so simple to put together that even young children can help out with the folding.
And since it's modular origami, you can adjust the size easily—just add more units to make it bigger.
This is one of those easy origami ideas that looks impressive but doesn’t require a lot of precision.
The folds are simple and repetitive, which makes it great for beginners.
Plus, there’s something really satisfying about seeing your individual folded pieces come together into one complete, wearable design.
You can make this origami crown using square sheets of paper, as long as they’re all the same size.
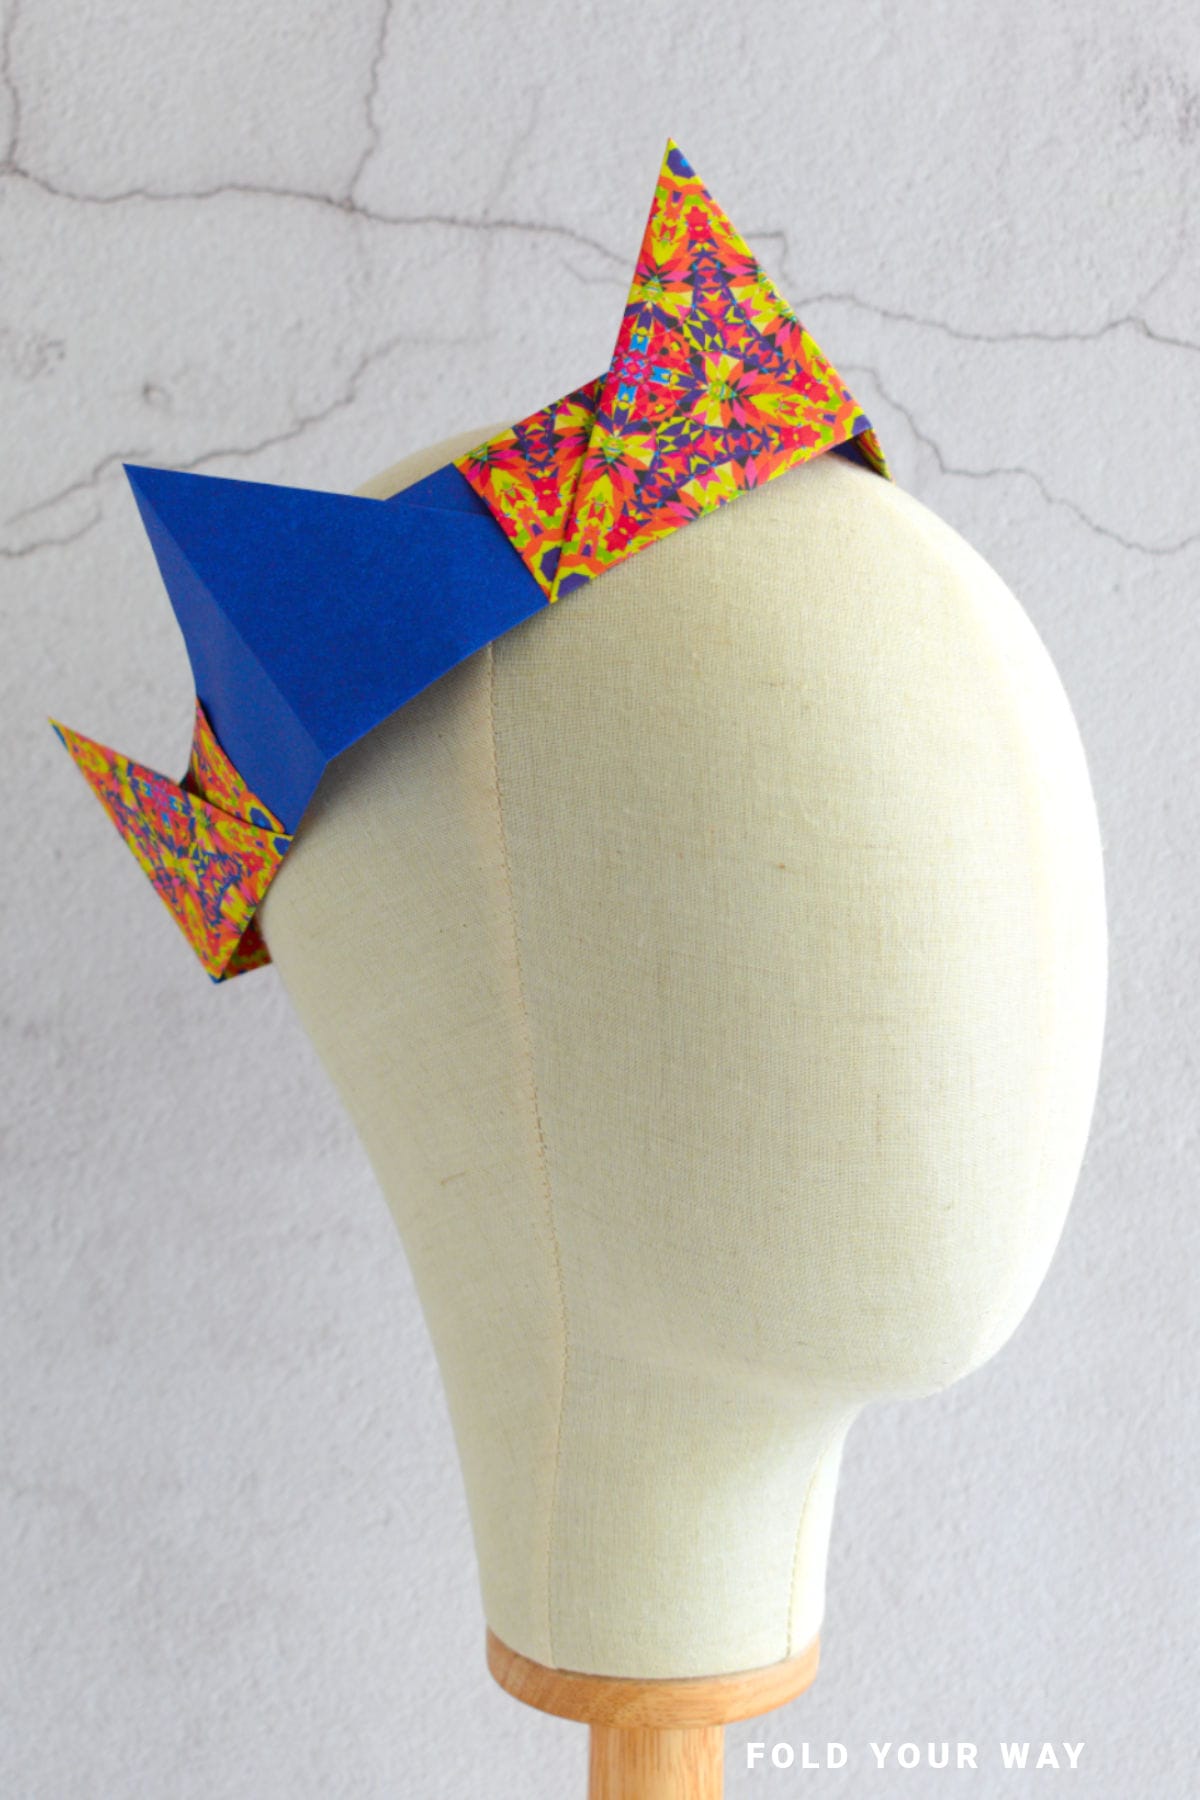
Bright colors look great, but you can also make it in gold or silver for a more classic royal look.
It’s a perfect project for school, birthday crafts, or just a fun afternoon activity at home.
Ready to make your own?
Follow the step by step instructions to fold each unit, connect them together, and wear your finished crown with pride.
Why You'll Love This Pattern
- No glue, scissors, or tape required
- Adjustable—add or remove pieces to fit any head size
- Ideal for classrooms, birthdays, or rainy day activities
- Great origami starter project for kids
- Makes a real, wearable paper crown
- Uses simple folds and common paper sizes
Skill Level
★☆☆☆☆ (Very Easy)
Materials Needed
- 5 square sheets of origami paper (6 inch x 6 inch [15 cm x 15 cm]). This is a good adult sized crown. For young kids you could use 4 inch x 4 inch (10 cm x 10 cm) paper and adjust the amount of sheets to suit the head size.
- Optional: Extra sheet if you need a larger crown
Instructions
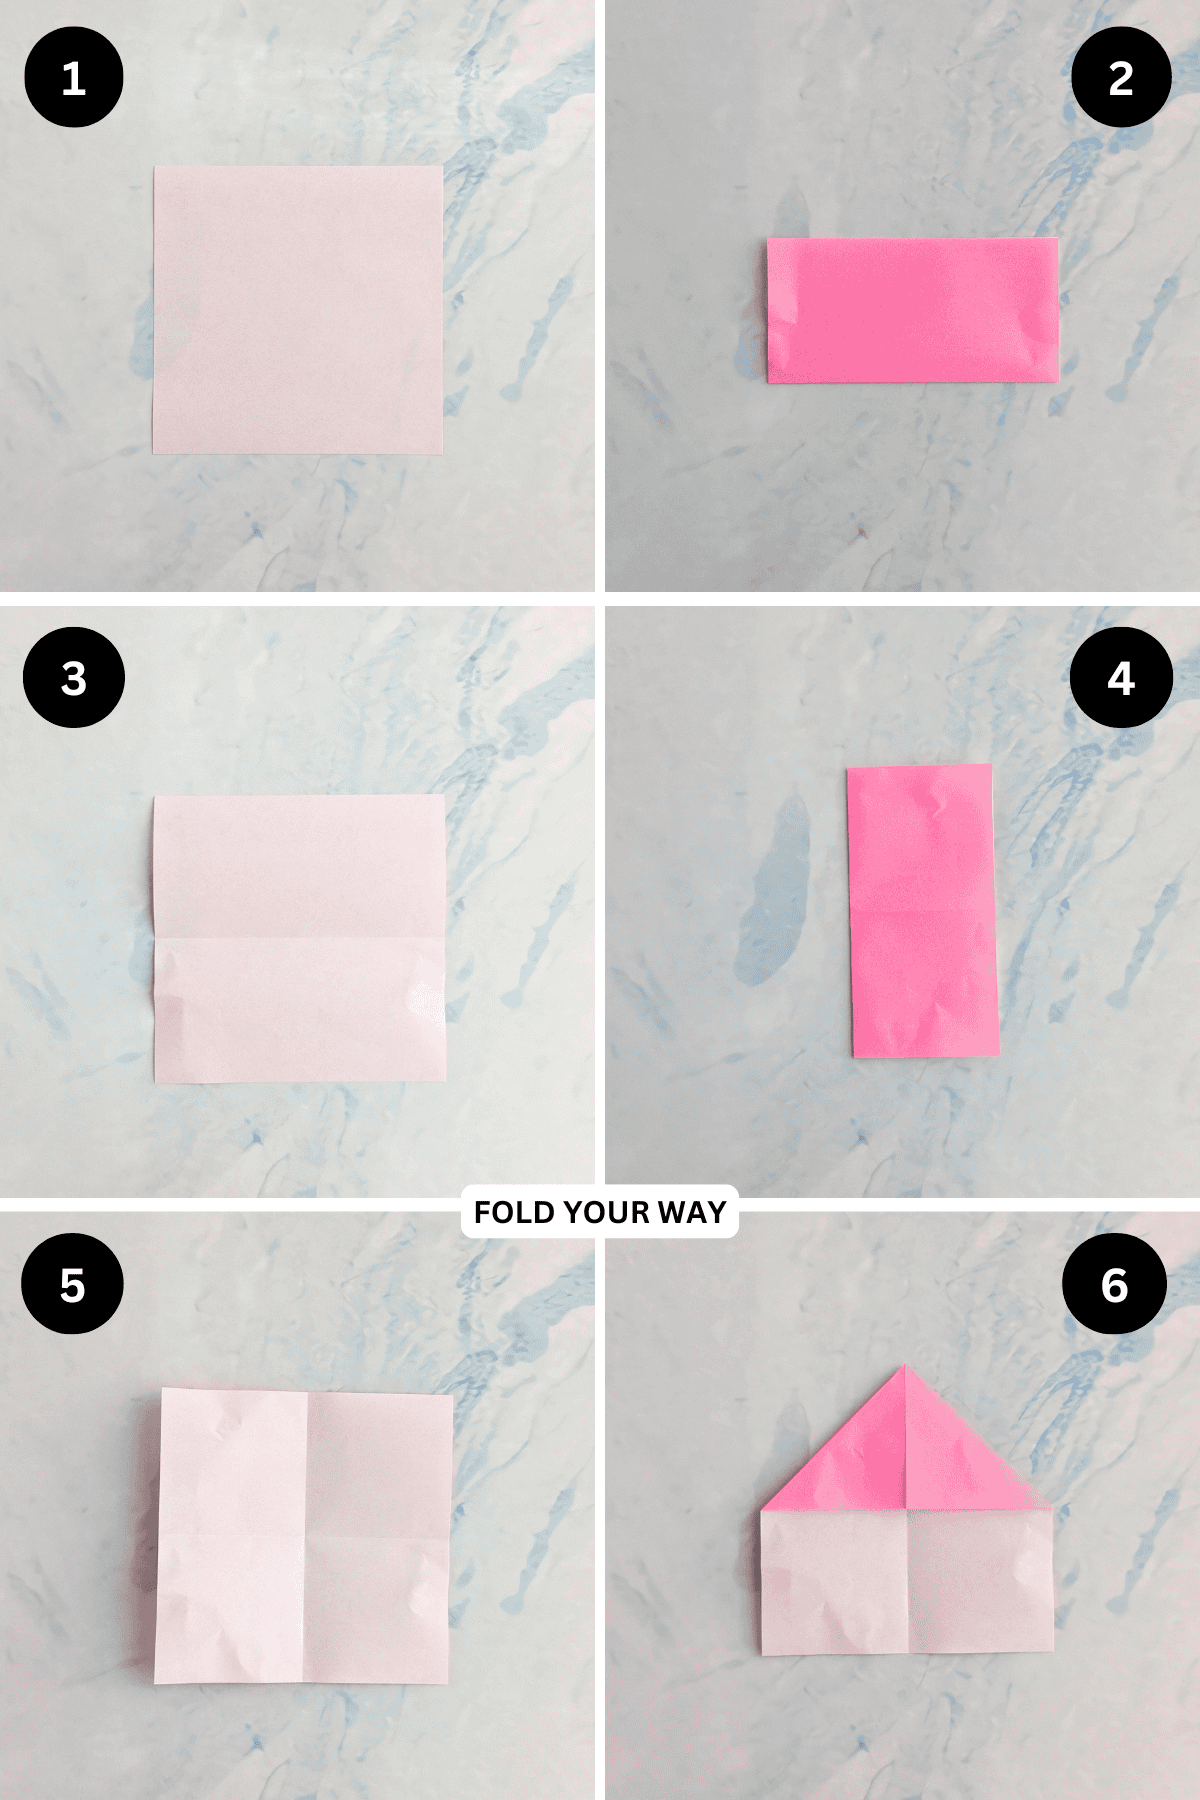
Step 1: Take one of your papers and arrange it so the color you want on the outside is facing down.
Step 2: Fold the bottom edge up to meet the top edge.
Step 3: Unfold previous step.
Step 4: Fold the left edge to meet the right edge.
Step 5: Unfold previous step.
Step 6: Fold both the top left and top right corners in to meet the middle.
✨ You're almost there! ✨
To unlock the final steps and complete your pattern, create a free account with Grow.me. below.
Make sure you tick the box to subscribe to our newsletter and stay up to date with the latest patterns, tips, and more!
Once you're signed up, you'll get instant access to finish your project and enjoy exclusive content in the future.
Already signed up? Hit the button below and select ‘Switch to Log In’ to pick up where you left off and finish your project!
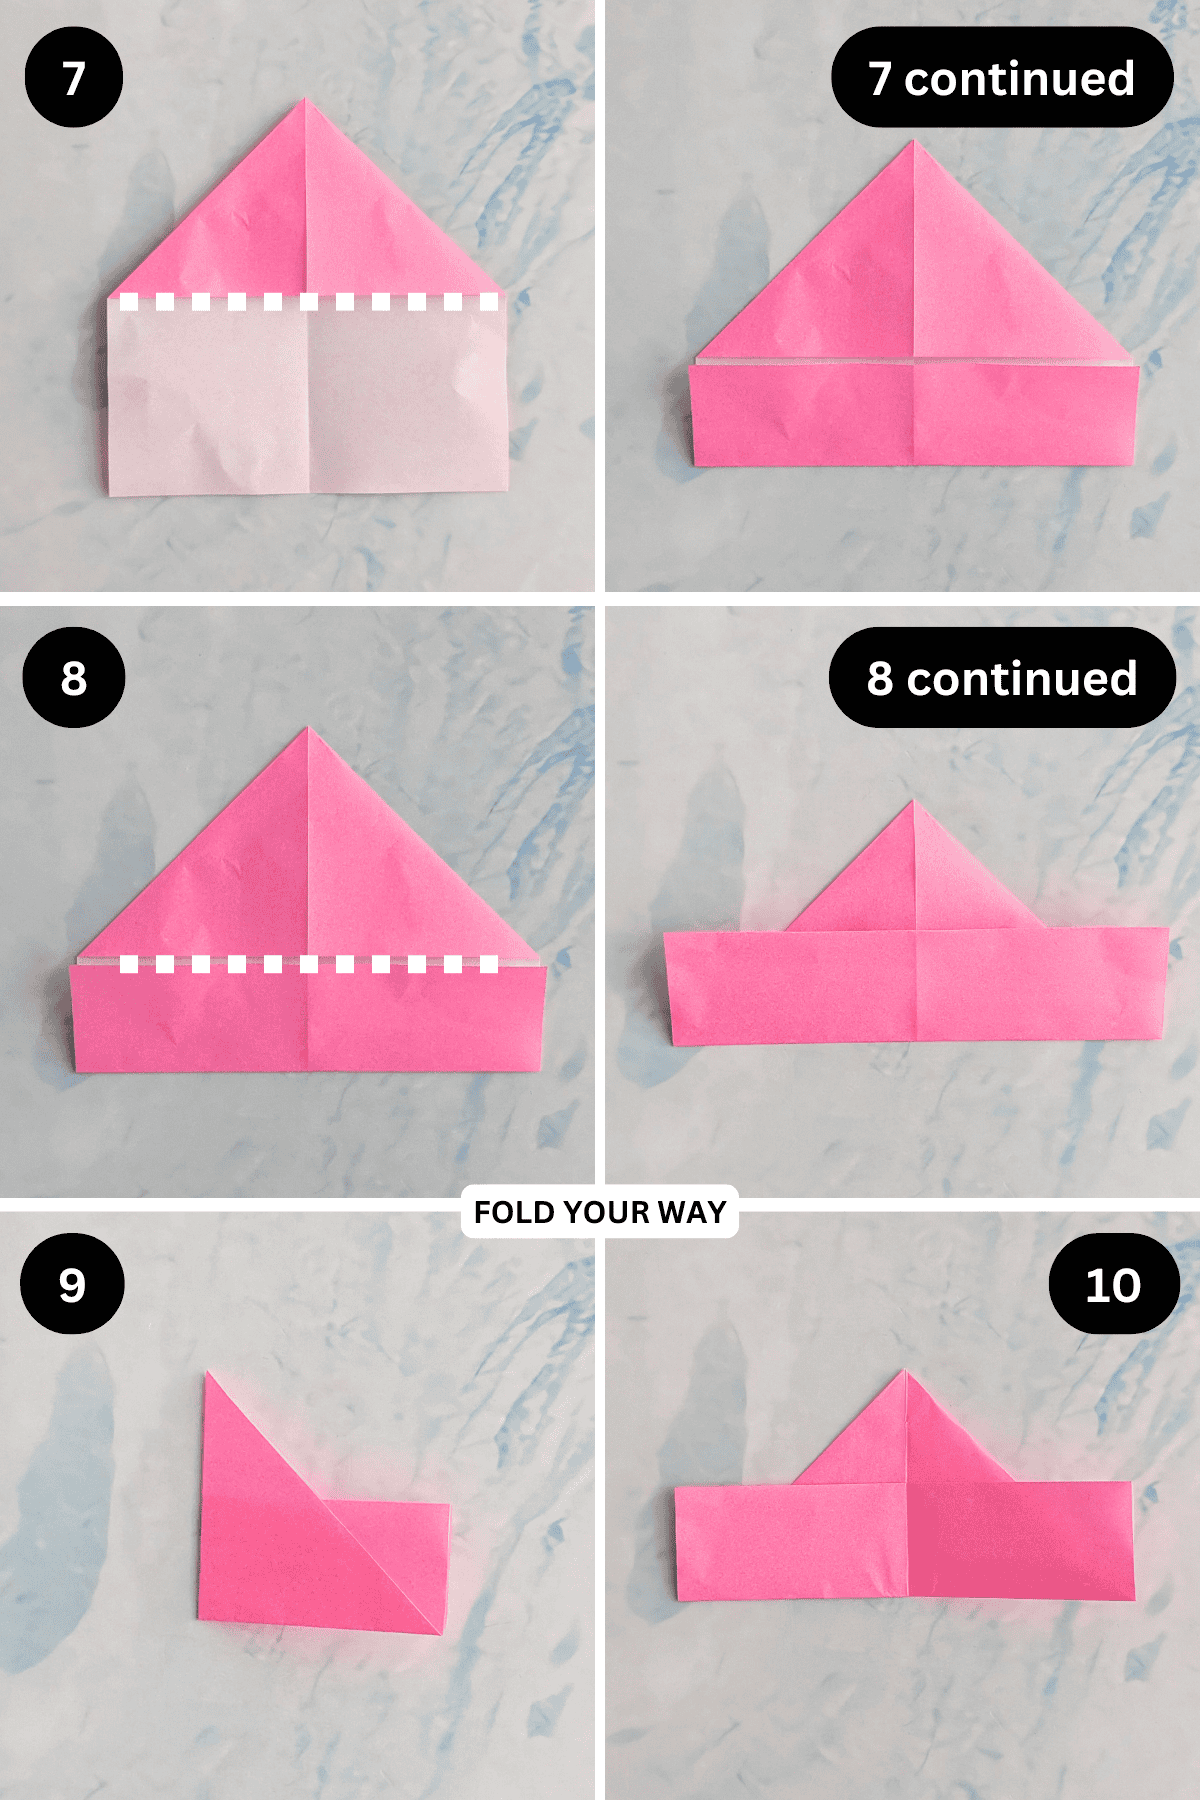
Step 7: Fold the bottom edge up to meet the line shown.
Step 8: Once again, fold the bottom edge up along the line shown.
Step 9: Fold the paper in half from left to right.
Step 10: Unfold previous step.
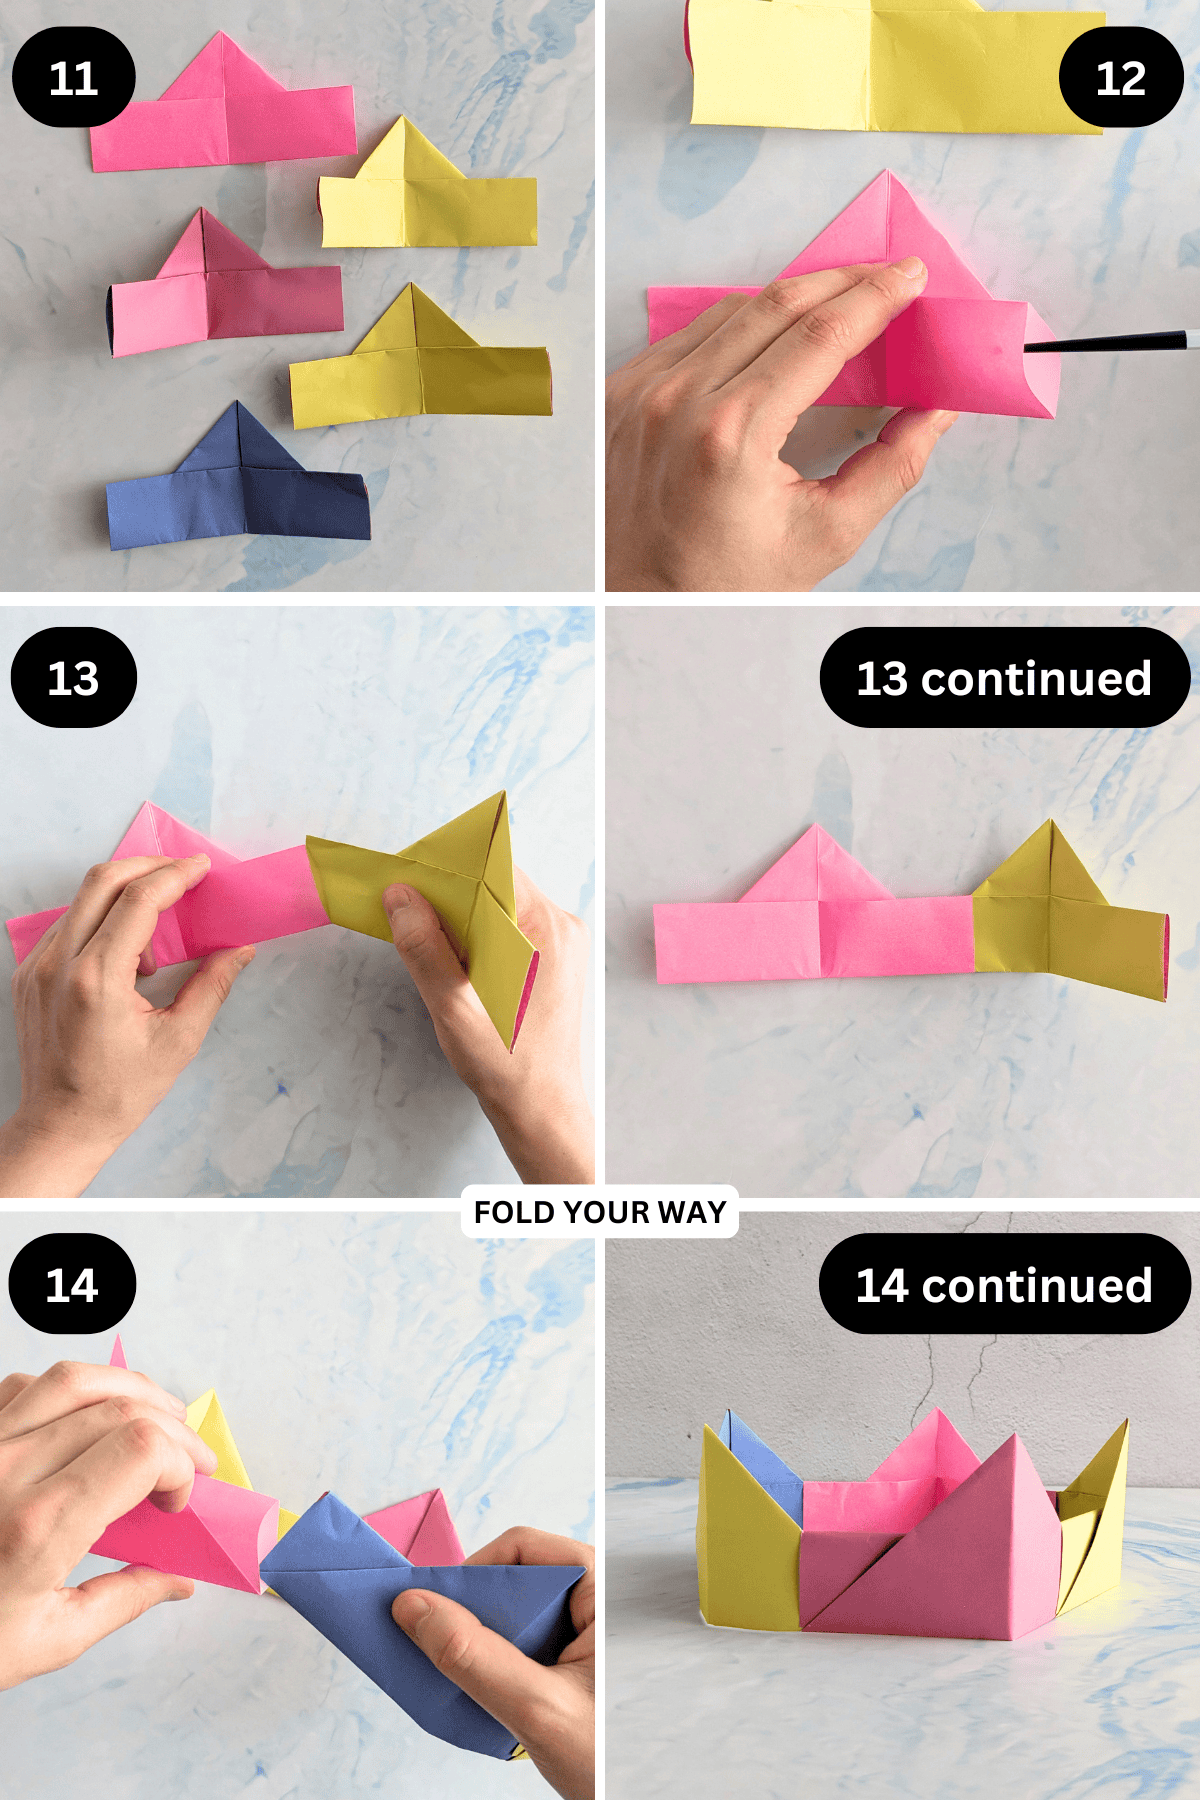
Step 11: Repeat steps 1 to 10 for the remaining sheets of paper.
Step 12: To join the crown together: On the folded pieces you will see a small pocket on either side of the rectangle part (see picture for guide). This is where you will slip in each piece.
Step 13: Take 2 pieces and join them together by sliding one into the pocket of the other.
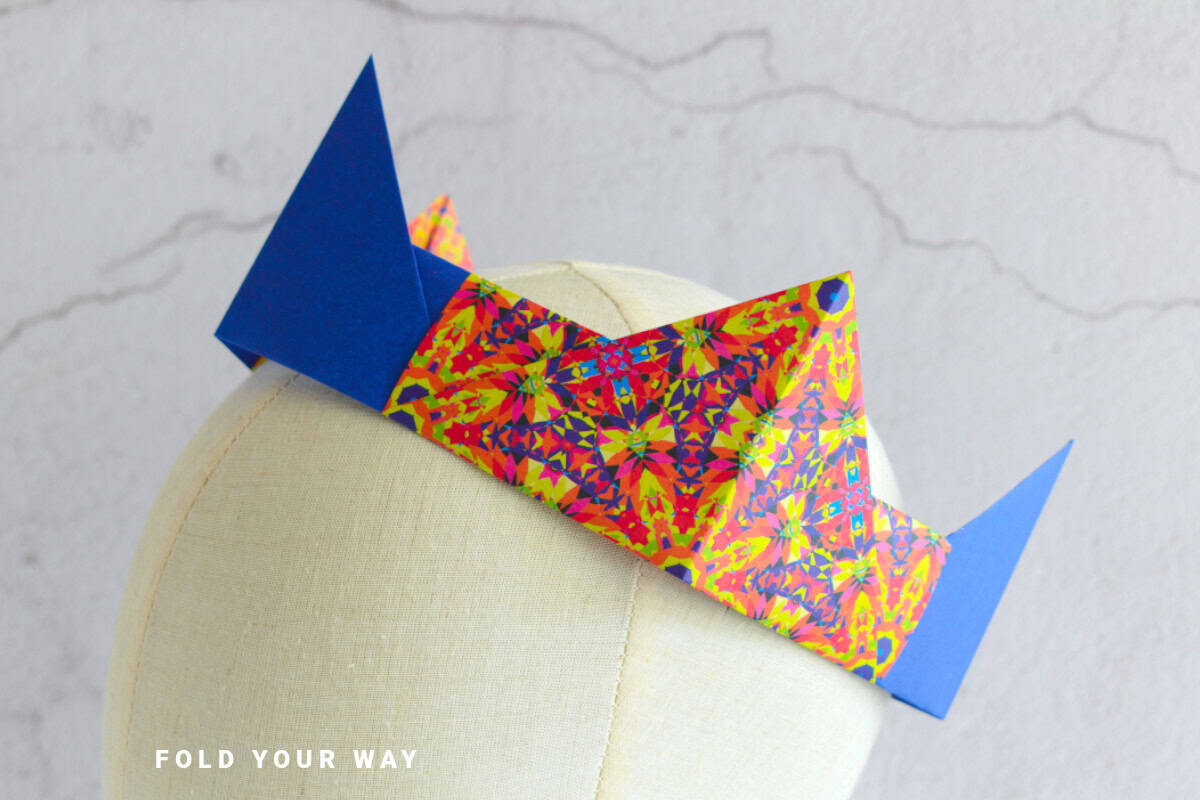
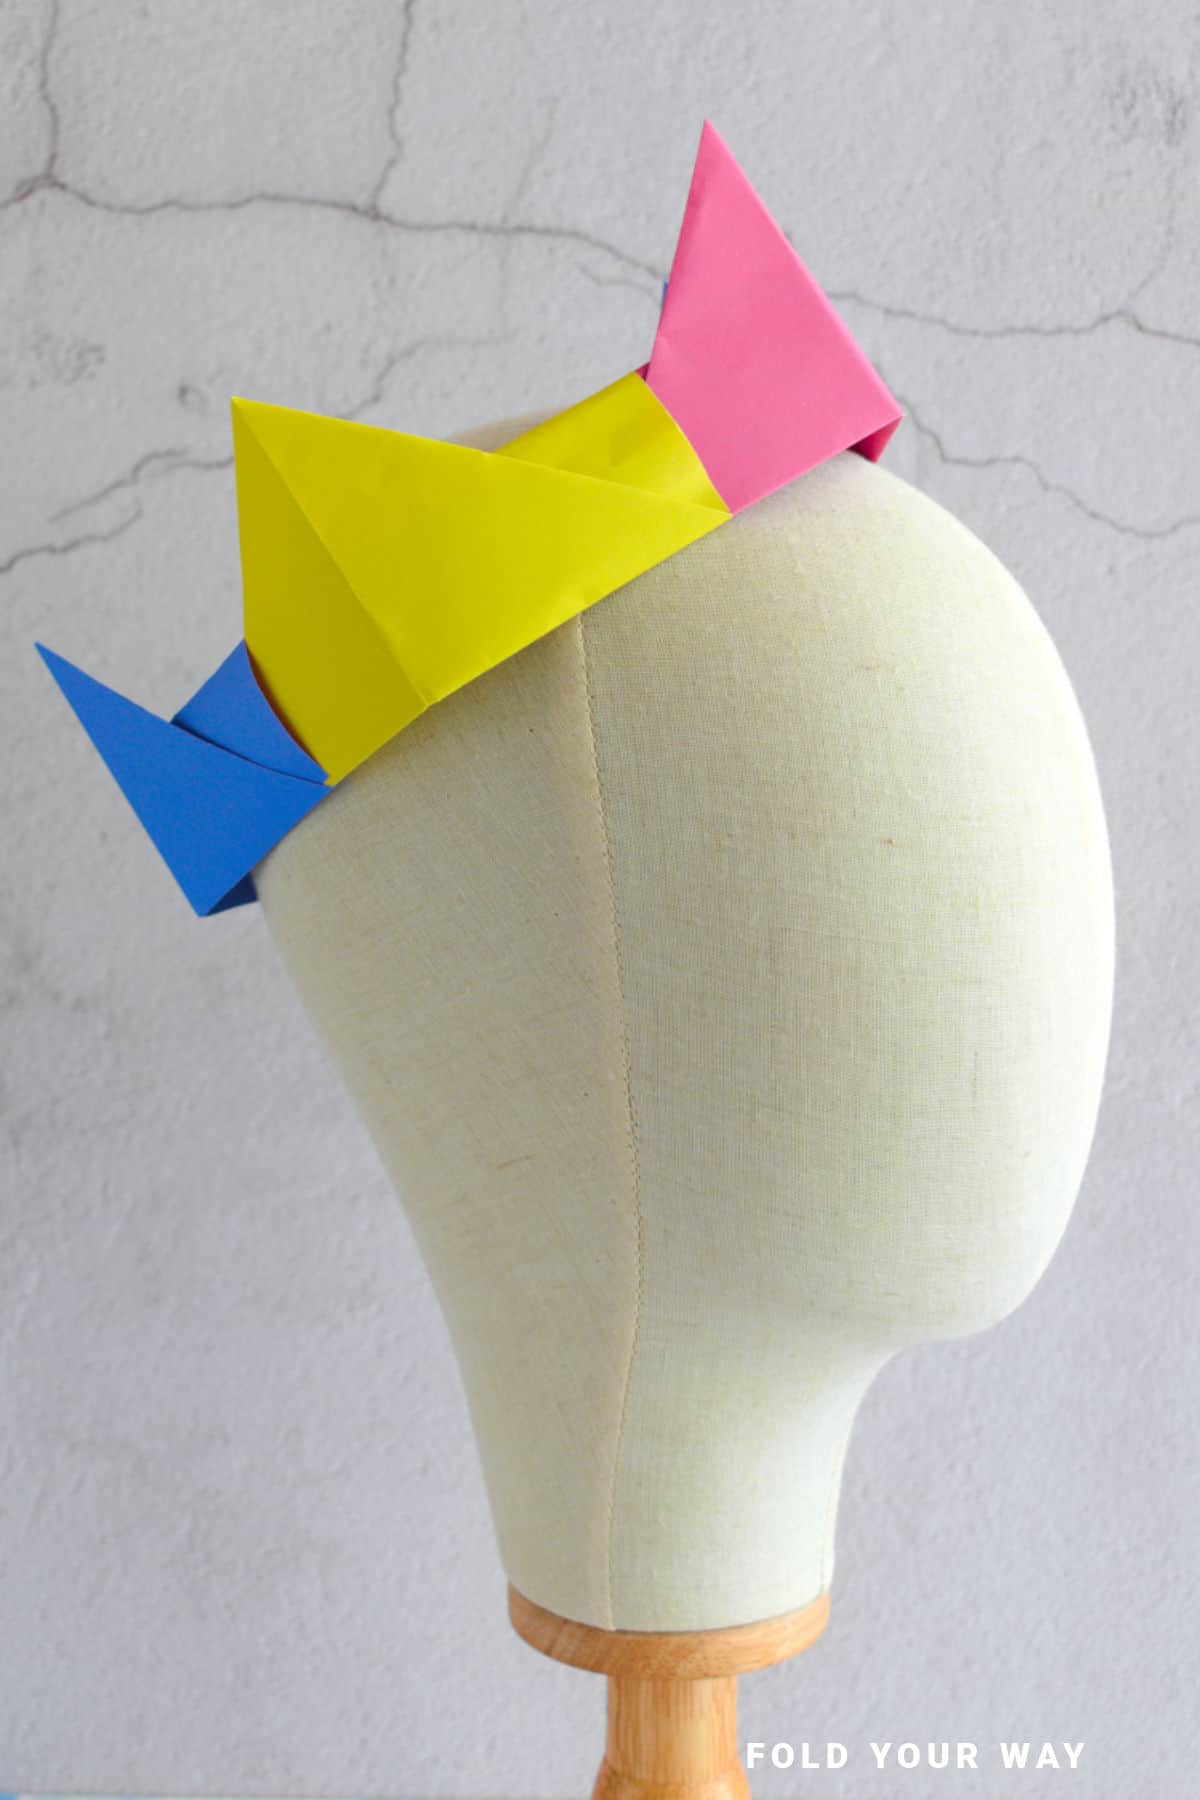
Step 14: Repeat previous step for the remaining pieces. Completed crown.
Tips For Success
- Use lightweight but sturdy paper—printer paper or origami paper works well
- Fold all units the same way before assembling.
- Tuck pieces tightly together to keep the crown secure
- Practice with scrap paper before using special colors
- If your crown is too tight, add one or two more units
Color, Paper Ideas, and Variations
- Gold or metallic paper – Perfect for royal-themed parties
- Bright rainbow colors – Fun for kids’ birthdays or classrooms
- Solid colors – Clean and bold look
- Patterned origami paper – Adds visual interest
- Two-tone effect – Alternate between two colors for a striped crown
- Mini versions – Use smaller square sheets of paper to make smaller crowns for dolls or pets
FAQ
Most adult-sized crowns need about 5–6 sheets (when using 6 inch x 6 inch [15 cm x 15 cm] paper). Kids' crowns may only need 4–5. You can add more units as needed.
Yes—the modular design locks each piece into the next. Just fold and connect tightly.
Absolutely! It's a great easy origami tutorial for kids aged 6 and up with a bit of help.
Other Paper Crafts You Might Like To Try:
Stay Connected
Made this pattern? Let us know how it went in the comments below!
Pin this post - Pin now to take your paper crafting skills to the next level.
Share on Instagram or Facebook - Capture the beauty of your finished paper craft project and share it on Instagram or Facebook! Tag us @foldyourway so we can see your work!
Other Patterns You Might Like To Try:
Looking for other easy patterns like this? Try these:


Comments
No Comments