
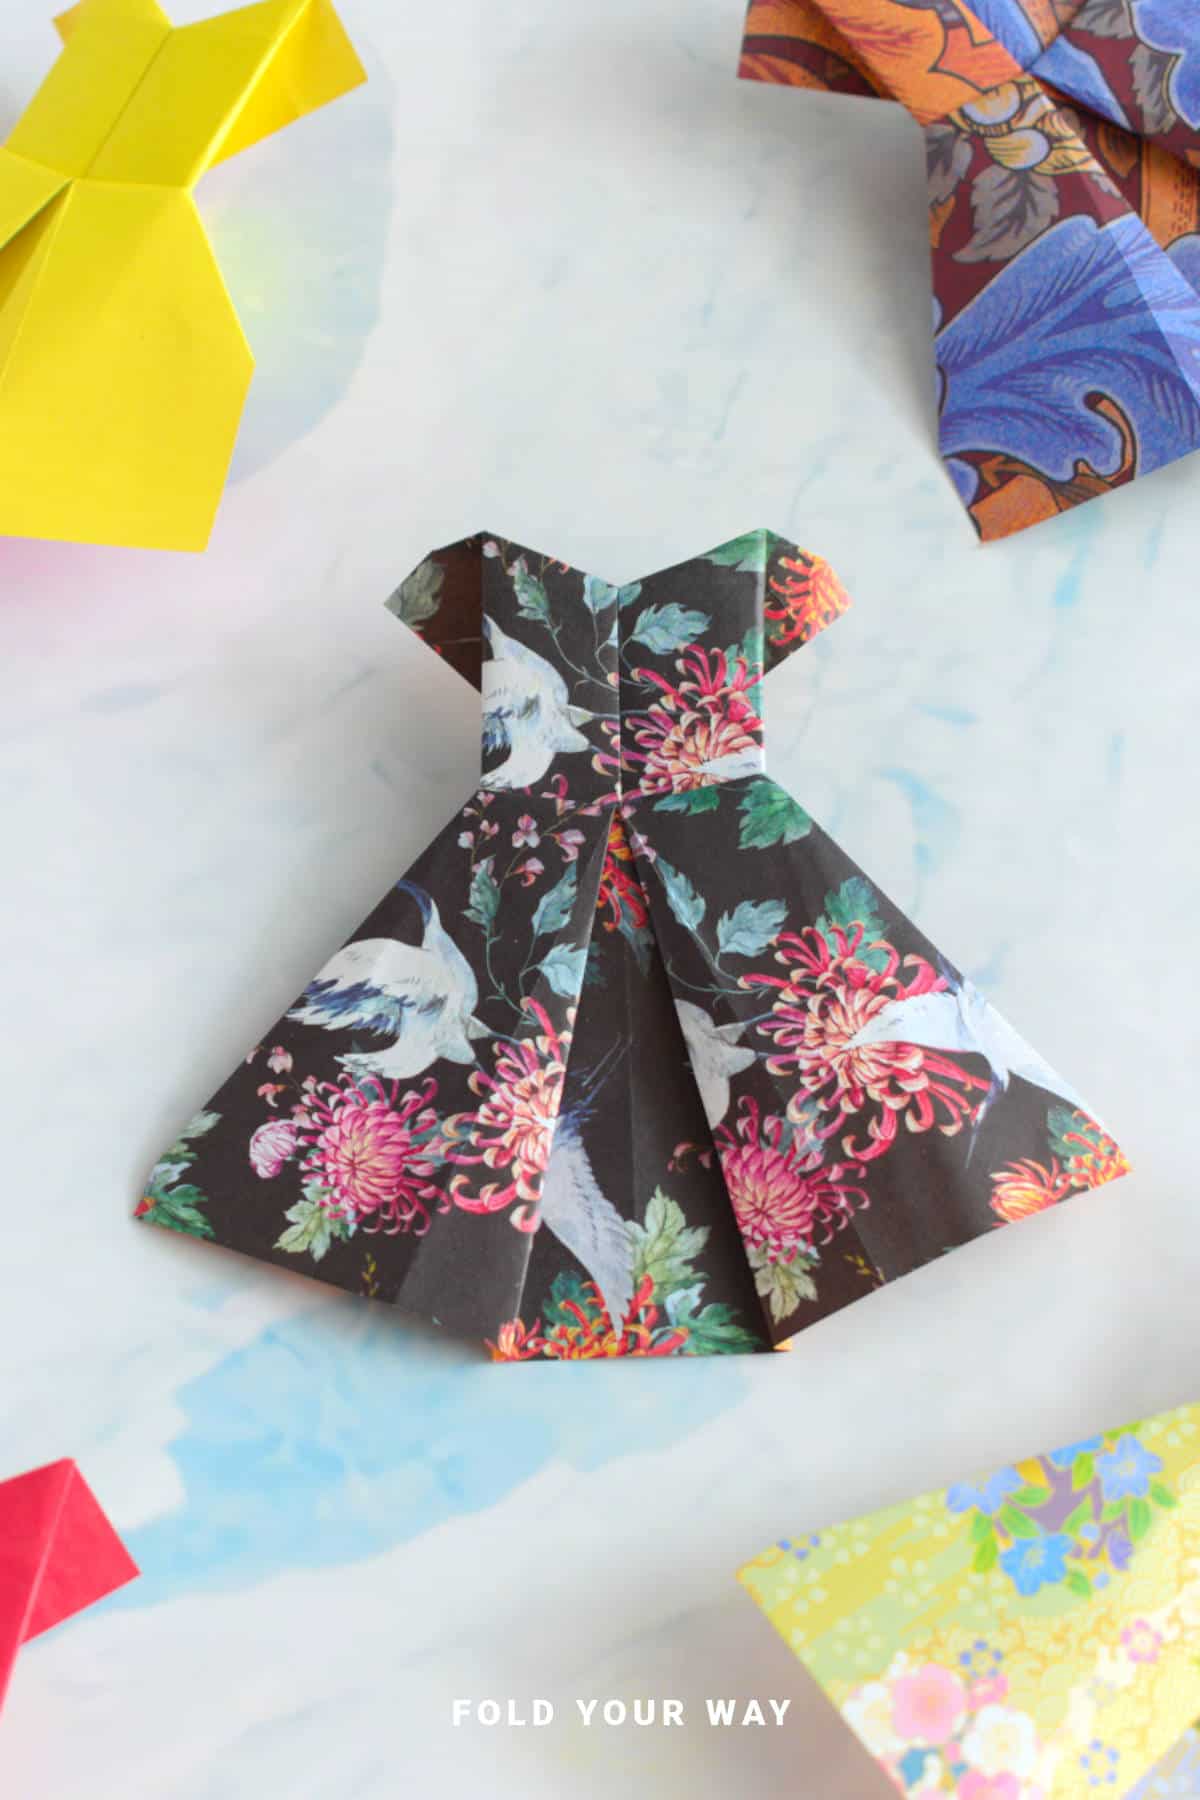
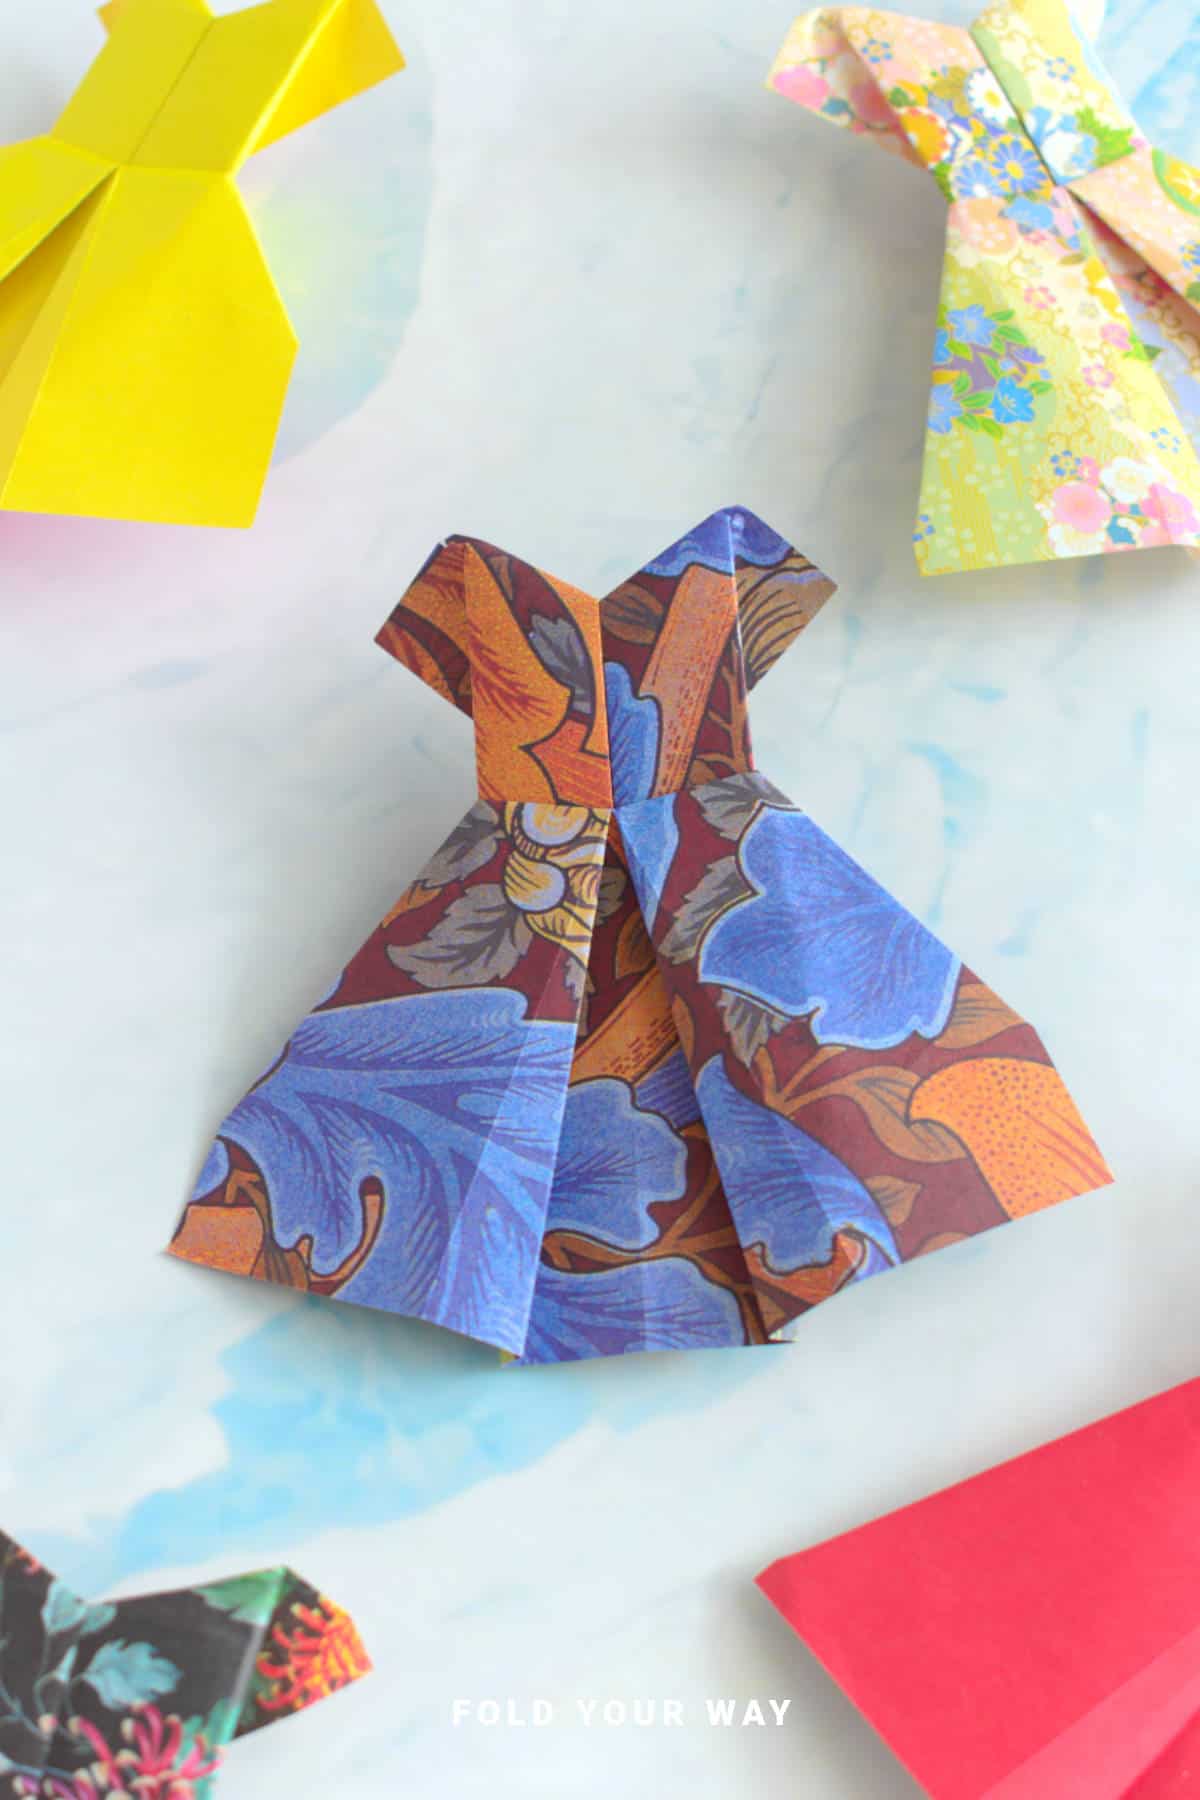
This easy origami dress is a charming paper folding project you can make with just one square sheet of paper—no cutting or glue required!
Great for cards, gift tags, decorations, or even party themes like baby showers, birthdays, or Mother’s Day.
Jump to:
If you're looking for a fun and elegant paper craft that’s quick to make but still makes a lovely impression, this easy origami dress is a perfect choice.
With just one square sheet of paper, you can fold a cute little dress that works beautifully for handmade greeting cards, scrapbooking, party invitations, or themed decorations.
It’s also a great craft for kids, teens, or anyone who enjoys paper folding—whether you're brand new to origami or have a few folds under your belt.
This origami dress makes a lovely touch for occasions like Mother’s Day, baby showers, birthdays, or even bridal showers. Want to turn it into a DIY gift tag?
Just tape it onto a blank tag and write your message on the back. You could also attach a few to a string and create a mini dress garland—adorable for decorating a cake table or adding detail to a room.
This easy origami tutorial is perfect for beginners but still satisfying to complete. The folds are simple, and the end result is surprisingly stylish and pretty.
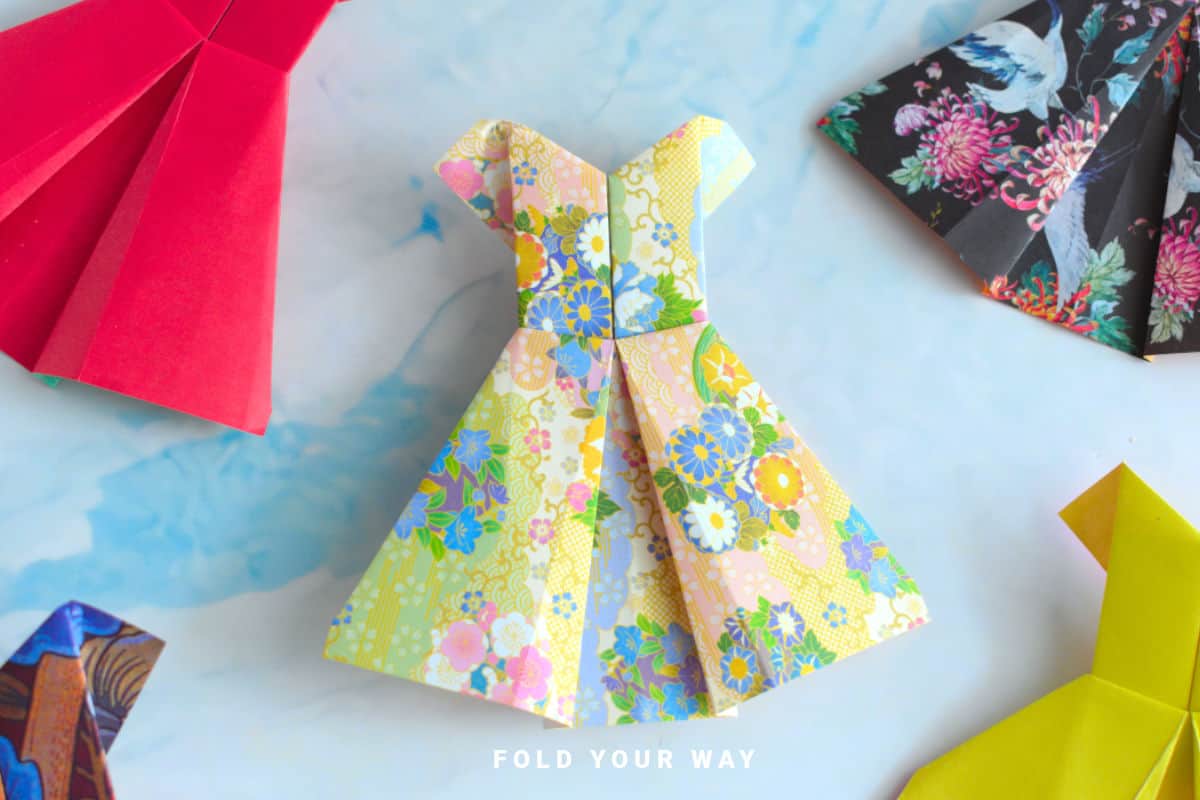
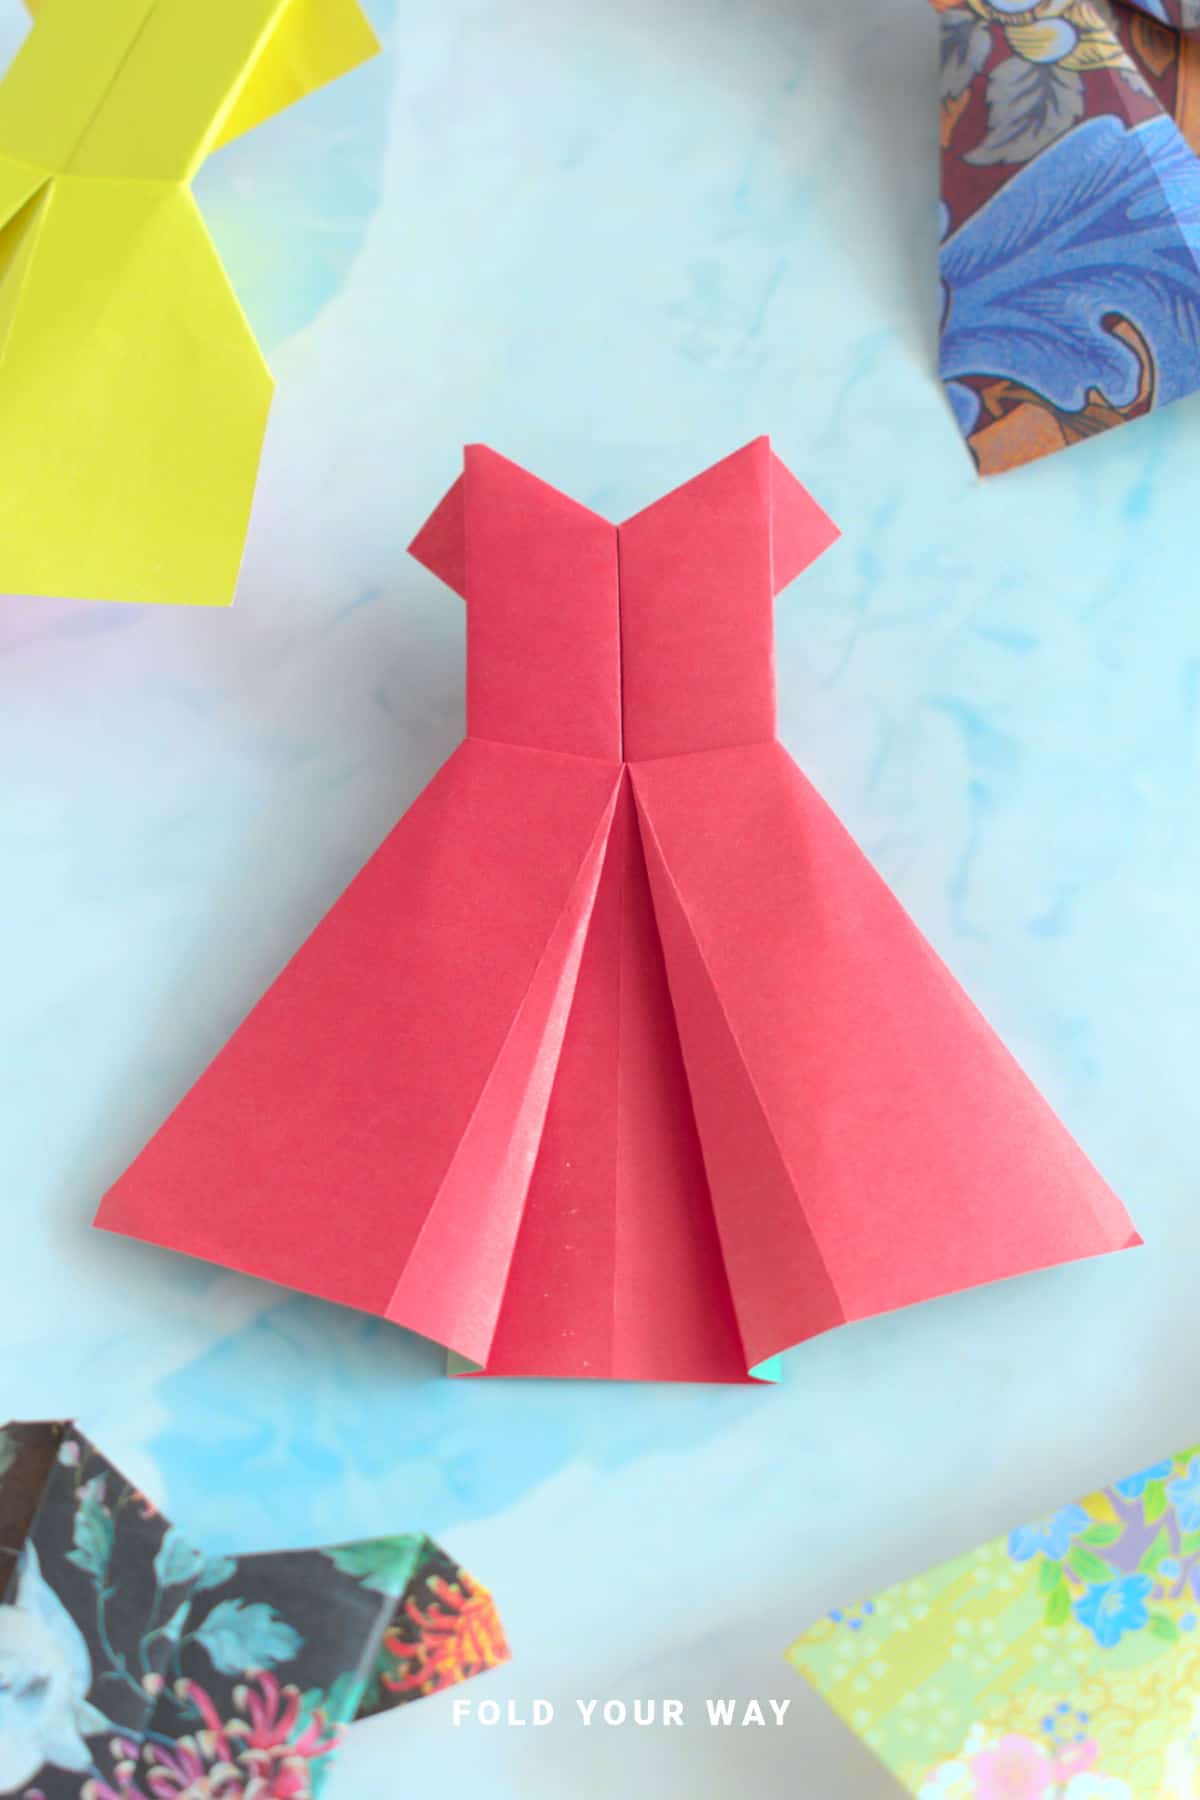
You can experiment with different paper designs, colors, and even sizes.
It's a cool origami idea that feels both playful and elegant, and once you try it, you'll likely want to make more.
Why You'll Love This Pattern
- Just one square sheet of paper needed—no glue, tape, or scissors
- Great for handmade cards, gift tags, scrapbooking, or garlands
- Perfect for birthdays, Mother’s Day, baby showers, or even dress-themed party decor
- Easy to fold and beginner-friendly
- Cute origami project with endless color/pattern options
- Great as an easy DIY tutorial for kids or adults
Skill Level
★☆☆☆☆ (Easy)
Materials Needed
1 square sheet of paper (any size, ideally lightweight or origami paper)
Note: an origami dress made with 6 inch x 6 inch (15 cm x 15 cm) paper will make a paper dress that is about 4 inches x 5 inches (11 cm x 12 cm).
Instructions
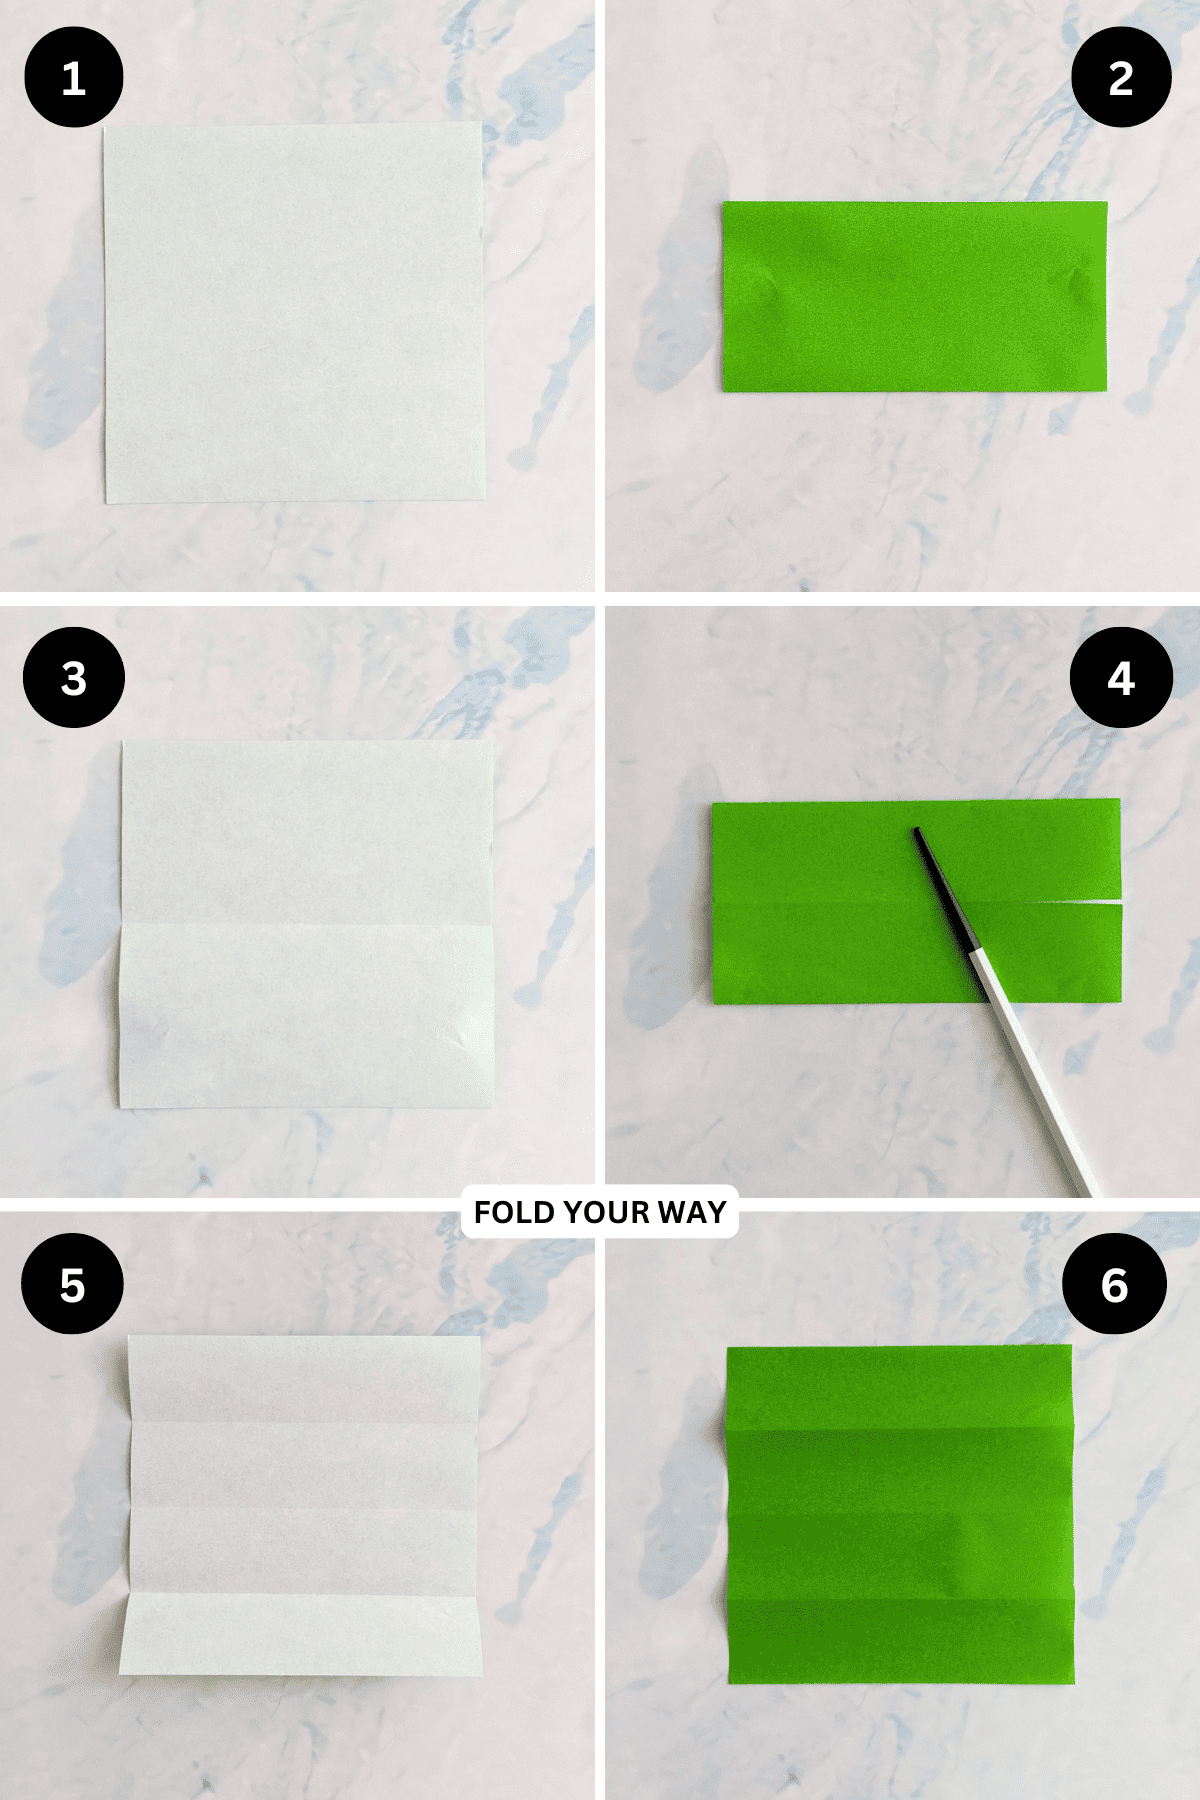
Step 1: Start with the color you want your dress to be facing down.
Step 2: Fold the bottom edge up to meet the top edge.
Step 3: Unfold previous step.
Step 4: Fold both the top and bottom edges in to meet the middle.
Step 5: Unfold previous step.
Step 6: Flip your paper over from left to right, making sure the creases are still running horizontally.
Step 7: Fold the 1st crease from the bottom up to meet the middle.
Step 8: Fold the 1st crease from the top down to meet the middle.
Step 9: Flip your paper over and arrange it to sit as shown.
Step 10: Fold the top edge down to meet the bottom edge.
Step 11: Fold the bottom edge (top layer only) up along the line shown.
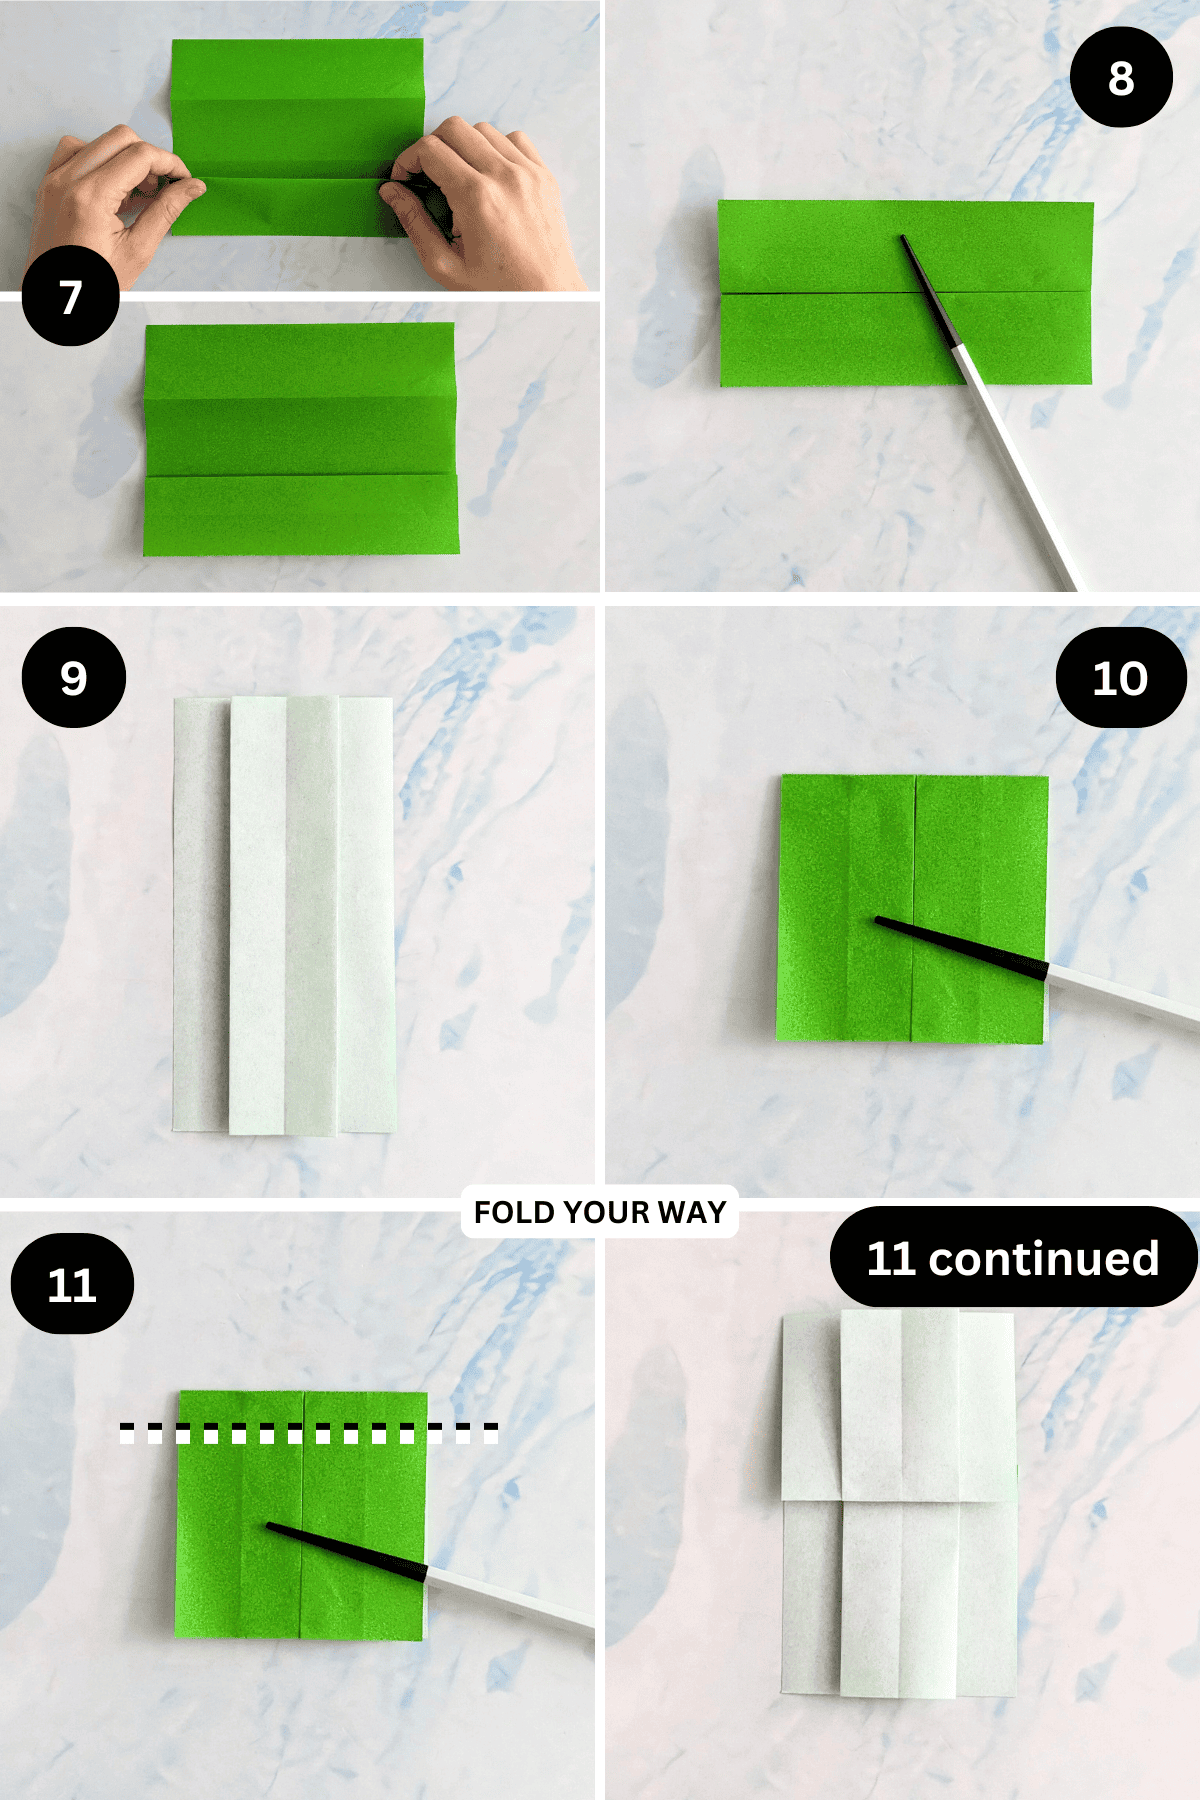
Step 12: Flip your paper over from left to right.
Step 13: Holding the top layer of the bottom left section, open it out slightly as shown.
Step 14: Repeat previous step for the bottom right section.
Step 15: Flip your paper over from left to right.
Step 16: Fold the top edge down along the line shown.
✨ You're almost there! ✨
To unlock the final steps and complete your pattern, create a free account with Grow.me. below.
Make sure you tick the box to subscribe to our newsletter and stay up to date with the latest patterns, tips, and more!
Once you're signed up, you'll get instant access to finish your project and enjoy exclusive content in the future.
Already signed up? Hit the button below and select ‘Switch to Log In’ to pick up where you left off and finish your project!
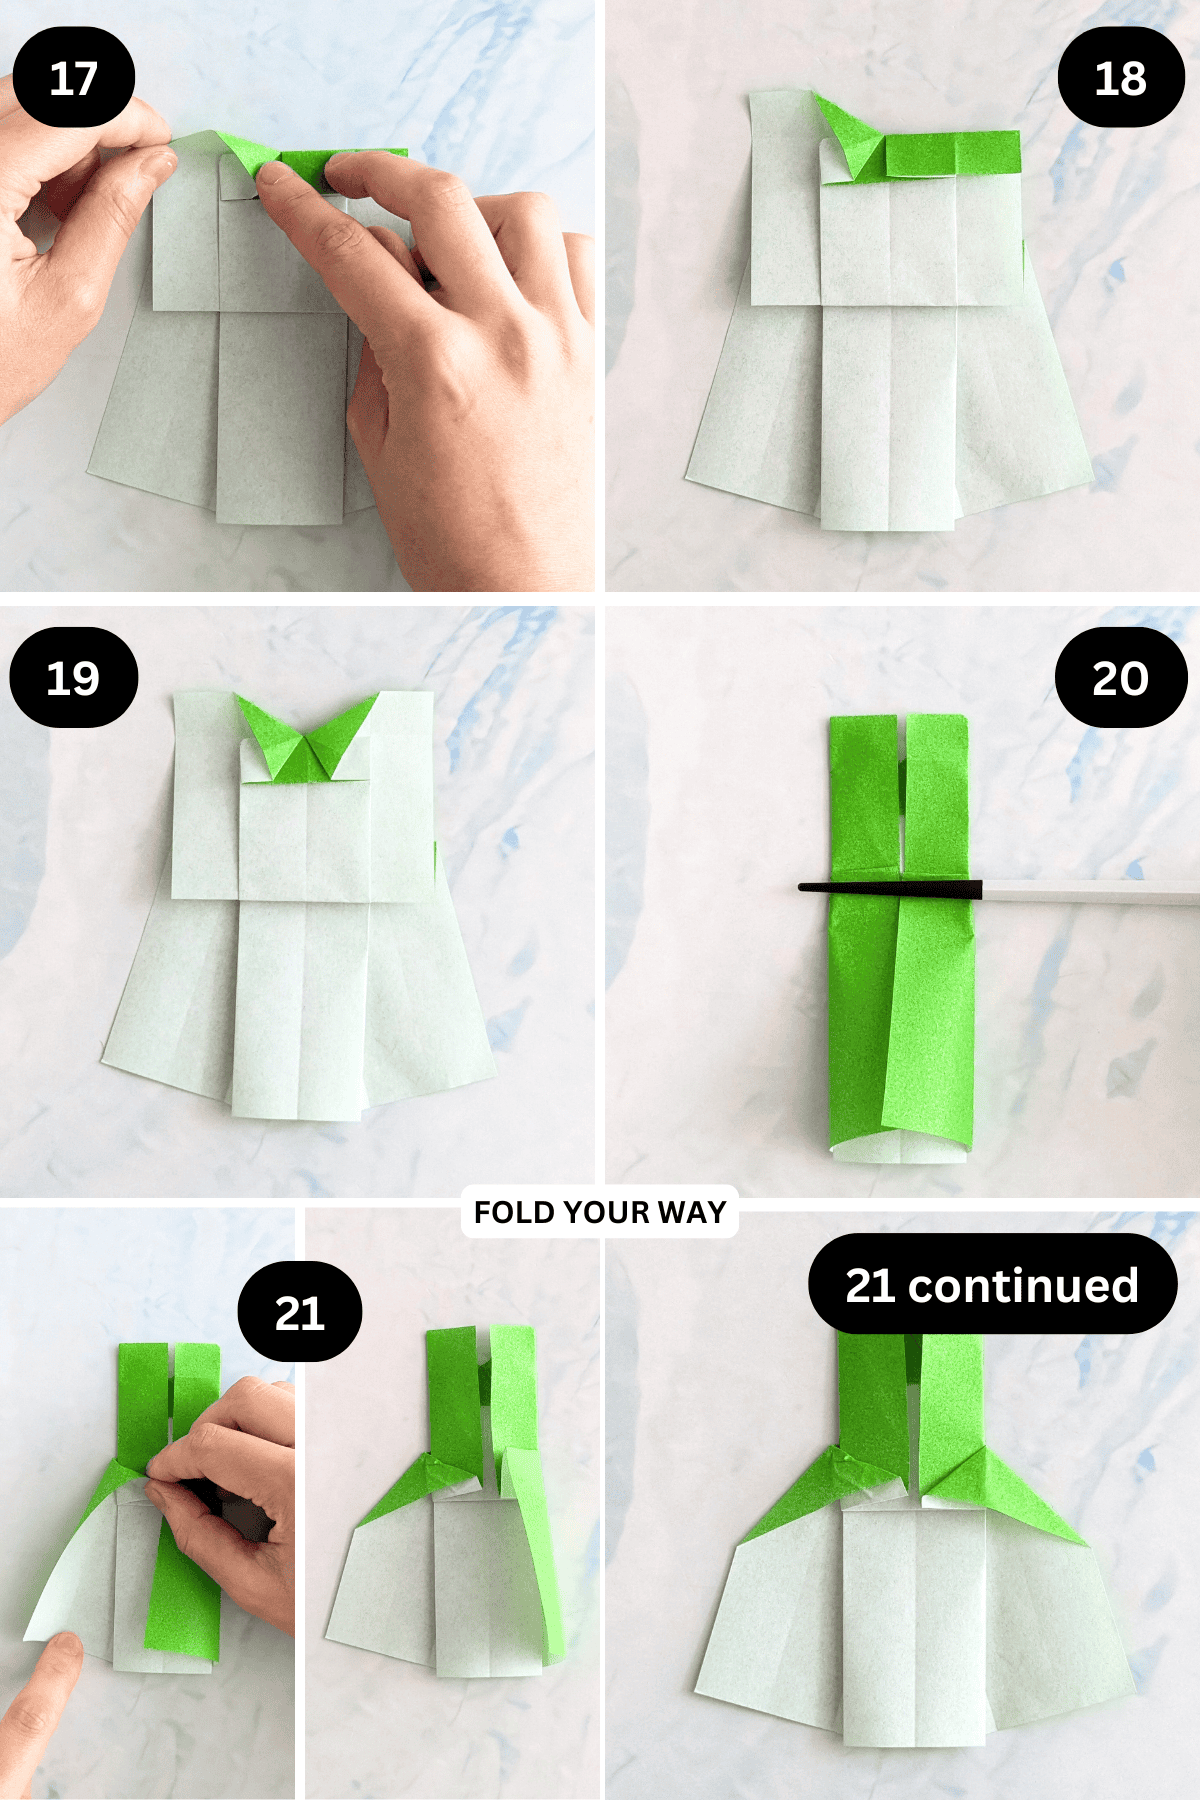
Step 17: Open out the top left section as shown.
Step 18: Still working on the top left section, flatten it as shown.
Step 19: Repeat previous 2 steps for the top right section. Try to keep it as symmetrical as possible to the left side.
Step 20: Fold both the left and right sides in to the middle as shown, creasing only on the top section.
Step 21: Slightly open out the bottom edges and flatten. The angle you fold the bottom half in will change how wide your skirt will be.
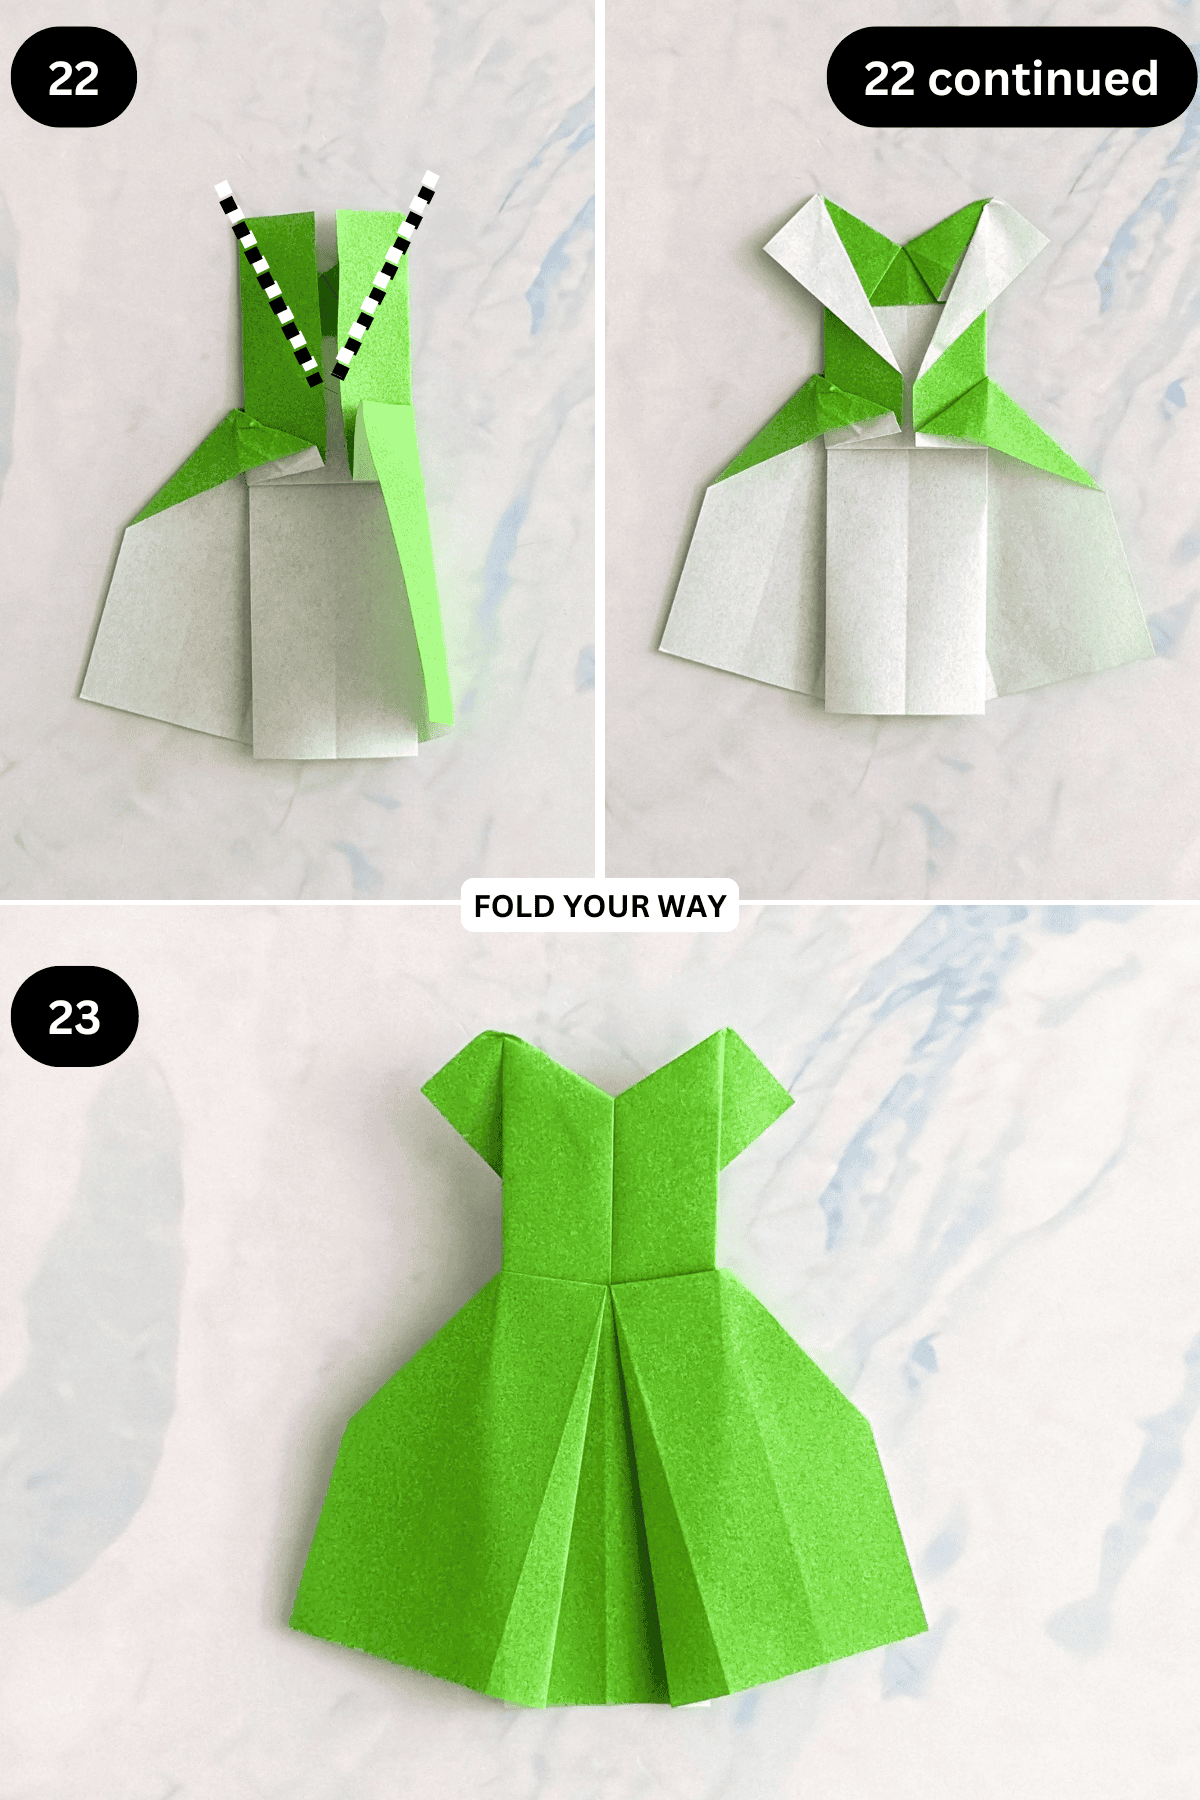
Step 22: Fold the top left and top right (top layer only) edges out along the lines shown.
Step 23: Flip your paper over from left to right. Completed dress.
Tips For Success
- Thinner paper (like origami paper) makes it easier to shape the folds cleanly
- Try using patterned paper for a fun, dress-like effect
- Fold slowly and crease each fold well to keep the dress looking neat
- To make a garland, fold several dresses and attach them to a string with small clothespins or tape
- Want a sparkly version? Use metallic paper or glitter cardstock for a fun twist
Common Mistakes & How To Avoid Them
- Paper too thick – Heavier paper can be hard to fold and won’t hold the shape as well. Stick with lightweight paper.
- Folds not aligned – Take your time to line up edges and corners carefully for a clean look.
- Losing the dress shape – If folds feel off, gently unfold or adjust the folds again.
- Creases not sharp enough – Press down with your fingers or a flat edge (like a ruler) to sharpen each fold.
Color, Paper Ideas, and Variations
- Patterned paper – Use floral, striped, or polka dot paper to mimic different dress styles
- Solid color + embellishments – Decorate with bows, sequins, or stickers for a festive look
- Metallic or shimmer paper – Great for weddings or elegant event cards
- Mini dress garland – Fold several tiny dresses and attach to a string for baby showers or parties
- Card topper – Glue the dress to the front of a blank card for a handmade greeting
FAQ
Any square paper will work. A good starting point is 6 inch x 6 inch (15 cm x 15 cm) paper, but you can size up or down depending on your project.
Yes, just trim it into a square first. Thinner paper folds better for this design.
A dot of glue or some double-sided tape on the back works perfectly.
Definitely! The steps are easy to follow, and it’s a great introduction to folding shapes.
Other Crafts You Might Like To Try:
Stay Connected
Made this pattern? Let us know how it went in the comments below!
Pin this post - Pin now to take your paper crafting skills to the next level.
Share on Instagram or Facebook - Capture the beauty of your finished paper craft project and share it on Instagram or Facebook! Tag us @foldyourway so we can see your work!
Other Patterns You Might Like To Try:
Looking for other easy patterns like this? Try these:


Comments
No Comments