
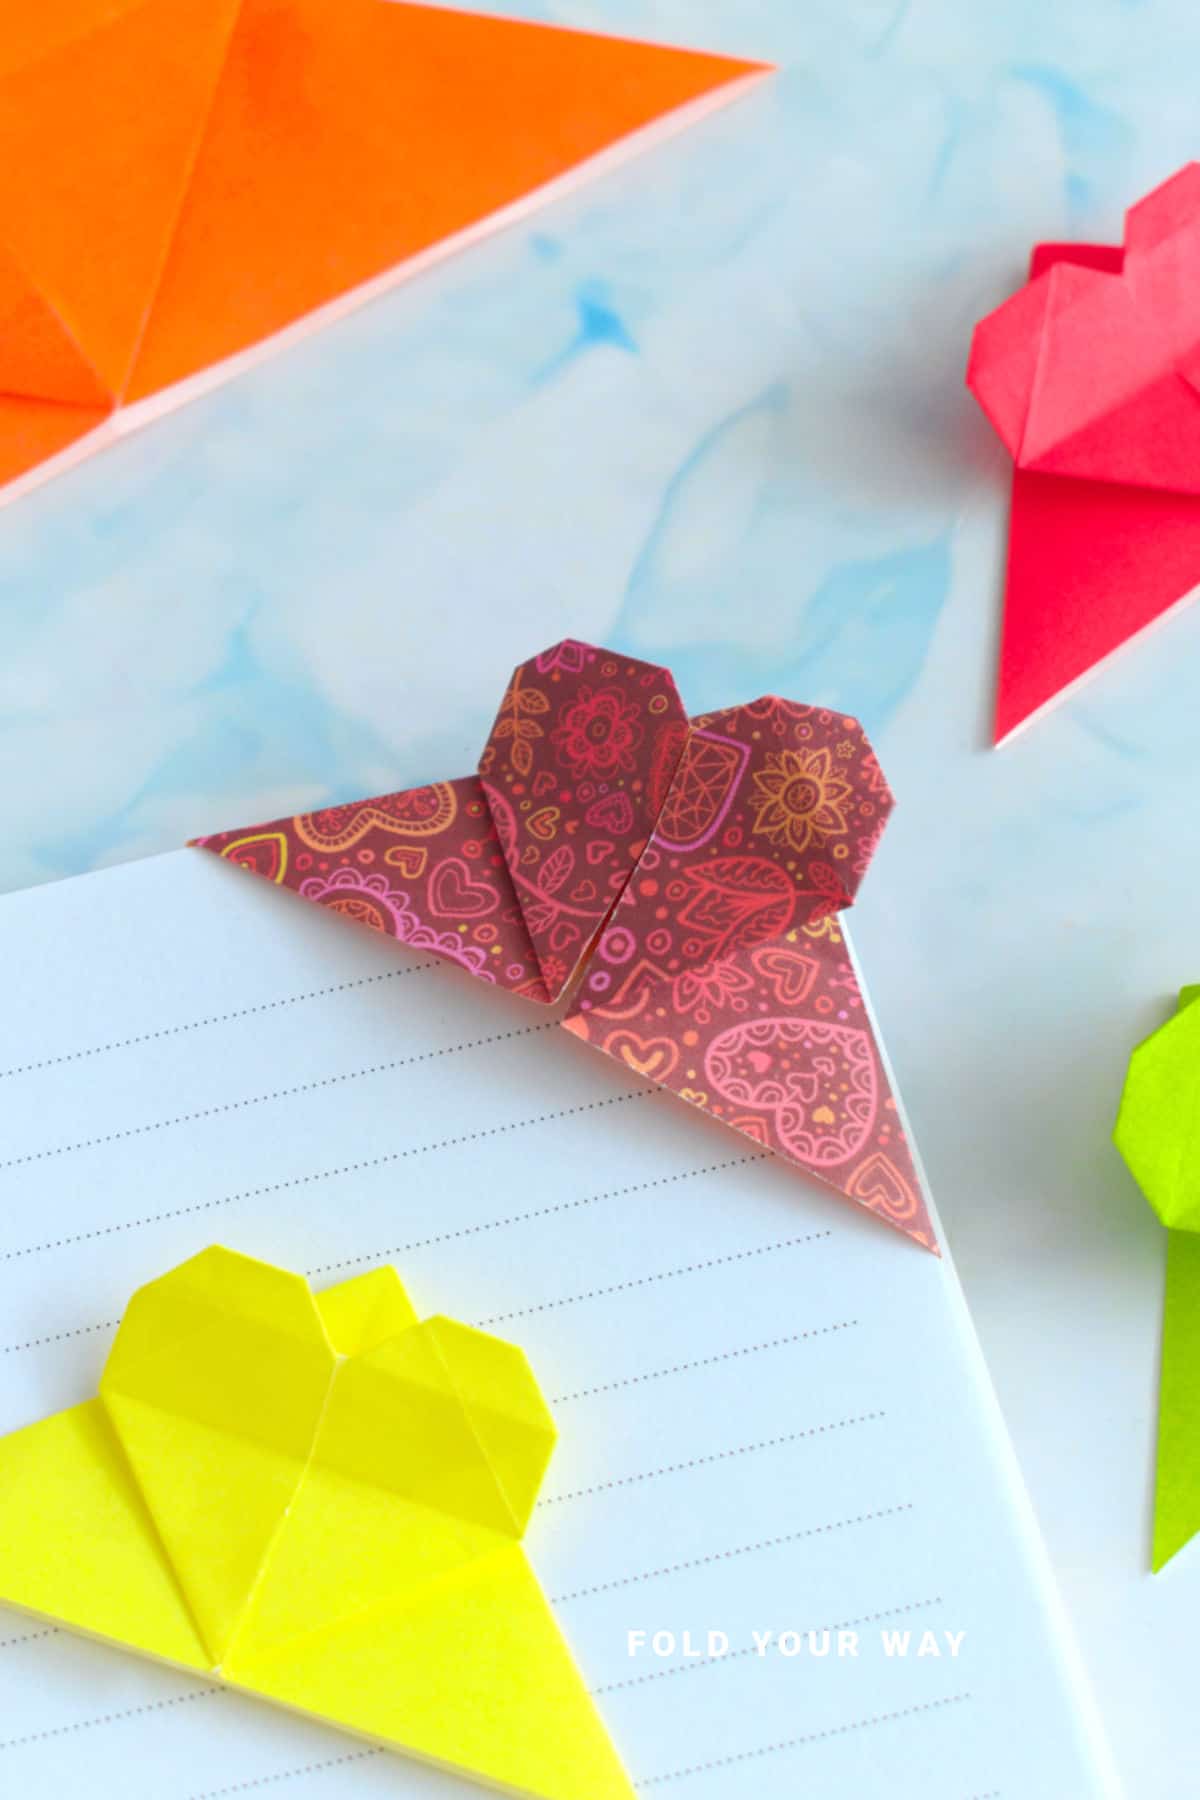
This heart origami corner bookmark is easy to make and perfect for Valentine’s Day, Mother’s Day, or just to add a little love to your reading time.
All you need is one square piece of paper!
Jump to:
Whether you're crafting for a special occasion or simply love adding handmade touches to everyday items, this heart origami corner bookmark is a fun and thoughtful project.
With just one square sheet of paper, a few folds, and no glue or scissors required, you’ll end up with a cute and functional paper craft that’s as charming as it is useful.
Perfect for Valentine’s Day, anniversaries, Mother's Day, or even wedding favors, this easy origami bookmark is also a great classroom or library craft.
It makes a beautiful addition to gift bags, card inserts, or even a DIY book-themed present.
You can personalize it with colors, patterns, or tiny handwritten messages, and because it’s folded from a single square, it’s a great project for beginners or anyone short on time.
This is one of those easy origami ideas that doesn’t take long but looks impressive when complete.
It’s fun, functional, and absolutely adorable — whether you’re making it for yourself or gifting it to someone special.

Why You'll Love This Pattern
- Super cute origami bookmark
- Only one square sheet of paper required
- No scissors or glue needed
- Great for all ages — truly easy DIY tutorial
- Perfect for holidays, parties, classrooms, and more
- Makes a thoughtful handmade gift
Skill Level
★☆☆☆☆ (Easy)
Materials Needed
1 square piece of paper, e.g. origami paper
| Paper Size | Final Heart Bookmark Size | |
| Small Origami Bookmark | 3 inches x 3 inches (7.5 cm x 7.5 cm) | 3 inches x 1.5 inches (7.5 cm x 4 cm) |
| Large Origami Bookmark | 6 inches x 6 inches (15 cm x 15 cm) | 6 inches x 3 inches (15 cm x 7.5 cm) |
Instructions
Step 1: Start with the color you want your heart bookmark to be facing up.
Step 2: Fold the bottom edge up to meet the top edge.
Step 3: Unfold previous step.
Step 4: Fold the left edge to meet the right edge.
Step 5: Unfold previous step.
Step 6: Flip your paper over from left to right.

Step 7: Fold the bottom left corner up to meet the top right corner.
Step 8: Unfold previous step.
Step 9: Fold the bottom right corner up to meet the top left corner.
Step 10: Unfold previous step.
Step 11: Hold both the left and right sides as shown.
Then, collapse the sides of the paper in to bring the top edge to meet the bottom edge. You will end up with a triangle shape. This is known as the water bomb base.

✨ You're almost there! ✨
To unlock the final steps and complete your pattern, create a free account with Grow.me. below.
Make sure you tick the box to subscribe to our newsletter and stay up to date with the latest patterns, tips, and more!
Once you're signed up, you'll get instant access to finish your project and enjoy exclusive content in the future.
Already signed up? Hit the button below and select ‘Switch to Log In’ to pick up where you left off and finish your project!
Step 12: Fold the top point down to meet the bottom edge.
Step 13: Unfold previous step.
Step 14: Open out the top layer as shown so it stands slightly along the crease you made in step 12.
Step 15: Bring the bottom left corner (top layer only) up to the top centre to form a new diagonal crease on the bottom.
Step 16: Repeat previous step for the bottom right corner (top layer only).
Step 17: Fold the top flap down. Do this gently without flattening the paper too much (if you make a strong crease here you will see it in your finished bookmark).

Step 18: Fold the bottom edge of the same flap up to meet the middle crease.
Step 19: Lift the flap you folded up in the previous step so that it stands as shown.
Step 20: Open out, then flatten the flap from the previous step by pushing on both the left and right edges of the flap.
Step 21: Fold both the inner corners of the top flap diagonally out to form two points.
Step 22: Fold the lower points up slightly as shown.
Step 23: Fold the entire top flap up to reveal the heart shape. Completed heart bookmark.

Tips For Success
- Add stickers, doodles, or initials to personalize
- Thinner paper is easier to work with

Color, Paper Ideas, and Variations
- Classic red or pink – Perfect for Valentine’s Day
- Pastels – Soft shades make it ideal for weddings or baby showers
- Patterned paper – Hearts, florals, or polka dots add a fun twist
- Mini bookmarks – Use smaller squares for party favors or planner decorations
- Message inside – Write a little note on the back before gifting
FAQ
Yes! It’s a great intro to folding and a fun paper craft activity.
Yes, the corner fits snugly without damaging your pages.
Absolutely! Tuck it into a card or gift book — it's a thoughtful, cute origami detail.
Other Crafts You Might Like To Try:
Helpful Tips and Common Mistakes For Paper Crafts
Paper crafting and origami can be hard sometimes. Which is why we've made this printable PDF just for you.
It outlines helpful tips so that you can successfully complete your craft, and some of the most common mistakes people come across.
You can download the helpful tips and common mistakes for paper crafts printable PDF here.
Stay Connected
Made this pattern? Let us know how it went in the comments below!
Pin this post - Pin now to take your paper crafting skills to the next level.
Share on Instagram or Facebook - Capture the beauty of your finished paper craft project and share it on Instagram or Facebook! Tag us @foldyourway so we can see your work!

Other Patterns You Might Like To Try:
Looking for other easy patterns like this? Try these:


Comments
No Comments