
Make a classic origami paper hat with just one sheet of paper!
This easy origami hat is perfect for beginners, classroom fun, or themed party crafts.
Great for playtime, decorations, or even costume accessories!
Jump to:
Looking for a fun and easy paper folding idea that’s both nostalgic and practical?
This traditional origami hat is a classic project that many remember from childhood—and it’s just as fun today!
Made from a simple rectangular sheet of paper, this DIY paper hat is a great beginner origami activity for kids and adults alike.
Whether you're crafting for a school event, party, or just a rainy-day project at home, this easy origami hat is quick to fold and surprisingly versatile.
It’s especially great for pirate parties, plays, craft time at school, or imaginative play at home.
You can decorate the finished hat with stickers, markers, or washi tape to match any theme—be it Halloween, birthday parties, or book week.
You can even size it up using newspaper for a wearable version!
Why You'll Love This Pattern
- A fun and fast origami project for beginners
- Only uses one rectangular sheet of paper—no glue or cutting needed
- Great for costumes, school projects, or party favors
- Customizable with color, stickers, or your own design!
- Makes a fun prop for pirate day, plays, or classroom activities
Skill Level
★☆☆☆☆ (Easy)
Materials Needed
1 rectangular sheet of paper (A4, US letter, or newspaper for larger hats)
| Paper Size | Final Hat Size | |
| Small Paper Hat | A5 | 6 inches x 3 inches (15 cm x 7.5 cm) |
| Large Paper Hat | A4 | 8 inches x 4 inches (21 cm x 10 cm) |
Note: If you want a wearable hat, you could use a sheet of newspaper.
Instructions
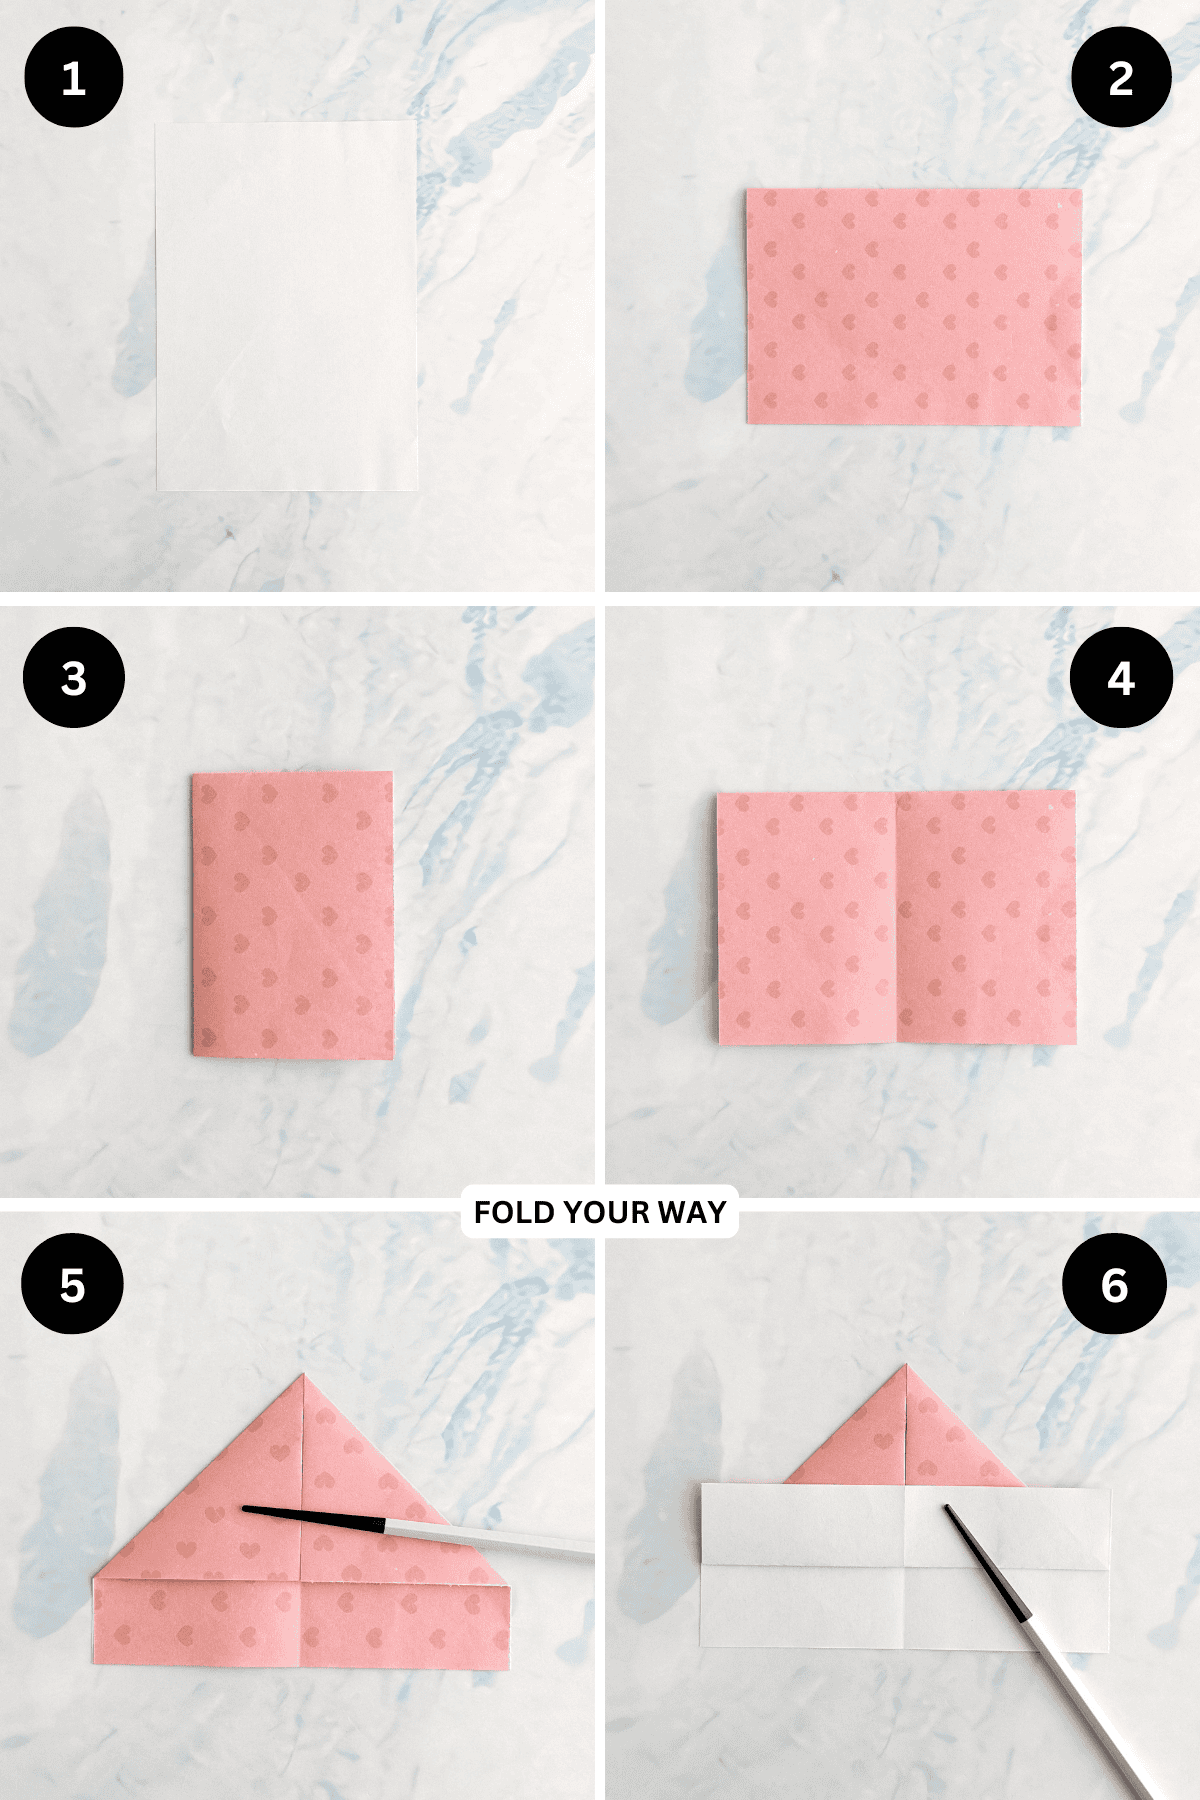
Step 1: Start with the color you want your hat to be facing down. Arrange your paper to sit vertically.
Step 2: Fold the top edge down to meet the bottom edge.
Step 3: Fold the left edge to meet the right edge.
Step 4: Unfold previous step.
Step 5: Fold both the top left and top right corners in on a diagonal to meet the middle.
Step 6: Fold the bottom edge up (top layer only) along the bottom edges of the triangles you made in the previous step.
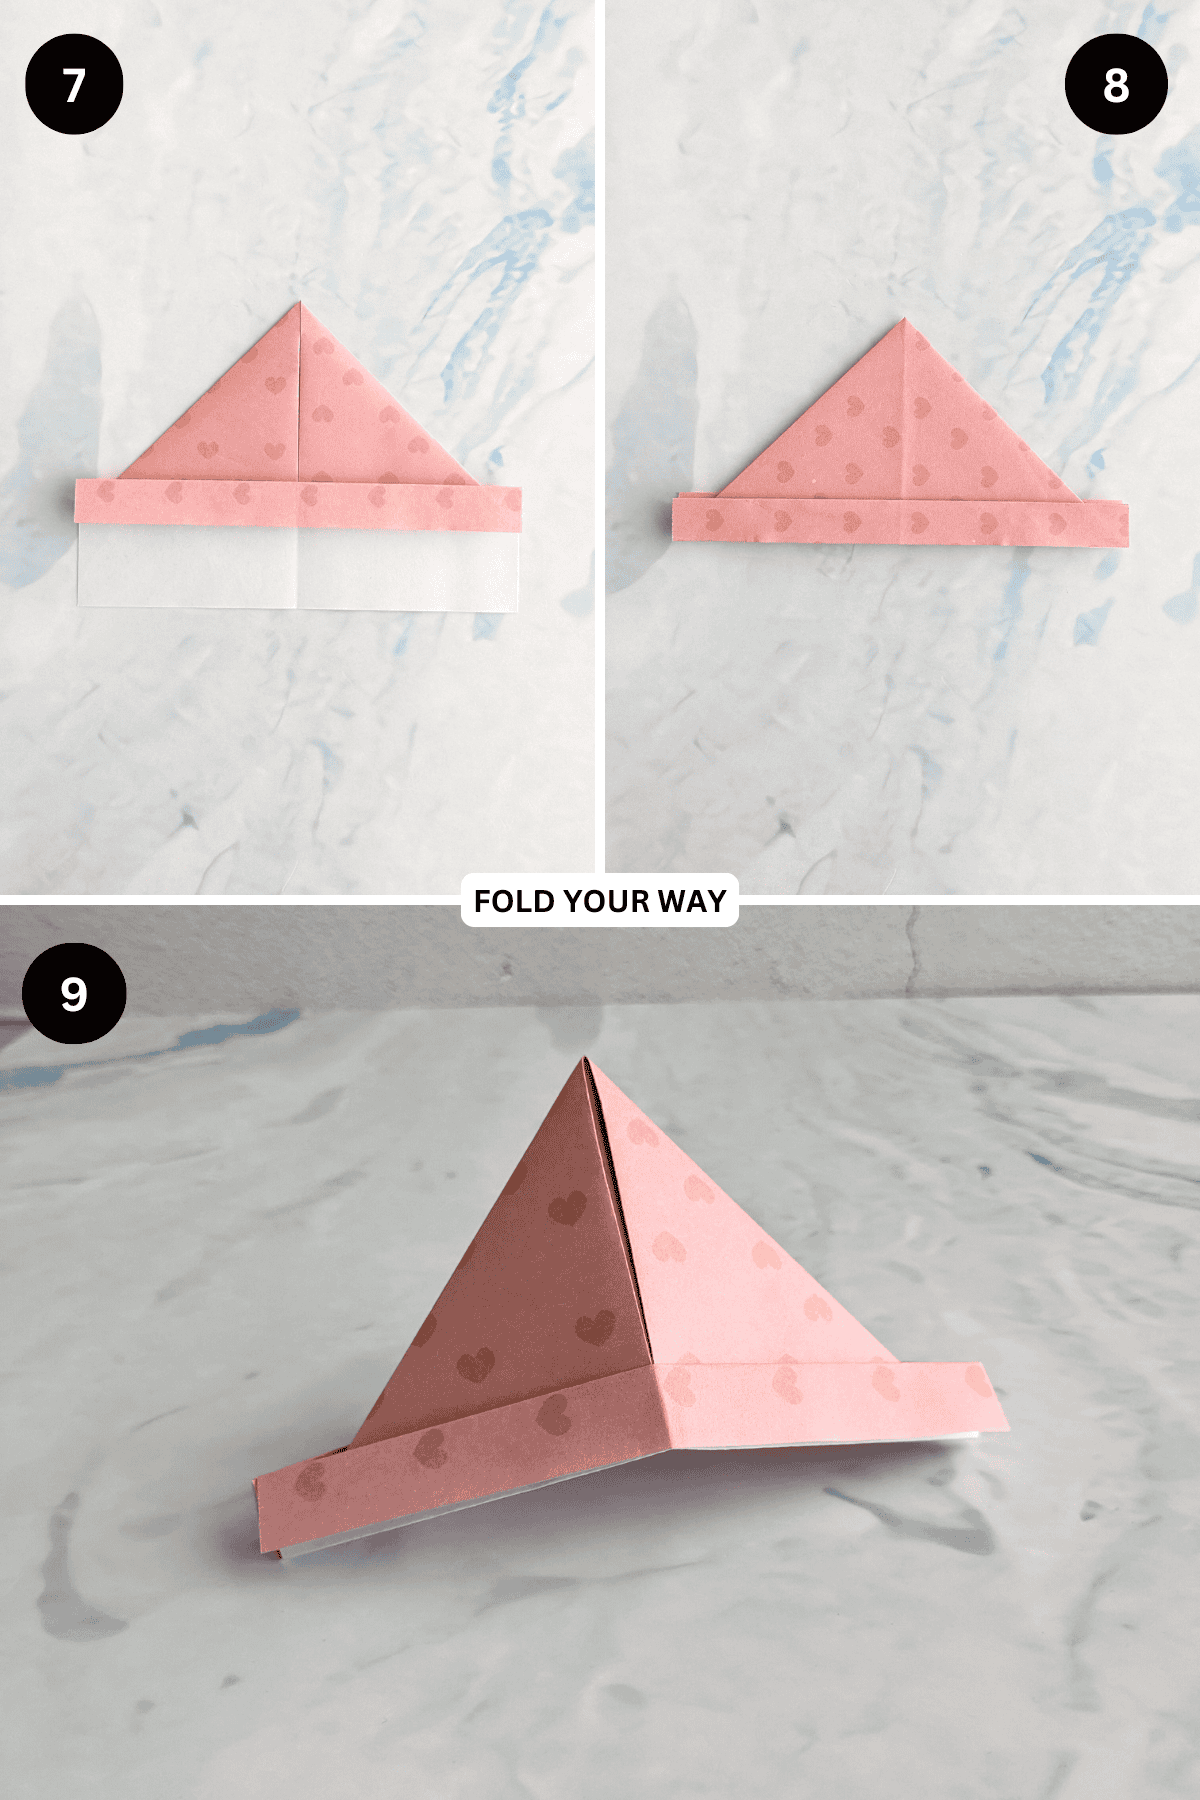
Step 7: Fold the same flap down to meet its bottom edge.
Step 8: Flip your paper over and repeat previous 2 steps.
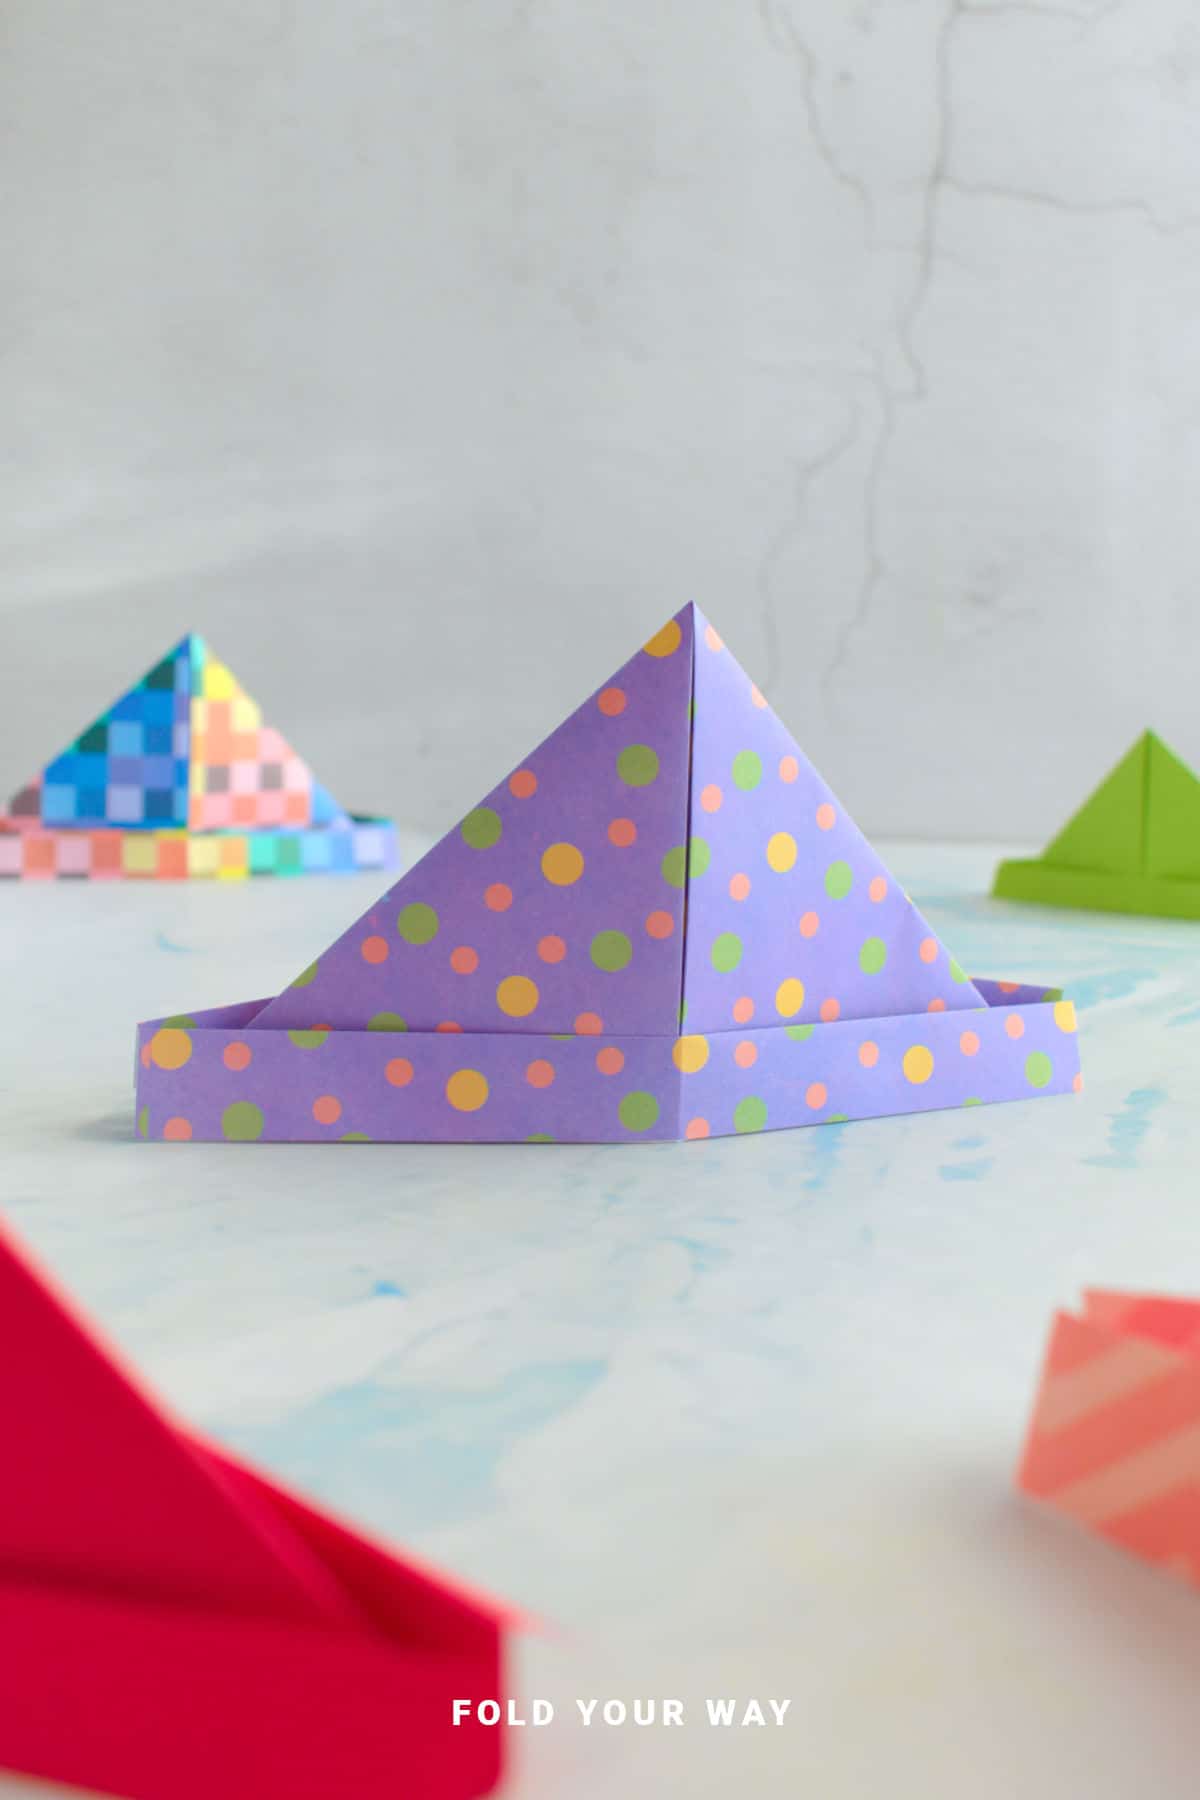
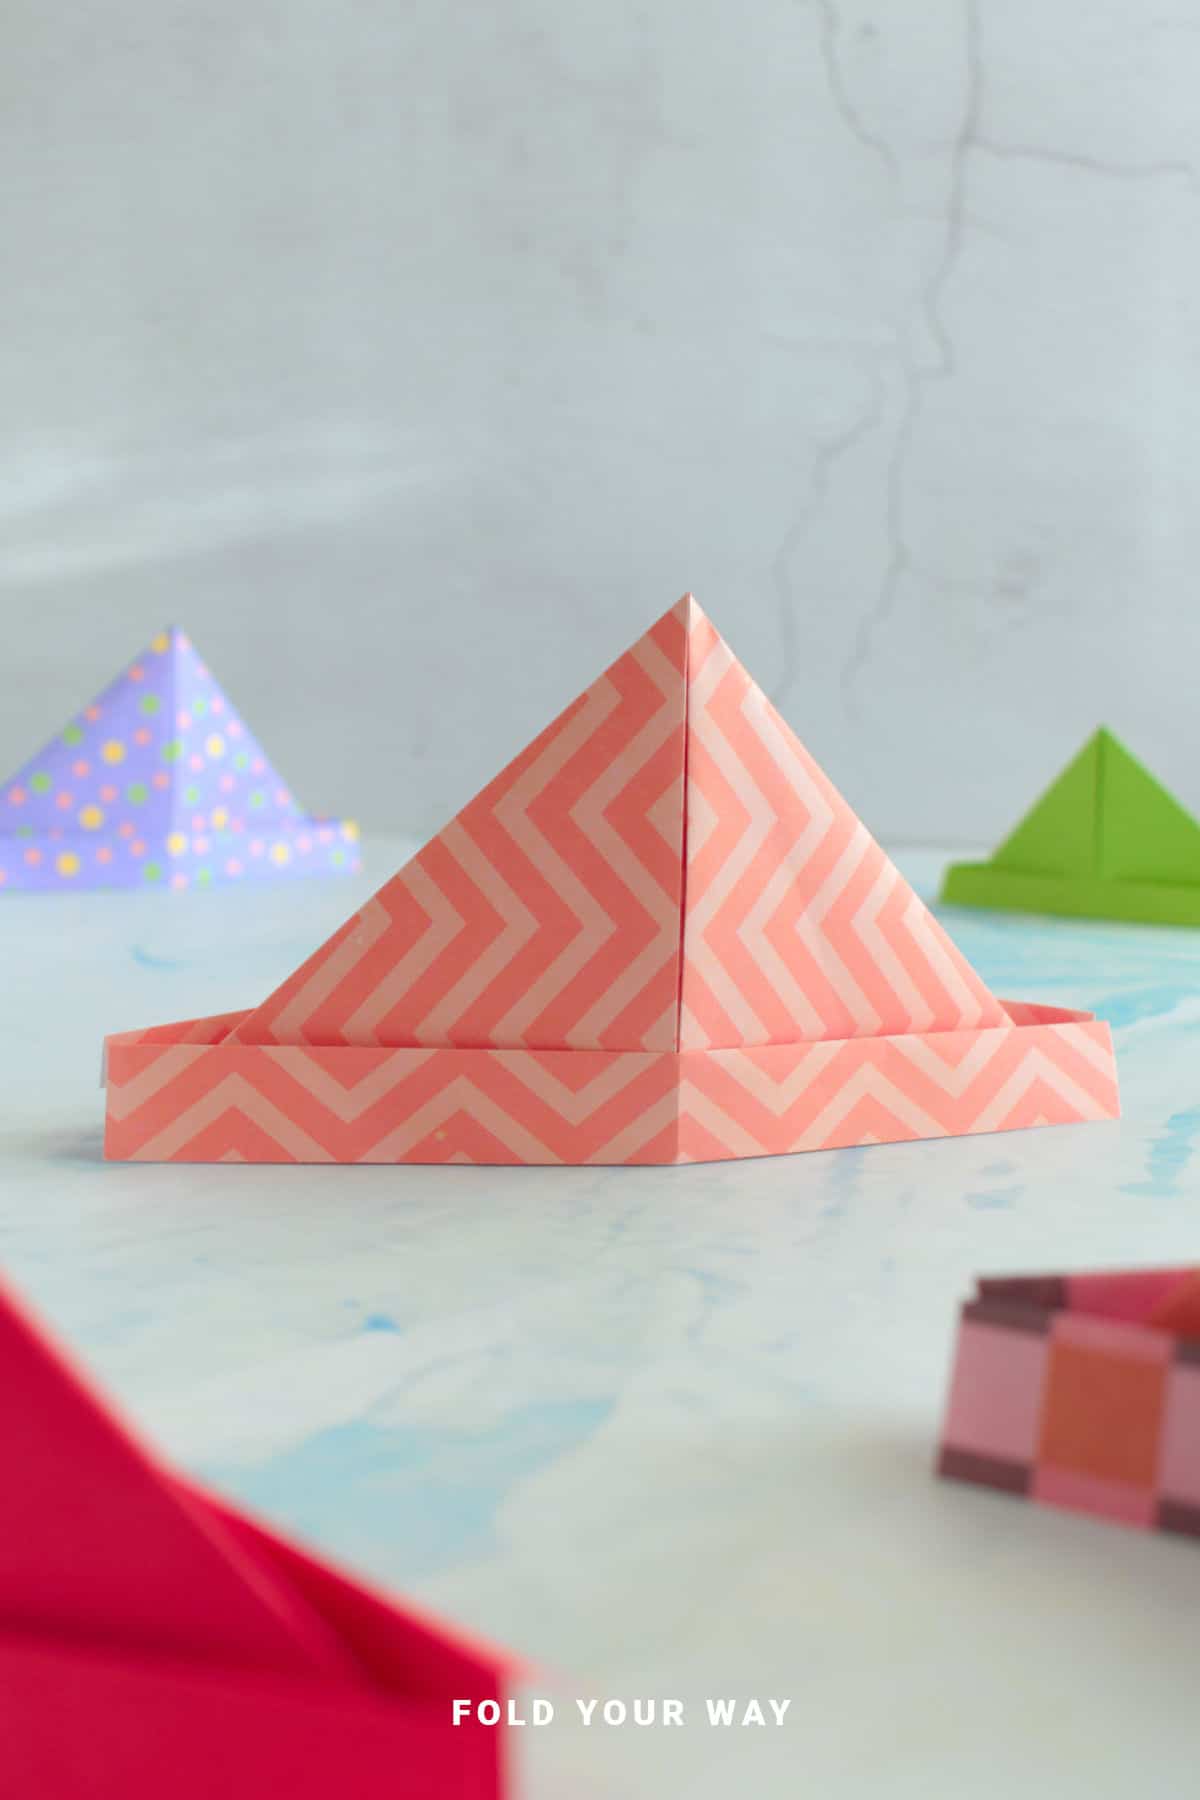
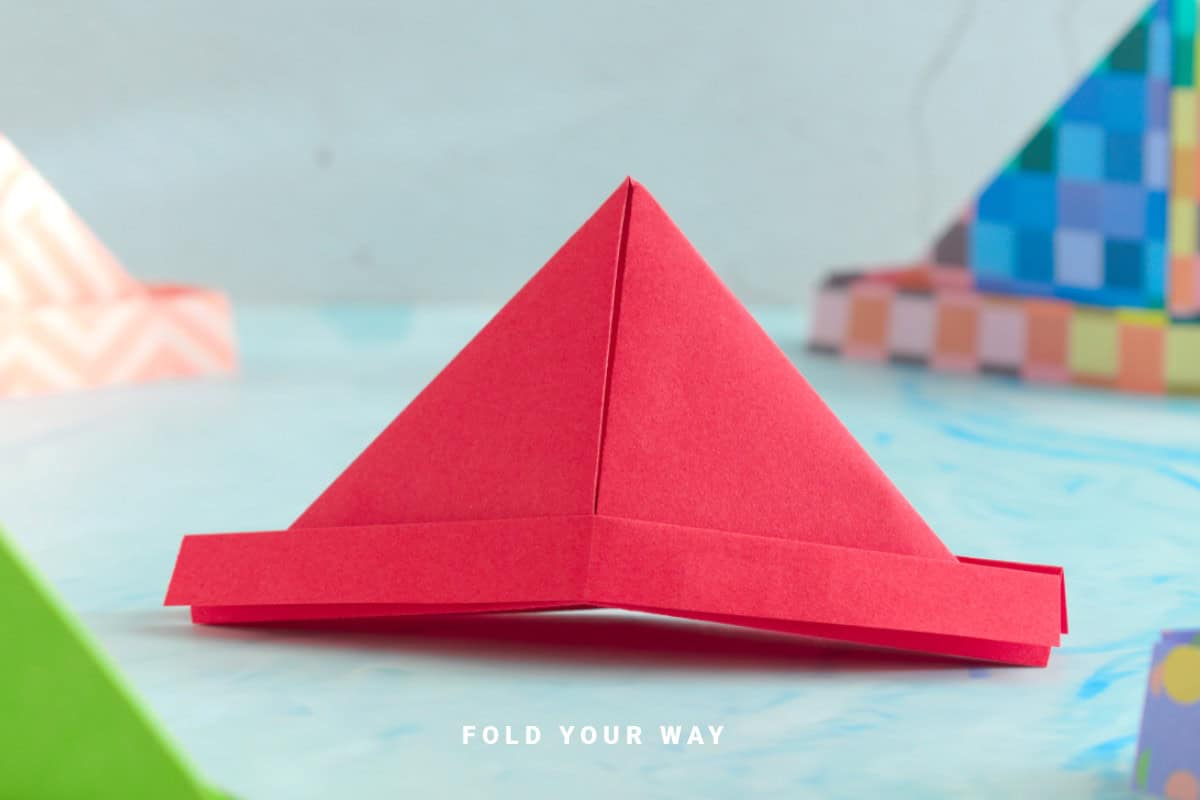
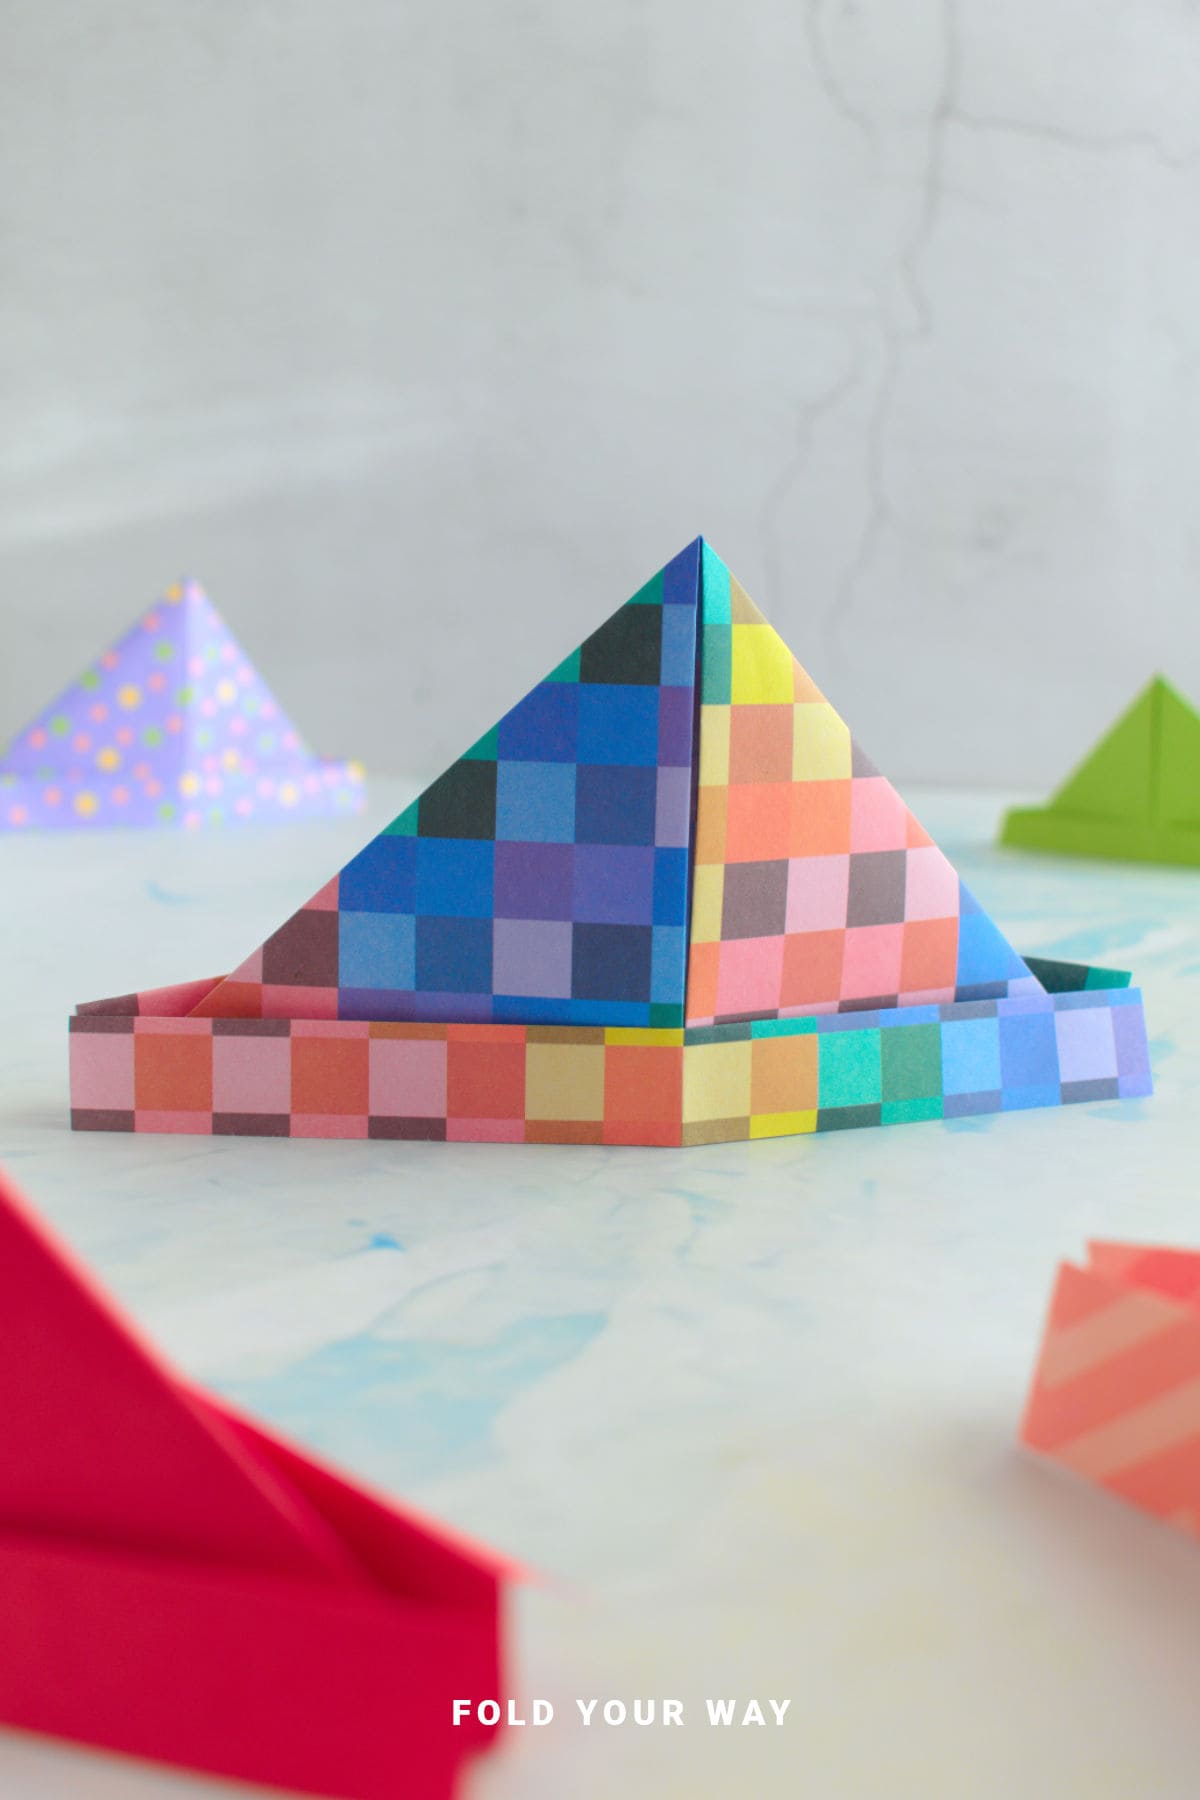
Step 9: Completed hat.
Tips For Success
- Use newspaper or wrapping paper for oversized hats you can wear
- Decorate before folding to make drawing easier
- For a sturdier hat, use slightly thicker paper (but not too thick to fold easily)
Fold edges crisply for a cleaner final look
Color, Paper Ideas, and Variations
- White printer paper is great for decorating with markers
- Use newsprint or kraft paper for a vintage look
- Try patterned scrapbook paper for party hats
- Use large construction paper to make wearable hats
- Add washi tape or stickers after folding for fun customization
- For younger kids, pre-fold some steps to make it easier
FAQ
Yes! Just use a large enough sheet of paper, like newspaper, for a wearable size.
Absolutely. It's one of the easiest origami projects—perfect for classrooms or crafting at home.
Definitely. Try pirate decorations for a party or use red and white paper for a Santa hat version.
Other Paper Crafts You Might Like To Try:
Stay Connected
Made this pattern? Let us know how it went in the comments below!
Pin this post - Pin now to take your paper crafting skills to the next level.
Share on Instagram or Facebook - Capture the beauty of your finished paper craft project and share it on Instagram or Facebook! Tag us @foldyourway so we can see your work!
Other Patterns You Might Like To Try:
Looking for other easy patterns like this? Try these:


Comments
No Comments