
This easy origami pinwheel is a fun and colorful paper craft you can make with just a few simple supplies.
It’s perfect for kids’ crafts, party decorations, or even as a cheerful embellishment for gift wrapping.
Jump to:
- Why You'll Love This Pattern
- Skill Level
- Materials Needed
- Instructions
- Tips For Success
- Common Mistakes & How To Avoid Them
- Color, Paper Ideas, and Variations
- FAQ
- Other Paper Crafts You Might Like To Try:
- Helpful Tips and Common Mistakes For Paper Crafts
- Stay Connected
- Other Patterns You Might Like To Try:
- Comments
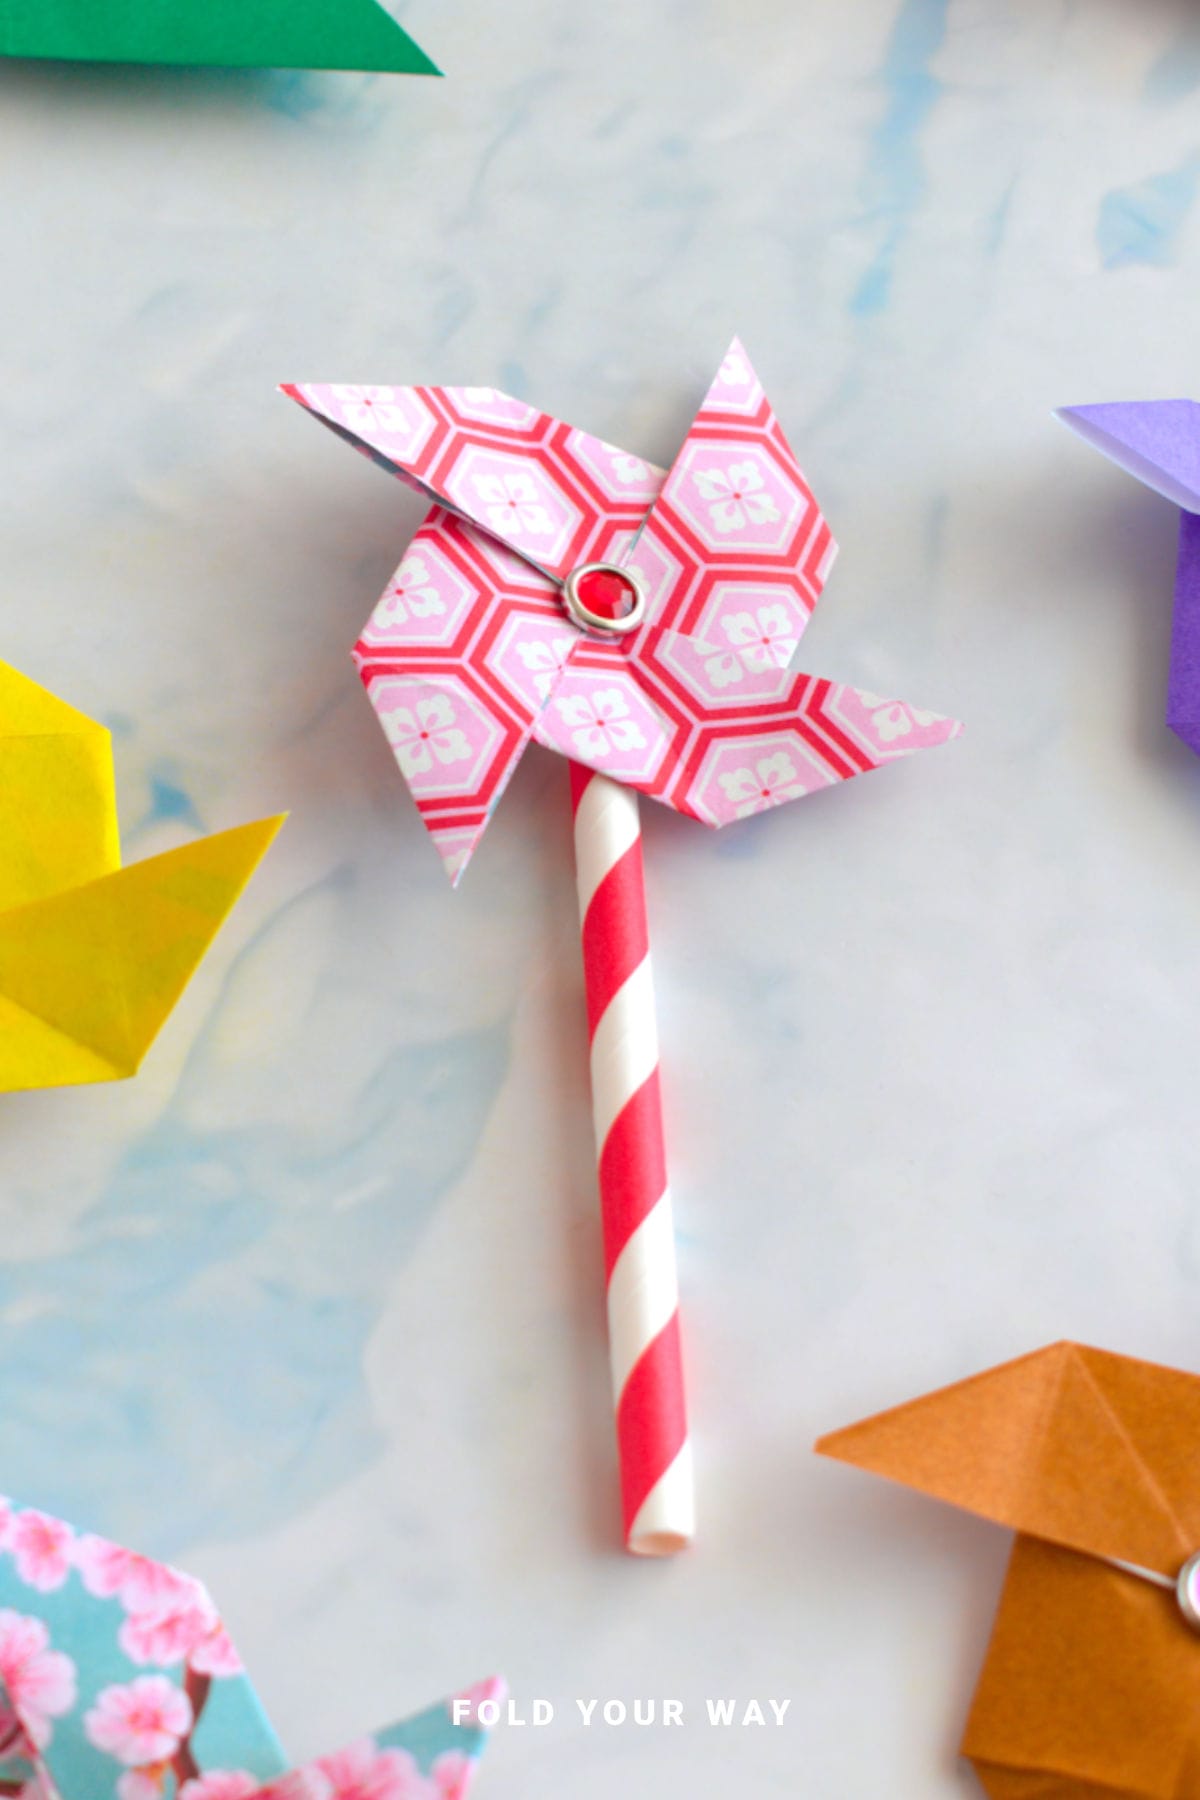
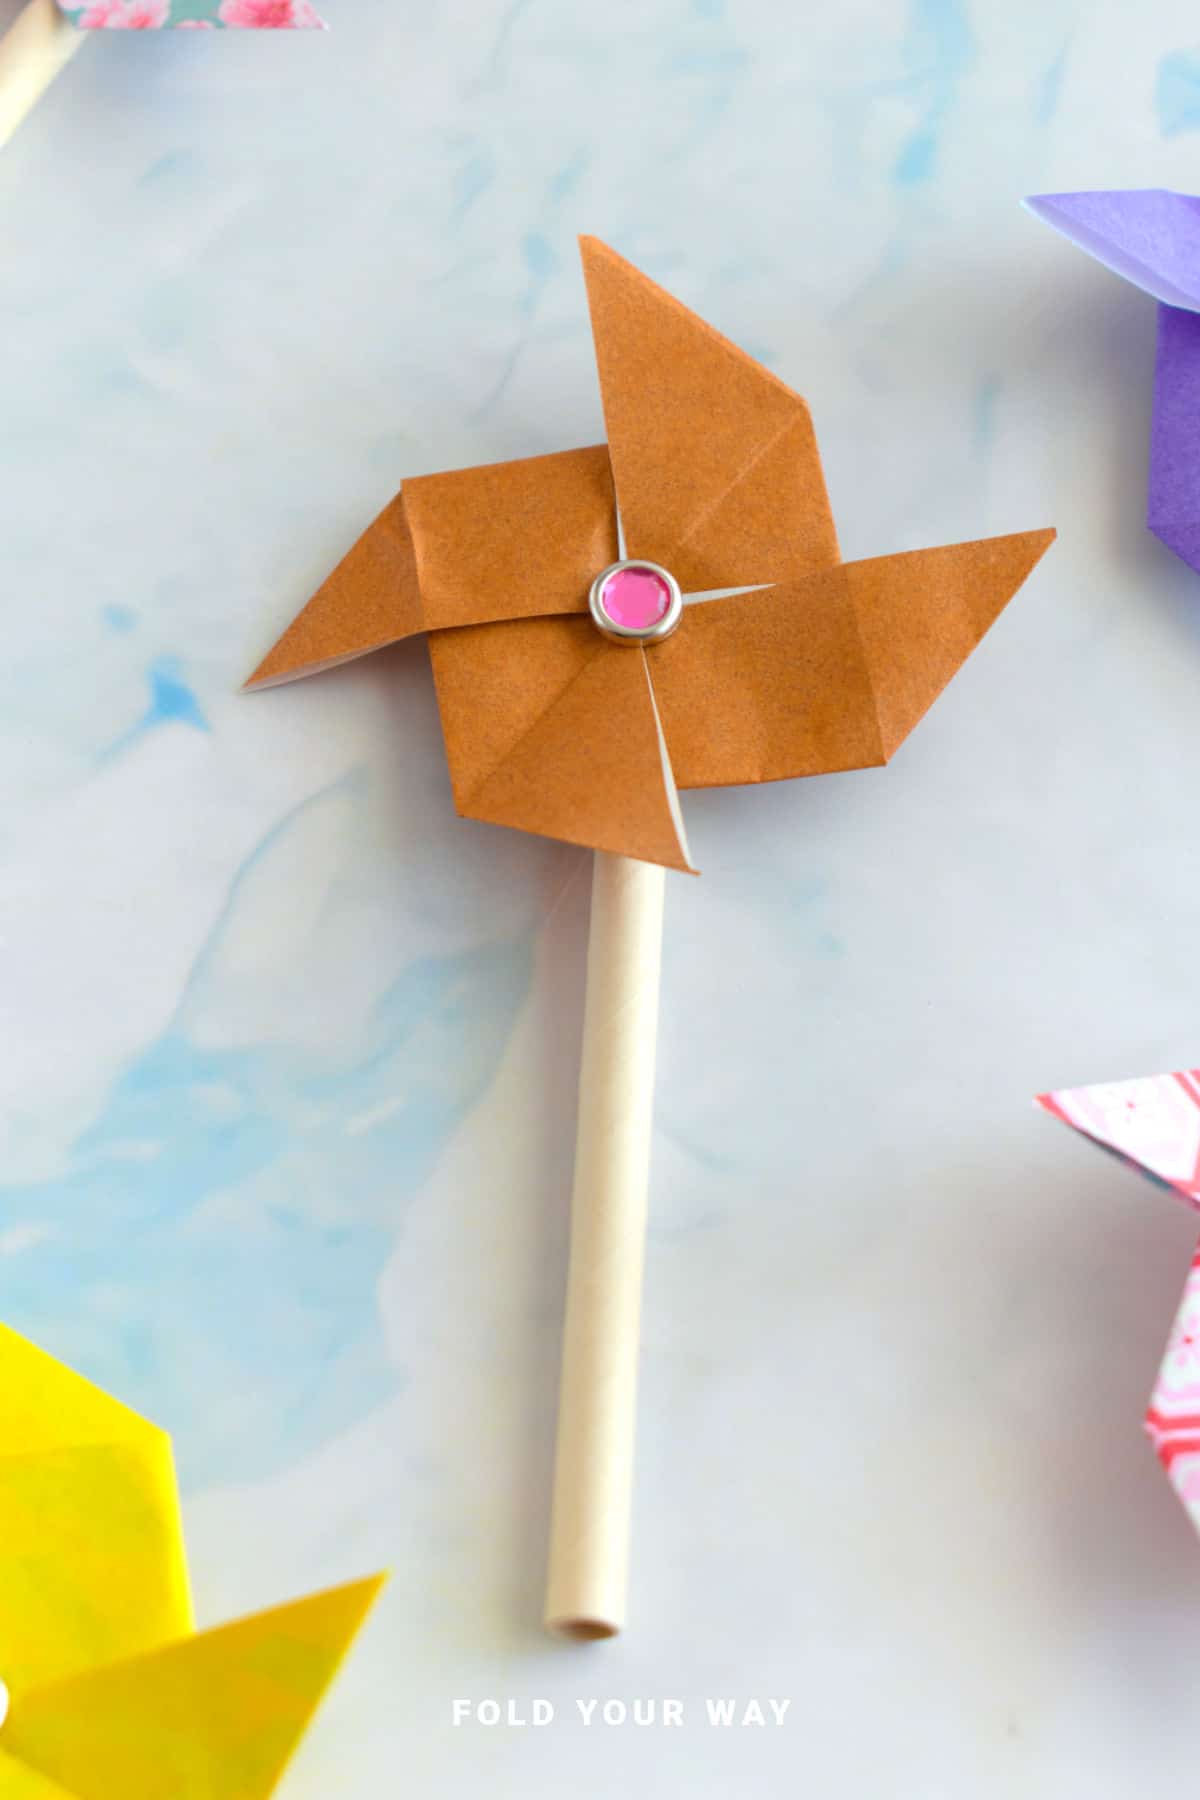
If you’re looking for a quick and cheerful paper project, this easy origami pinwheel is a fantastic choice.
With just origami paper, a split pin, a paper straw, and a needle or pin to make the holes, you can create a spinning pinwheel that’s both decorative and functional.
This project is perfect for summer parties, picnics, or adding a playful touch to birthday gift wrap.
You can make them in any size or color combination, so they’re great for everything from backyard BBQs to school craft projects.
This step by step origami tutorial is beginner-friendly and works beautifully as an afternoon craft for kids or adults.
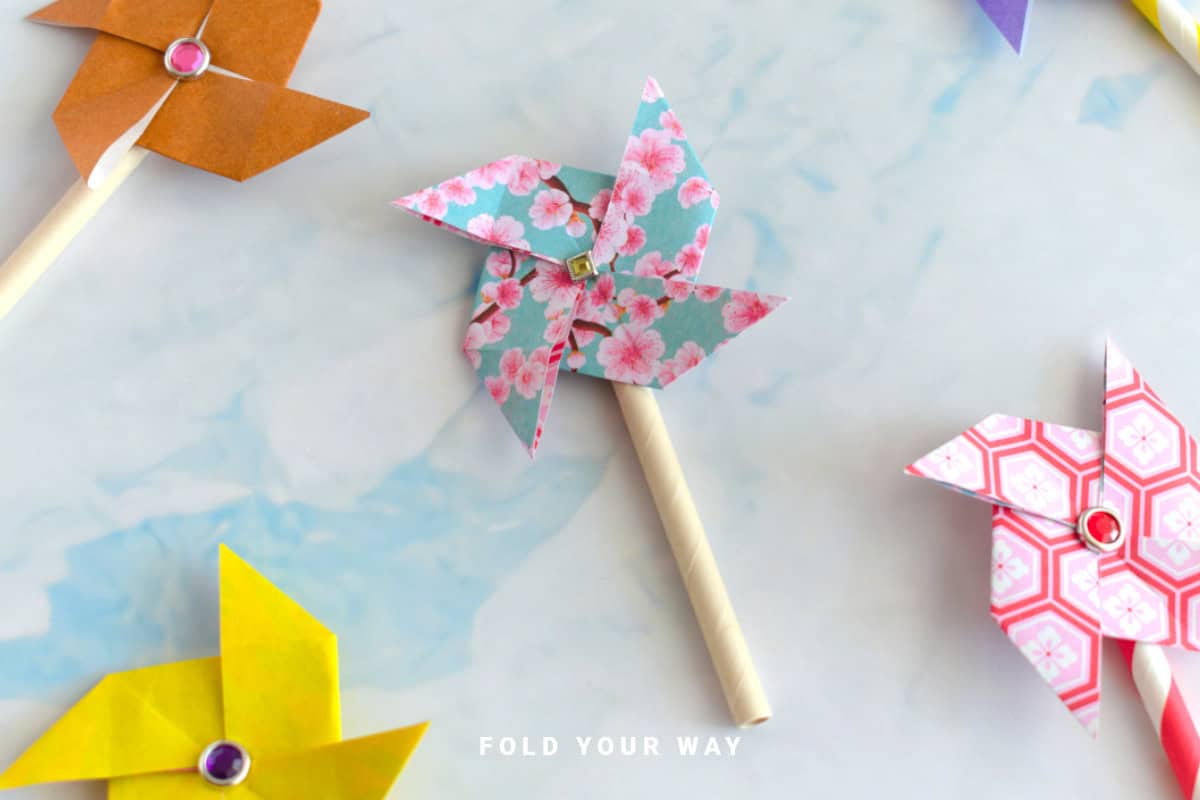
If you love simple paper crafts that deliver a big pop of color, you’ll enjoy making a whole bouquet of these pinwheels to brighten your space.
Whether you use them as party favors, photo props, or even as a handmade gift topper, these spinning pinwheels bring a touch of joy to any occasion.
Why You'll Love This Pattern
- A bright and cheerful paper craft perfect for any season
- Beginner-friendly origami tutorial with step by step instructions
- Great for party décor, photo props, or gift wrapping embellishments
- Fun for kids and adults to make together
- Fully customizable with different paper colors and patterns
Skill Level
★★☆☆☆ (Easy)
Materials Needed
- 1 sheet of origami paper (square, any size)
- 1 split pin (brad)
- 1 paper straw
- Needle, pin, or thumbtack (to make holes)
Instructions
Step 1: Start with the color you want your pinwheel to be facing down.
Step 2: Fold the bottom edge up to meet the top edge.
Step 3: Unfold previous step.
Step 4: Fold the left edge to meet the right edge.
Step 5: Unfold previous step.
Step 6: Fold the bottom left corner up to meet the top right corner.
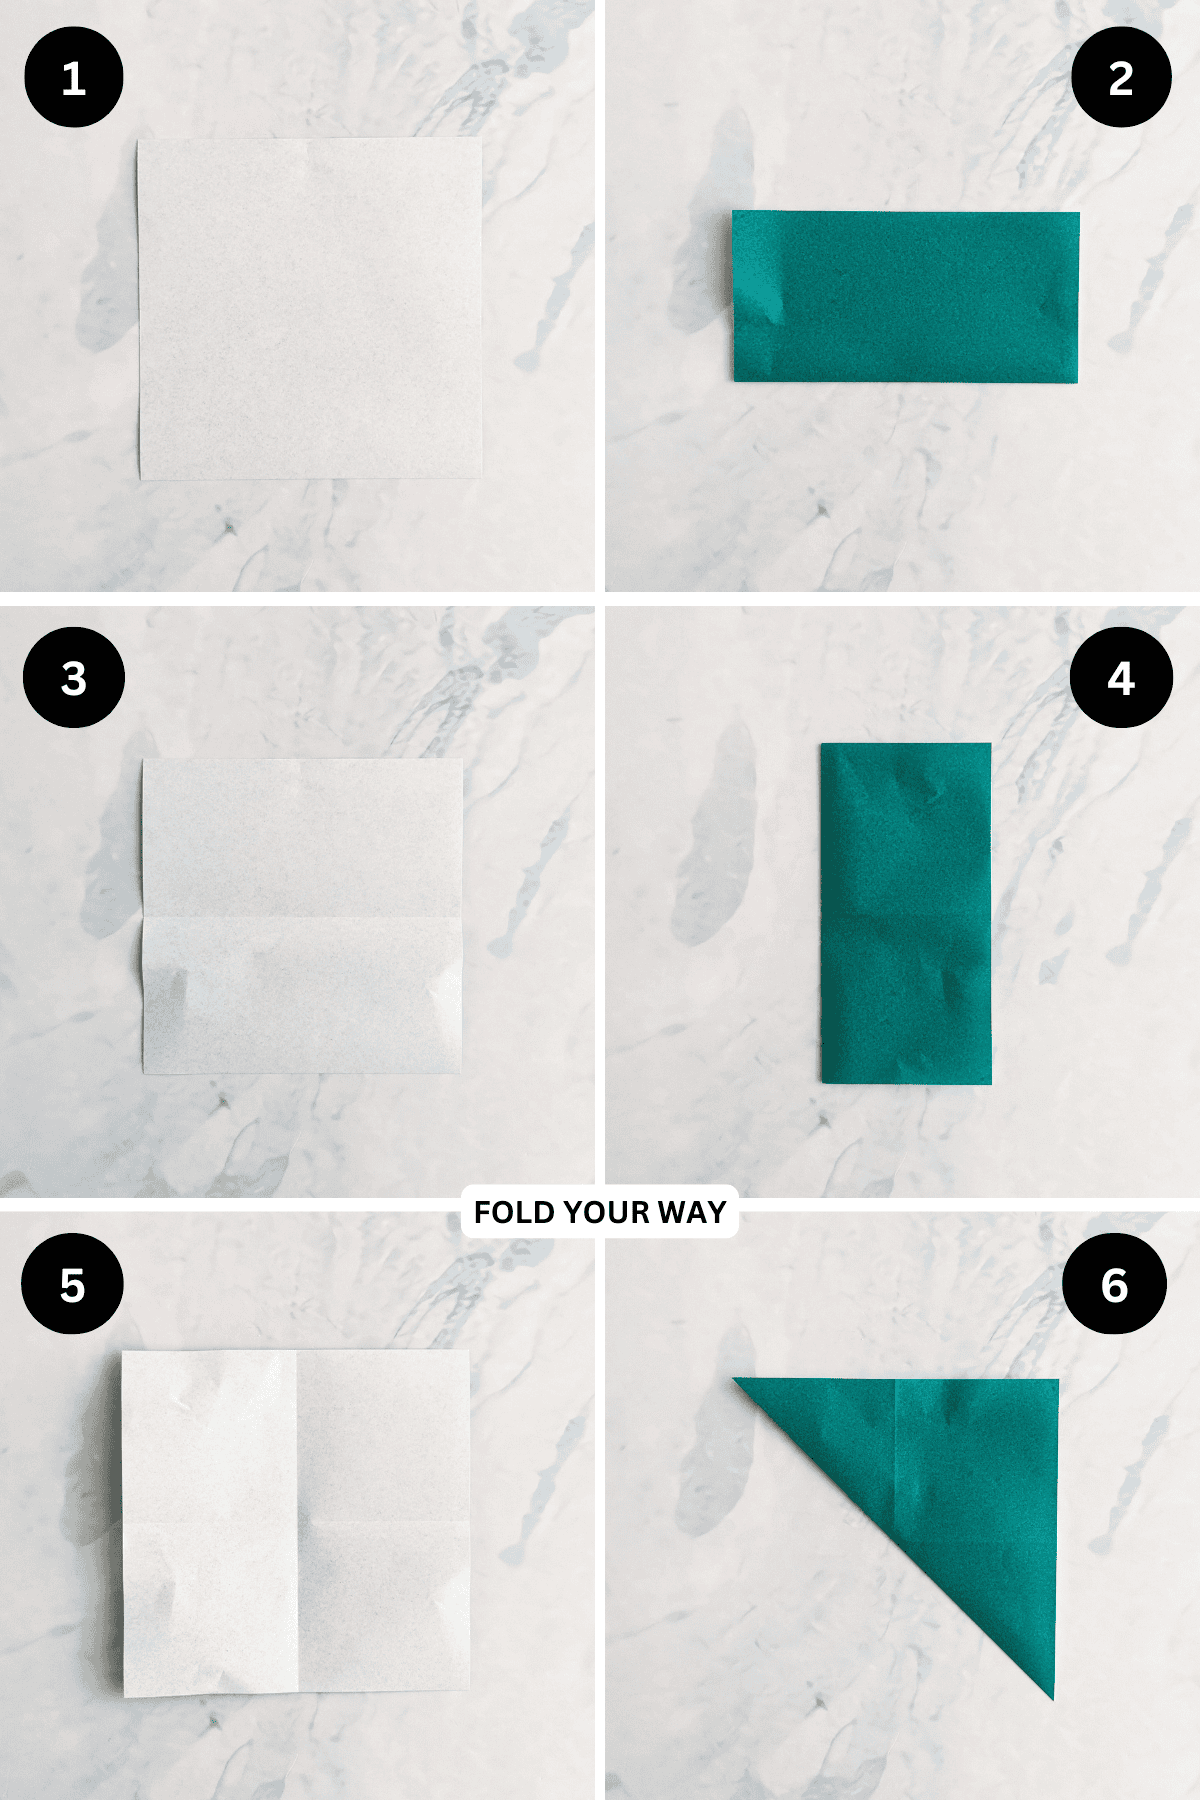
Step 7: Unfold previous step.
Step 8: Fold the bottom right corner up to meet the top left corner.
Step 9: Unfold previous step.
Step 10: Fold both the left and right edges in to meet the middle.
Step 11: Fold both the bottom and top edges in to meet the middle.
Step 12: Lift up the top flap so it stands upright.

✨ You're almost there! ✨
To unlock the final steps and complete your pattern, create a free account with Grow.me. below.
Make sure you tick the box to subscribe to our newsletter and stay up to date with the latest patterns, tips, and more!
Once you're signed up, you'll get instant access to finish your project and enjoy exclusive content in the future.
Already signed up? Hit the button below and select ‘Switch to Log In’ to pick up where you left off and finish your project!
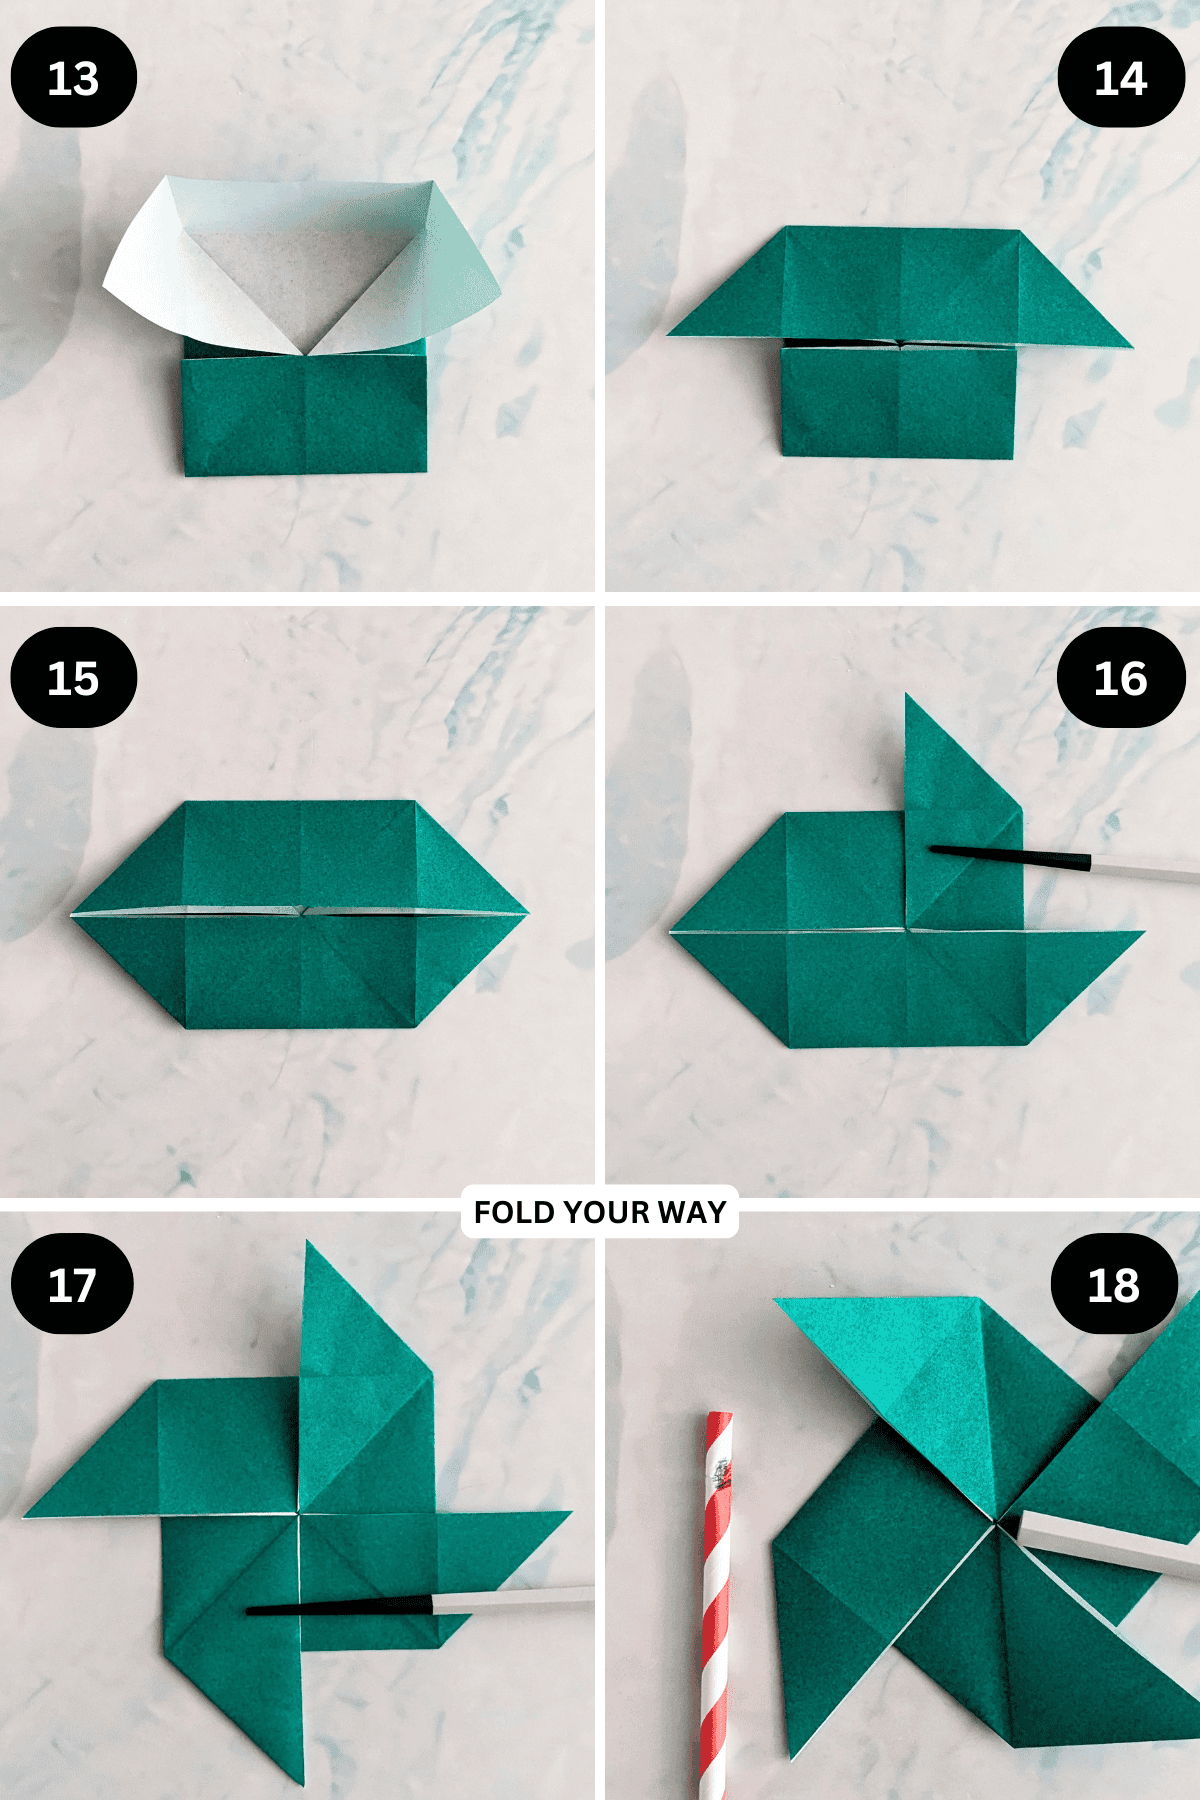
Step 13: Still on the top flap, open it out slightly, pushing the inner edges outward on a diagonal, then crease.
Step 14: Flatten the top flap as shown.
Step 15: Repeat steps 12 to 14 for the bottom flap.
Step 16: Fold the upper right flap up on a diagonal.
Step 17: Fold the bottom left flap down on a diagonal.
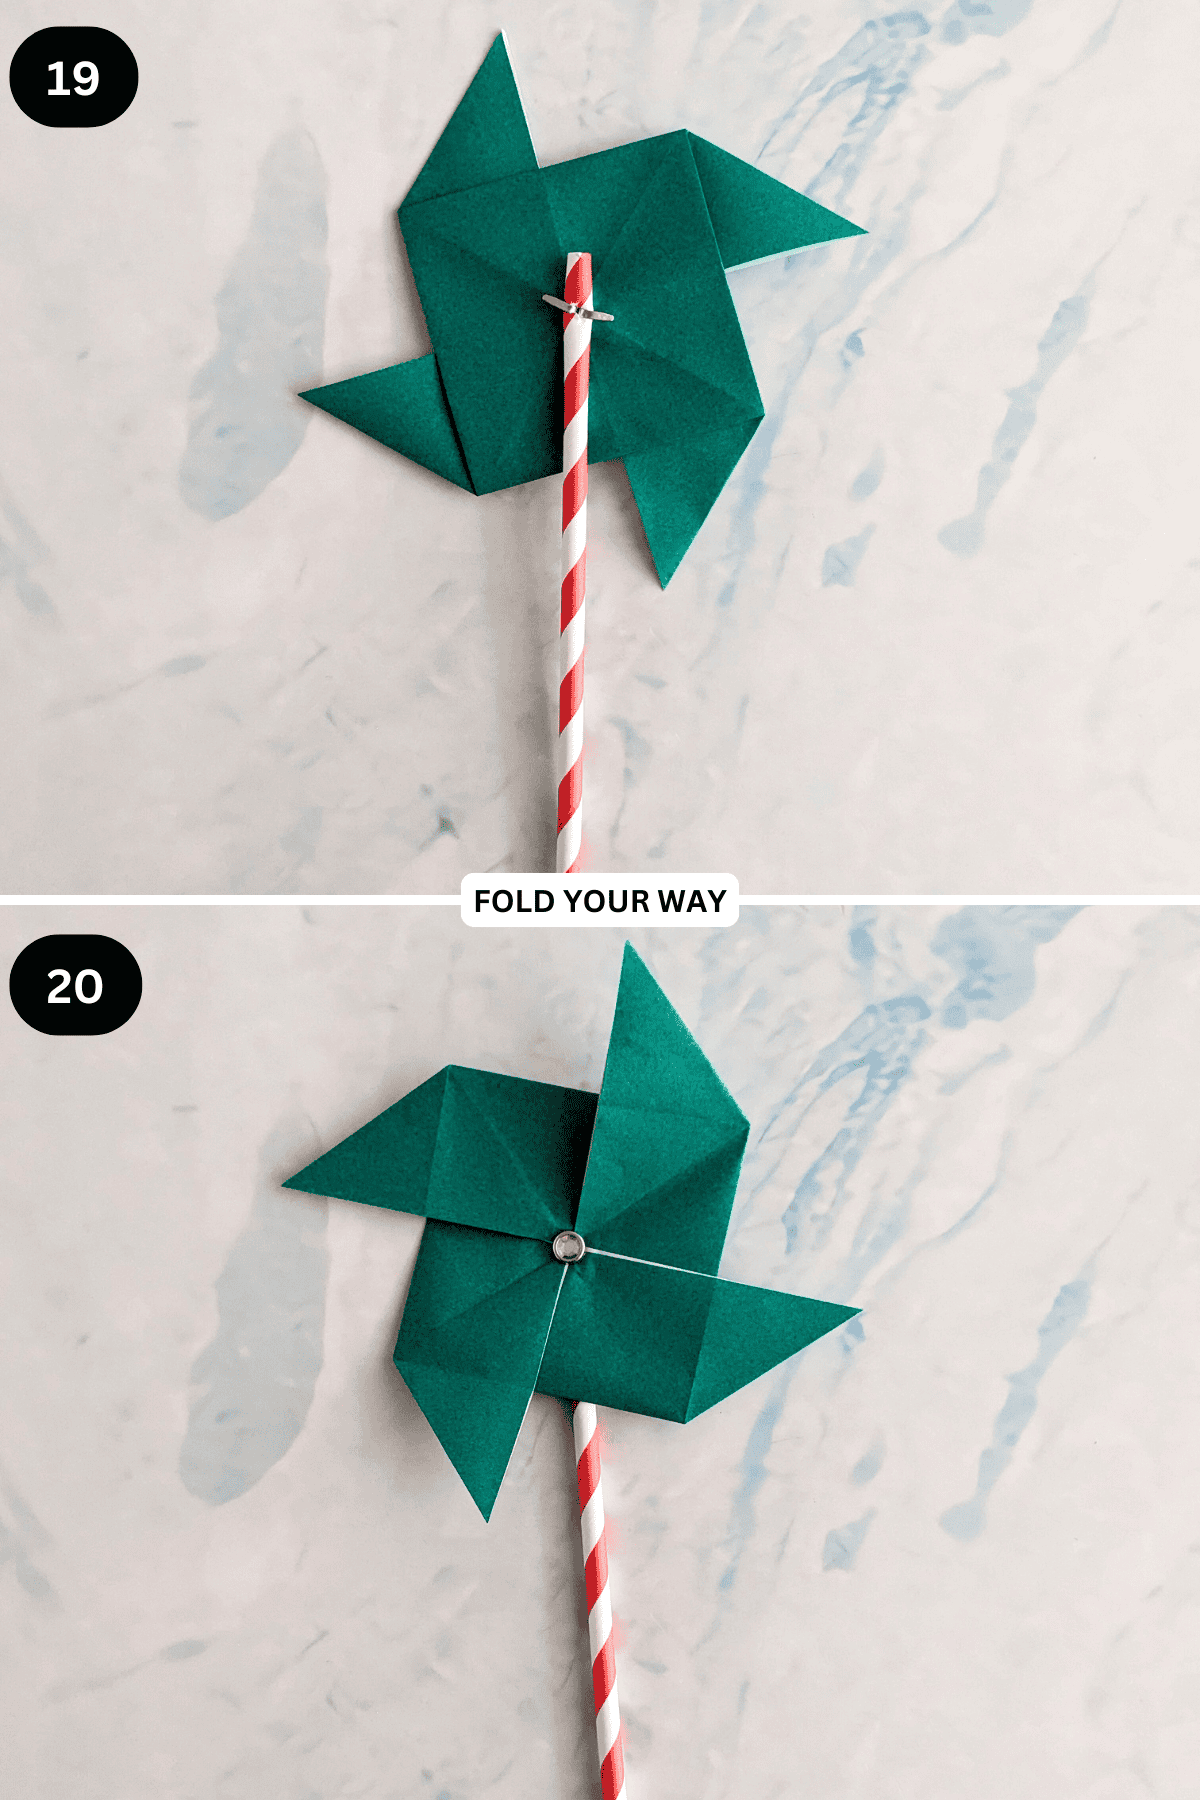
Step 18: Using a small pin, poke a hole in the middle of the pinwheel head as well as on the top of the straw.
Step 19: Place your split pin through the holes to join the straw and pinwheel head.
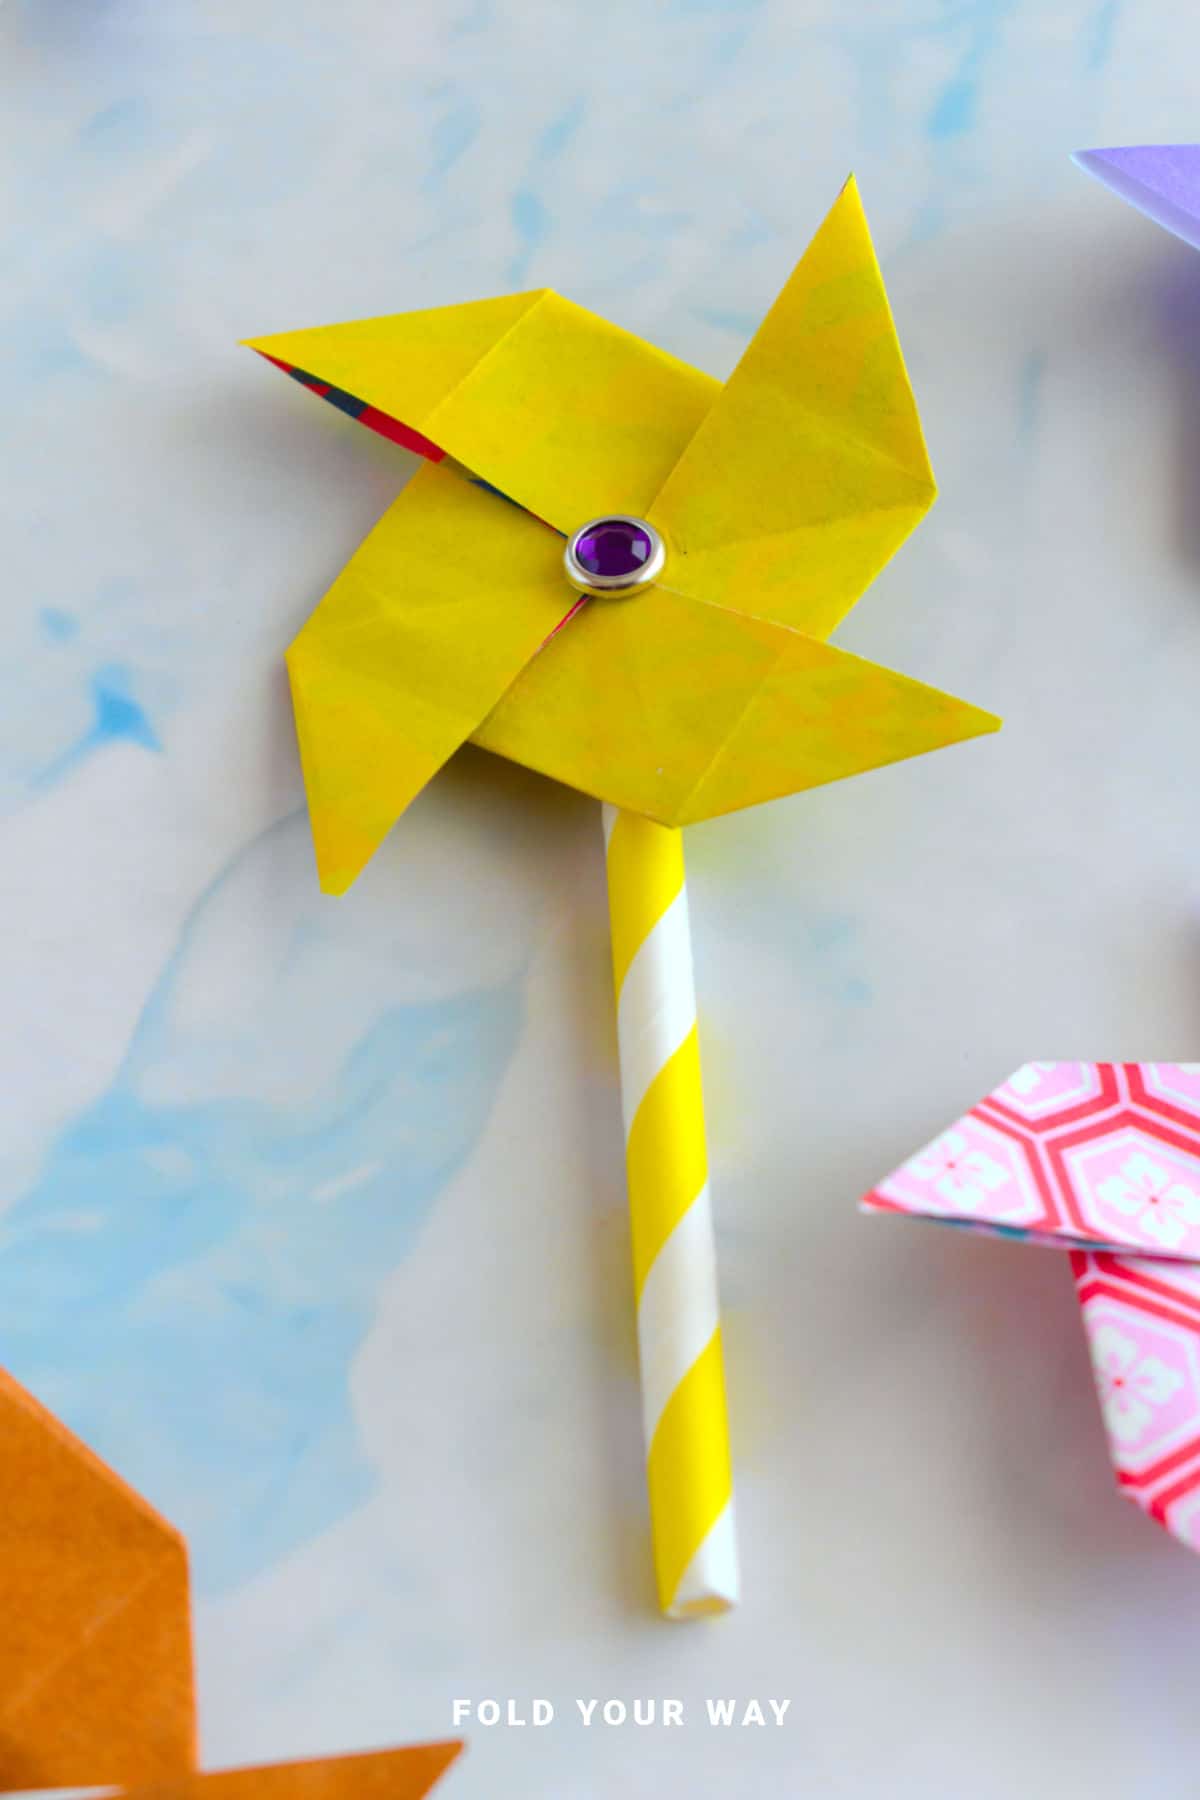
Step 20: Completed pinwheel.
Tips For Success
- Use double-sided origami paper for a more colorful, dynamic pinwheel.
- Don’t push the split pin too tightly—leave it a little loose so the pinwheel can spin freely.
- For younger kids, pre-punch the holes in the paper to make assembly easier.
- If you want a sturdier pinwheel, use cardstock instead of regular origami paper.
Common Mistakes & How To Avoid Them
Pinwheel doesn’t spin: Make sure the split pin isn’t fastened too tightly and there’s enough space for the blades to turn.
Color, Paper Ideas, and Variations
- Classic carnival style: Bright red, blue, yellow, and green pinwheels for a festive look.
- Pastel party: Soft pinks, blues, and yellows for baby showers or spring picnics.
- Holiday themes: Red and green paper for Christmas, or orange and black for Halloween.
- Mini pinwheels: Make smaller versions to use as cupcake toppers or gift wrap decorations.
- Metallic magic: Use foil origami paper for a shiny, eye-catching effect.
FAQ
Yes! With a little help making the holes and inserting the split pin, this is a great craft for kids.
It can! As long as you leave the split pin slightly loose and blow on the blades, it will turn.
Any size square works, but 6x6 inch (15x15 cm) origami paper makes a good medium pinwheel.
Not for a spinning pinwheel, but if you’re making it for decoration only, glue will work fine.
Other Paper Crafts You Might Like To Try:
Helpful Tips and Common Mistakes For Paper Crafts
Paper crafting and origami can be hard sometimes. Which is why we've made this printable PDF just for you.
It outlines helpful tips so that you can successfully complete your craft, and some of the most common mistakes people come across.
You can download the helpful tips and common mistakes for paper crafts printable PDF here.
Stay Connected
Made this pattern? Let us know how it went in the comments below!
Pin this post - Pin now to take your paper crafting skills to the next level.
Share on Instagram or Facebook - Capture the beauty of your finished paper craft project and share it on Instagram or Facebook! Tag us @foldyourway so we can see your work!
Other Patterns You Might Like To Try:
Looking for other easy patterns like this? Try these:


Comments
No Comments