
This origami cicada is a cool origami project that blends nature-inspired design with beginner-friendly folding.
With just a square of paper and some easy step by step instructions, you’ll learn how to make a cicada that’s surprisingly detailed and full of personality.
Great for bug-themed crafts, summer decorations, or as a fun classroom activity, this easy DIY tutorial is perfect for beginners and paper craft lovers looking for something a little different.
Jump to:
Cicadas might not be everyone’s favorite insect in real life, but when it comes to paper craft, they make for a surprisingly beautiful and fun folding subject.
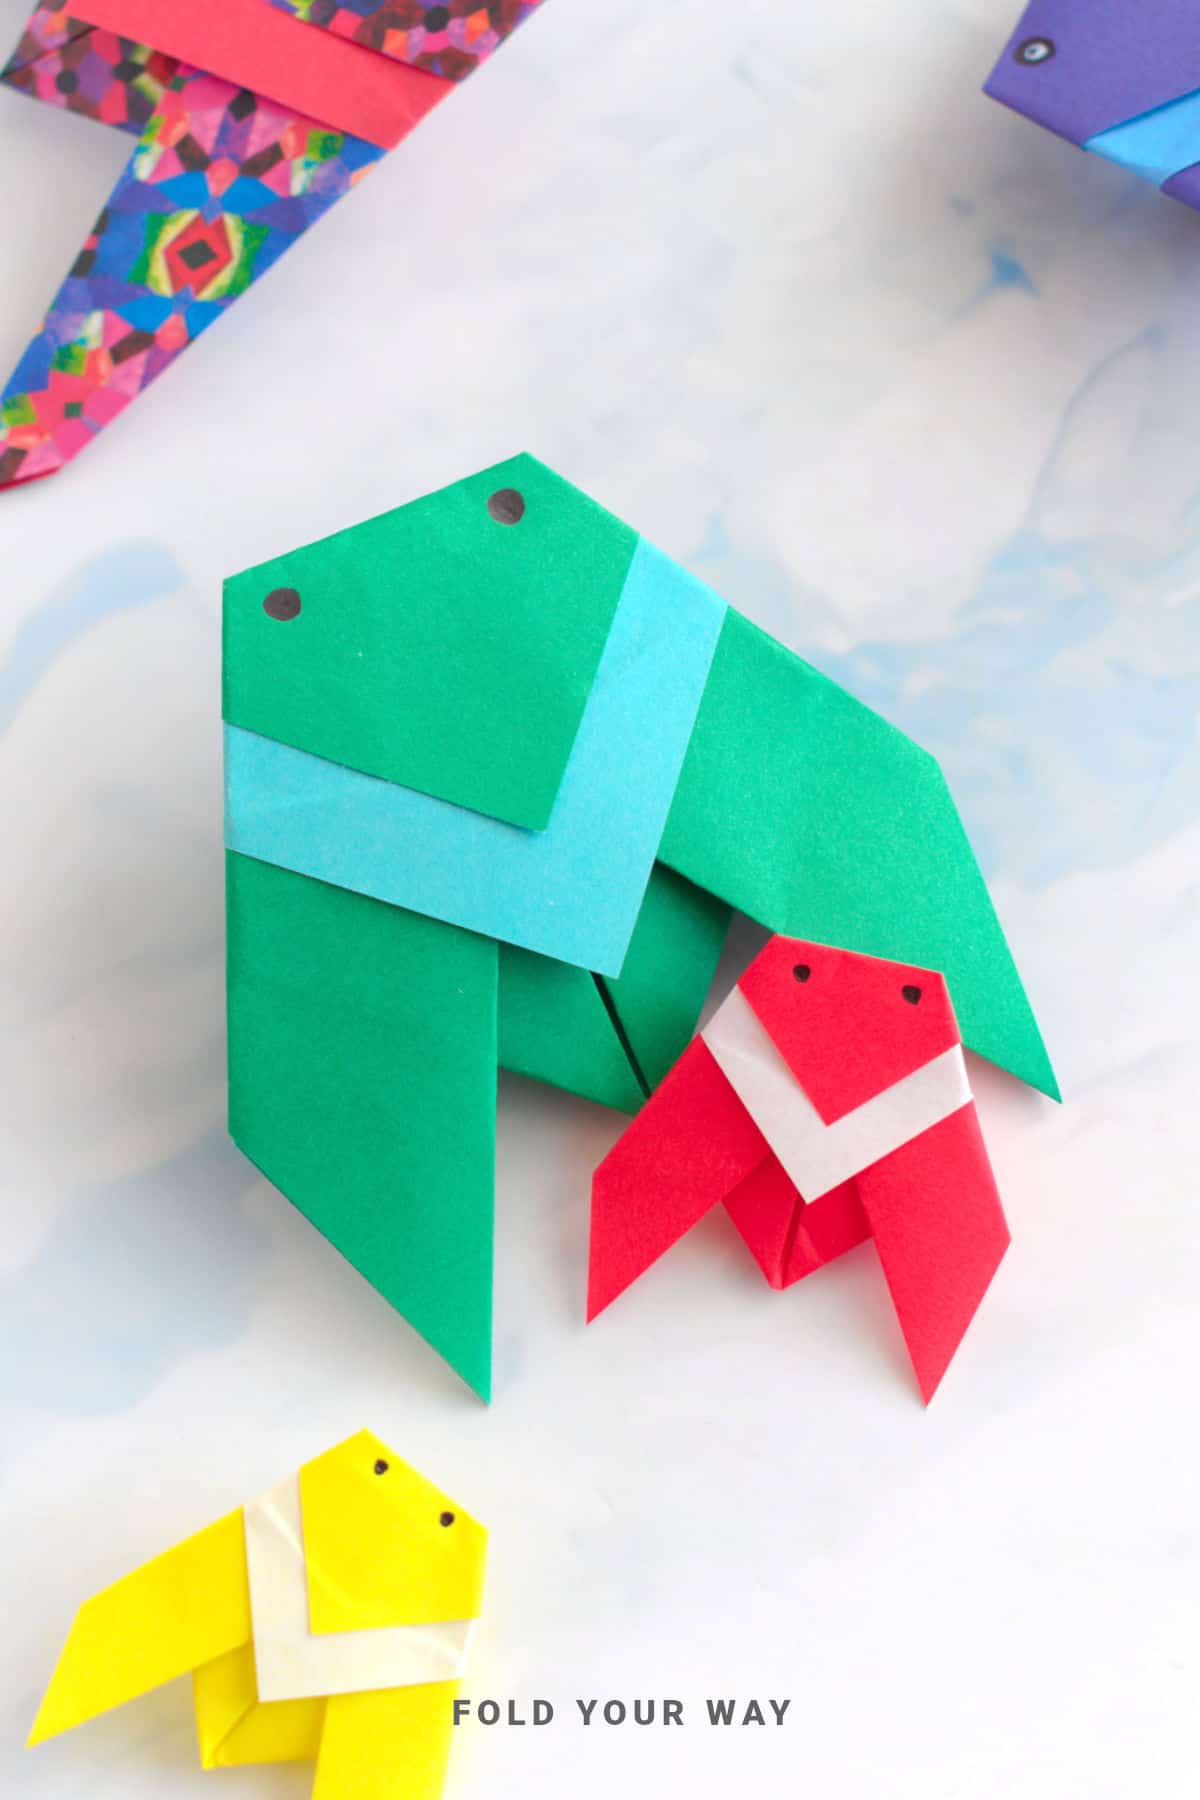
With their distinctive wings and stout little bodies, origami cicadas are a fantastic project that blends natural inspiration with a sleek, geometric look.
Whether you're teaching a nature lesson, decorating for summer, or just want to try something new, this easy origami tutorial delivers a satisfying craft with minimal effort.
This origami cicada is designed for beginners but still has that cool factor that makes it look more complex than it really is.
You’ll be using a simple square of paper and following step by step instructions that guide you through each fold without frustration.
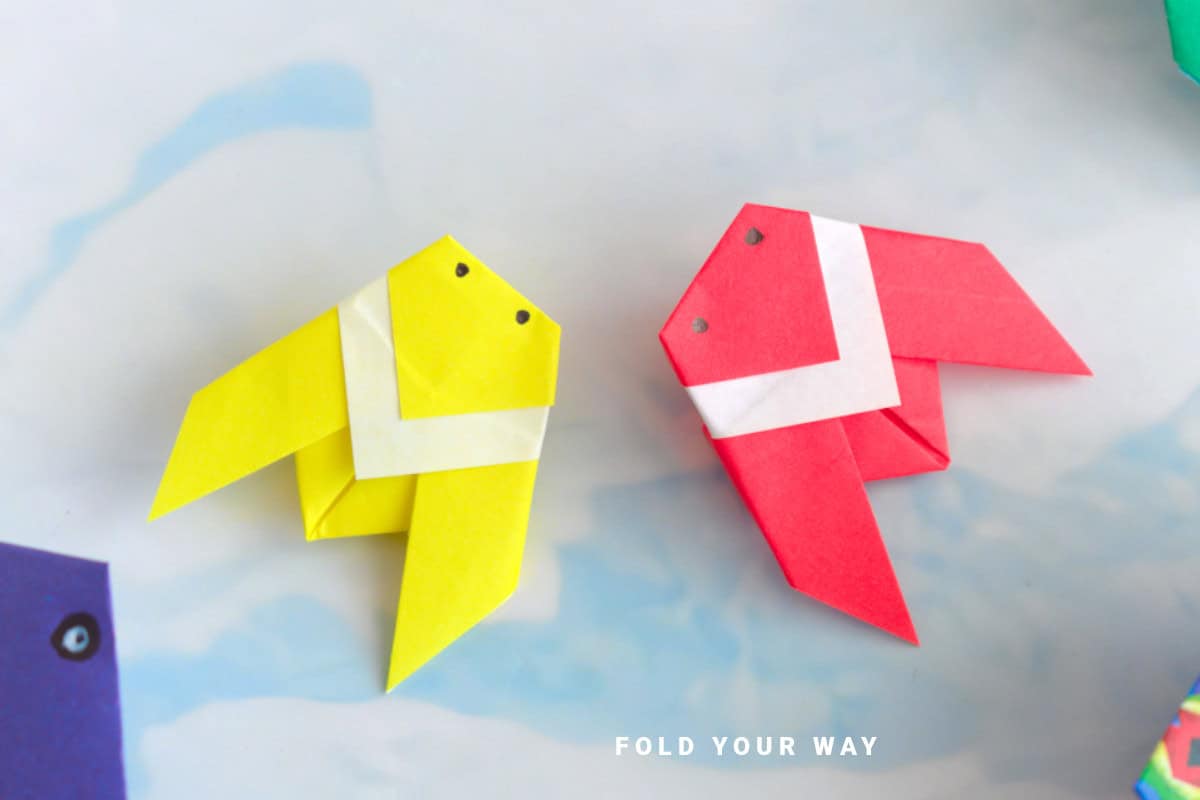
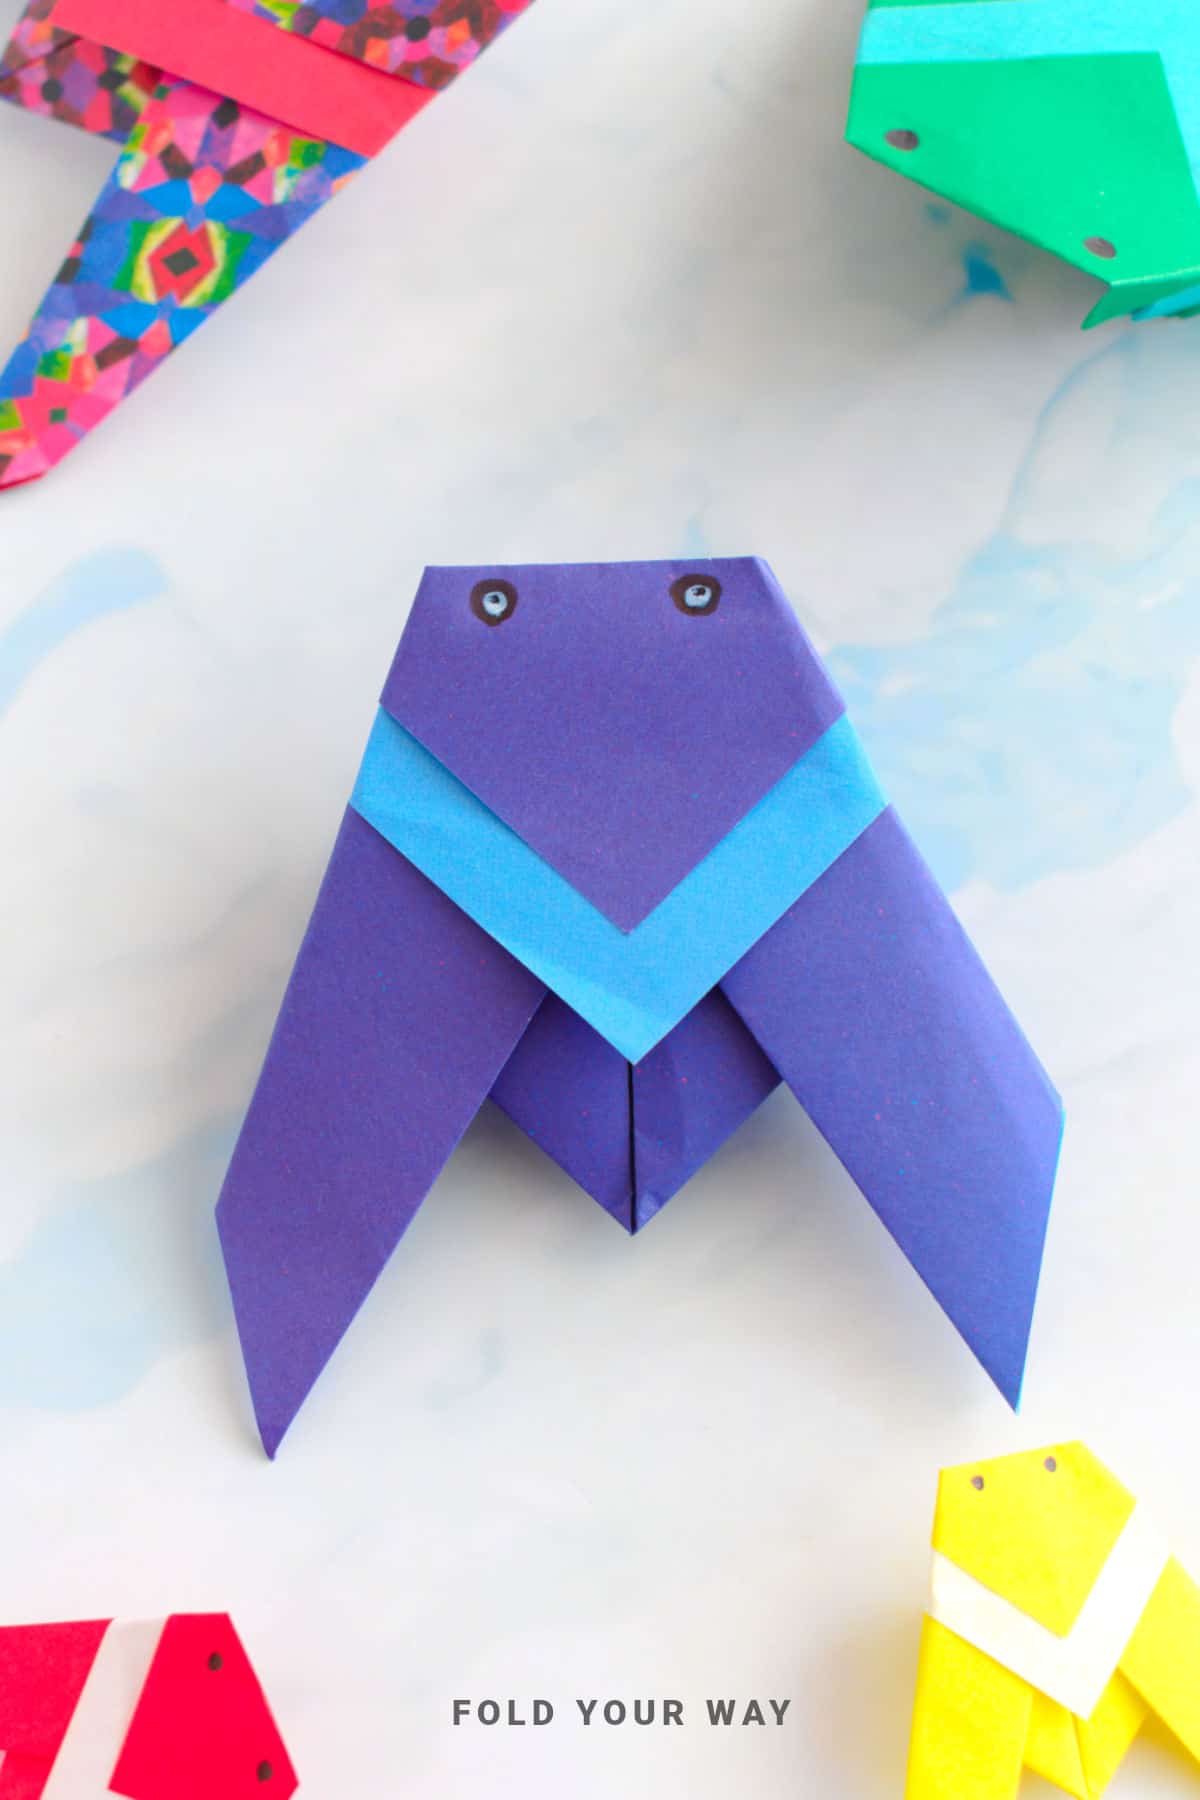
The final result is a stylized cicada with flared wings and a strong, folded body that you can perch on a shelf, attach to a card, or hang from a string as part of a bug-themed garland.
One of the best things about this project is how quickly it comes together. With just a few folds and a bit of shaping, you’ll have a finished piece in ten minutes or less. It’s a great origami idea for classrooms, camps, or anyone looking for a creative, hands-on break from screens.
You can also easily personalize your cicada.
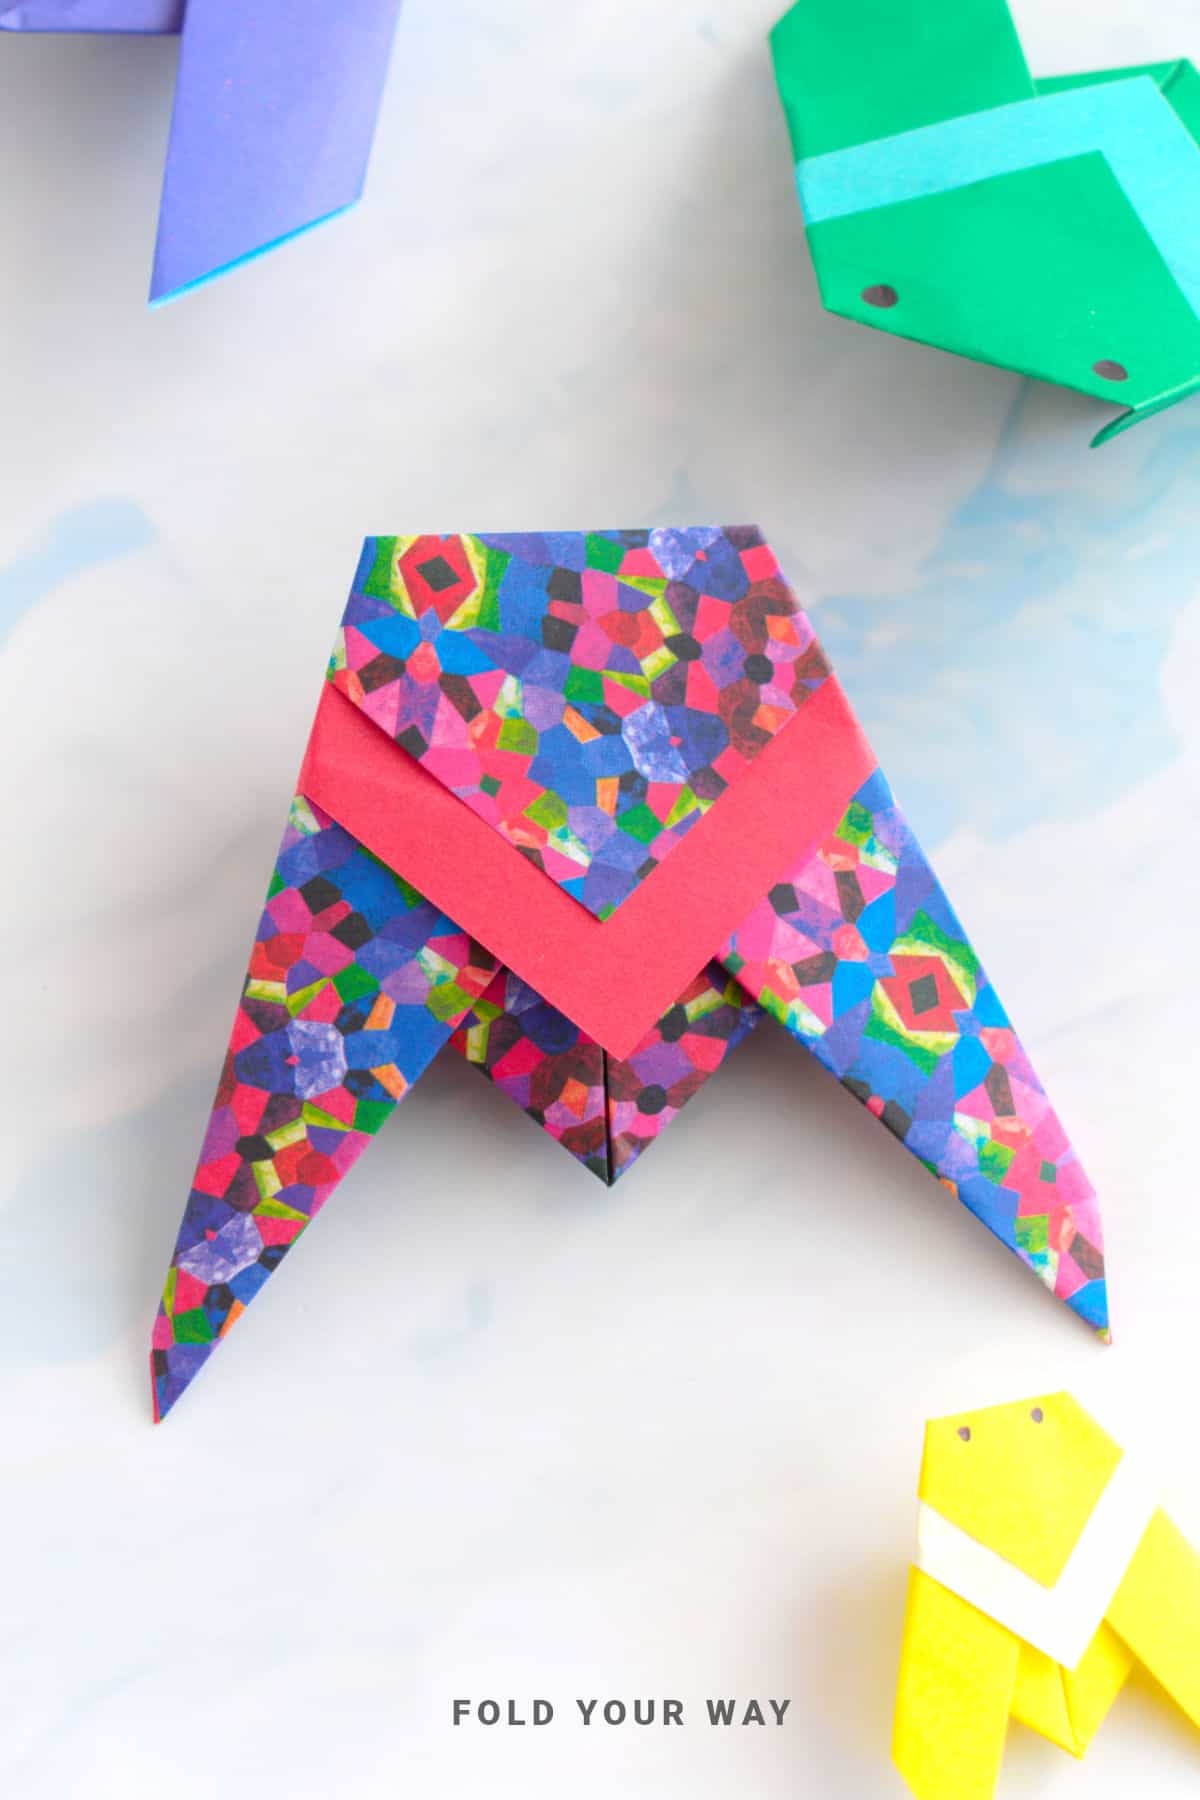
Use realistic greens and browns for a natural effect, or go bold with metallic paper or bright prints for a more artistic version.
If you’re feeling extra crafty, draw or glue on eyes or even cut out a little branch for your cicada to sit on. There’s plenty of room for creativity here, even with the basic form.
So whether you're a seasoned folder or just starting out with cute origami ideas, this cicada offers a beautiful, fun paper craft that fits any skill level. It’s the perfect mix of quick, cool, and creative—and proof that even bugs can be art.
Why You'll Love This Pattern
- Great entry-level project with a polished look
- Fast and fun—takes under 10 minutes to fold
- Works well as part of nature or insect-themed crafts
- Customizable with paper colors, patterns, and added details
- Easy origami idea that looks impressive
- Kid-friendly and ideal for group settings or classrooms
Skill Level
★☆☆☆☆ (Easy)
Materials Needed
- 1 square sheet of origami paper
- Optional: marker or pen for drawing eyes or details
Instructions
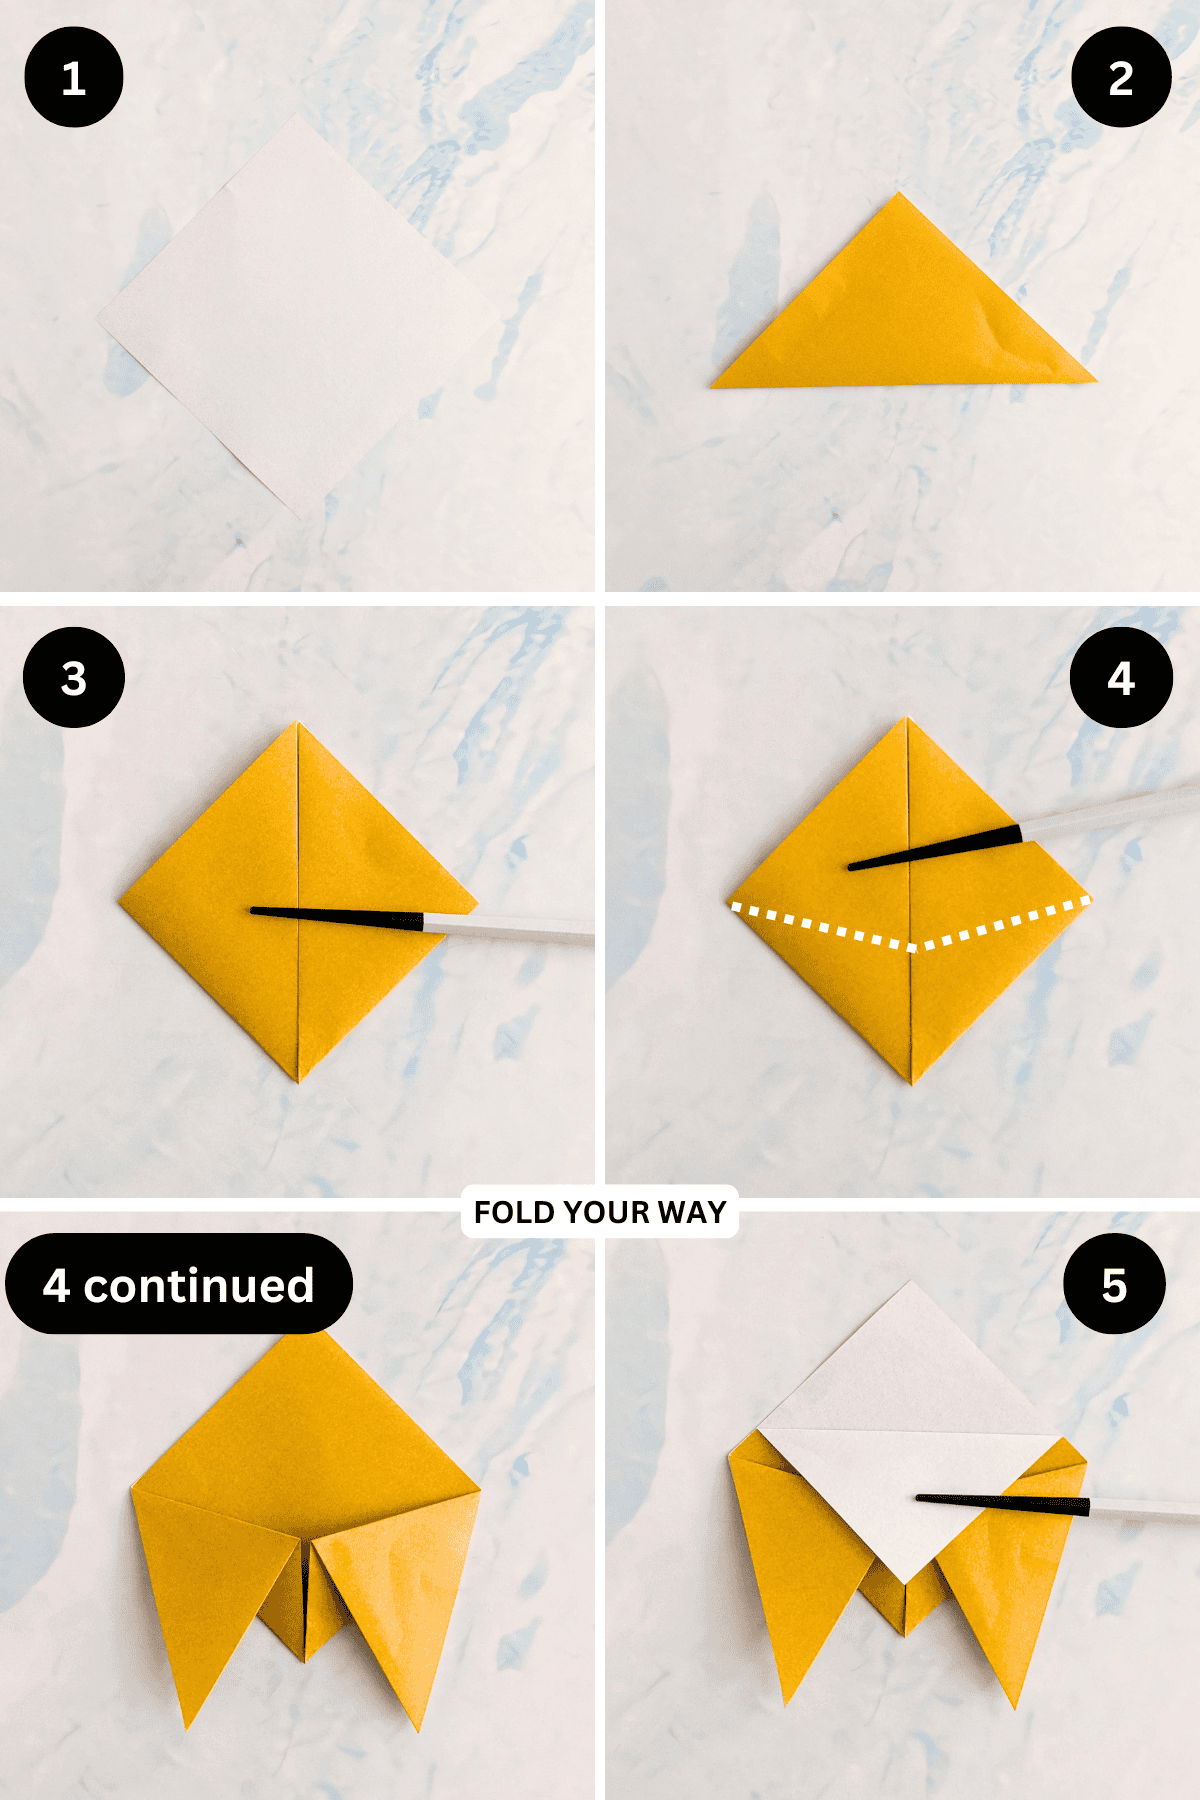
Step 1: Start with the color you want your cicada to be facing down. The top color will become your stripe. Arrange your paper to sit like a diamond shape.
Step 2: Fold the bottom point up to meet the top point.
Step 3: Fold both the bottom left and bottom right points up to meet the top point.
Step 4: Fold the left and right sides of the paper (top layer only) down along the lines shown.
Step 5: Fold the top point (top layer only) down as shown.
✨ You're almost there! ✨
To unlock the final steps and complete your pattern, create a free account with Grow.me. below.
Make sure you tick the box to subscribe to our newsletter and stay up to date with the latest patterns, tips, and more!
Once you're signed up, you'll get instant access to finish your project and enjoy exclusive content in the future.
Already signed up? Hit the button below and select ‘Switch to Log In’ to pick up where you left off and finish your project!
Step 6: Once again, fold the top point down as shown.
Step 7: Flip your paper over from left to right.
Step 8: Fold both the left and right edges in along the lines shown.
Step 9: Fold the paper in half from left to right.
Step 10: Unfold previous step.
Step 11: Flip your paper over from left to right. Completed cicada.

Tips For Success
- Use slightly thicker origami paper for sharper folds.
- For a realistic touch, fold in muted greens, browns, or black.
- To add a special touch to your origami cicadas, use foil-backed paper or patterns with contrast.
- Flatten each crease firmly—this helps the body hold its form.
Color, Paper Ideas, and Variations
- Earth tones: Try olive, tan, and black for a realistic cicada look.
- Metallics: Use gold or bronze foil paper for a futuristic version.
- Bold and bright: Neon paper makes these pop as fun party decorations.
- Recycled magazine pages: Add texture and sustainability to your project.
- Mini cicadas: Fold small versions and turn them into earrings or pins.
- Patterned wings: Choose paper with nature prints or add your own wing patterns with markers.
FAQ
Yes. It’s simple enough for elementary-age kids with some guidance, especially if pre-creased or demonstrated step by step.
Origami paper or lightweight printer paper works best. Avoid heavy cardstock.
Yes, just use a bigger square. We recommend using 10 inches x 10 inches (25 cm x 25 cm) paper.
Other Paper Crafts You Might Like To Try:
Helpful Tips and Common Mistakes For Paper Crafts
Paper crafting and origami can be hard sometimes. Which is why we've made this printable PDF just for you.
It outlines helpful tips so that you can successfully complete your craft, and some of the most common mistakes people come across.
You can download the helpful tips and common mistakes for paper crafts printable PDF here.
Stay Connected
Made this pattern? Let us know how it went in the comments below!
Pin this post - Pin now to take your paper crafting skills to the next level.
Share on Instagram or Facebook - Capture the beauty of your finished paper craft project and share it on Instagram or Facebook! Tag us @foldyourway so we can see your work!
Other Patterns You Might Like To Try:
Looking for other easy patterns like this? Try these:


Comments
No Comments