Looking for a fun, creative gift idea for Father's Day or a special occasion?
This easy origami paper tie is a fantastic project that requires just one sheet of paper – no cutting or glue needed!
It’s a perfect, personalized addition to a gift or card.

Jump to:
If you're searching for a unique way to impress on Father's Day or any special occasion, why not try making an origami paper tie?
This fun and simple craft uses just one square sheet of paper, making it an ideal project for anyone, regardless of origami experience.
No glue, scissors, or fancy tools required – just some folding skills, and you're ready to create a stylish paper tie.
This origami tie can be added to a Father’s Day card, a gift box, or even attached as a fun detail to a wrapping.
It's also a great decoration for an office or work event, adding a playful touch to your desk or workspace.
Because it's made from paper, you can customize the design to suit the recipient. Use solid-colored paper for a classic look or choose patterned paper to match the recipient’s style or interests.
You can even make a whole series of different origami ties for a creative, fun display.
Whether it's for Father's Day, birthdays, or as a quirky decoration for an office party, this easy origami tie will add charm and personality to any occasion.
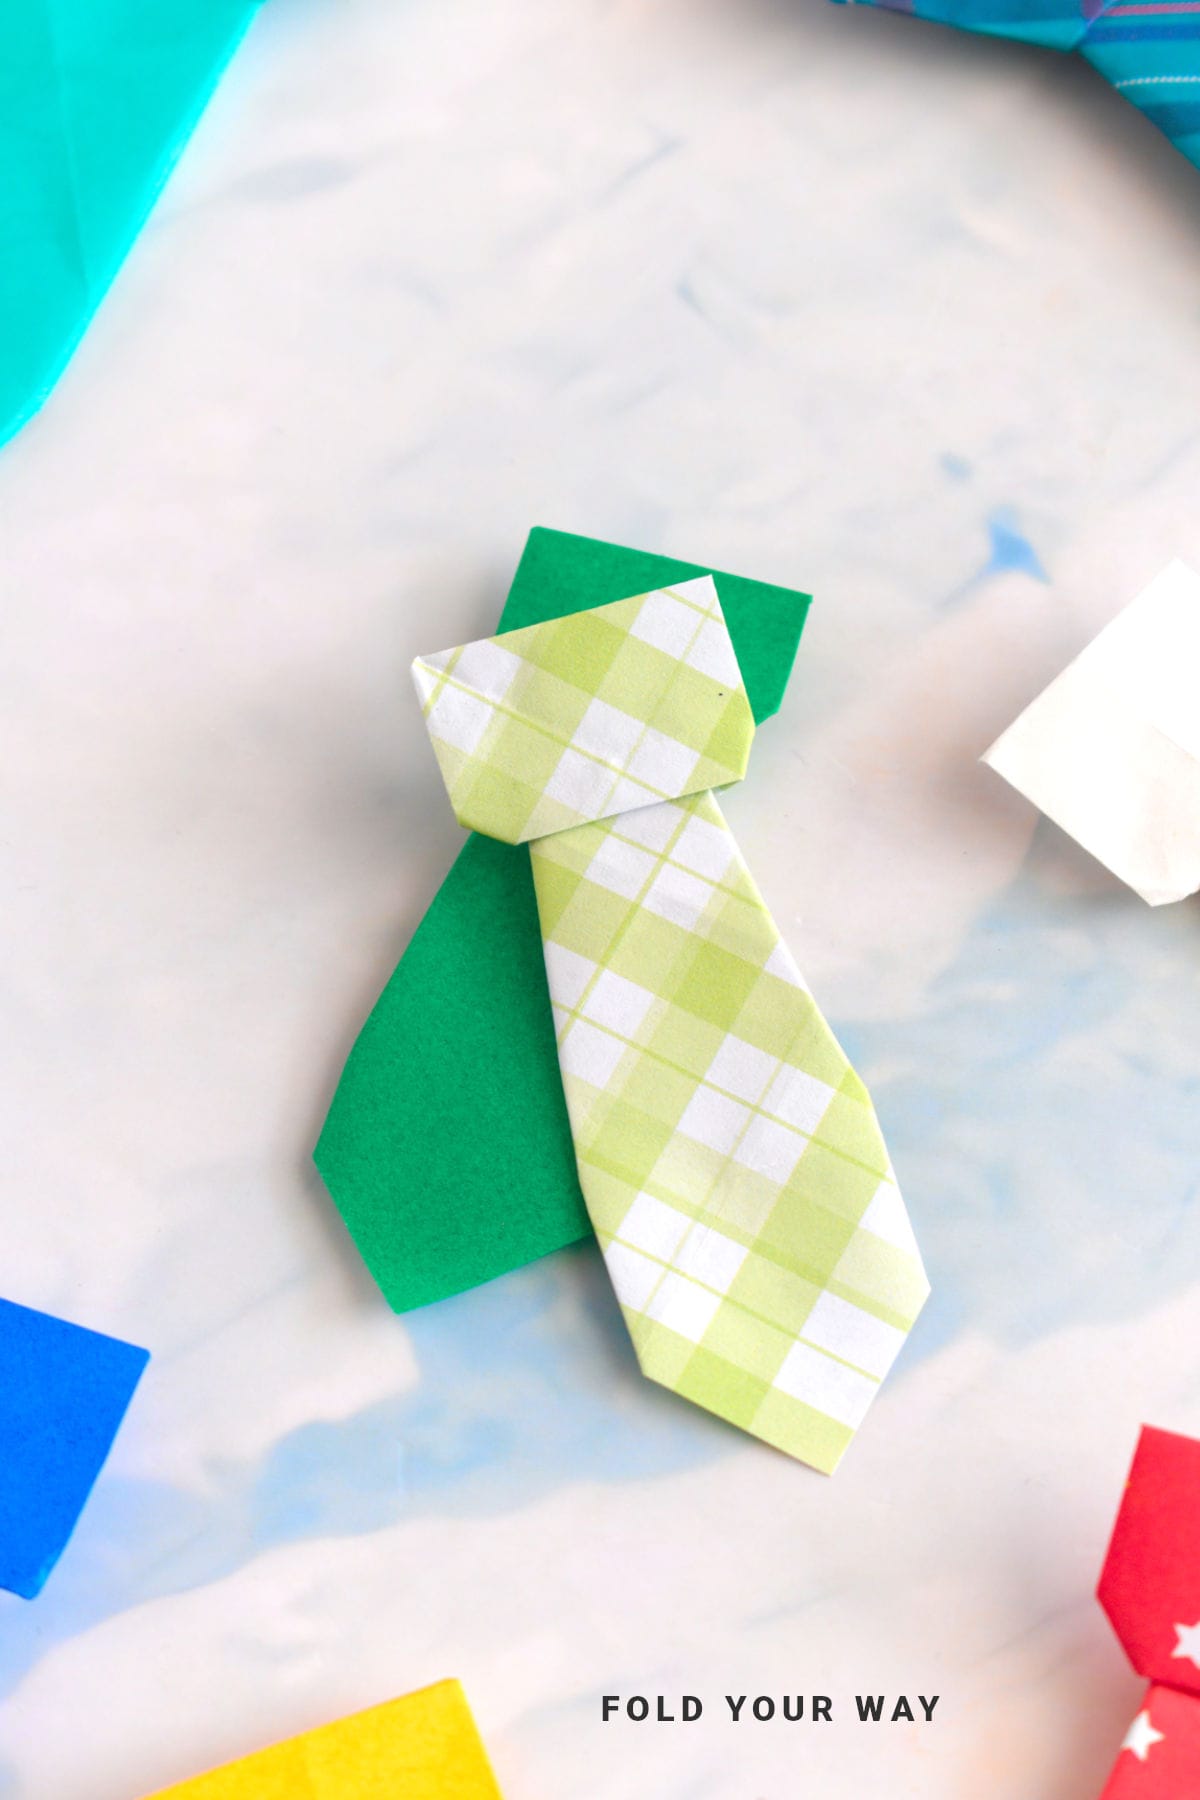
Why You'll Love This Pattern
- No scissors, no glue – Simply fold a single sheet of paper to create this fun and unique tie.
- Great gift addition – Perfect for Father’s Day, birthdays, or other occasions as a quirky gift accessory.
- Customizable – Pick your favorite colors or patterns to make this tie personal and special for the recipient.
- Simple yet impressive – Easy enough for beginners, yet still impressive when finished!
Skill Level
★☆☆☆☆ (Very Easy)
Materials Needed
- 1 square sheet of paper (any color or pattern you prefer)
Note: an origami paper tie made with 6 inches x 6 inches (15 cm x 15 cm) paper makes a tie that is 5.5 inches x 2 inches (14 cm x 4 cm).
Instructions
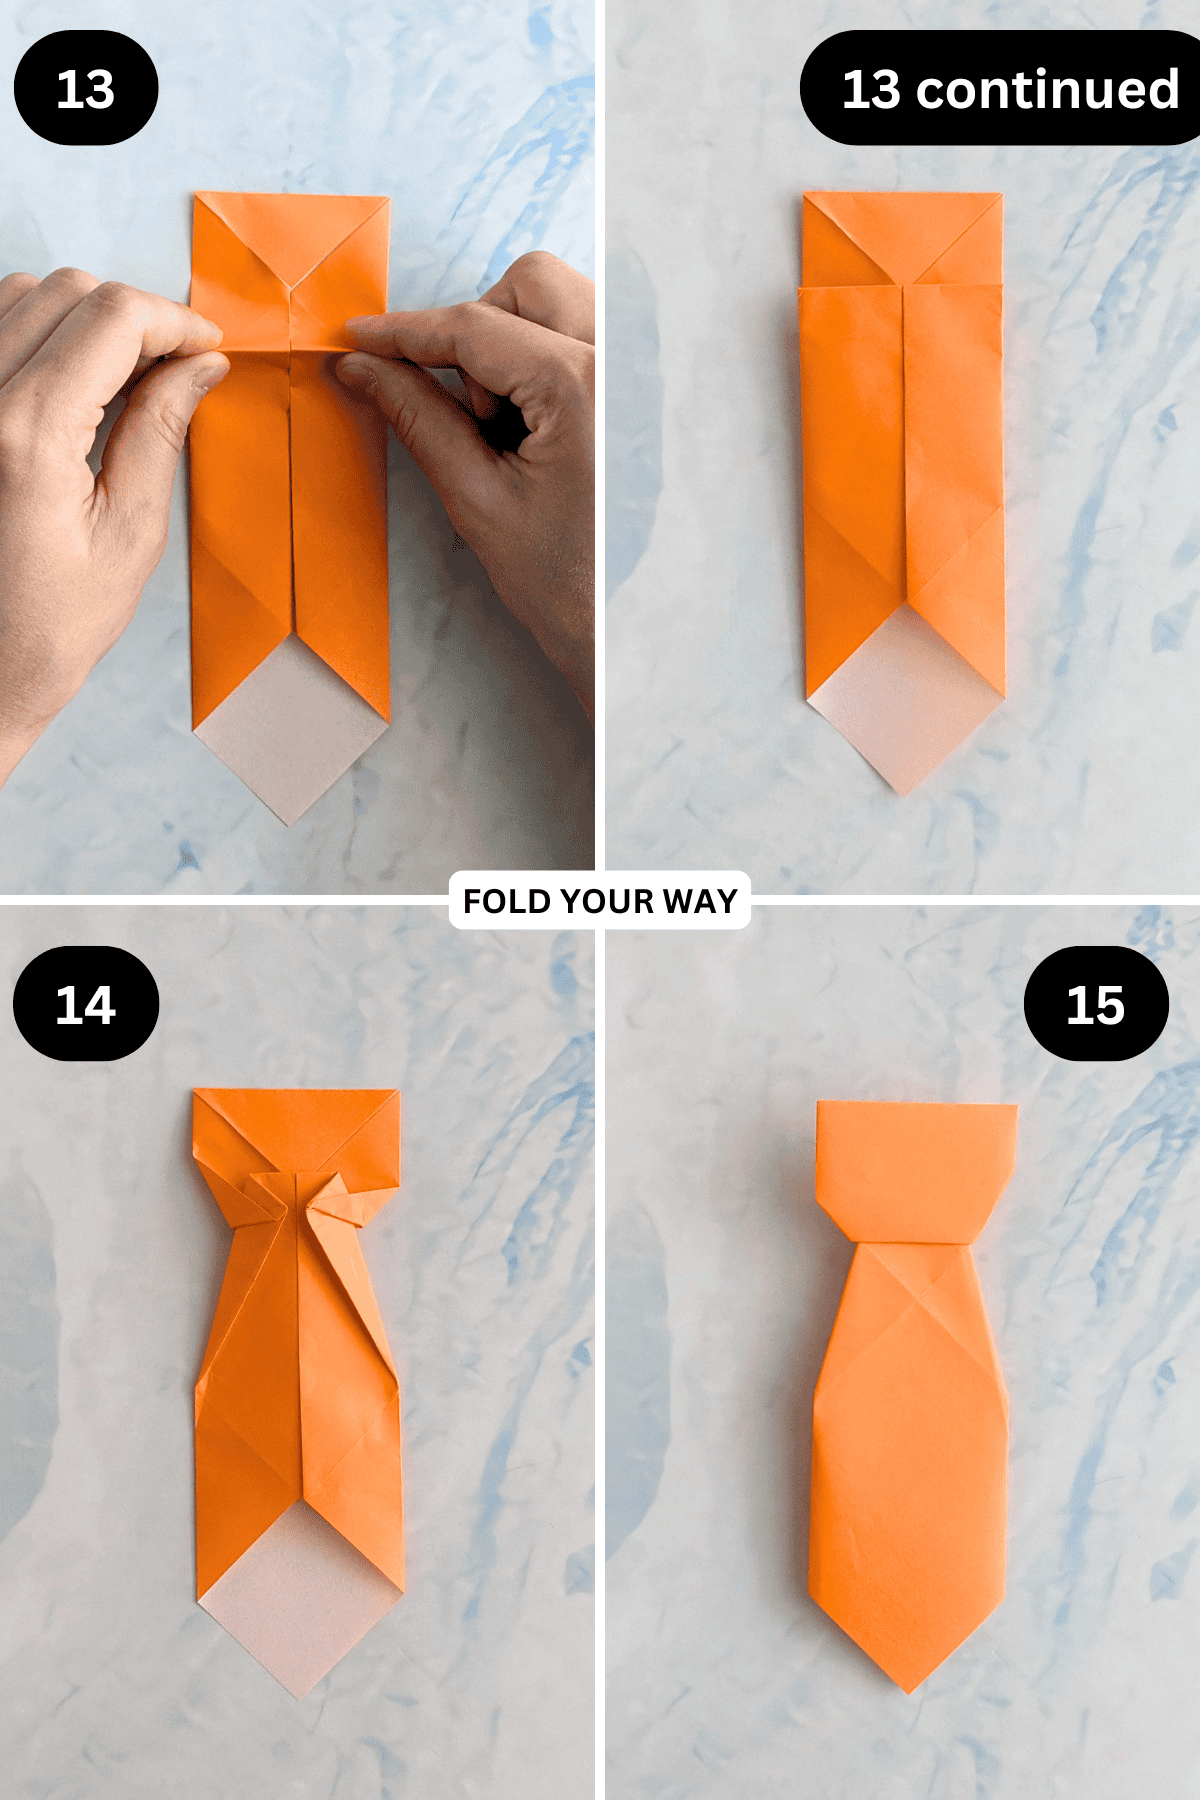
Step 1: Start with the color you want your tie to be facing down.
Step 2: Fold the bottom edge up to meet the top edge.
Step 3: Unfold previous step.
Step 4: Fold the left edge to meet the right edge.
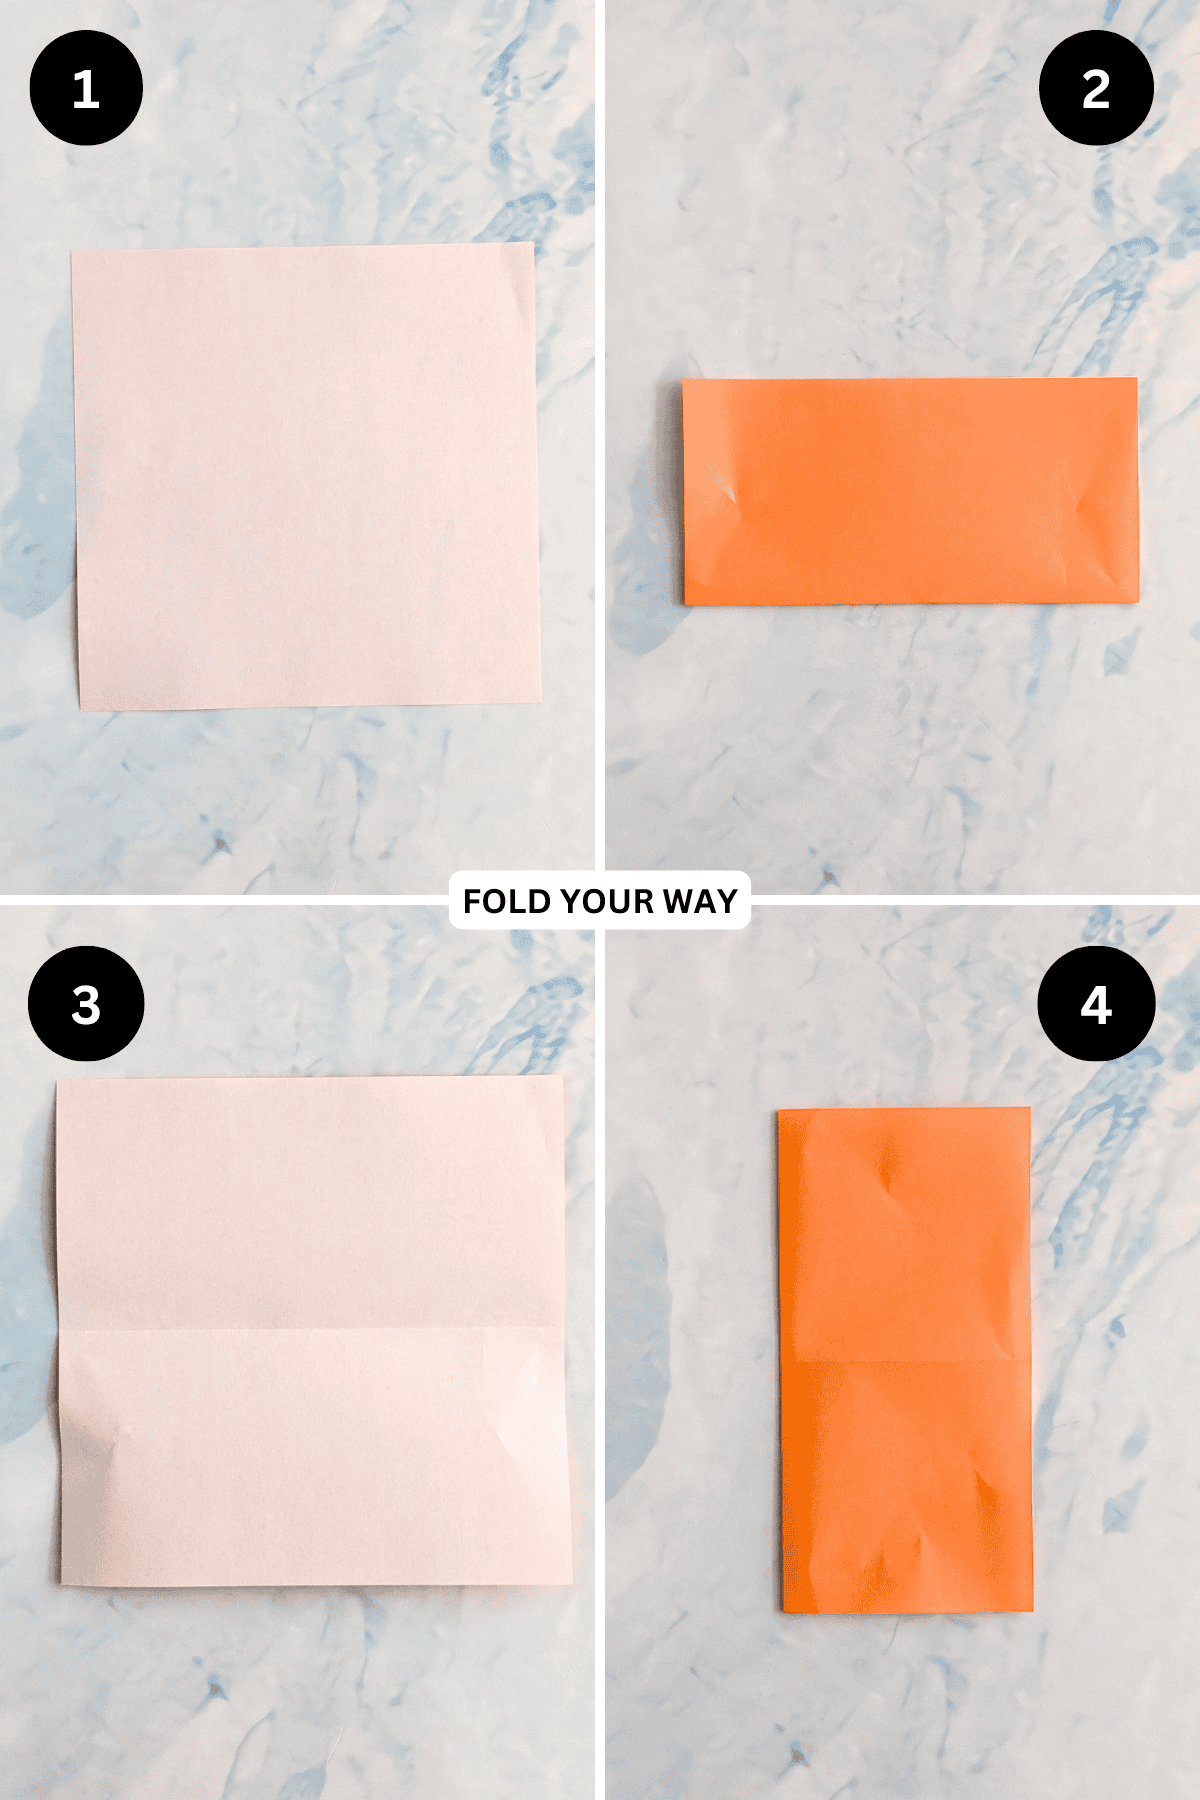
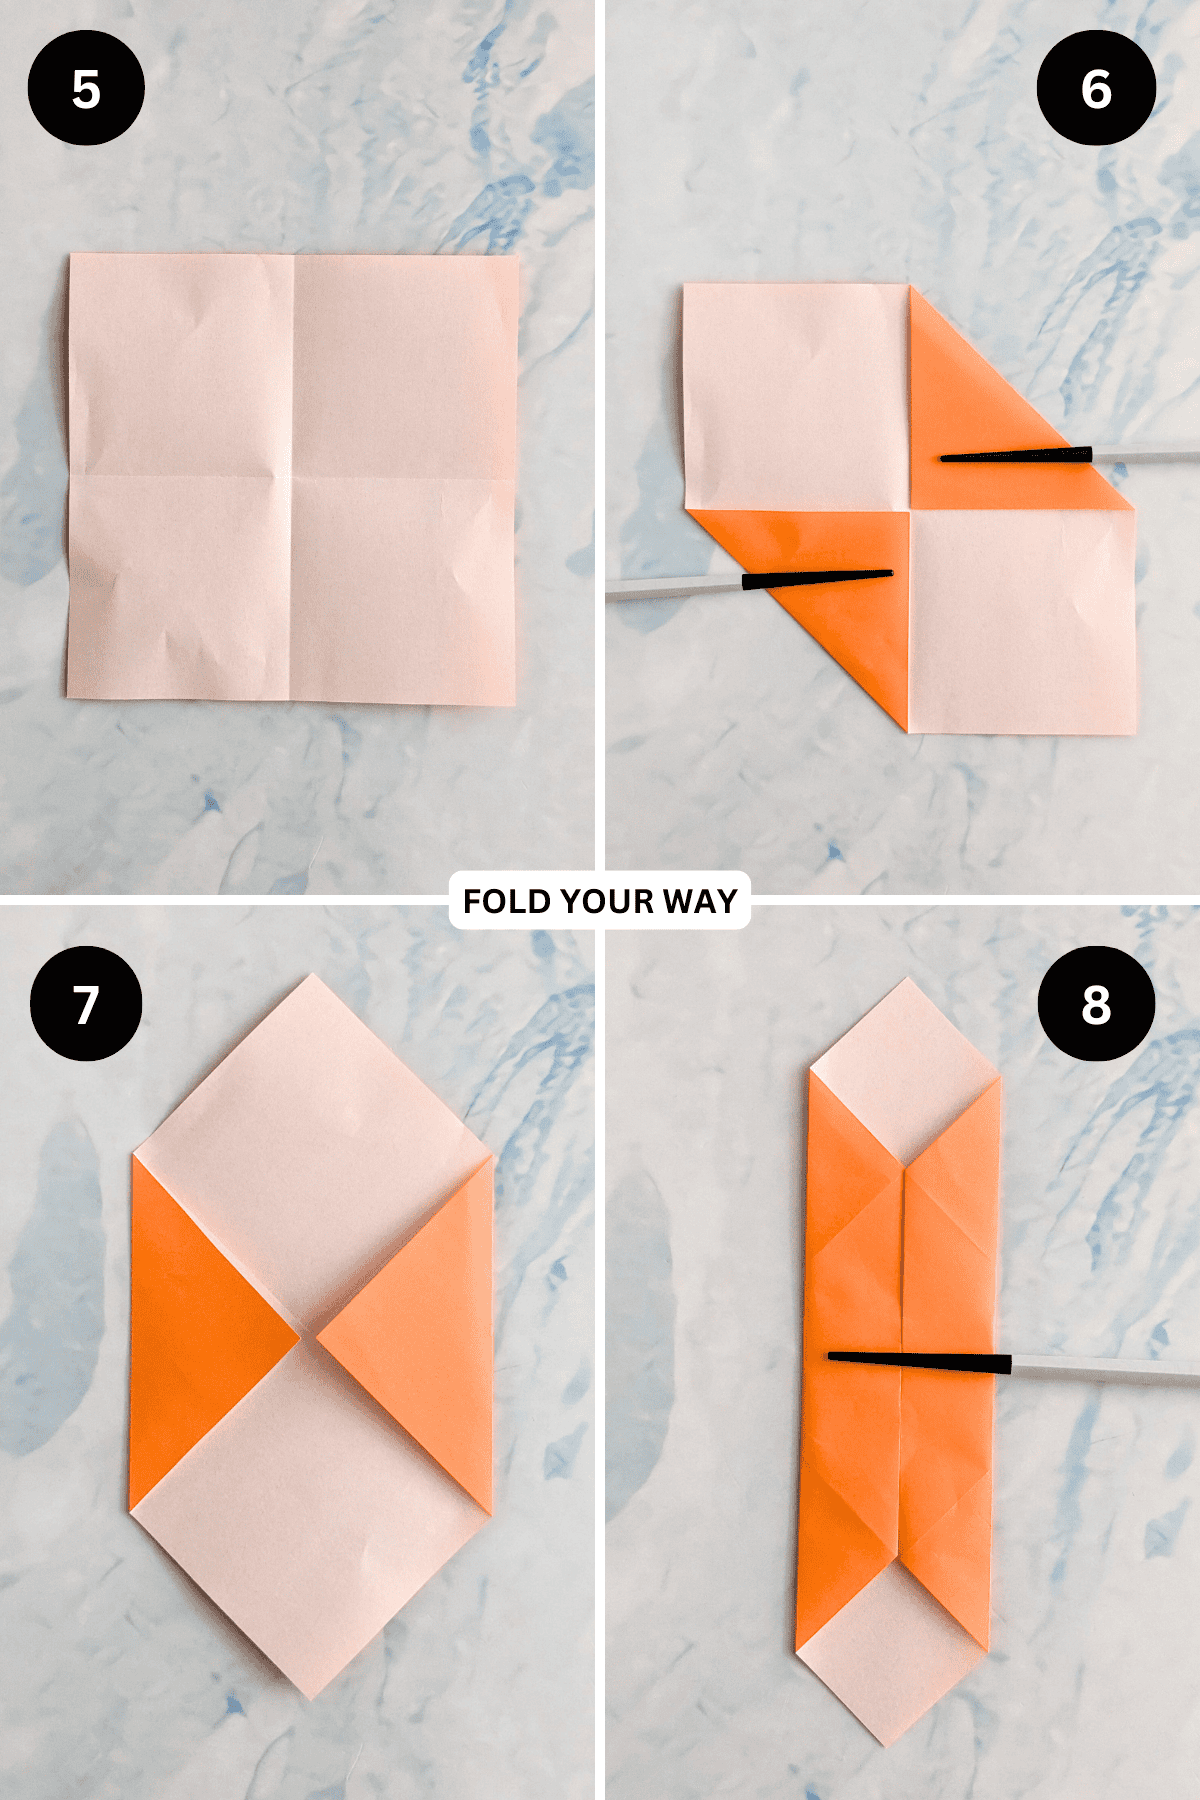
Step 5: Unfold previous step.
Step 6: Fold both the bottom left and top right corners in to meet the middle.
Step 7: Rotate your paper so it sits as shown.
Step 8: Fold both the left and right edges in to meet the middle.
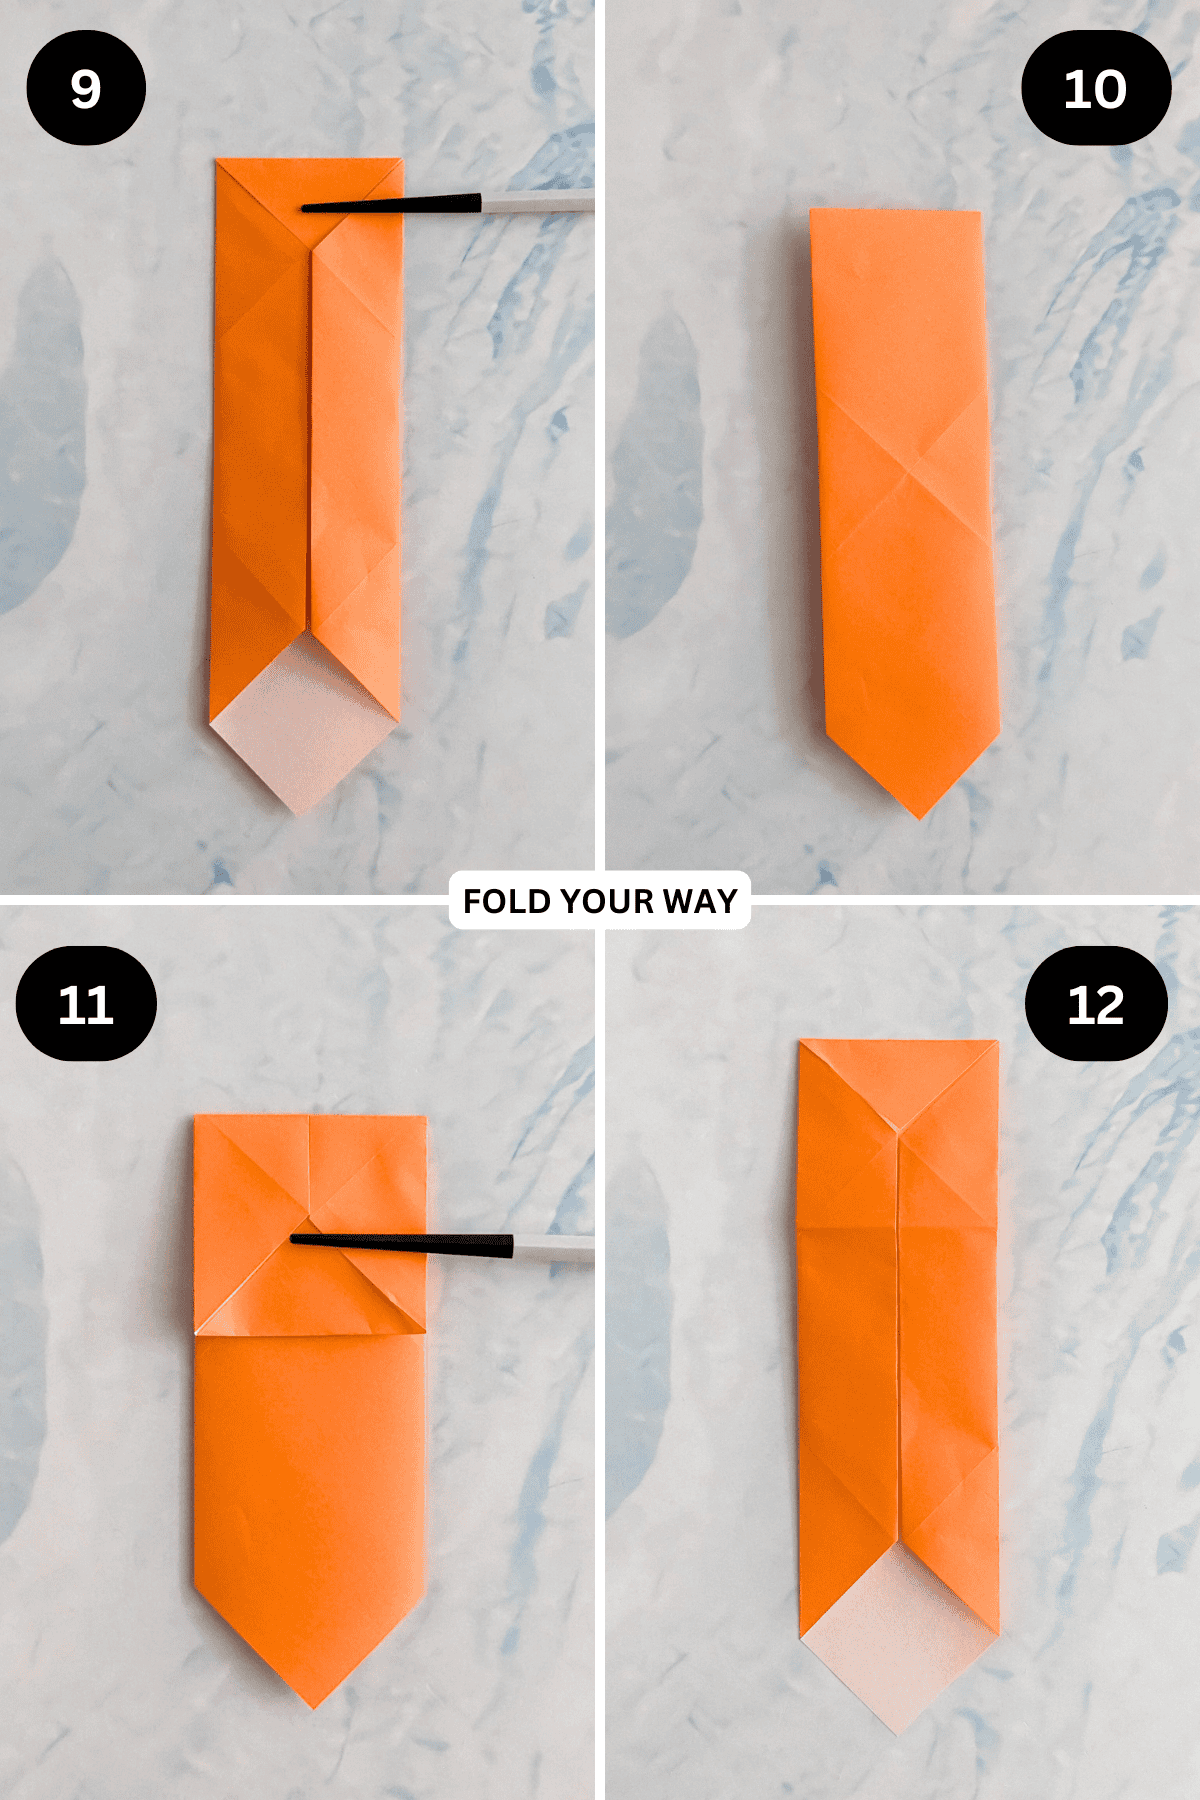
✨ You're almost there! ✨
To unlock the final steps and complete your pattern, create a free account with Grow.me. below.
Make sure you tick the box to subscribe to our newsletter and stay up to date with the latest patterns, tips, and more!
Once you're signed up, you'll get instant access to finish your project and enjoy exclusive content in the future.
Already signed up? Hit the button below and select ‘Switch to Log In’ to pick up where you left off and finish your project!
Tips For Success
- Use a square piece of paper: The size of the square will affect the size of your origami tie, so choose a paper size that suits the project.
- Choose a patterned paper: If you want to make your tie more interesting, go for patterned or textured paper. This can add a stylish flair to your final design.
- Use a sturdy paper: A medium-weight paper works best to ensure your origami tie holds its shape.

Color, Paper Ideas, and Variations
- Classic colors: Use traditional colors like navy blue, gray, or black for a classic, formal look.
- Bold patterns: Choose bright, fun patterns like stripes, polka dots, or plaid for a modern or playful twist.
- Metallic or glittery paper: For a more festive occasion, use metallic or glittery paper for added shine and elegance.
- Personalized paper: If you're making this for a special person, consider using paper with their favorite colors or patterns (like sports themes, favorite hobbies, etc.).
FAQ
These instructions work best with a square sheet of paper. If you use a different size, the proportions of the tie may be off.
But you can use larger or smaller square sheets of paper.
Definitely! This origami tie works perfectly for birthdays, Father’s Day, or as a fun touch for a wedding or graduation gift.
You can easily attach the origami tie to a card or gift by using a small amount of glue or tape. It can be a fun, creative addition to any gift wrapping.
Other Paper Crafts You Might Like To Try:
Stay Connected
Made this pattern? Let us know how it went in the comments below!
Pin this post - Pin now to take your paper crafting skills to the next level.
Share on Instagram or Facebook - Capture the beauty of your finished paper craft project and share it on Instagram or Facebook! Tag us @foldyourway so we can see your work!

Other Patterns You Might Like To Try:
Looking for other easy patterns like this? Try these:



Comments
No Comments