
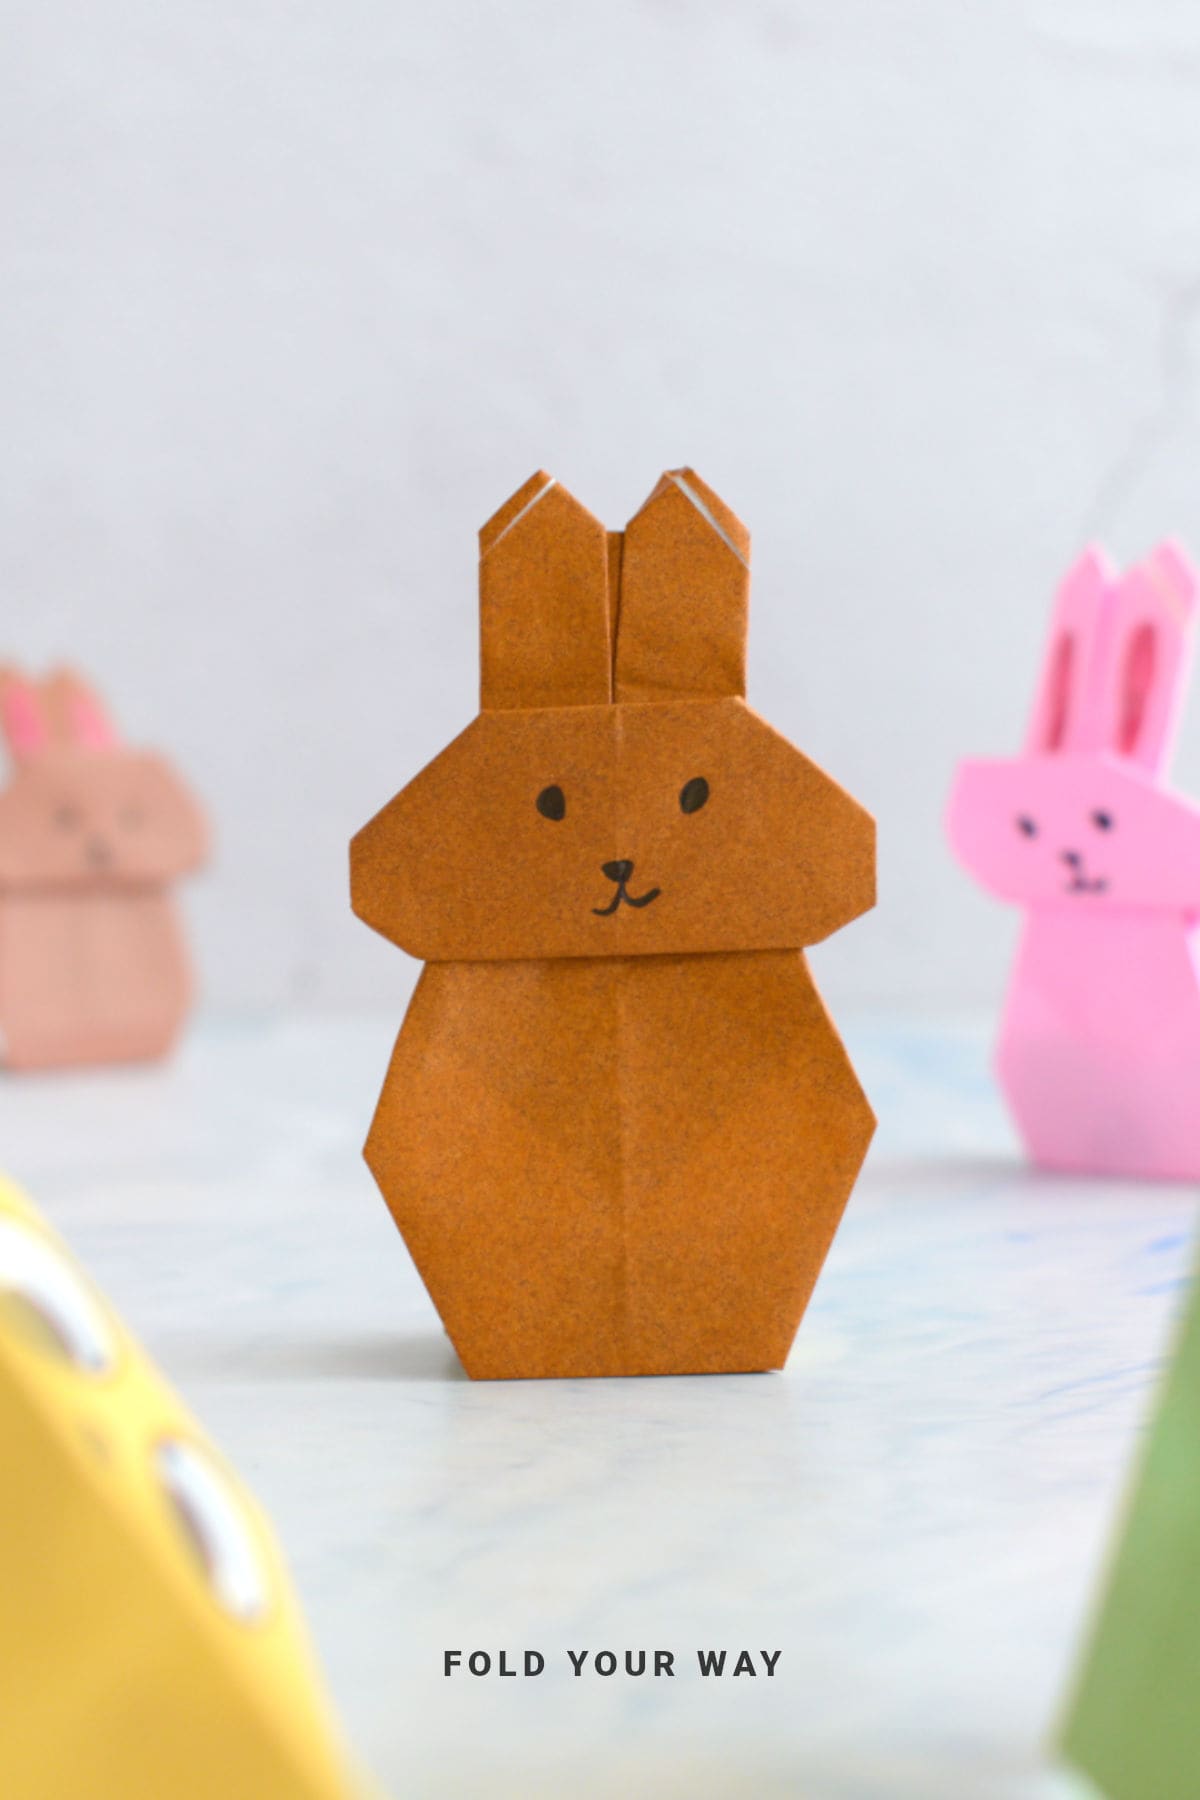
Nothing says Spring like a little rabbit hopping across your craft table.
With a single square sheet, you can fold an origami rabbit that’s perfect for Easter decorations, kids’ projects, or festive displays.
This origami rabbit is an easy origami project for beginners that combines creativity with seasonal fun.
Jump to:
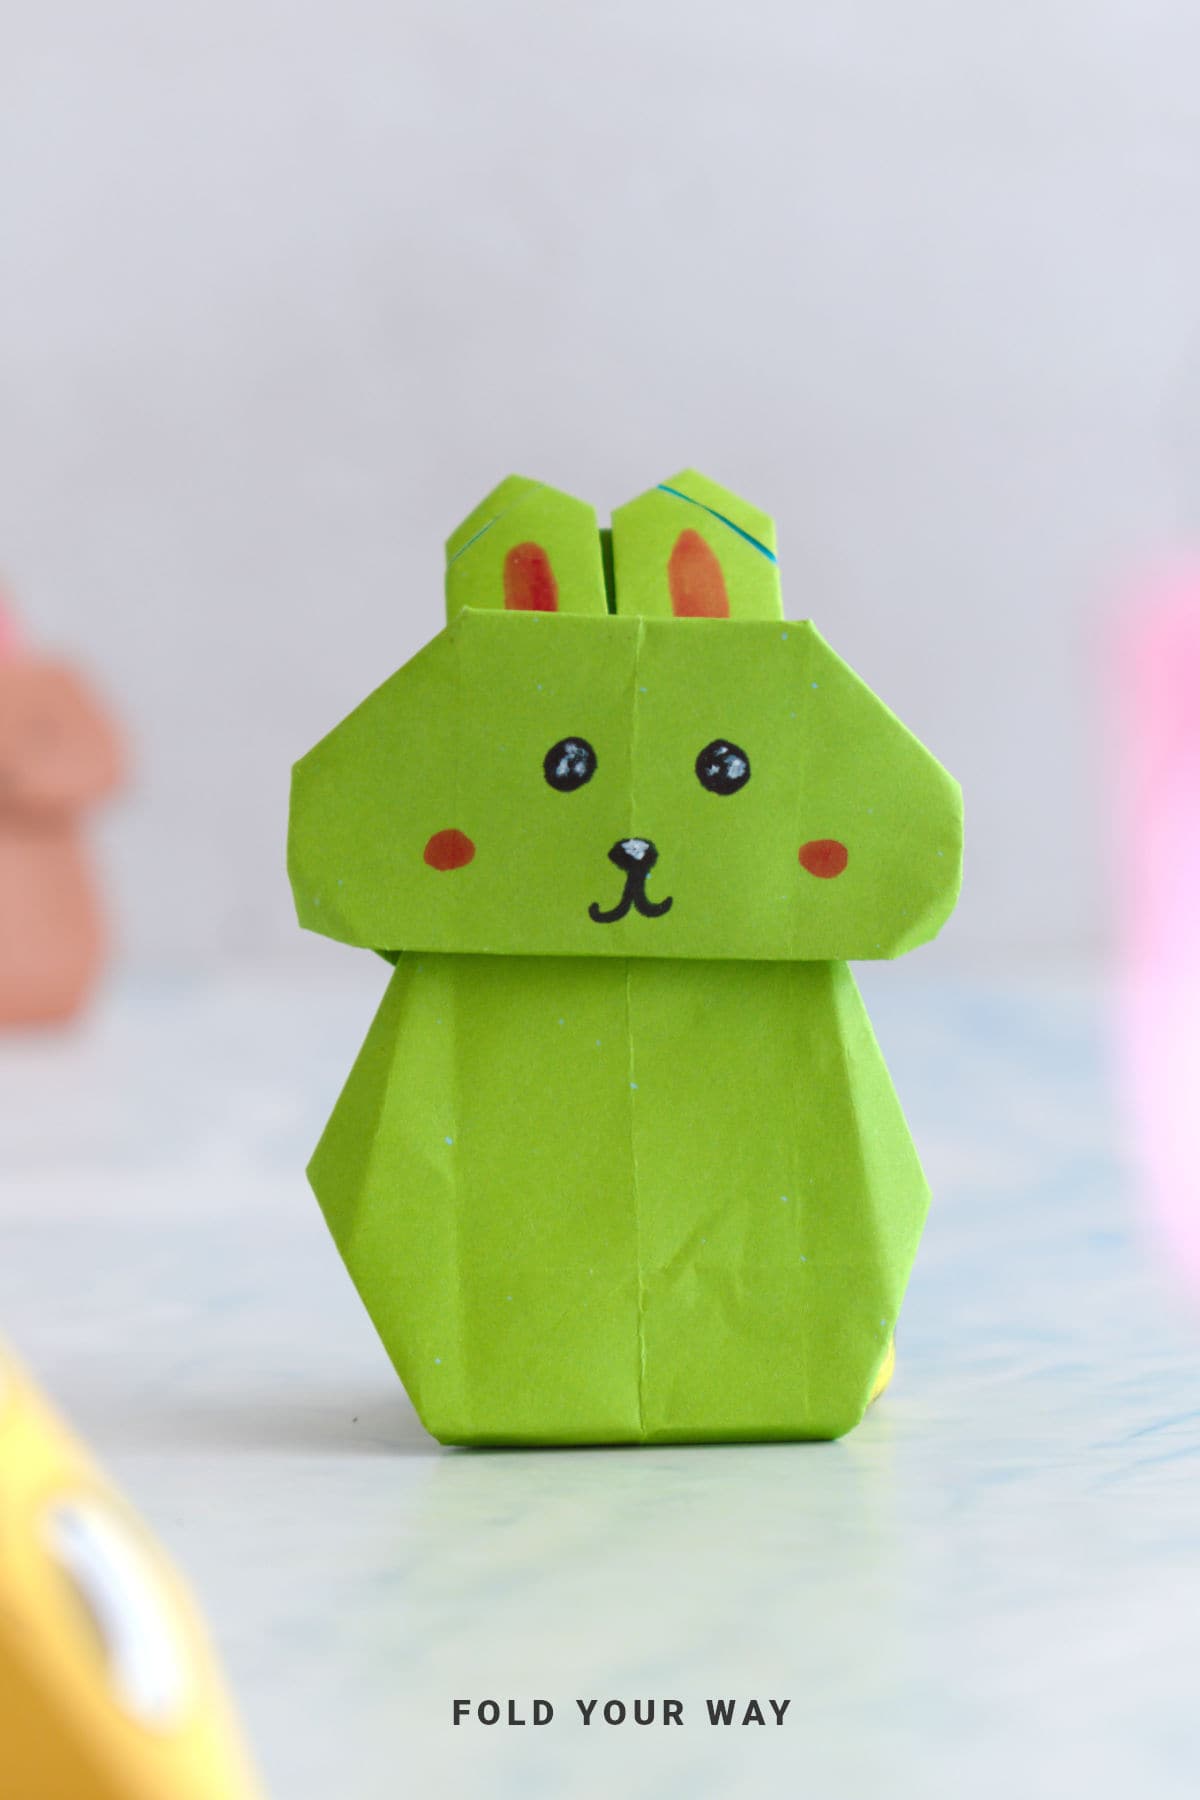
This origami rabbit turns a single square sheet of paper into a foldable, festive bunny.
Perfect for Easter decorations, kids’ activities, or spring-themed displays, it’s a hands-on way to practice folding skills while creating a cute seasonal craft.
Quick, satisfying, and fully customizable, this project is both fun to make and a charming addition to your spring décor or gift ideas.
Imagine hopping into spring with a little handmade bunny on your table!
This origami rabbit lets you fold a simple paper bunny that’s ideal for Easter décor, classroom activities, or seasonal displays at home.
You can turn plain paper into a tiny decorative animal, then experiment with different sizes, colors, or textures to create a whole springtime scene.
This origami rabbit is an easy origami project for beginners, offering a fun, tactile way to practice basic folds while producing a playful result.
It’s also a great gift idea for children or friends, especially when paired with a seasonal card or craft set.
Once you fold your first rabbit, you’ll likely want to make several more to fill a display or create a paper bunny family for Easter or Spring celebrations.
Why You'll Love This Pattern
- Fast and festive: Create a charming rabbit in just a few minutes
- Beginner-friendly: Simple folds make it an easy origami project for beginners
- Perfect for Easter, springtime crafts, or classroom projects
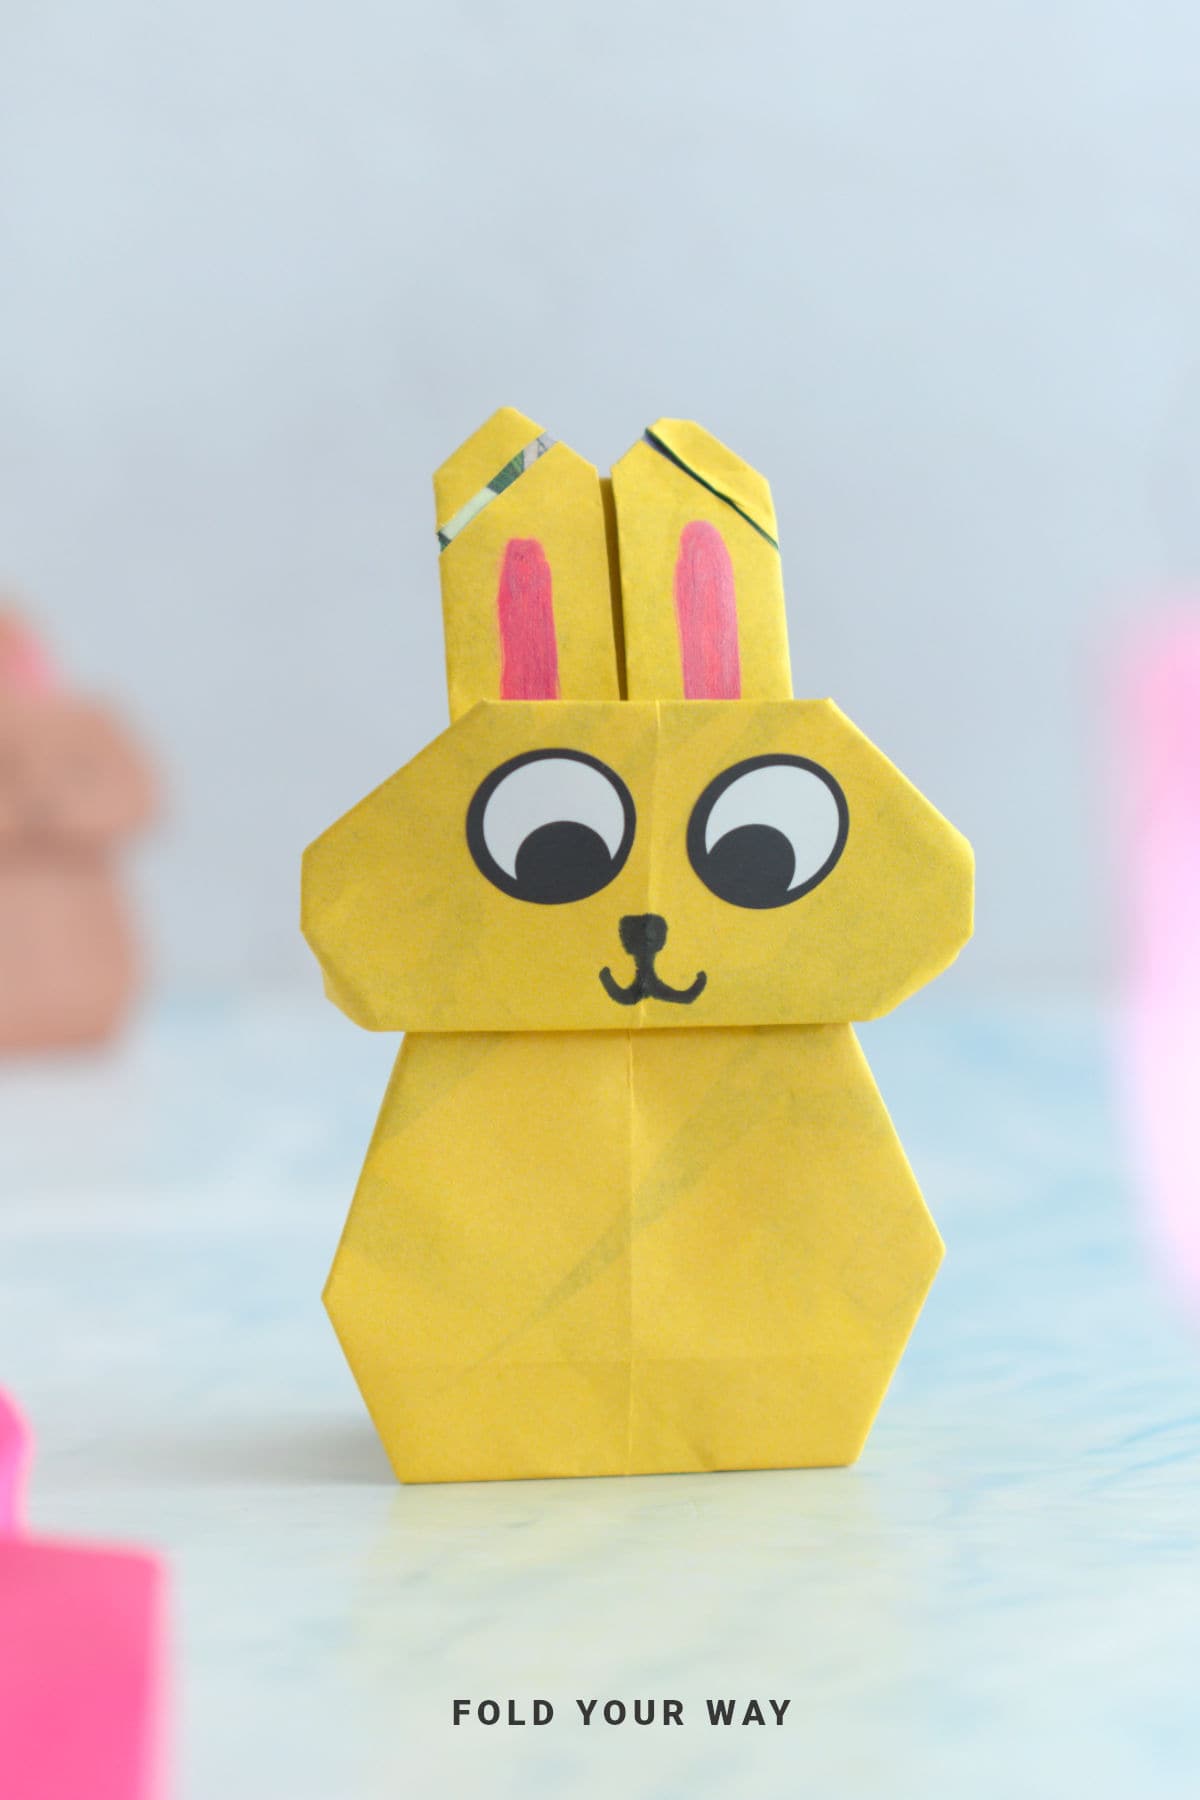
- Customizable: Decorate with markers, colored paper, or stickers for a personal touch
- Perfect for gifting or décor: Great for children, seasonal displays, or handmade gifts
Skill Level
★★☆☆☆ (Easy)
Materials Needed
1 x square sheet of origami paper.
Any size, but recommended to start with 6 inch (15 cm) square paper.
Instructions
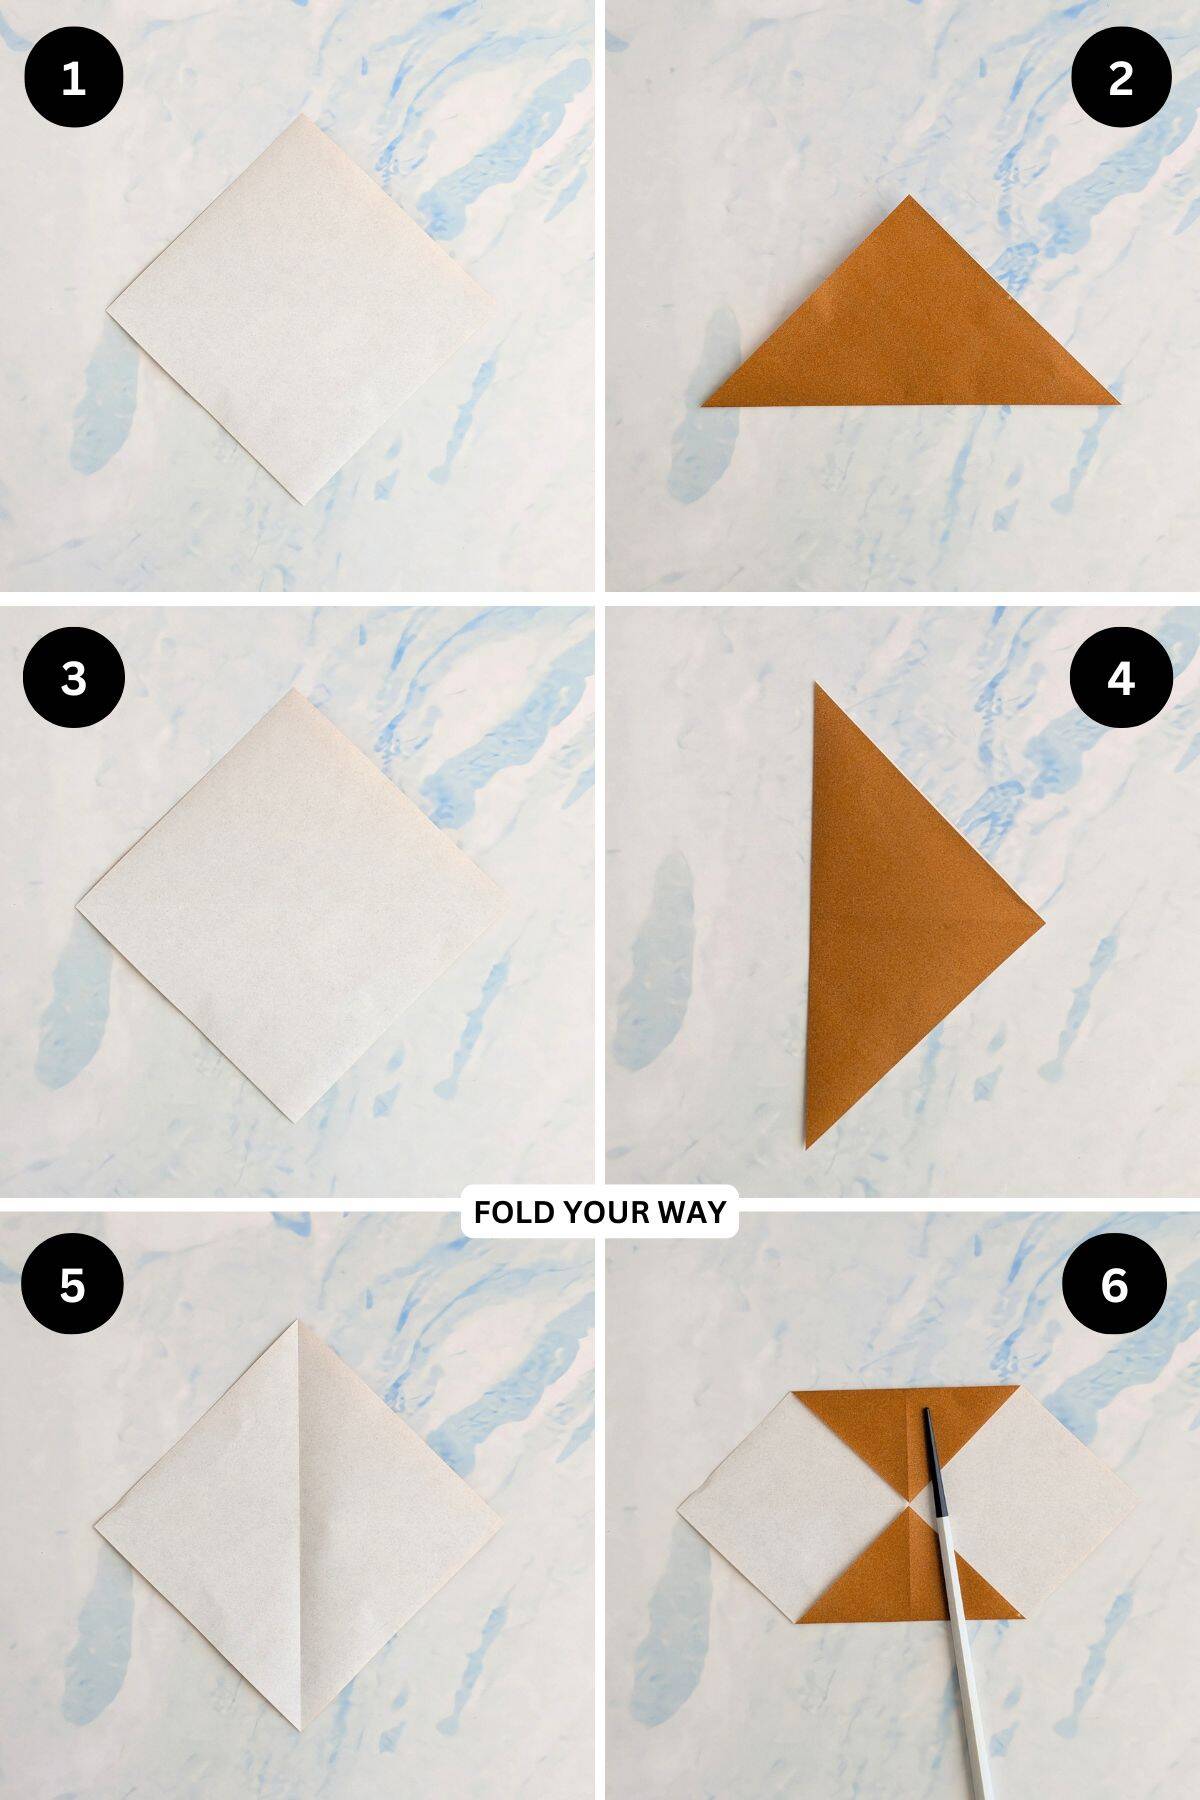
Step 1: Start with the color you want your rabbit to be facing down. Arrange the paper to side like a diamond.
Step 2: Fold the bottom point up to meet the top point.
Step 3: Unfold previous step.
Step 4: Fold the left point to meet the right point.
Step 5: Unfold previous step.
Step 6: Fold both the bottom point and top point in to meet the middle.
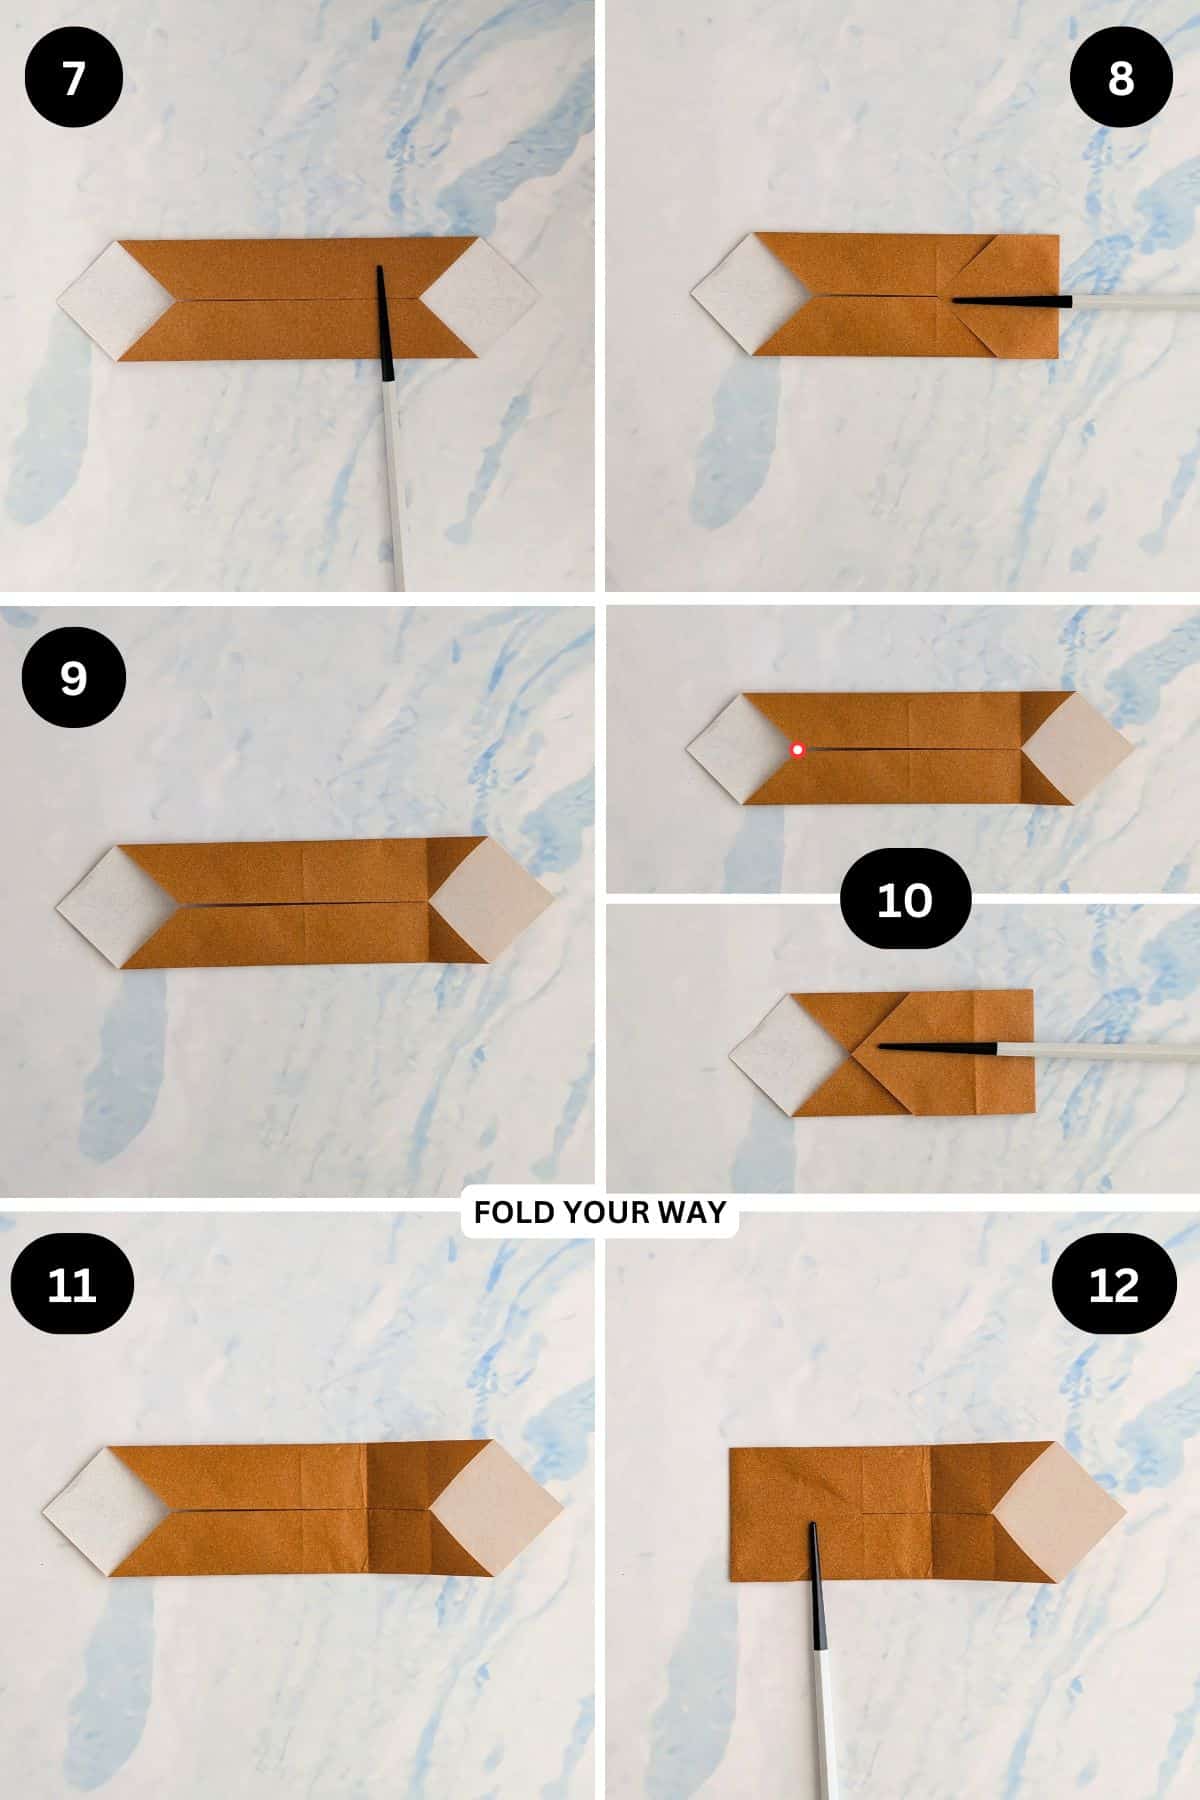
Step 7: Fold both the bottom edge and top edge in to meet the middle.
Step 8: Fold the right point in to meet the middle.
Step 9: Unfold previous step.
Step 10: Fold the right point to the left to meet the point shown.
Step 11: Unfold previous step.
Step 12: Fold the left point to meet the middle.
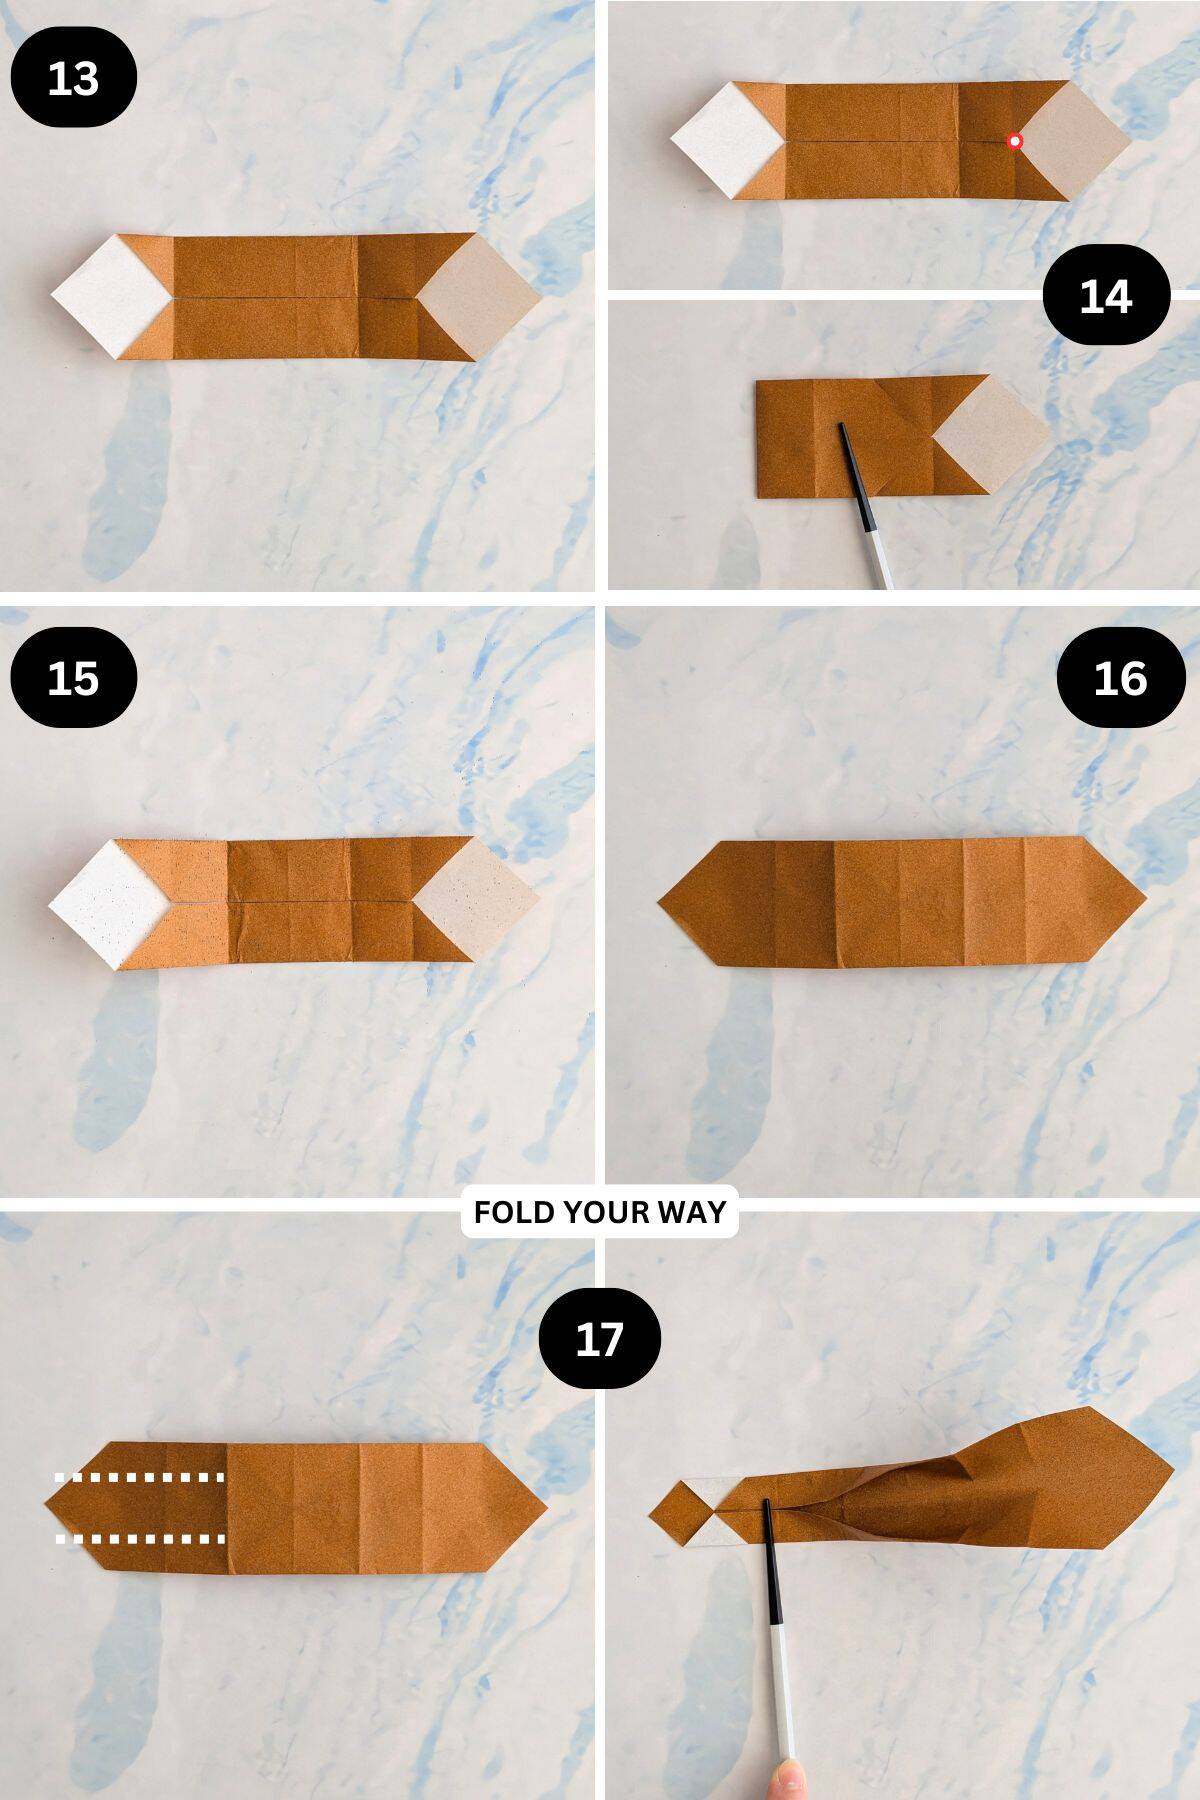
Step 13: Unfold previous step.
Step 14: Fold the left point to the right to meet the point shown.
Step 15: Unfold previous step.
Step 16: Flip your paper over from top to bottom.
Step 17: Fold both the top and bottom edges in to meet the middle but only crease along the lines shown. You only want to crease as far to the 2nd vertical crease from the left.
✨ You're almost there! ✨
To unlock the final steps and complete your pattern, create a free account with Grow.me. below.
Make sure you tick the box to subscribe to our newsletter and stay up to date with the latest patterns, tips, and more!
Once you're signed up, you'll get instant access to finish your project and enjoy exclusive content in the future.
Already signed up? Hit the button below and select ‘Switch to Log In’ to pick up where you left off and finish your project!
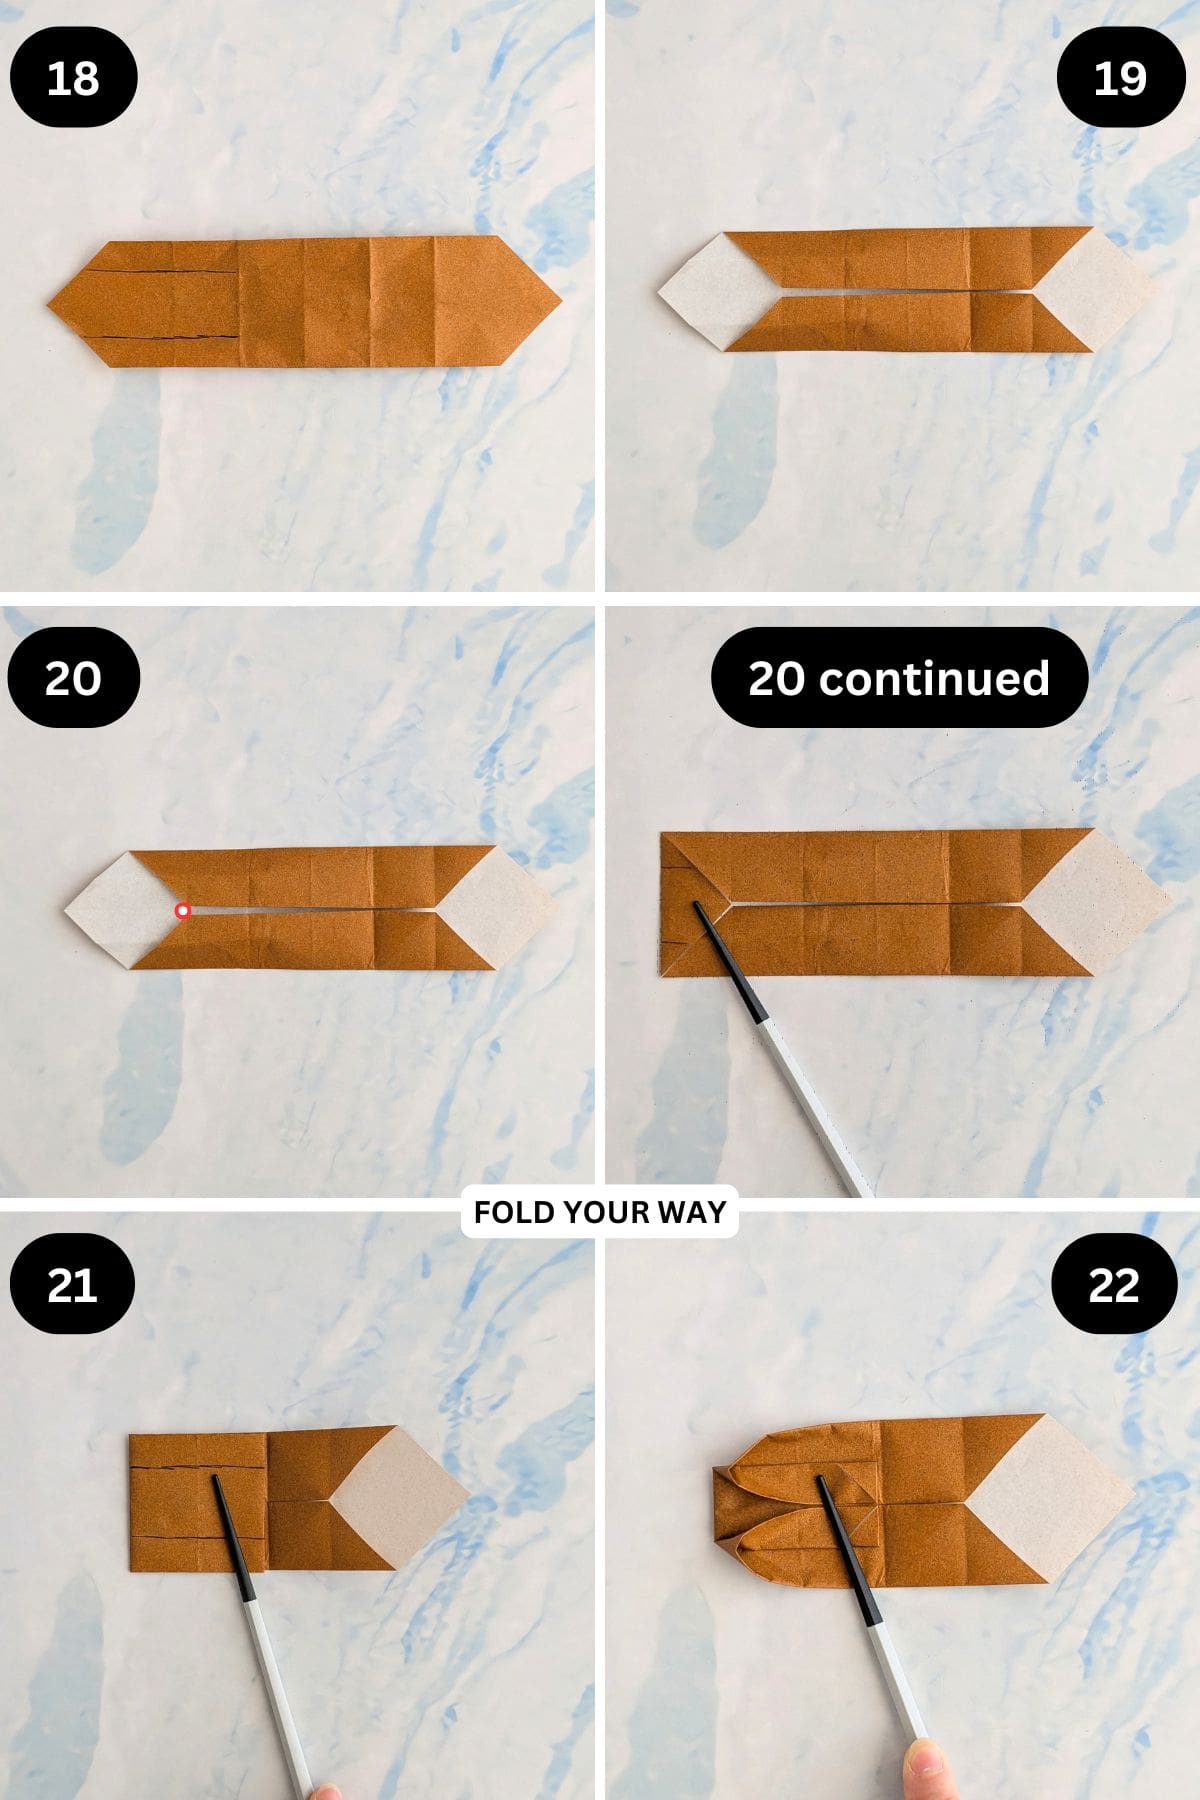
Step 18: Unfold previous step.
Step 19: Flip your paper over from top to bottom.
Step 20: Fold the left point in to meet the point shown.
Step 21: Fold the left side of the paper to the right along the 2nd vertical crease from the left.
Step 22: Fold the top and bottom edges of the upper flap (that you folded in the previous step), in along the existing crease lines.
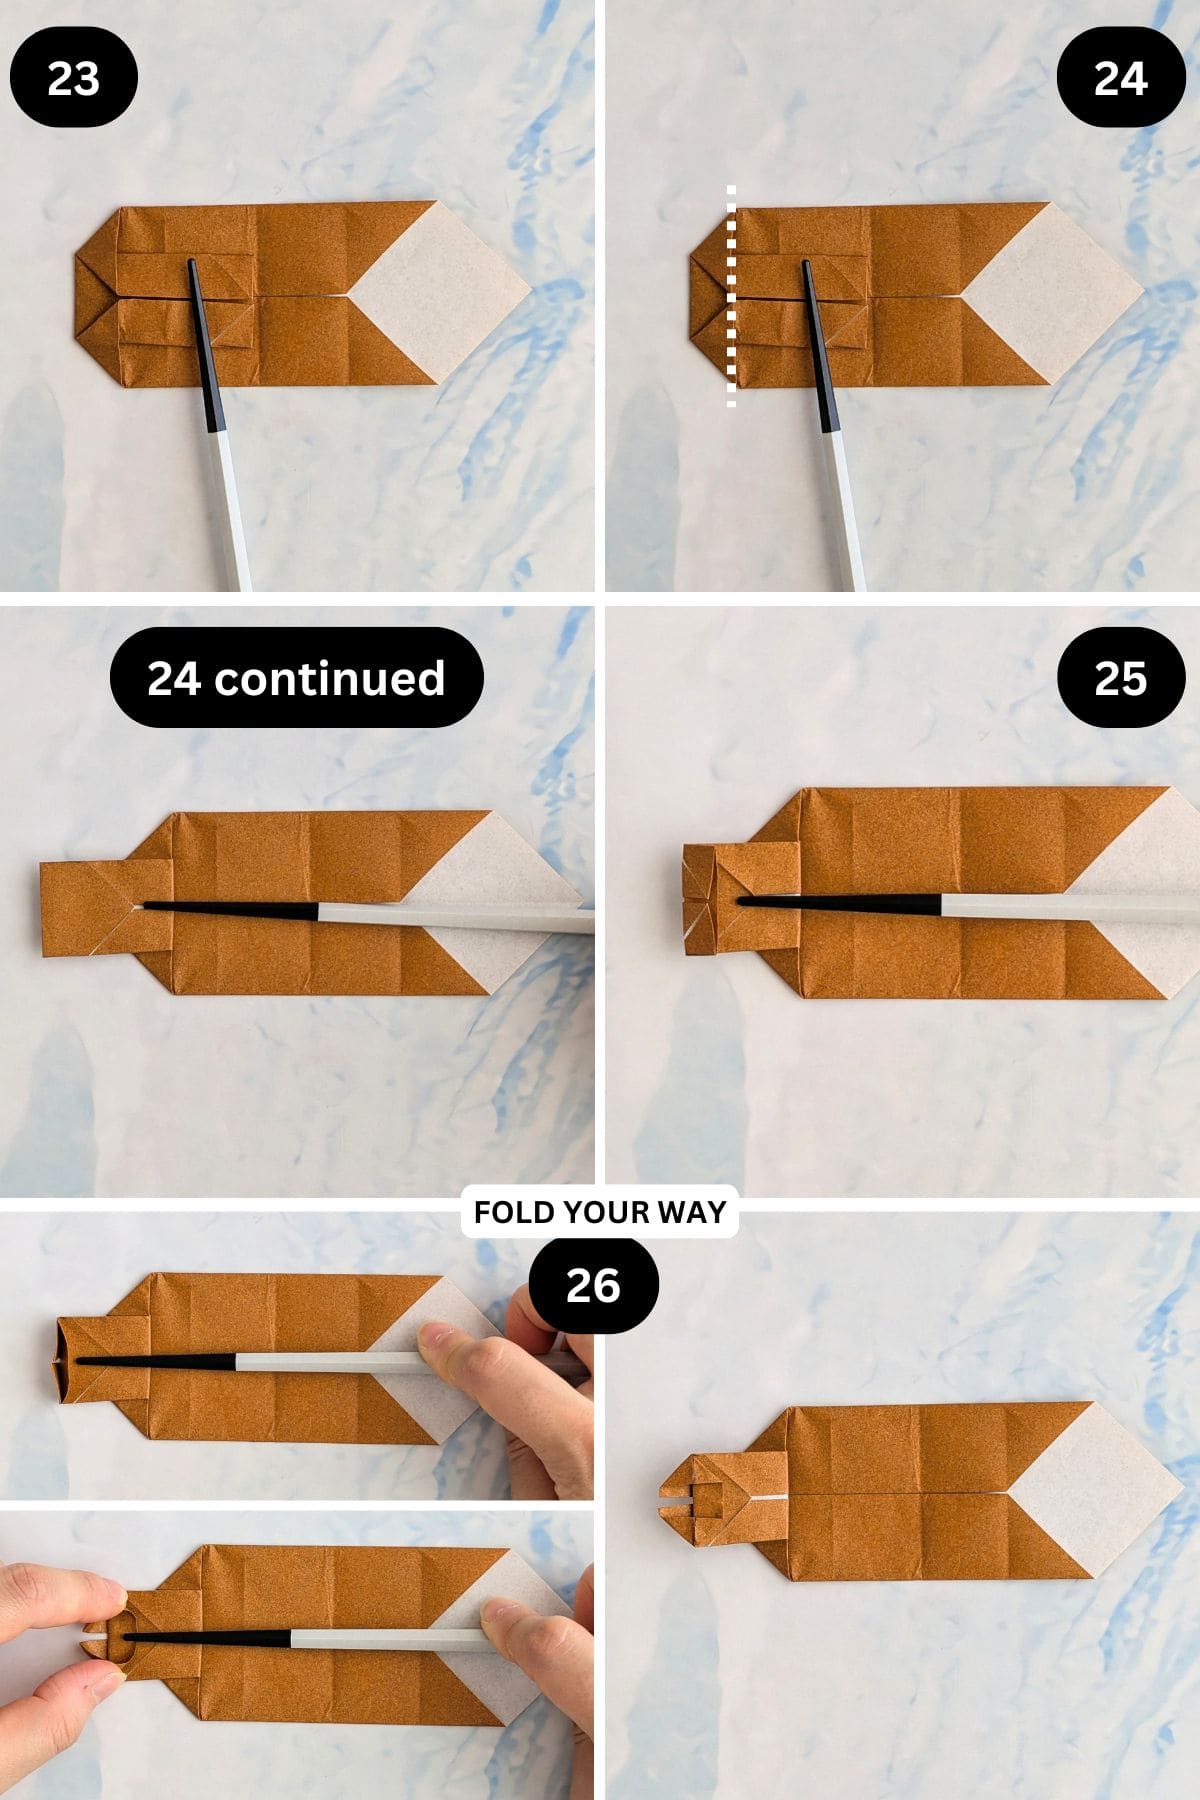
Step 23: Flatten the top and bottom left corners to form triangles as shown.
Step 24: Fold the top flap to the left along the line shown.
Step 25: Fold the left side of the paper to the right slightly as shown.
Step 26: Lift up the edge you folded in the previous step so that it stands upright. Then, open it out slightly and flatten it as shown.
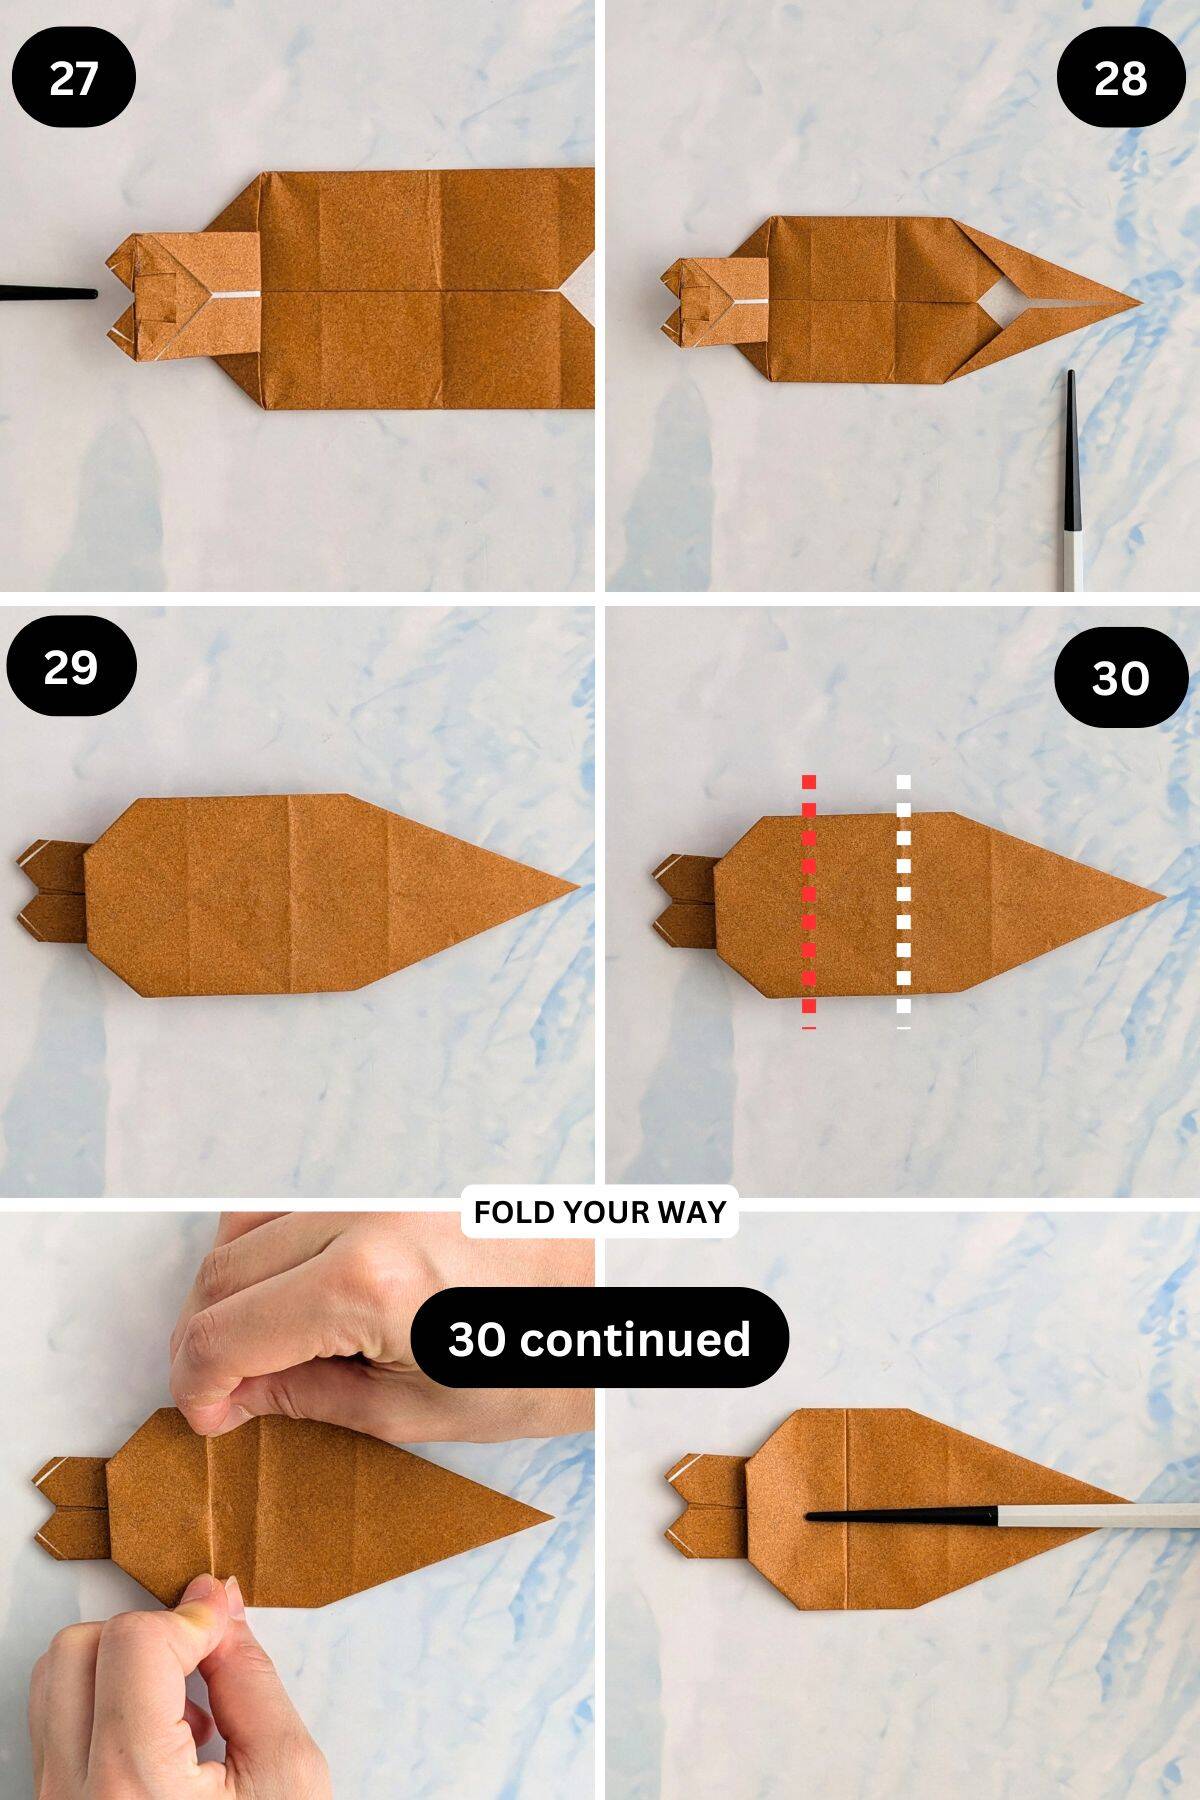
Step 27: Fold the inner corners on the left slightly as shown. These will be the ears of your bunny.
Step 28: Fold the bottom right and top right edges in to meet the middle as shown.
Step 29: Flip your paper over from top to bottom.
Step 30: Fold the 1st crease from the left (red line) to meet the 2nd crease from the left (white line), like an accordion fold or pleat.
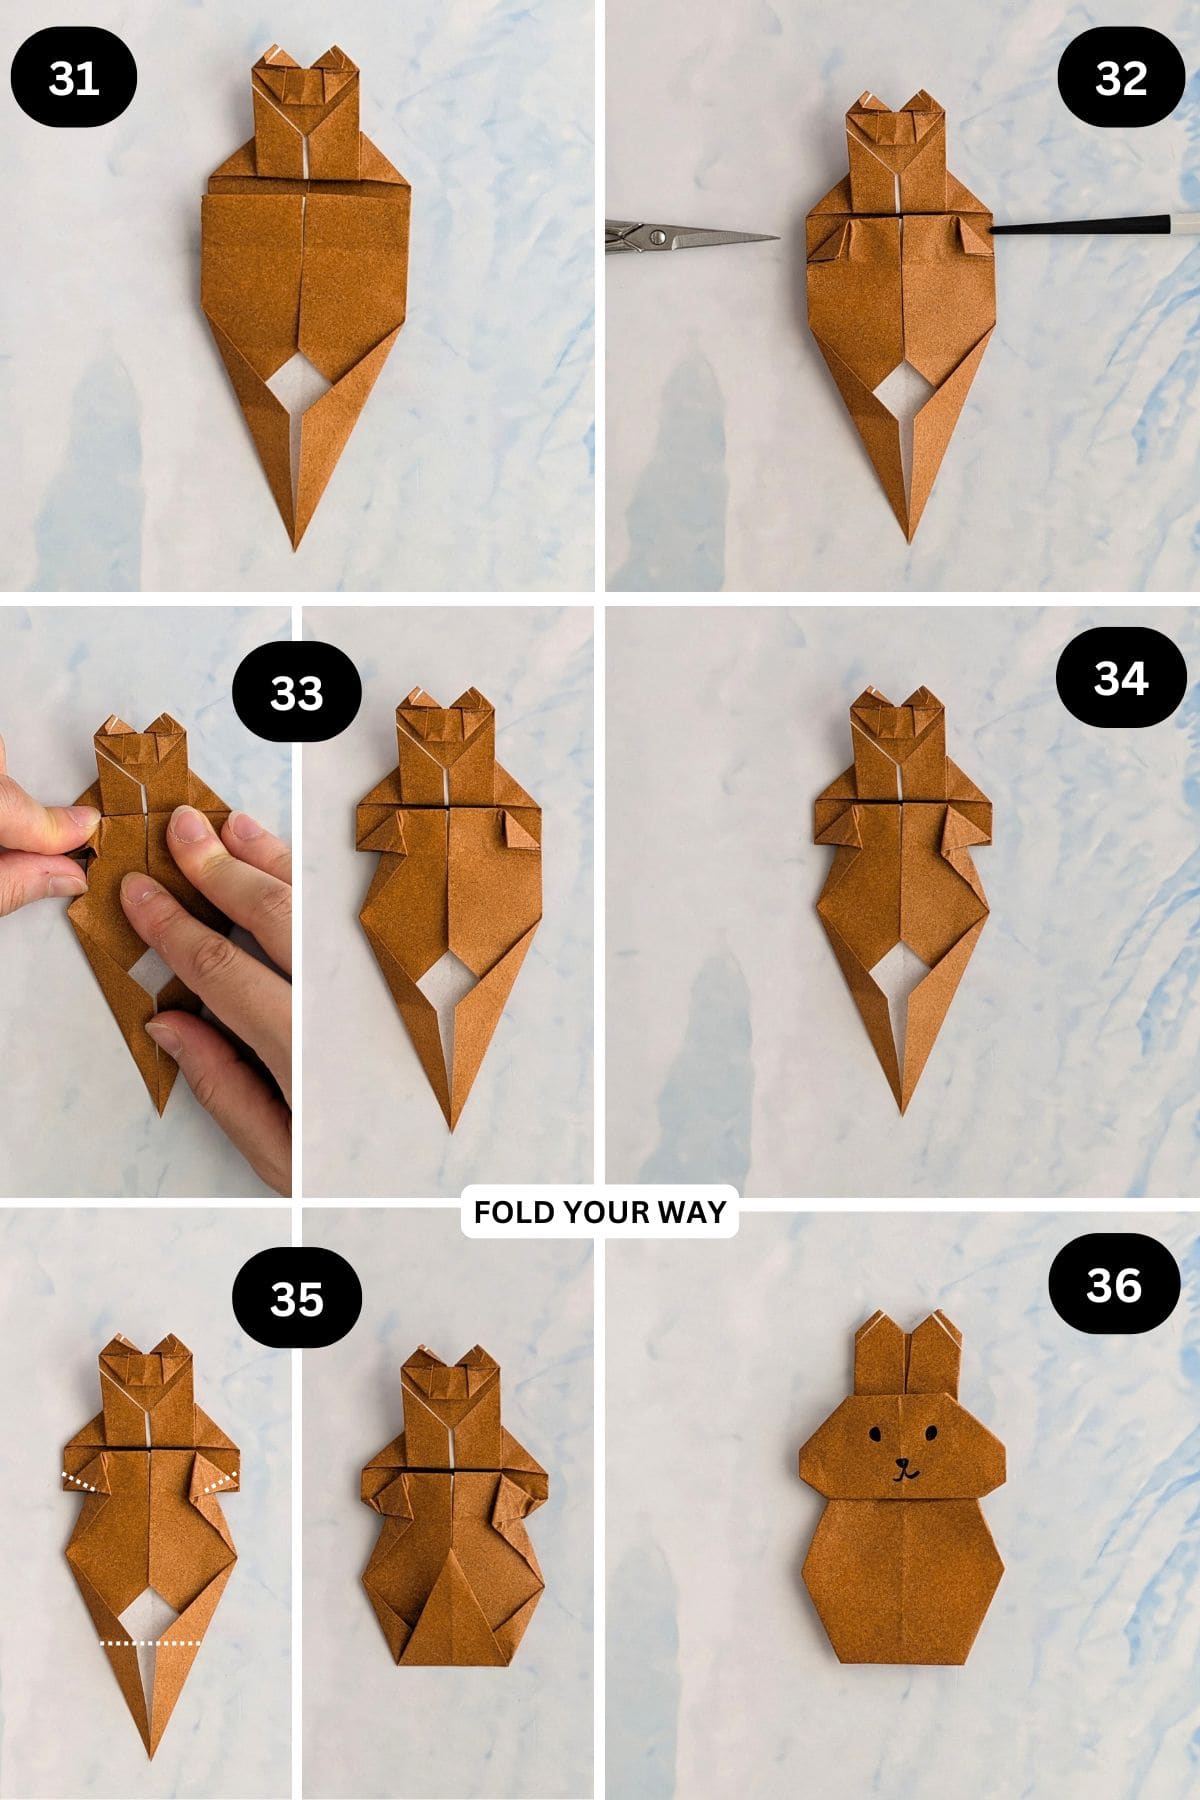
Step 31: Flip your paper over and arrange it to sit as shown.
Step 32: Fold the middle corners in slightly as shown. Crease well.
Step 33: Open out the left side of the paper and push the left side in slightly as shown, re creasing along the existing crease on the left.
Step 34: Repeat previous step for the right side, keeping it as symmetrical as possible.
Step 35: Fold the paper in along the lines shown.
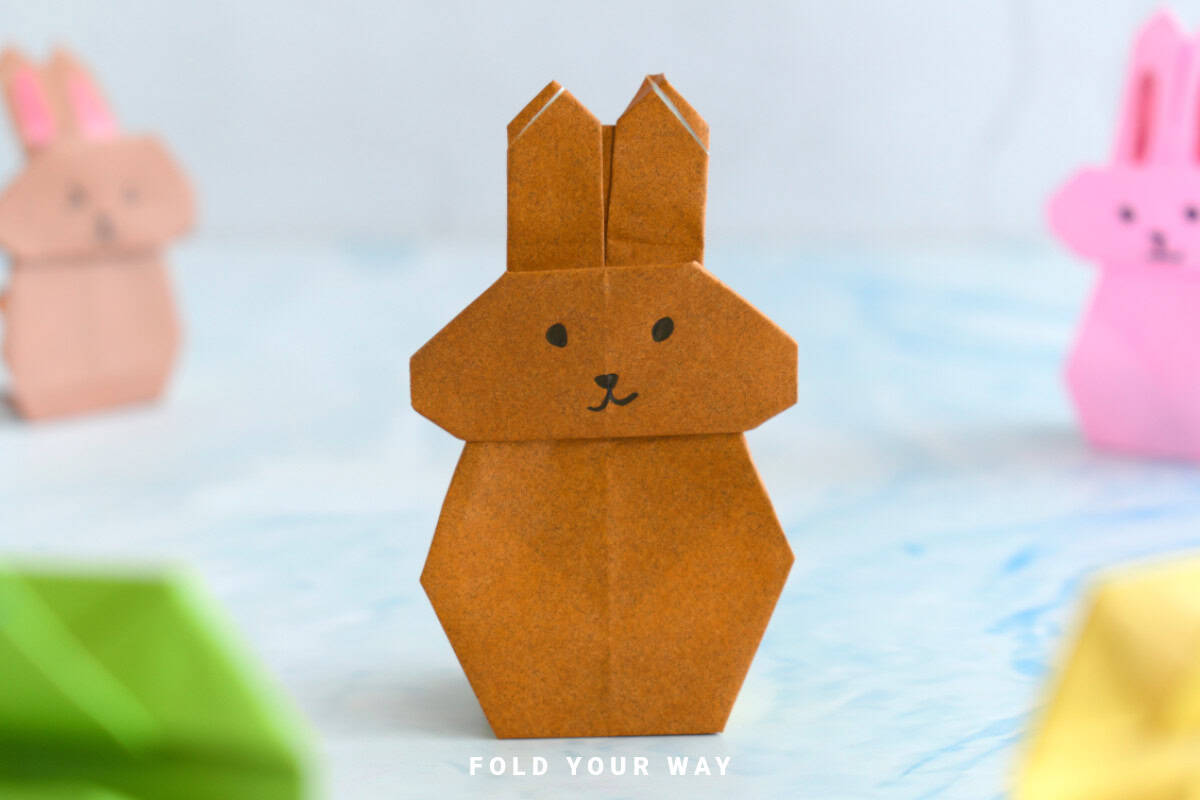
Step 36: Flip your paper over. Decorate your rabbit as you like.
Tips For Success
- Make sharp, crisp folds for clean edges
- Use thinner paper for easier folding, thicker paper for sturdier rabbits
- Practice the folds on scrap paper before using your final sheet
Color, Paper Ideas, and Variations
- White or pastel paper for Easter bunnies
- Brown or grey for realistic rabbits
- Patterned or textured paper for playful or whimsical designs
- Add colored paper for ears, nose, or tail accents
- Mix different sizes for a family of rabbits
FAQ
Absolutely. This is an easy origami project for beginners, perfect for kids’ crafts.
Yes, though thinner paper folds more cleanly, while thicker paper adds sturdiness.
No—this origami rabbit is made entirely from folds. Glue or scissors are optional for decoration or stability.
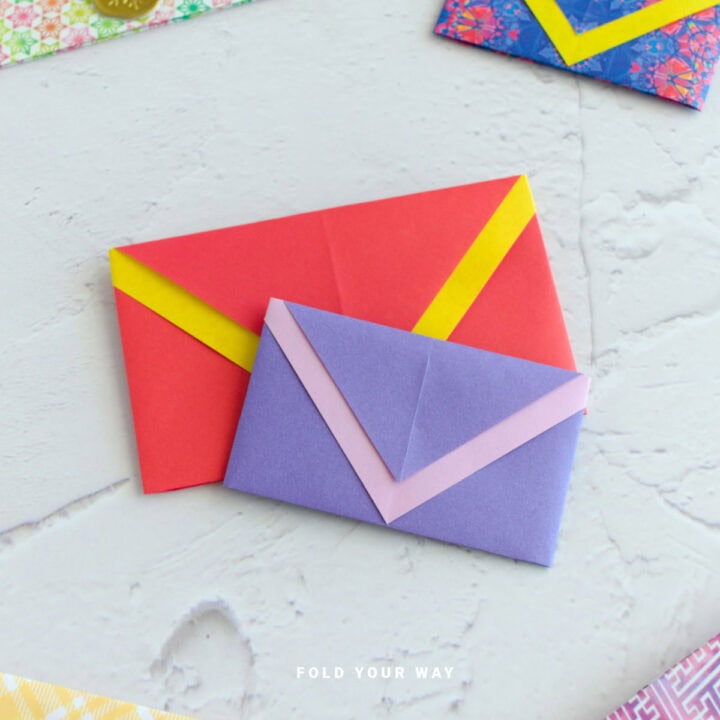
Other Paper Crafts You Might Like To Try:
Helpful Tips and Common Mistakes For Paper Crafts
Paper crafting and origami can be hard sometimes. Which is why we've made this printable PDF just for you.
It outlines helpful tips so that you can successfully complete your craft, and some of the most common mistakes people come across.
You can download the helpful tips and common mistakes for paper crafts printable PDF here.
Stay Connected
Made this pattern? Let us know how it went in the comments below!
Pin this post - Pin now to take your paper crafting skills to the next level.
Share on Instagram or Facebook - Capture the beauty of your finished paper craft project and share it on Instagram or Facebook! Tag us @foldyourway so we can see your work!
Other Patterns You Might Like To Try:
Looking for other easy patterns like this? Try these:


Comments
No Comments