
Looking for a fun, creative gift idea for Father's Day, a teacher's gift, or a special occasion?
This easy origami shirt and tie set is perfect!
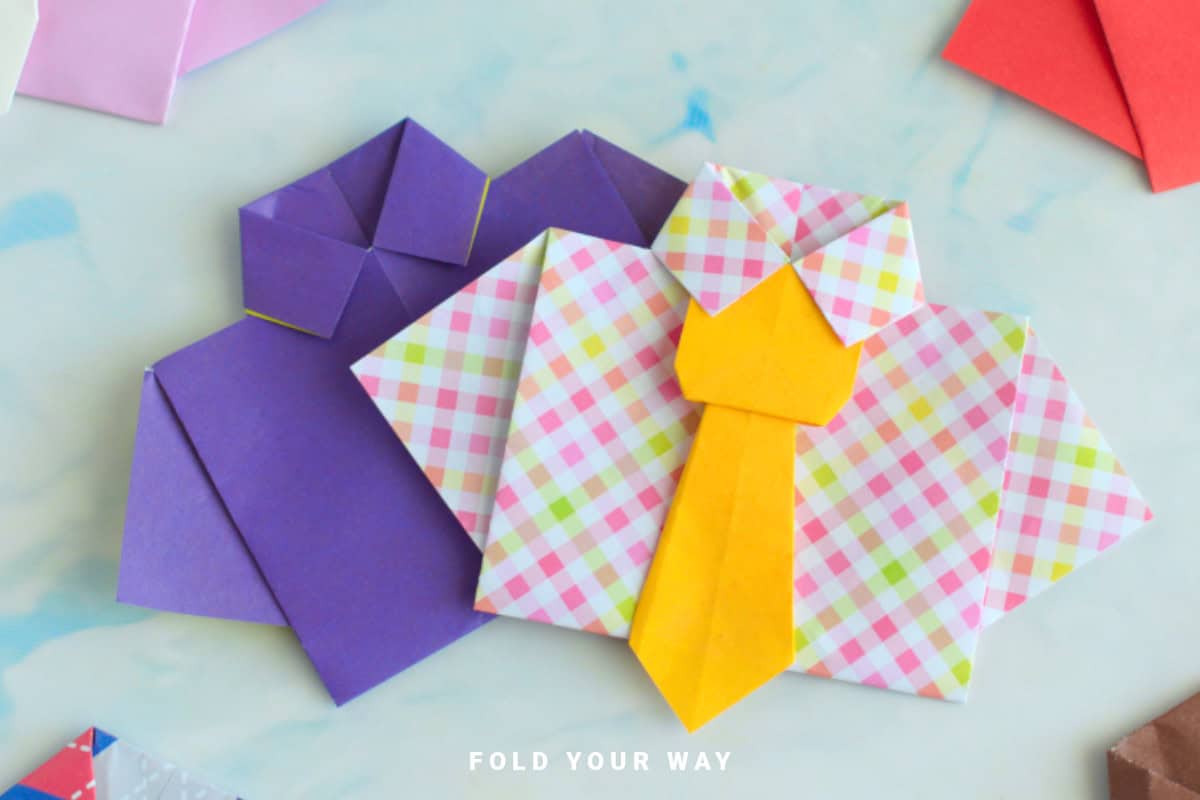
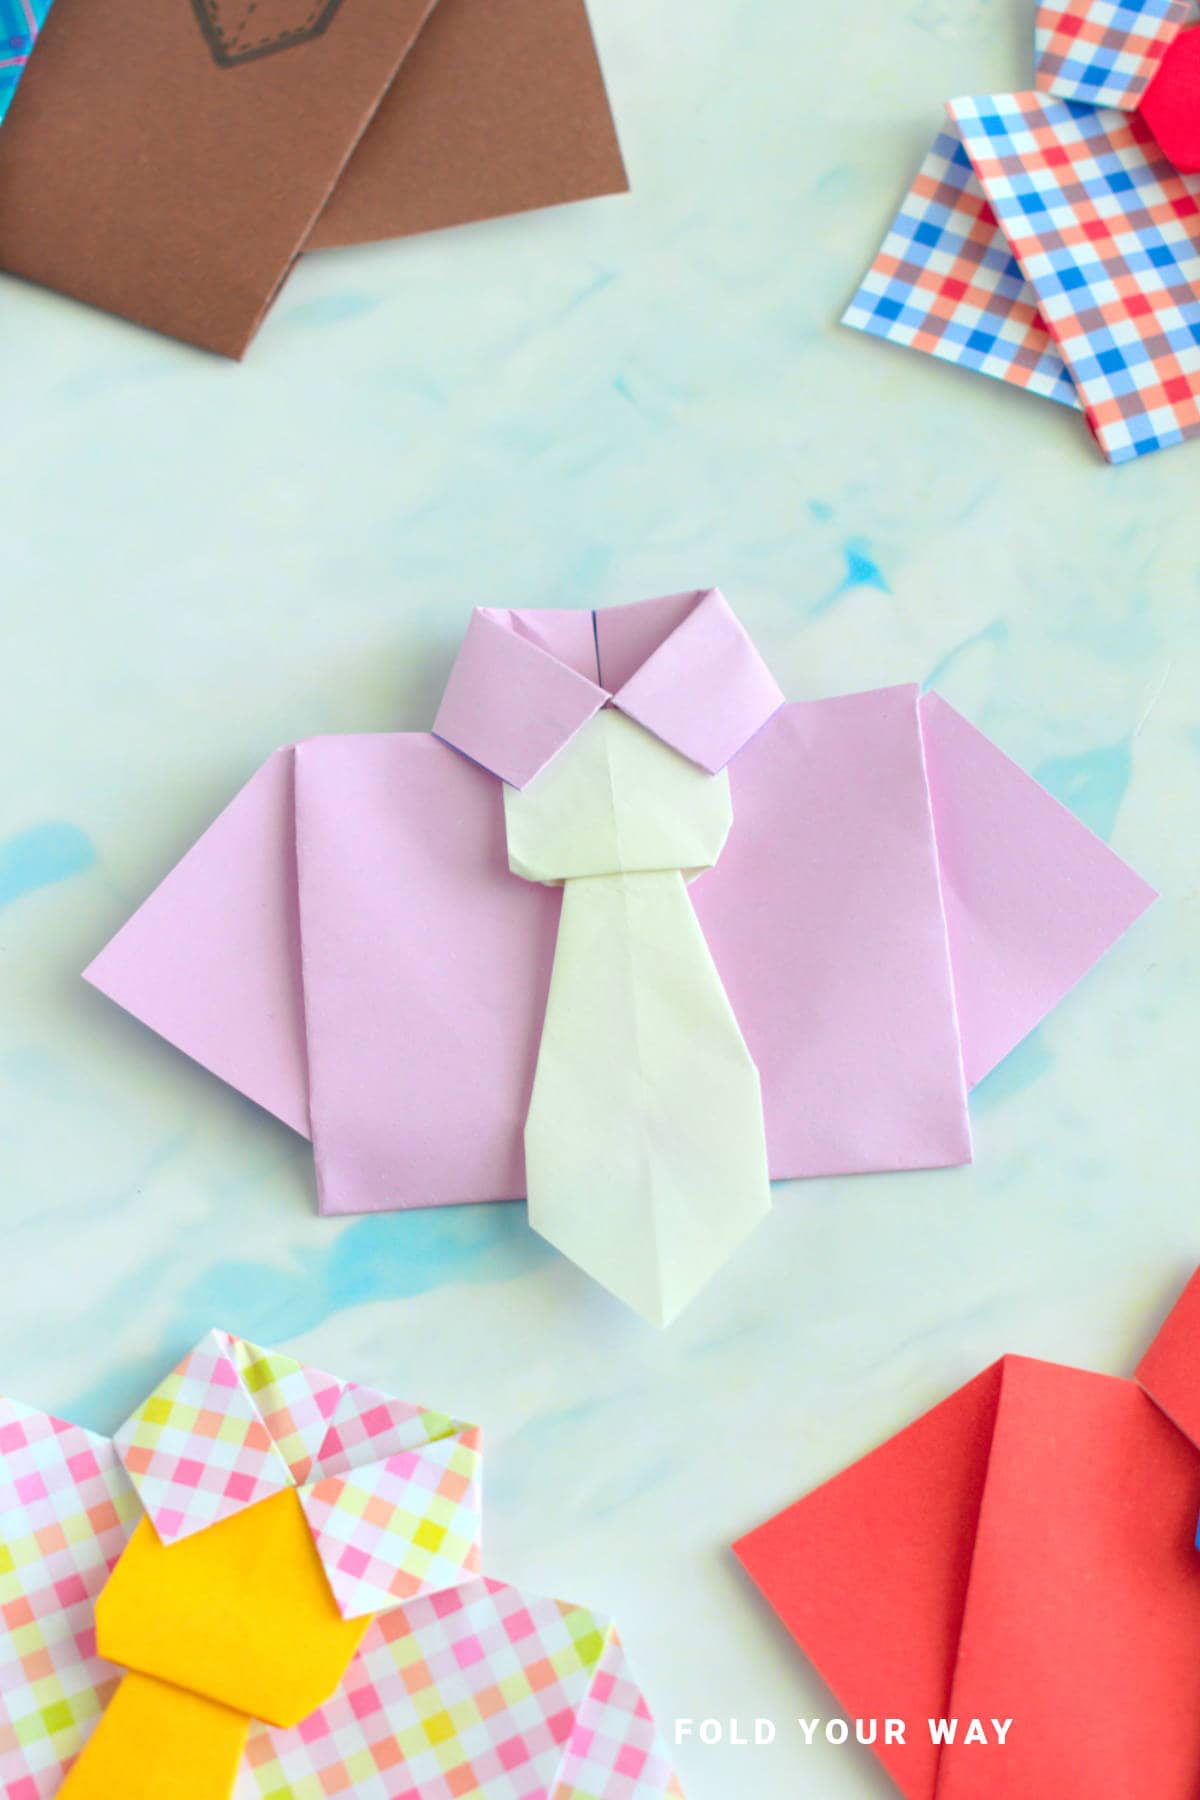
Made with two sheets of paper, this craft lets you create a shirt with an attachable tie – a personalized, clever touch to any gift.
Jump to:
If you’re looking for a fun and crafty way to surprise a loved one, this origami shirt and tie is the perfect project.
Made from two sheets of paper, this simple yet stylish craft allows you to create an adorable shirt and an attachable tie.
Whether it's for Father's Day, teacher appreciation gifts, or other special occasions, this origami shirt and tie set is a creative and thoughtful way to show you care.
This project is fun to make and easy to personalize. You can use your favorite colors or patterns to create the perfect design for the recipient.
The shirt can be made in any color you like, and the tie can be just as unique, making this an ideal way to add a personalized touch to your gift.
The tie attaches easily to the shirt, making it an interactive, charming addition to any gift or card.
Perfect for all skill levels, this origami shirt and tie set is a simple way to give a gift that’s both heartfelt and original.
Plus, it's a great activity for kids to make for their dads, grandfathers, or teachers.
It can also be used as a fun decoration for a party or special occasion.
Why You'll Love This Pattern
- Unique gift idea: A charming shirt and tie that’s sure to make the recipient smile.
- Personalized design: Customize with your choice of colors and patterns for a one-of-a-kind gift.
- Simple, no glue needed: All you need are two sheets of paper and some basic folding – no glue required!
- Great for all occasions: Perfect for Father’s Day, teacher gifts, and more!
Skill Level
★☆☆☆☆ (Very Easy)
Materials Needed
- 1 sheet of paper for the shirt (choose any color or pattern you like)
- 1 sheet of paper for the tie (again, pick a color or pattern to suit the occasion)
| Paper Size – Shirt | Paper Size – Tie | Final Paper Shirt Size | |
| Small Origami Shirt | 6 inches x 6 inches (15 cm x 15 cm) | 3 inches x 3 inches (7.5 cm x 7.5 cm) | 5 inches x 3 inches (12 cm x 7.5 cm) |
| Large Origami Shirt | 10 inches x 10 inches (25 cm x 25 cm) | 6 inches x 6 inches (15 cm x 15 cm) | 8 inches x 5 inches (12.5 cm) |
Instructions
Making the Origami Shirt
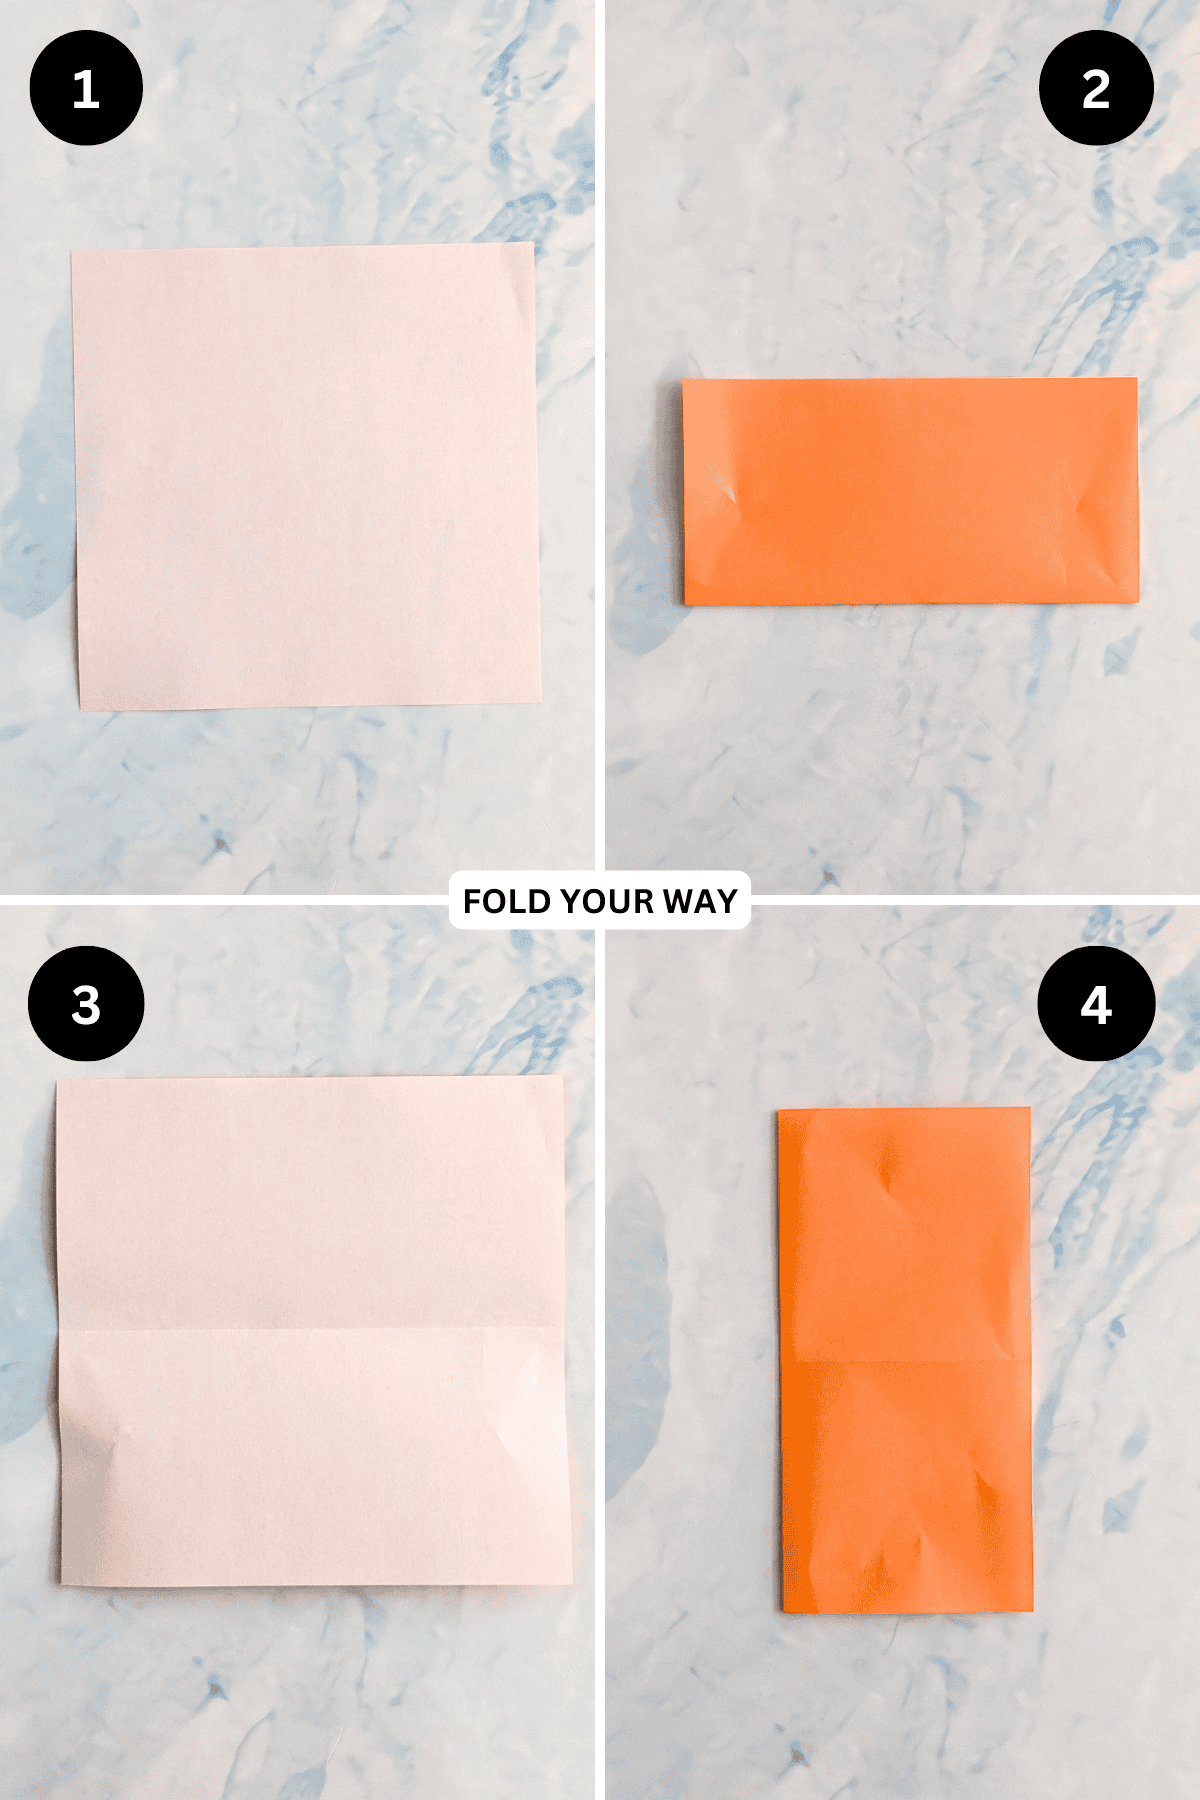
Step 1: Start with the color you want your shirt to be facing down.
Step 2: Fold your paper in half from left to right.
Step 3: Unfold previous step.
Step 4: Fold both the left and right edges in to meet the centre crease.
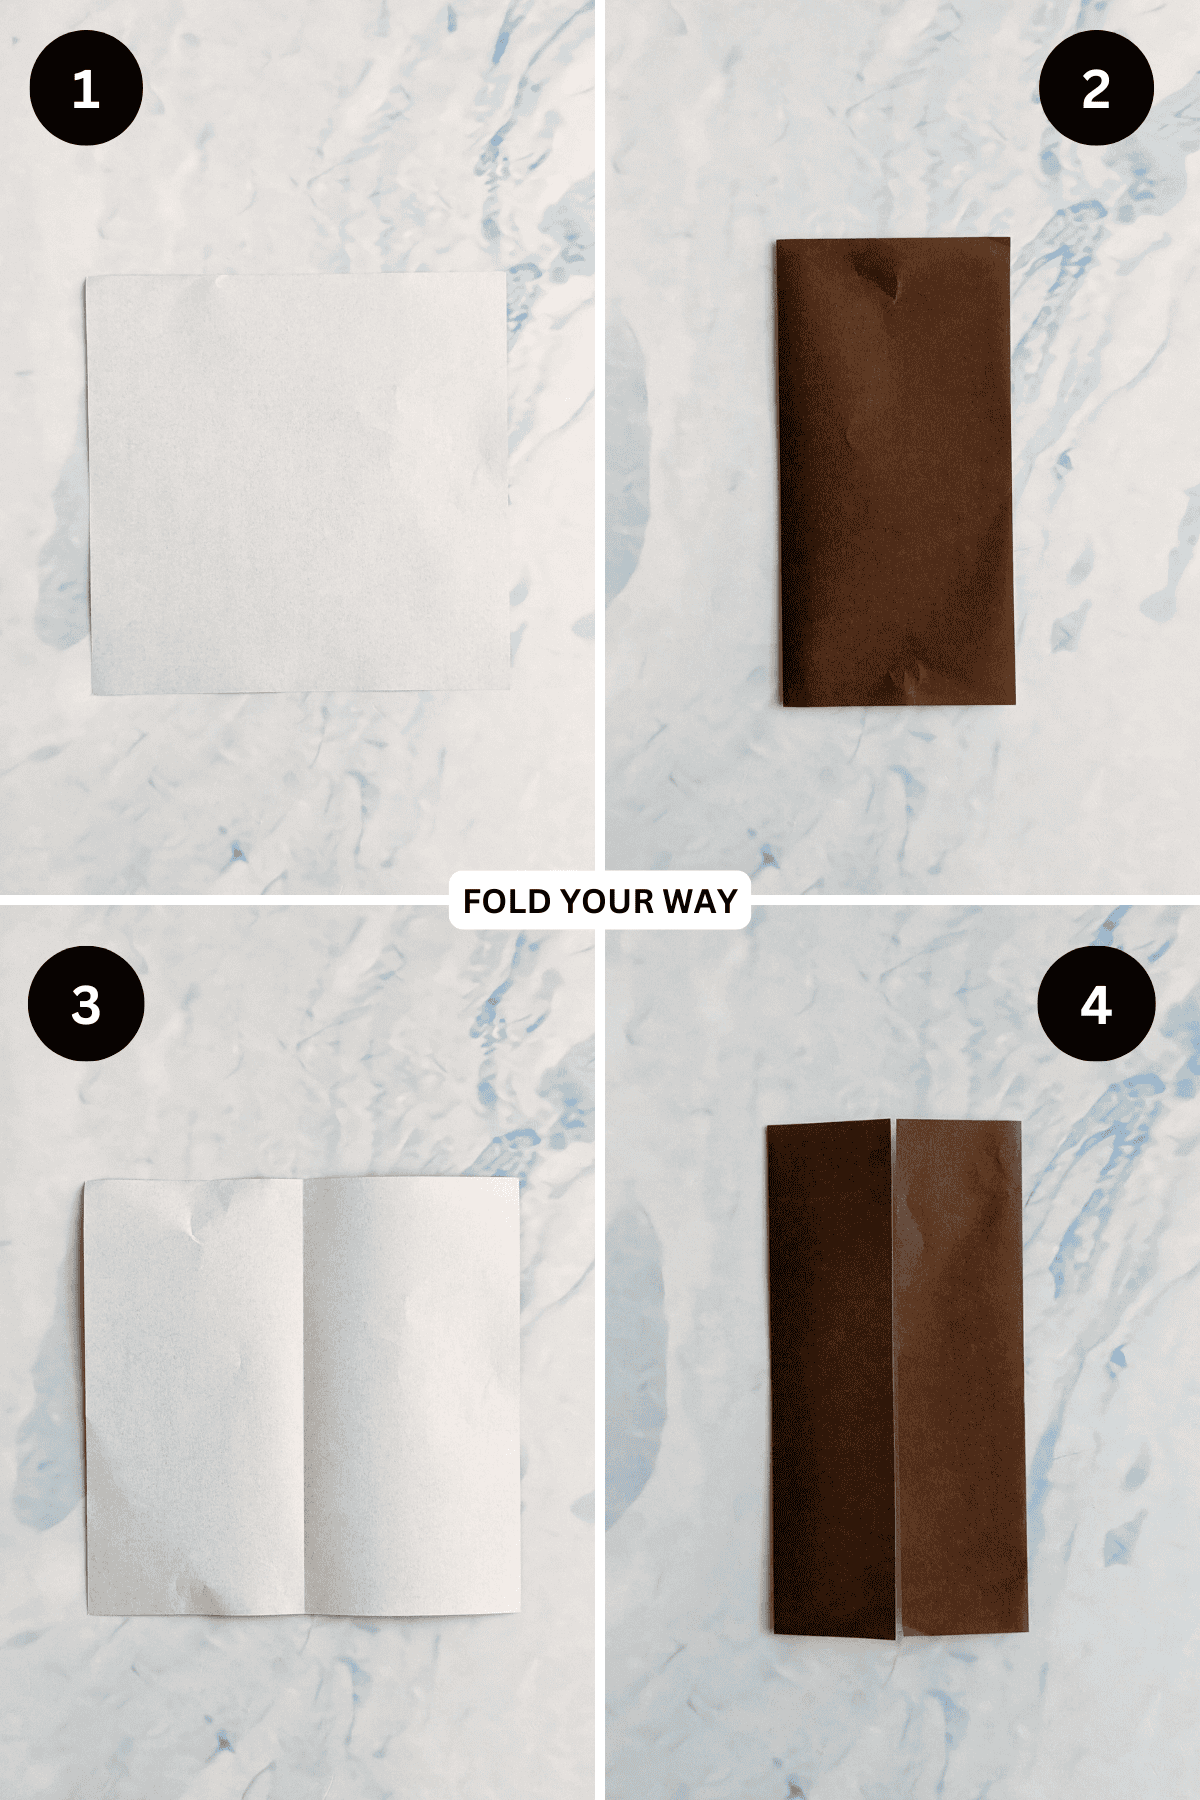
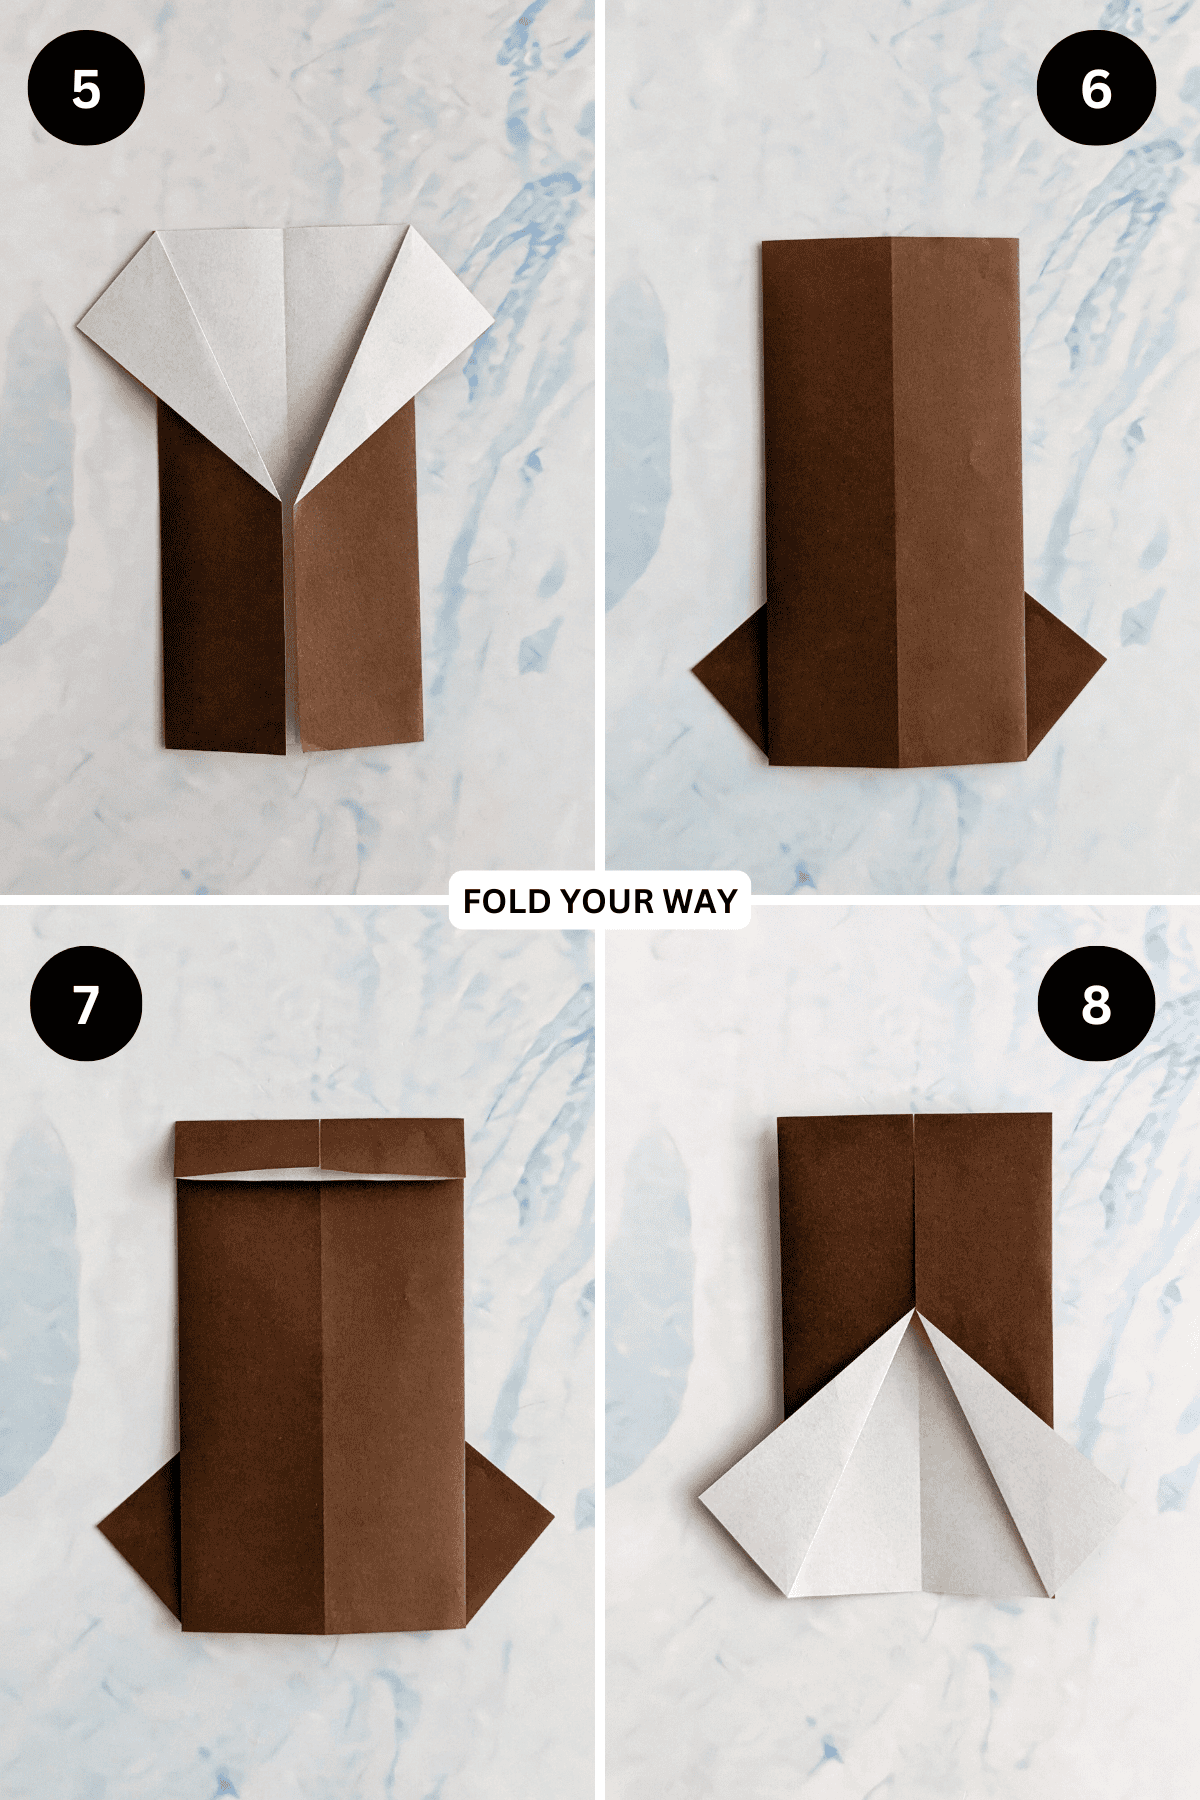
Step 5: Fold both the top left flap and top right flap out at an angle as shown.
Step 6: Flip your paper over from top to bottom.
Step 7: Fold the top edge down slightly. This will become the thickness of your collar.
Step 8: Filp your paper over from left to right.
✨ You're almost there! ✨
To unlock the final steps and complete your pattern, create a free account with Grow.me. below.
Make sure you tick the box to subscribe to our newsletter and stay up to date with the latest patterns, tips, and more!
Once you're signed up, you'll get instant access to finish your project and enjoy exclusive content in the future.
Already signed up? Hit the button below and select ‘Switch to Log In’ to pick up where you left off and finish your project!
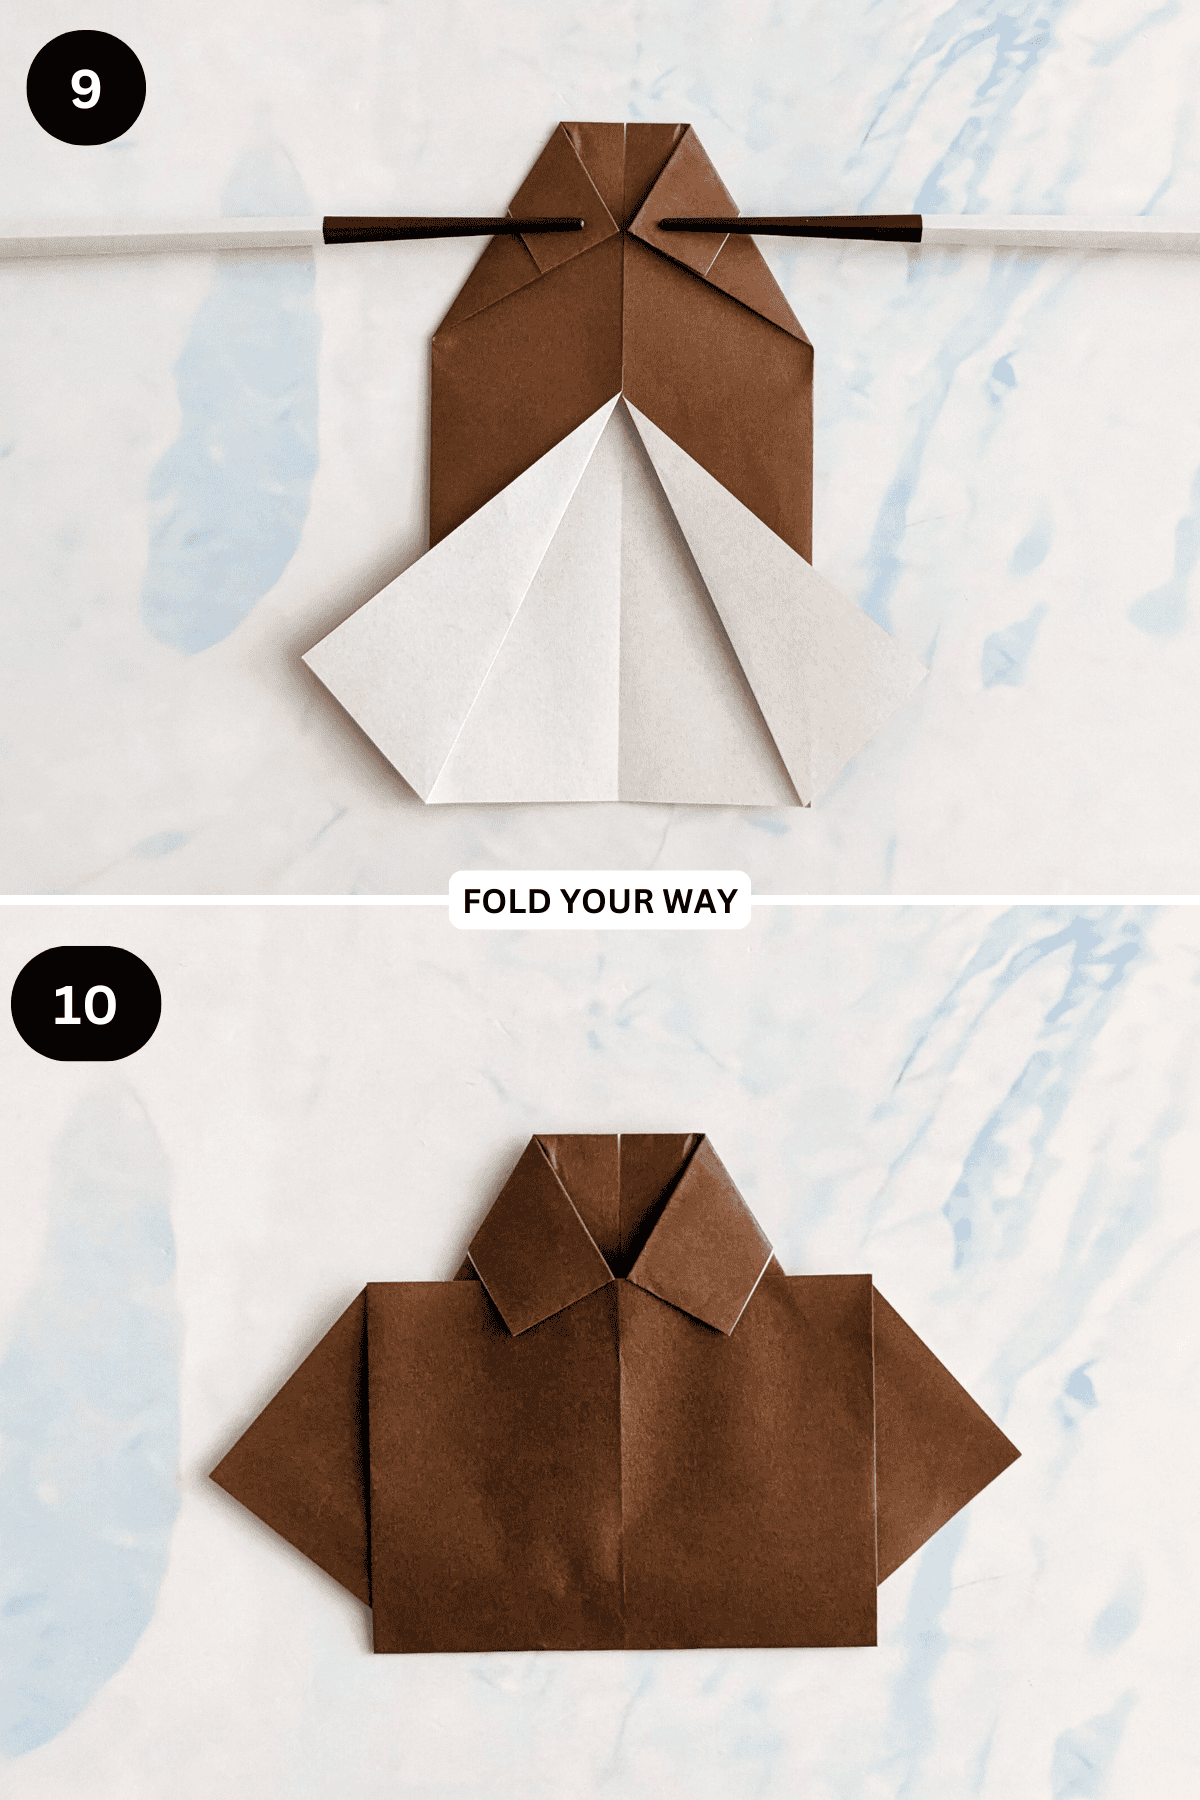
Step 9: Fold both the top left and top right corners in diagonally as shown (making sure the points touch the center crease), keeping the folds as symmetrical as possible.
Step 10: Fold the bottom edge up, slipping it under the flaps you folded in the previous step as shown, then crease.
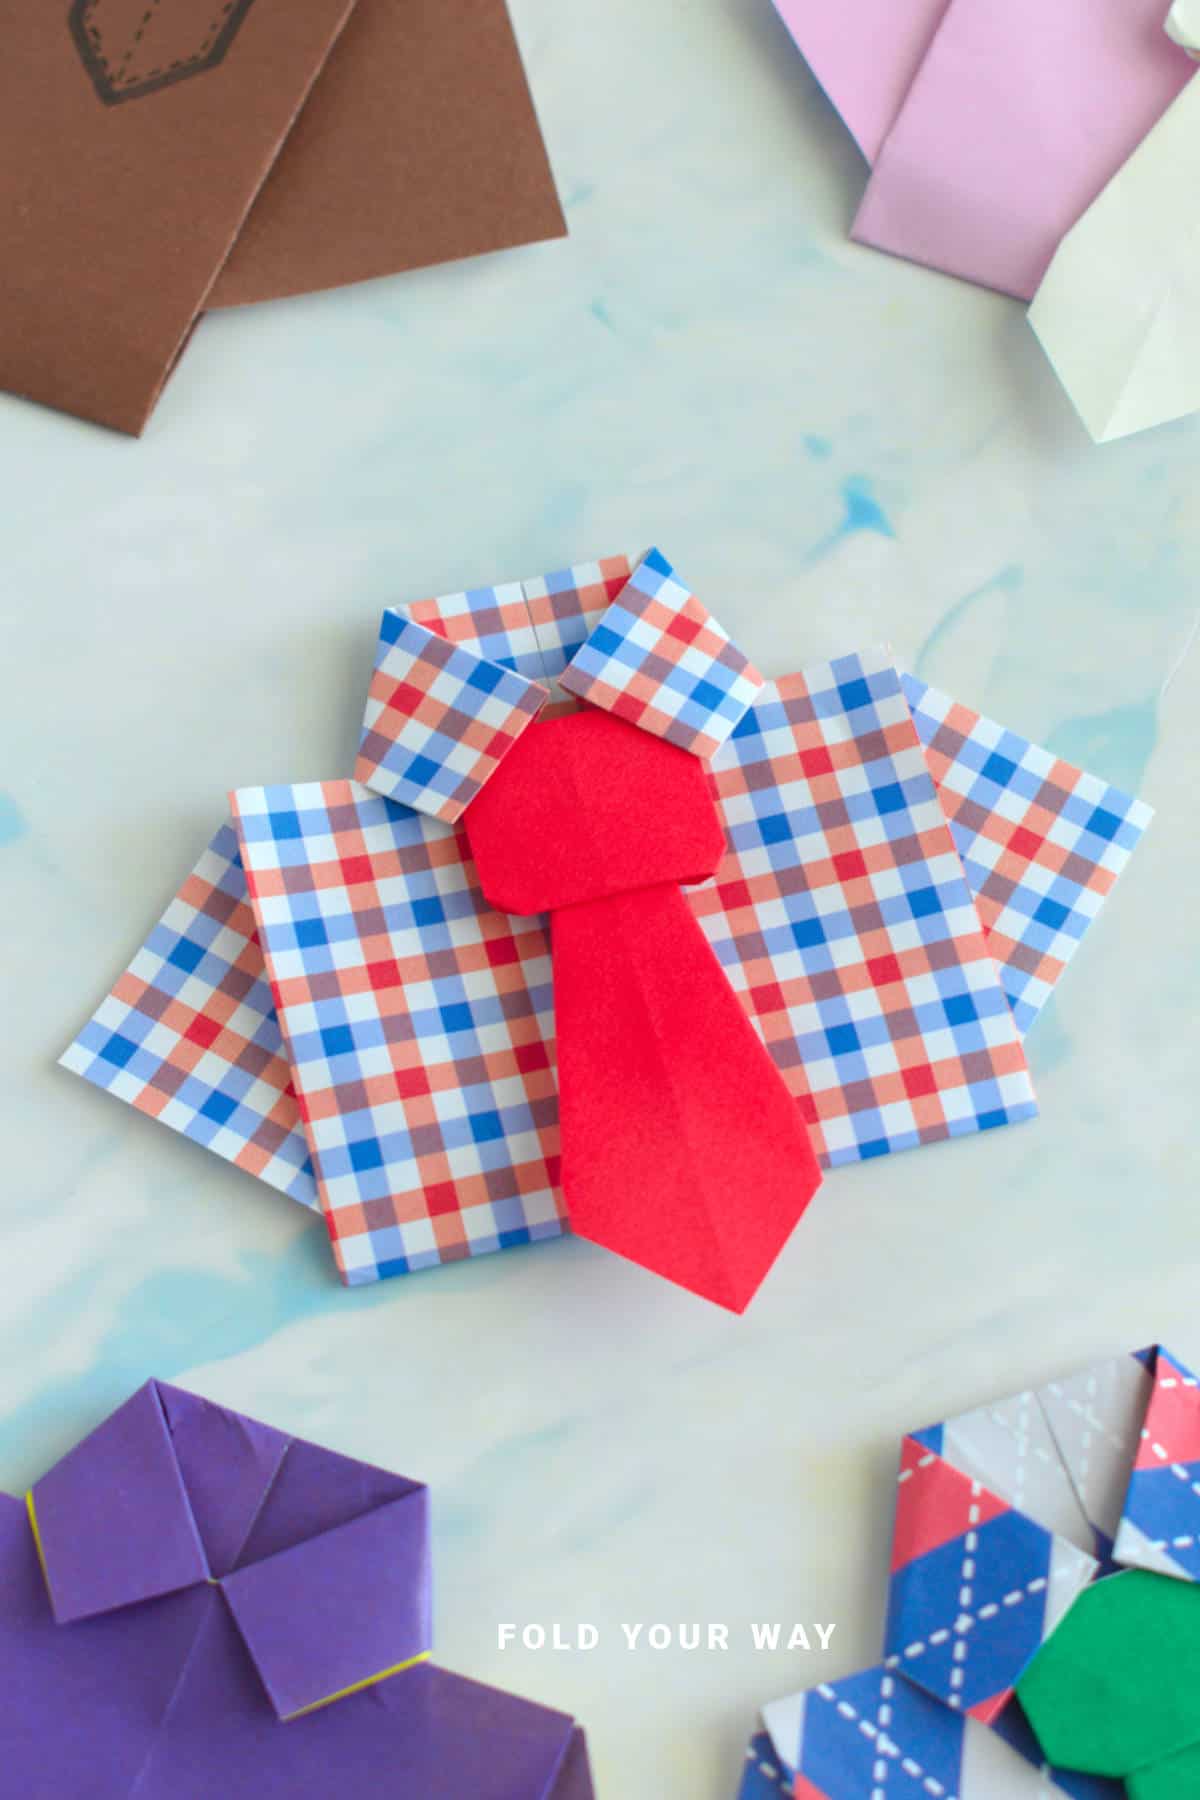
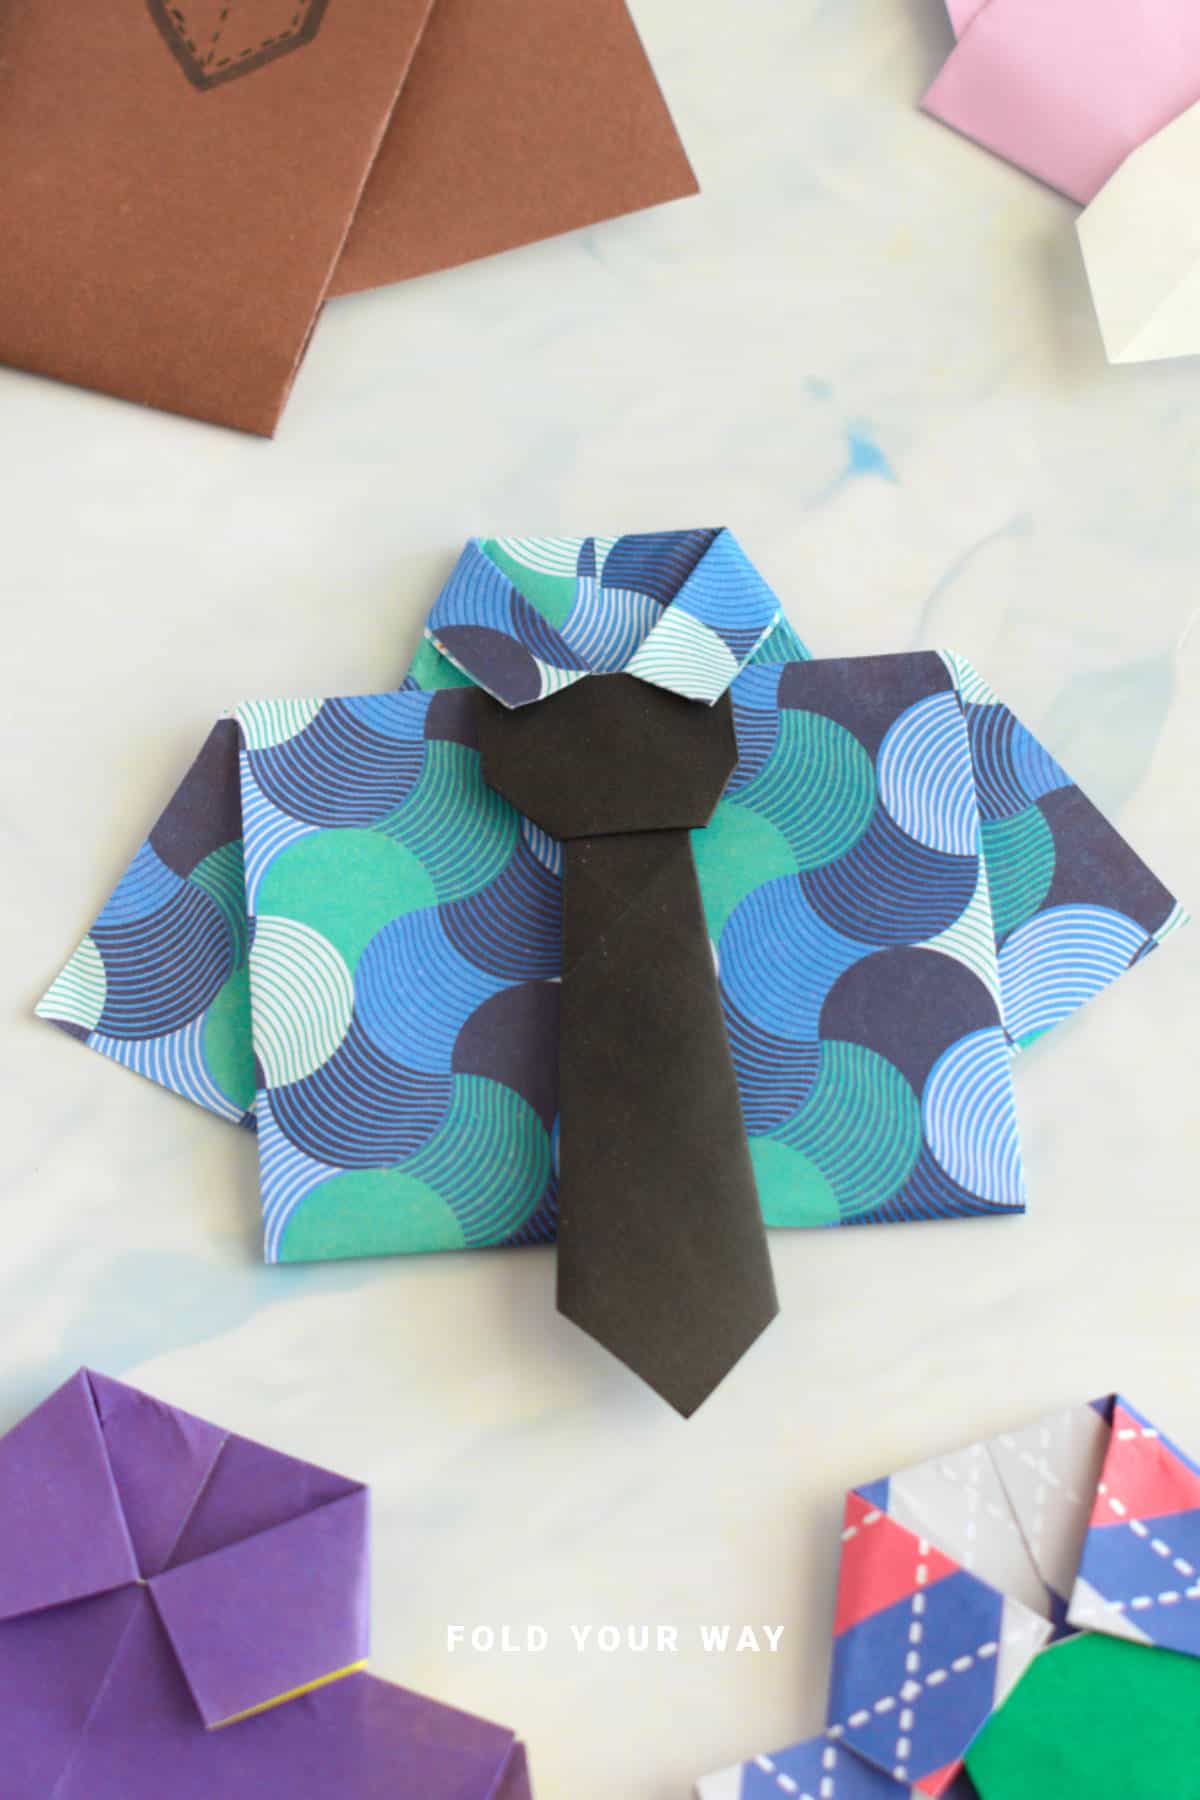
Completed shirt. You could leave your shirt plain, add buttons, or follow the steps for how to make an origami tie below.
Making The Tie
Step 1: Start with the color you want your tie to be facing down.
Step 2: Fold the bottom edge up to meet the top edge.
Step 3: Unfold previous step.
Step 4: Fold the left edge to meet the right edge.
Step 5: Unfold previous step.
Step 6: Fold both the bottom left and top right corners in to meet the middle.
Step 7: Rotate your paper so it sits as shown.
Step 8: Fold both the left and right edges in to meet the middle.

Step 9: Fold the top point down as shown.
Step 10: Flip your paper over from left to right.
Step 11: Fold the top edge down so that it sits about ½ inch (1 cm) below the center point.
Step 12: Unfold previous step and then flip your paper over from left to right.

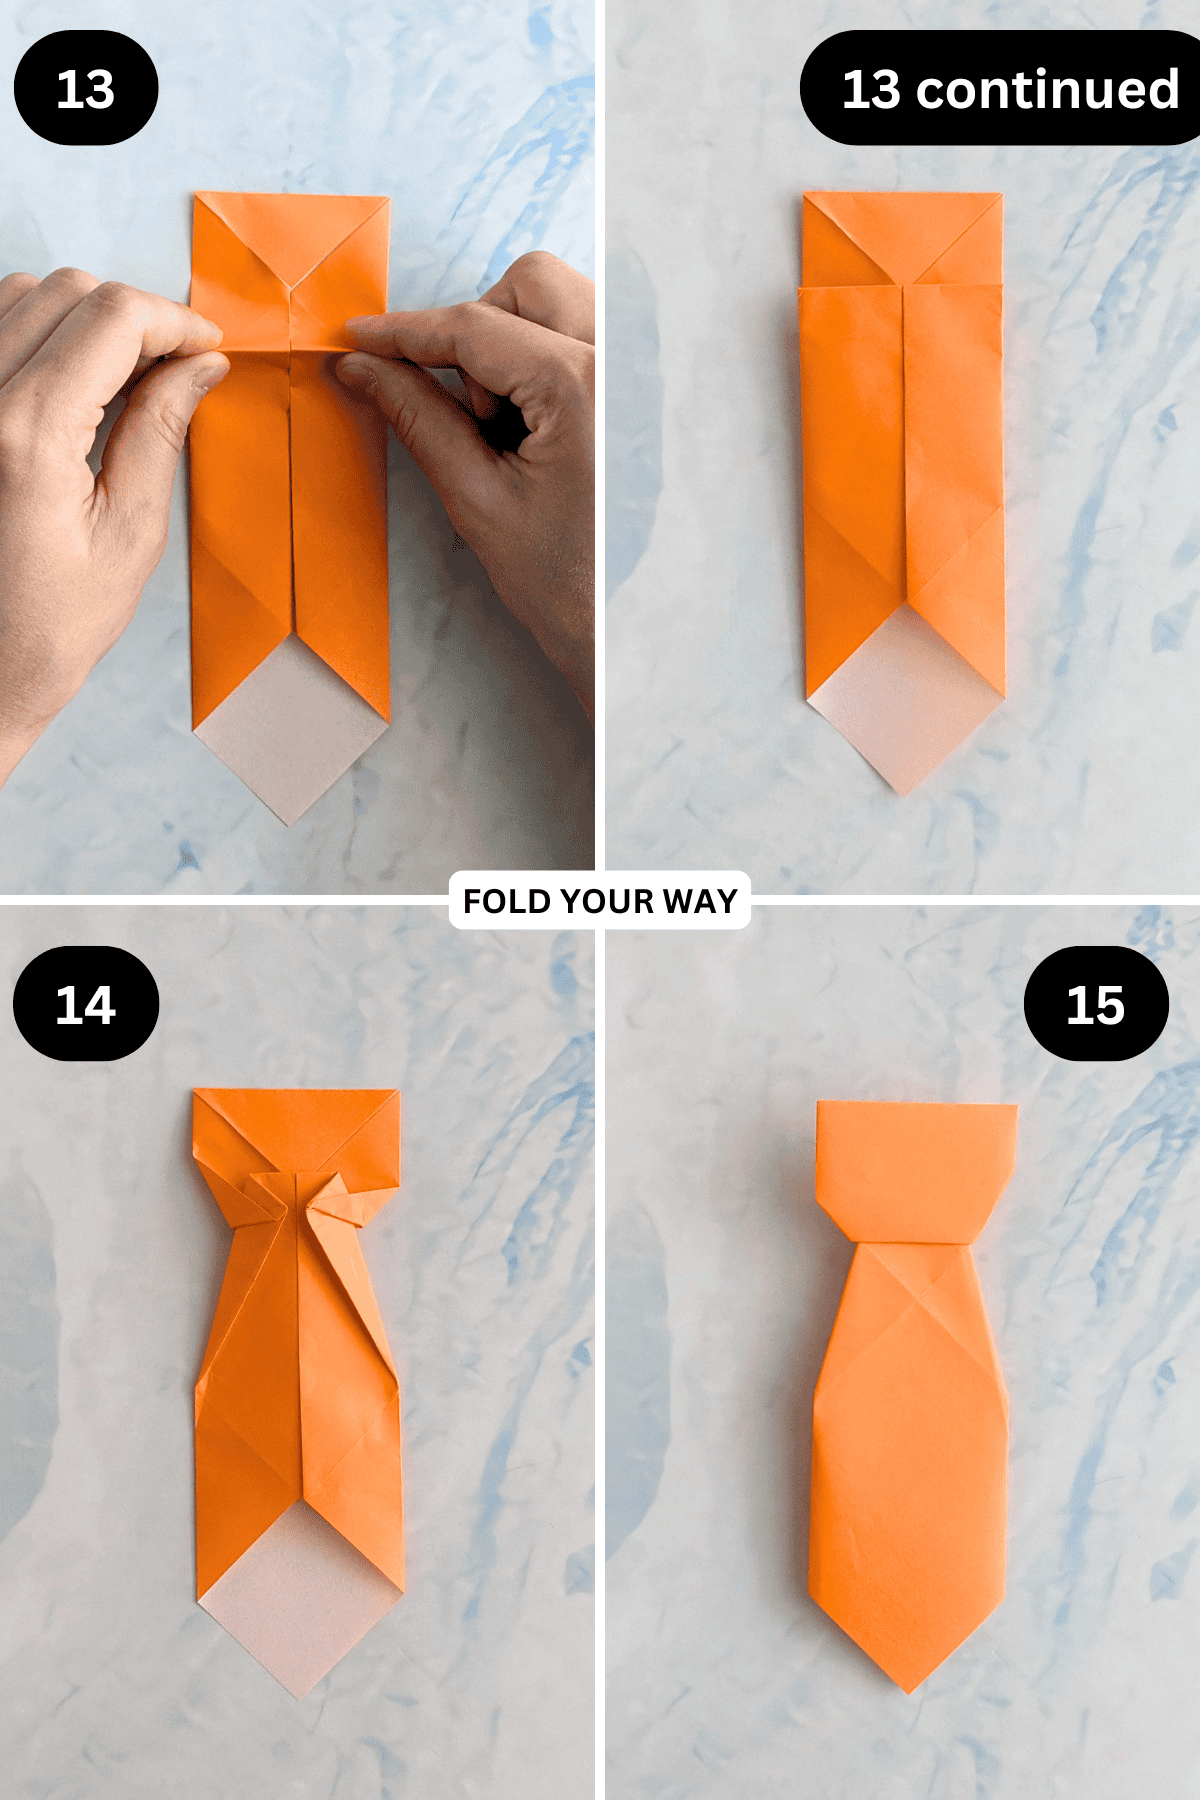
Step 13: Pinch the bottom of the crease you made in step 11, then lift it so that it meets the bottom point of the small triangle flap (that you folded down in step 9).
Step 14: Fold both the left and right edges of the paper in as shown, keeping it as symmetrical as possible. This will narrow the body of your tie.
Step 15: Flip your tie over. Completed tie.
To attach to your shirt, apply some glue or double sided tape to the back of the tie and place on shirt.
Tips For Success
Use a square sheet of paper: The project works best with square sheets of paper, though you can adjust the paper size as needed.
Color, Paper Ideas, and Variations
- Classic shirt colors: Go with a traditional shirt color like light blue, white, or even a checkered pattern for a more formal look.
- Fun, bright colors: For a more playful or casual look, choose bright and bold colors like red, yellow, or green.
- Personalized tie designs: The tie can be made using patterned paper (stripes, polka dots, etc.) to reflect the recipient’s style or interests.
- Textured or metallic paper: For special occasions, such as a formal gift, opt for metallic or textured paper to add an elegant touch to the shirt and tie.
FAQ
Yes! You can use a larger sheet of paper for the shirt to make a bigger version, but you may need to adjust the size of the tie to match.
Absolutely! Feel free to add extra details like buttons, cuffs, or even pockets to make the shirt more personalized.
Other Paper Crafts You Might Like To Try:
Helpful Tips and Common Mistakes For Paper Crafts
Paper crafting and origami can be hard sometimes. Which is why we've made this printable PDF just for you.
It outlines helpful tips so that you can successfully complete your craft, and some of the most common mistakes people come across.
You can download the helpful tips and common mistakes for paper crafts printable PDF here.
Stay Connected
Made this pattern? Let us know how it went in the comments below!
Pin this post - Pin now to take your paper crafting skills to the next level.
Share on Instagram or Facebook - Capture the beauty of your finished paper craft project and share it on Instagram or Facebook! Tag us @foldyourway so we can see your work!
Other Patterns You Might Like To Try:
Looking for other easy patterns like this? Try these:


Comments
No Comments