
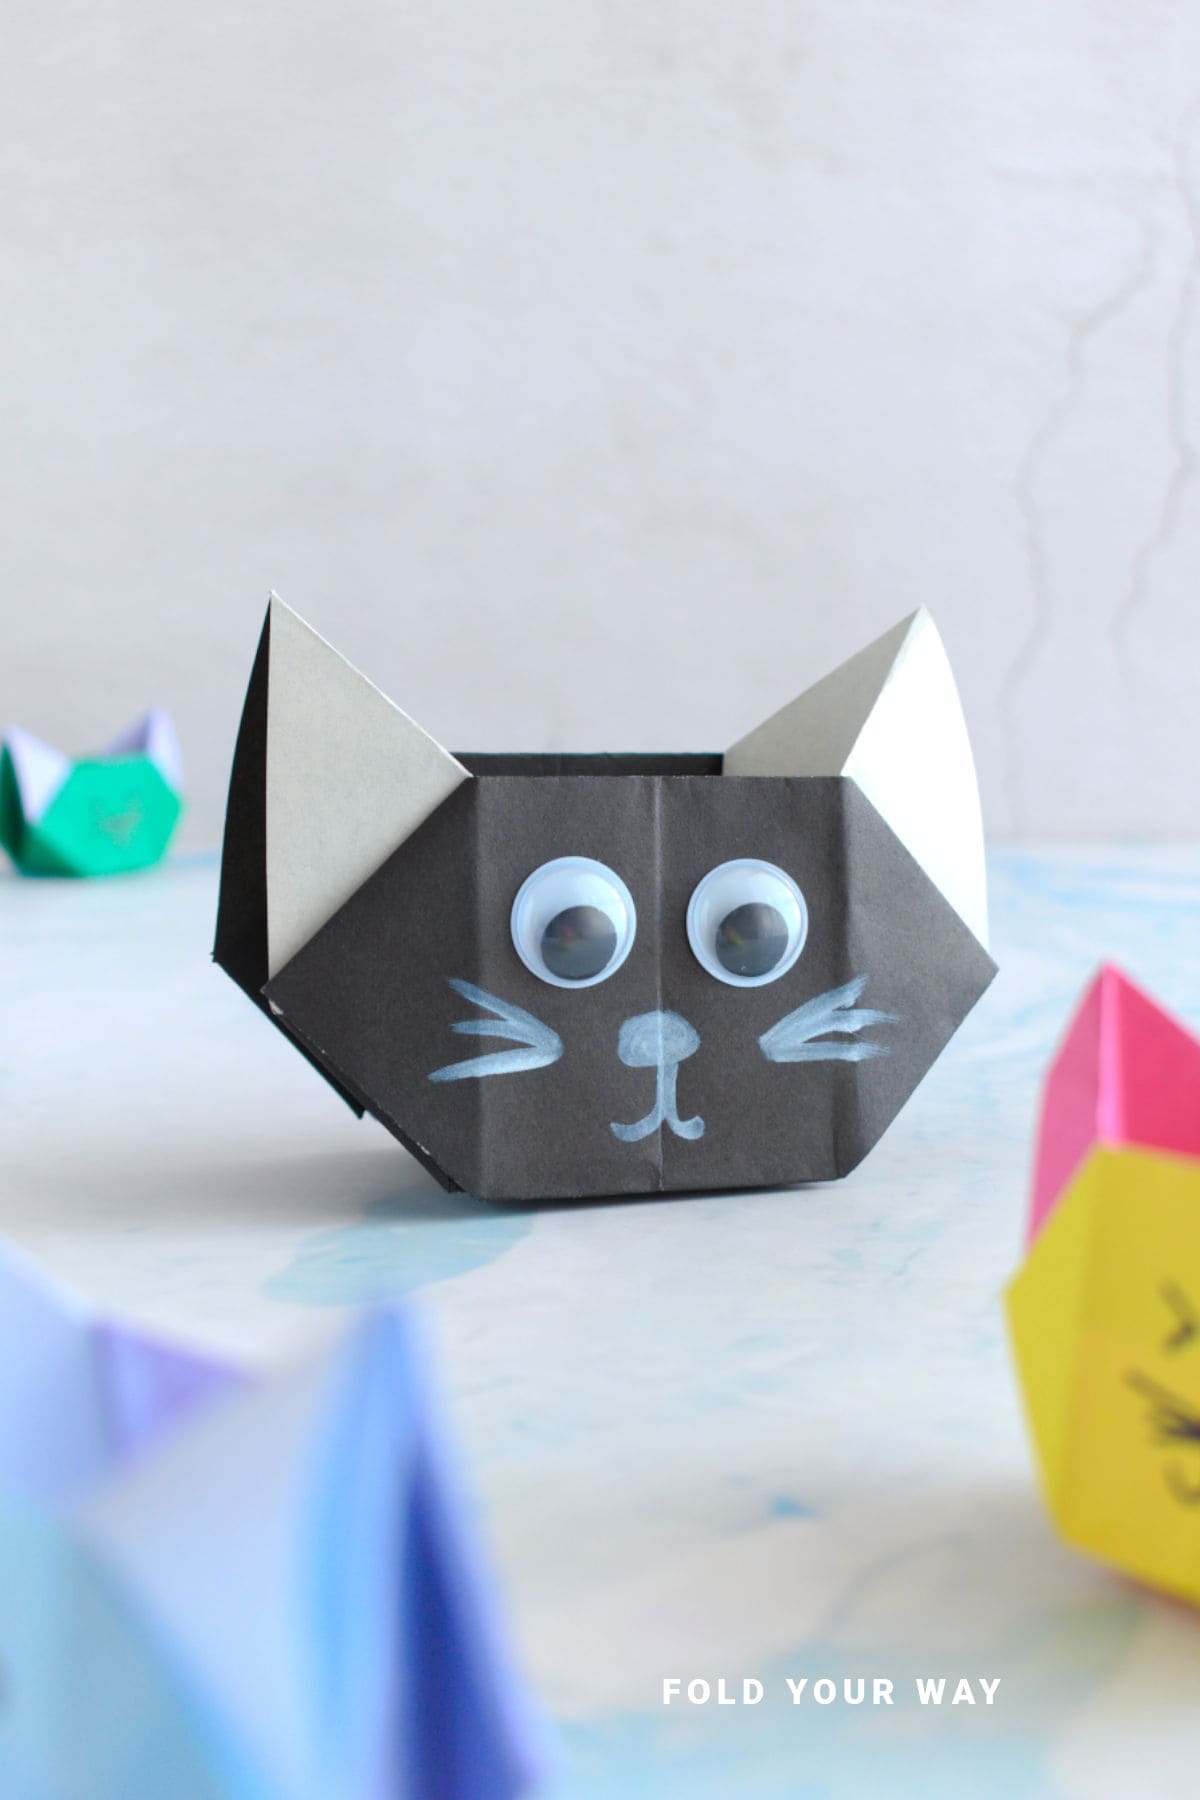
This simple cat origami box is a fun, foldable project.
It's perfect for storing little treats, organizing your desk, or gifting something small—great for birthdays, Halloween, or just because!

Jump to:
If you're looking for an adorable and practical paper craft, this simple cat origami box might be just the thing.
Made from one sheet of square paper this project comes together quickly and doesn’t require glue or scissors.
It’s a great way to get creative with your paper stash, and it works well as a little gift box, party favor container, or a cute desk accessory.
This box is especially fun to make with kids, and it’s a favorite with cat lovers of any age.
It can be themed for Halloween with a spooky black cat, dressed up in patterned paper for a birthday party, or used as a classroom project for a rainy afternoon.
You can even turn it into a place card holder or party favor by adding names or treats inside.
Best of all, it’s simple enough for beginners but leaves plenty of room for creativity—try different facial expressions, decorate with stickers, or play with bold paper choices.
Whether you’re looking for a DIY craft, a quick origami tutorial, or an easy craft idea, this little cat box is for you!

Why You'll Love This Pattern
- No cutting or glue needed.
- Super cute and fun to personalize
- Stands up on its own – great for display or gifting
- Quick to make, even in batches
- Ideal for birthdays, Halloween, party favors, or classroom crafts
- A great beginner-friendly project for both kids and adults
Skill Level
★☆☆☆☆ (Very Easy)
Materials Needed
- 1 square sheet of origami paper
- Markers for decorating your cat box
| Paper Size | Final Cat Box Size | |
| Small Cat Origami Box | 3 inches x 3 inches (7.5 cm x 7.5 cm) | 1.5 inches x 1.2 inches (4.5 cm x 3 inches) |
| Medium Cat Origami Box | 6 inches x 6 inches (15 cm x 15 cm) | 3 inches x 2 inches (7.5 cm x 5.5 cm) |
| Large Cat Origami Box | 10 inches x 10 inches (25 cm x 25 cm) | 5 inches x 4 inches (13 cm x 10 cm) |
Instructions
Step 1: Start with the color you want your cat to be facing down. The color facing up will become your cat’s ears.
Step 2: Fold the bottom edge up to meet the top edge.
Step 3: Unfold previous step.
Step 4: Fold the left edge to meet the right edge.

Step 5: Unfold previous step.
Step 6: Fold all 4 corners in to meet the middle.
Step 7: Unfold previous step.
Step 8: Fold the bottom left corner up to meet the top right corner.

Step 9: Unfold previous step.
Step 10: Fold the bottom right corner up to meet the top left corne.
Step 11: Unfold previous step.

Step 12: Fold the left and right edges in to meet the lines shown.
Step 13: Fold the bottom edge up to meet the top edge.

Step 14: Lift the right edge up so it stands up along the middle crease. Then open the paper as shown and flatten.
Step 15: Flip your paper over and repeat previous step.

Step 16: Fold the right edge (top layer only) over to the left like turning a page in a book.
Step 17: Repeat previous step for the other side.
Step 18: Fold both the upper left and upper right edges (top layer only) in to meet the middle crease as shown.
Step 19: Fold both the left and right points (found in the middle of the paper) in to meet the middle crease.

Step 20: Fold both of the inner flaps (found in the middle of the paper) outward along the lines shown.
Step 21: Tuck the flaps you folded in the previous step into the pockets found beneath them.

✨ You're almost there! ✨
To unlock the final steps and complete your pattern, create a free account with Grow.me. below.
Make sure you tick the box to subscribe to our newsletter and stay up to date with the latest patterns, tips, and more!
Once you're signed up, you'll get instant access to finish your project and enjoy exclusive content in the future.
Already signed up? Hit the button below and select ‘Switch to Log In’ to pick up where you left off and finish your project!
Step 22: Repeat steps 18 to 21 the other side.
Step 23: Fold the bottom pointup as shown.
Step 24: Unfold previous step.

Step 25: Gently open out your cat box, adjusting the edges as needed.
Step 26: Holding your cat box as shown, flatten it in half as shown. This will push out the sides to give your box the cat face shape.

Step 27: Open out your box again. Completed cat origami box. Decorate with markers or stickers if you want.

Tips For Success
Use sturdy origami or light cardstock for best structure

Color, Paper Ideas, and Variations
- Classic black cat – perfect for Halloween-themed parties or spooky displays
- Bright colors – pinks, oranges, or purples for a more playful look
- Patterned paper – florals, stars, or stripes can add personality
- Mini cat boxes – scale down the paper for tiny treat holders or desk buddies
- Different expressions – sleepy, silly, surprised—let your creativity shine
- Add details – glue on paper whiskers, ears, or even a little bowtie!
FAQ
Yes, just cut it into a square. Thinner paper is easier for folds.
Nope! It’s entirely made with folding. But you can use a bit of glue to attach the head if needed.
Other Paper Crafts You Might Like To Try:
Helpful Tips and Common Mistakes For Paper Crafts
Paper crafting and origami can be hard sometimes. Which is why we've made this printable PDF just for you.
It outlines helpful tips so that you can successfully complete your craft, and some of the most common mistakes people come across.
You can download the helpful tips and common mistakes for paper crafts printable PDF here.
Stay Connected
Made this pattern? Let us know how it went in the comments below!
Pin this post - Pin now to take your paper crafting skills to the next level.
Share on Instagram or Facebook - Capture the beauty of your finished paper craft project and share it on Instagram or Facebook! Tag us @foldyourway so we can see your work!
Other Patterns You Might Like To Try:
Looking for other easy patterns like this? Try these:


Comments
No Comments