
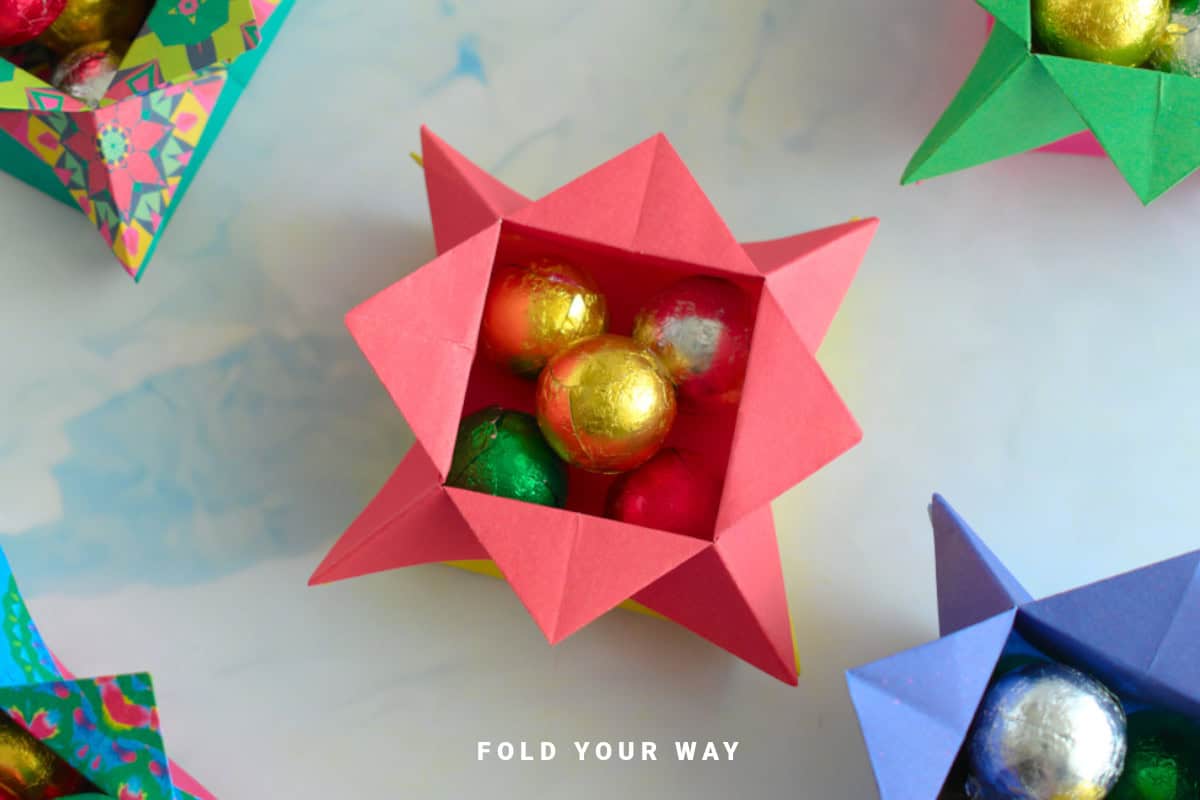
Discover how to make a simple star origami box from one sheet of paper—no glue or scissors needed.
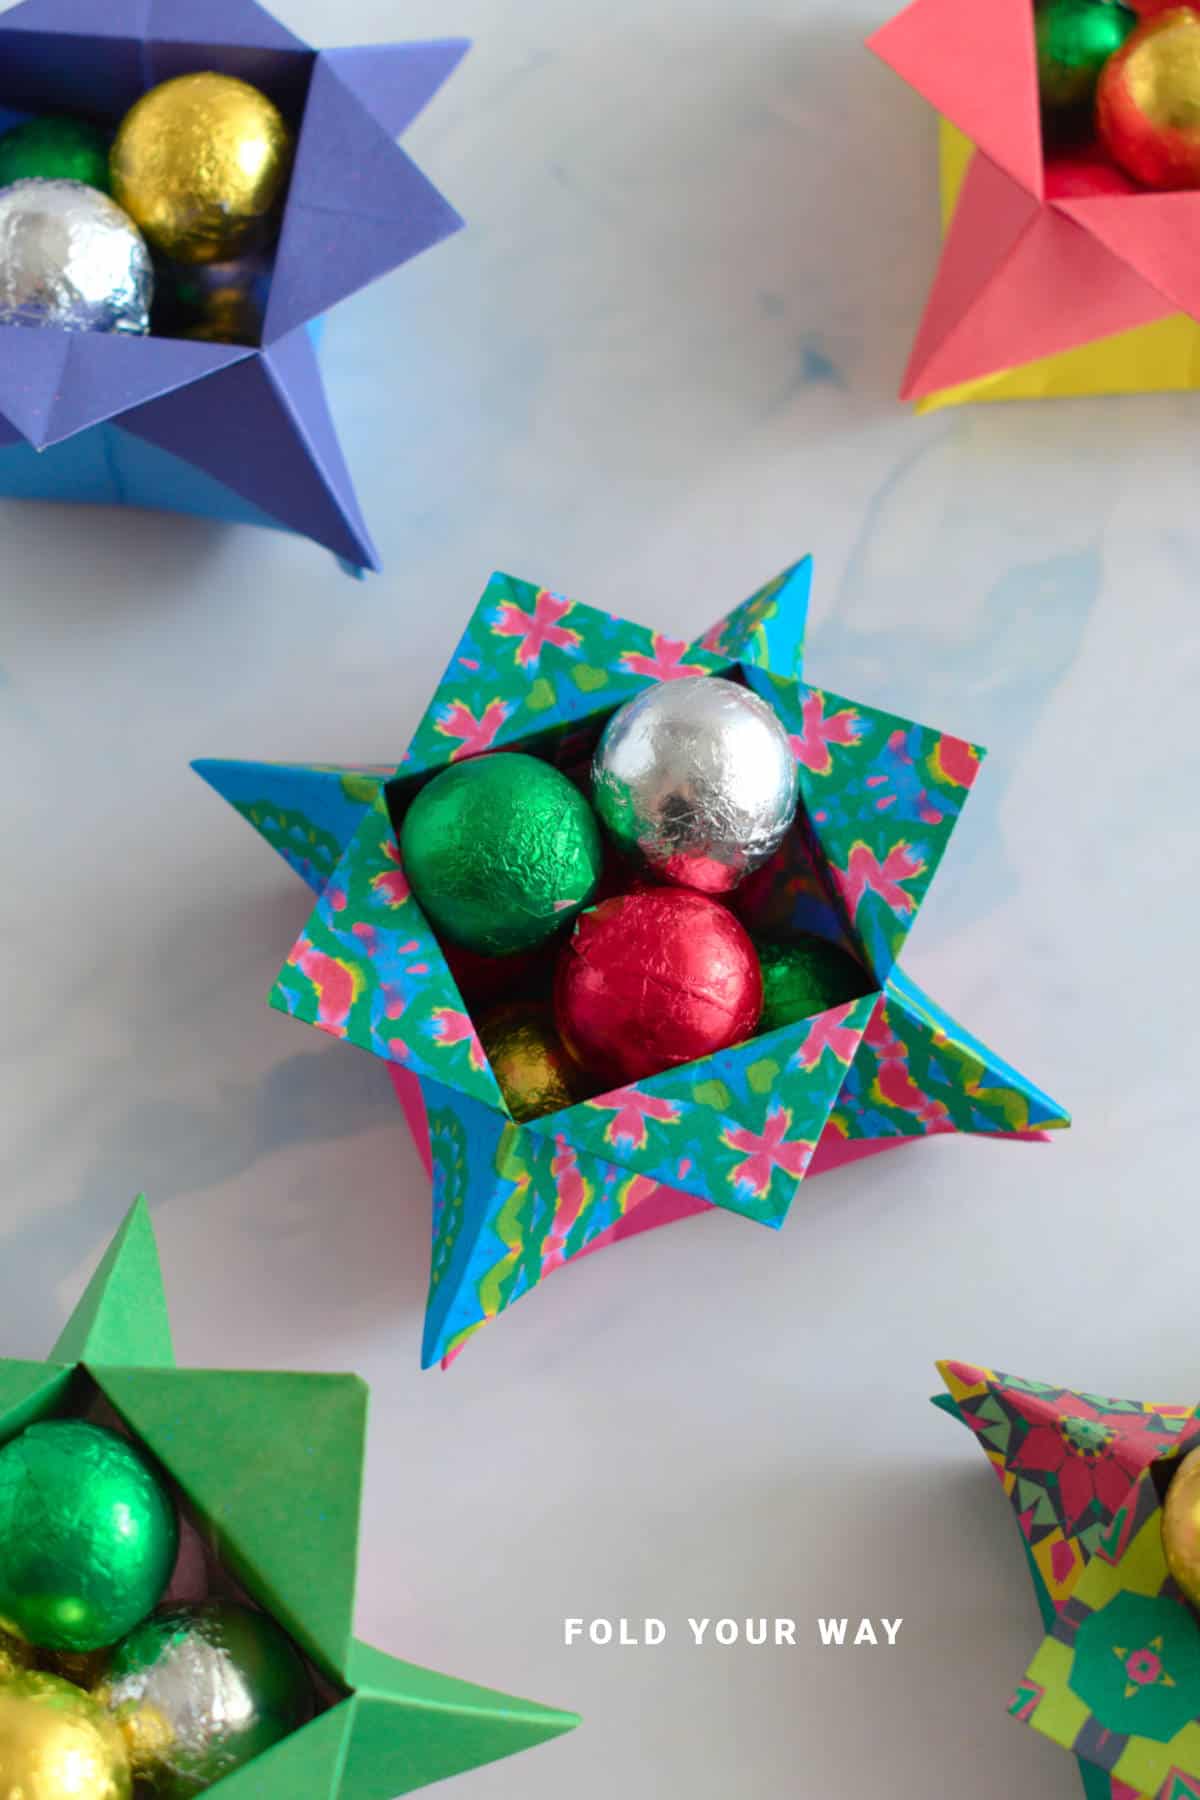
This versatile paper craft can be folded shallow or taller, perfect for candy bowls, party favors, desk organizing, or festive decorations.
Whether you’re a beginner or just looking for an easy DIY tutorial with step by step instructions, this beautiful and functional star-shaped box is a fun way to add charm and organization to any space or occasion.
Jump to:
Origami boxes are both practical and visually appealing, making them a favorite among paper craft lovers.
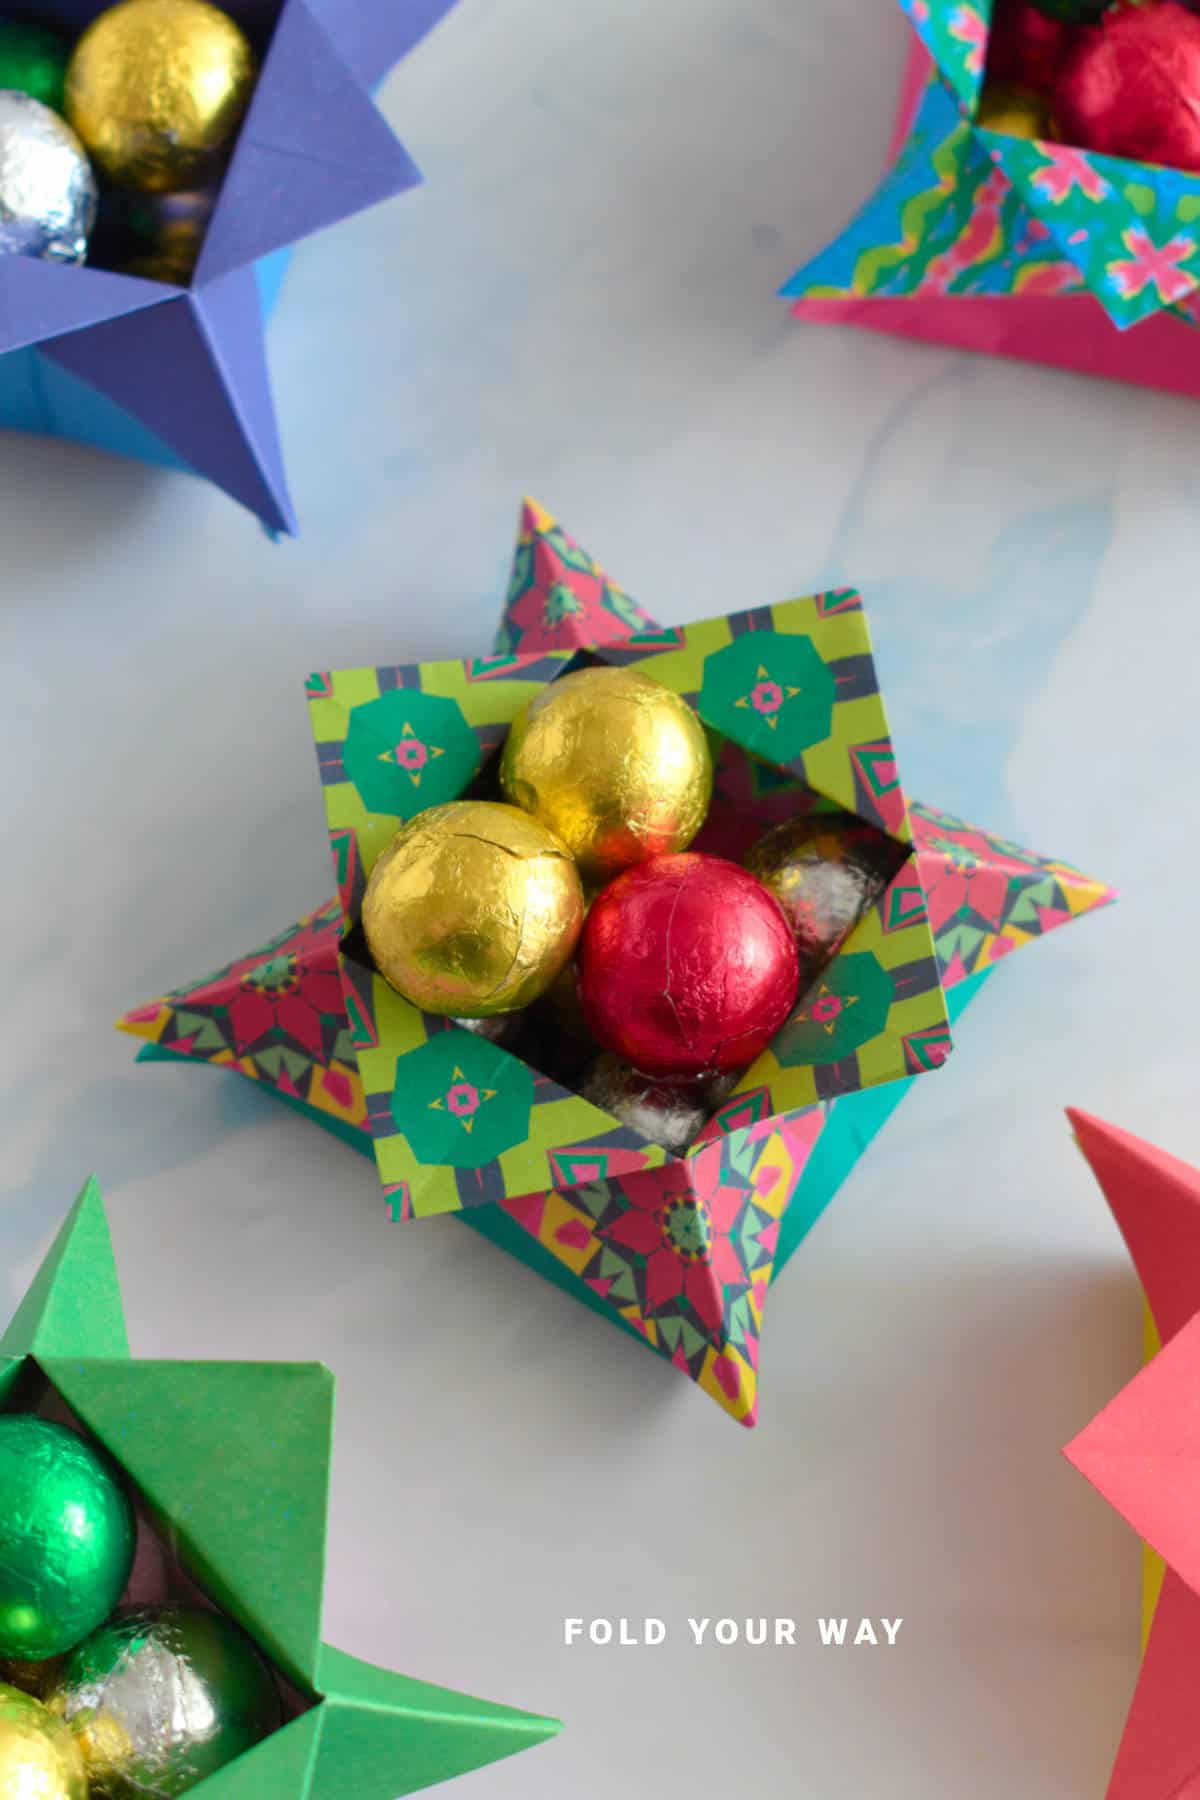
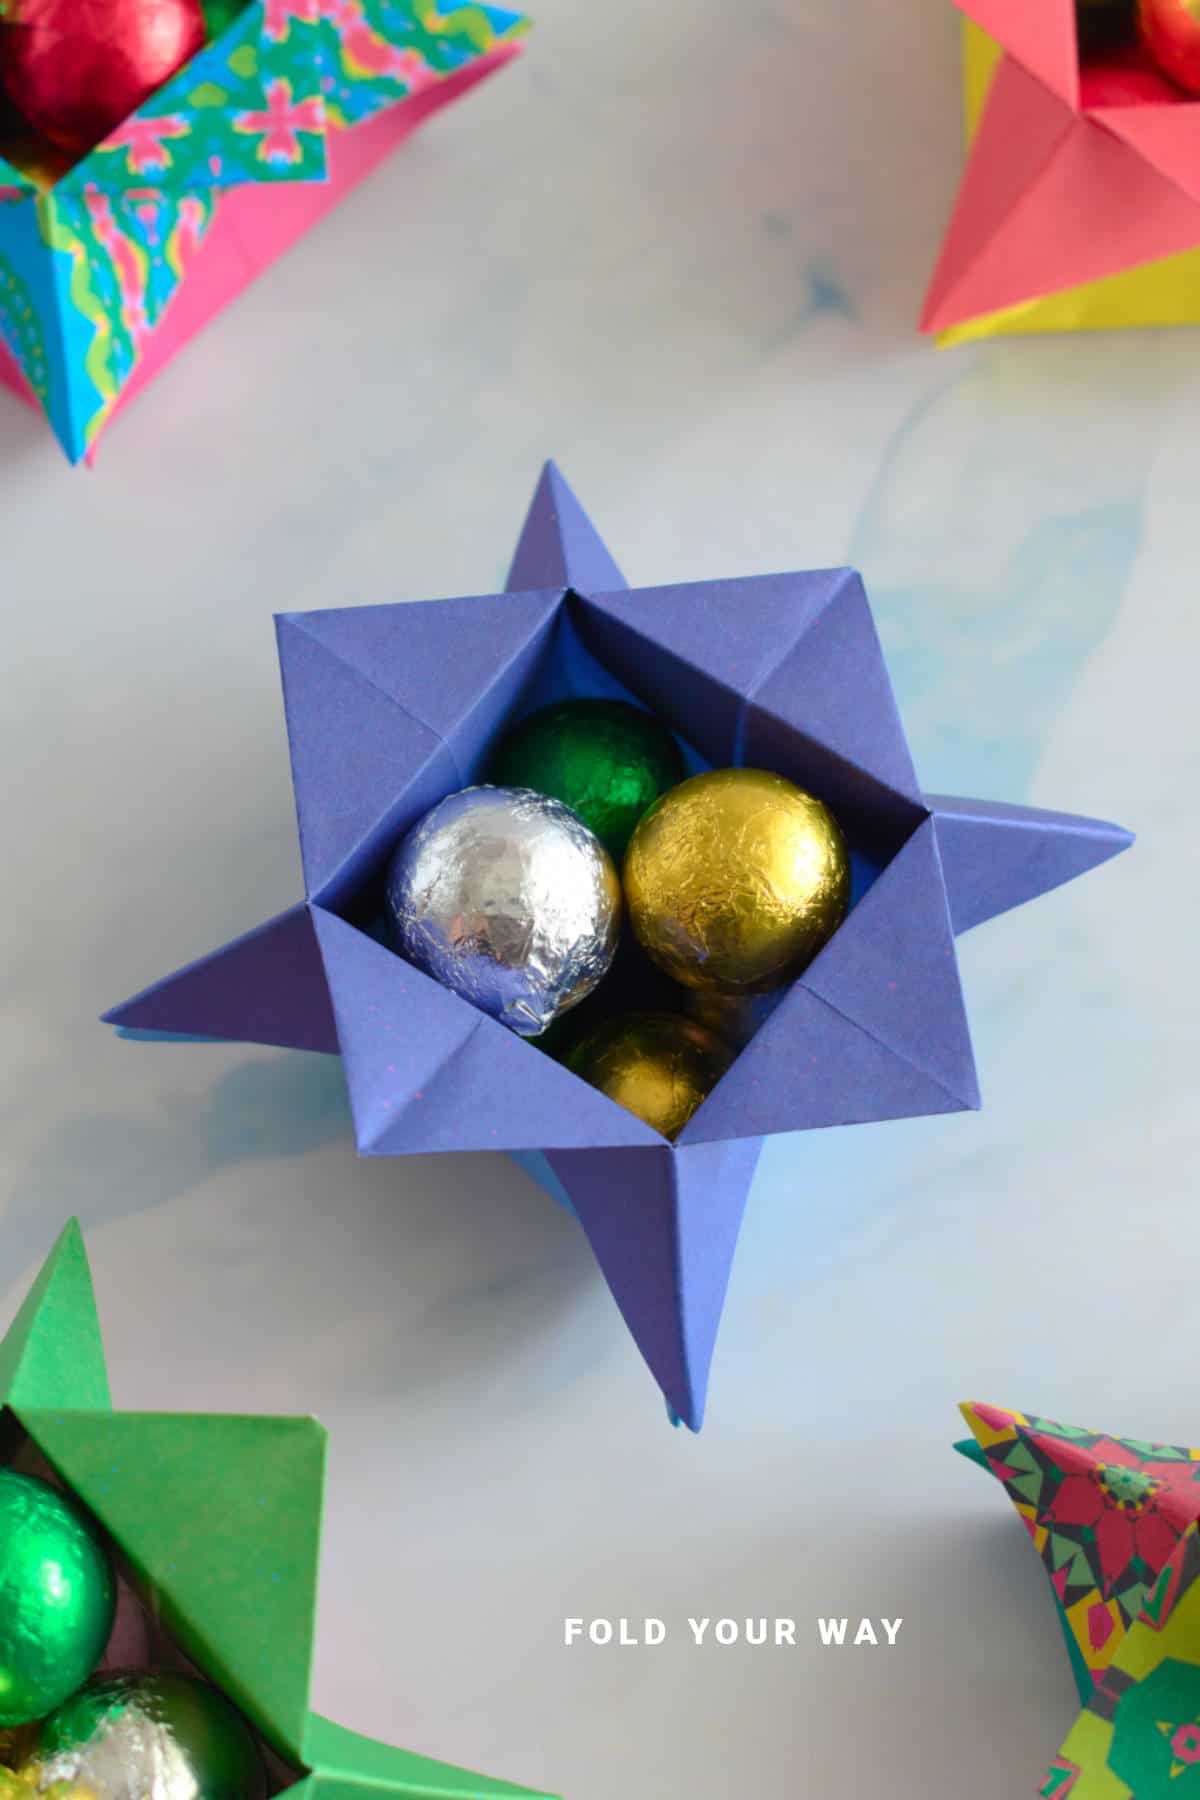
This simple star origami box stands out with its charming star-shaped top and flexible design.
Made from just one sheet of paper, it’s an easy folding project that doesn’t require glue or scissors, making it ideal for beginners and experienced folders alike.
What’s especially great about this star box is how adaptable it is.
Depending on your preference, you can fold it shallow for a low-profile tray or taller to hold more items.
This makes it incredibly useful for a variety of purposes—whether as a candy bowl at parties, a decorative container for small gifts, or a stylish way to organize desk supplies like paper clips, rubber bands, or pins.
The star shape gives the box a unique, festive look that works well all year round but shines particularly during holidays, birthdays, or special events.
It can be crafted using solid-colored origami paper, patterned sheets, or even recycled paper for an eco-friendly twist. Because it folds flat when not in use, it’s easy to store or gift.
This project also encourages creativity. You can personalize your star box with drawings, stickers, or by choosing paper that matches your event’s color scheme.
Folding several in different sizes and colors can create a charming clustered display on a mantel, table, or shelf.
With clear, step by step instructions, this simple star origami box tutorial makes it easy to master the folding technique and understand how to adjust the depth of the box.
It’s a fun and satisfying paper craft that blends beauty and function, perfect for anyone who loves easy DIY tutorials.
Why You'll Love This Pattern
- Made from one sheet with no glue or scissors needed
- Adjustable height for shallow or taller boxes to suit your needs
- Ideal for candy bowls, party favors, desk organizing, or décor
- Beginner-friendly with clear, step by step instructions
- Folds flat for easy storage or gifting
- Customizable with any color or patterned paper
Skill Level
★★☆☆☆ (Easy)
Materials Needed
1 square sheet of paper, e.g. origami paper
Note: an origami box made with 6 inches x 6 inches (15 cm x 15 cm) paper makes a box that is about 3 inches x 3 inches (8 cm x 8 cm)
Instructions
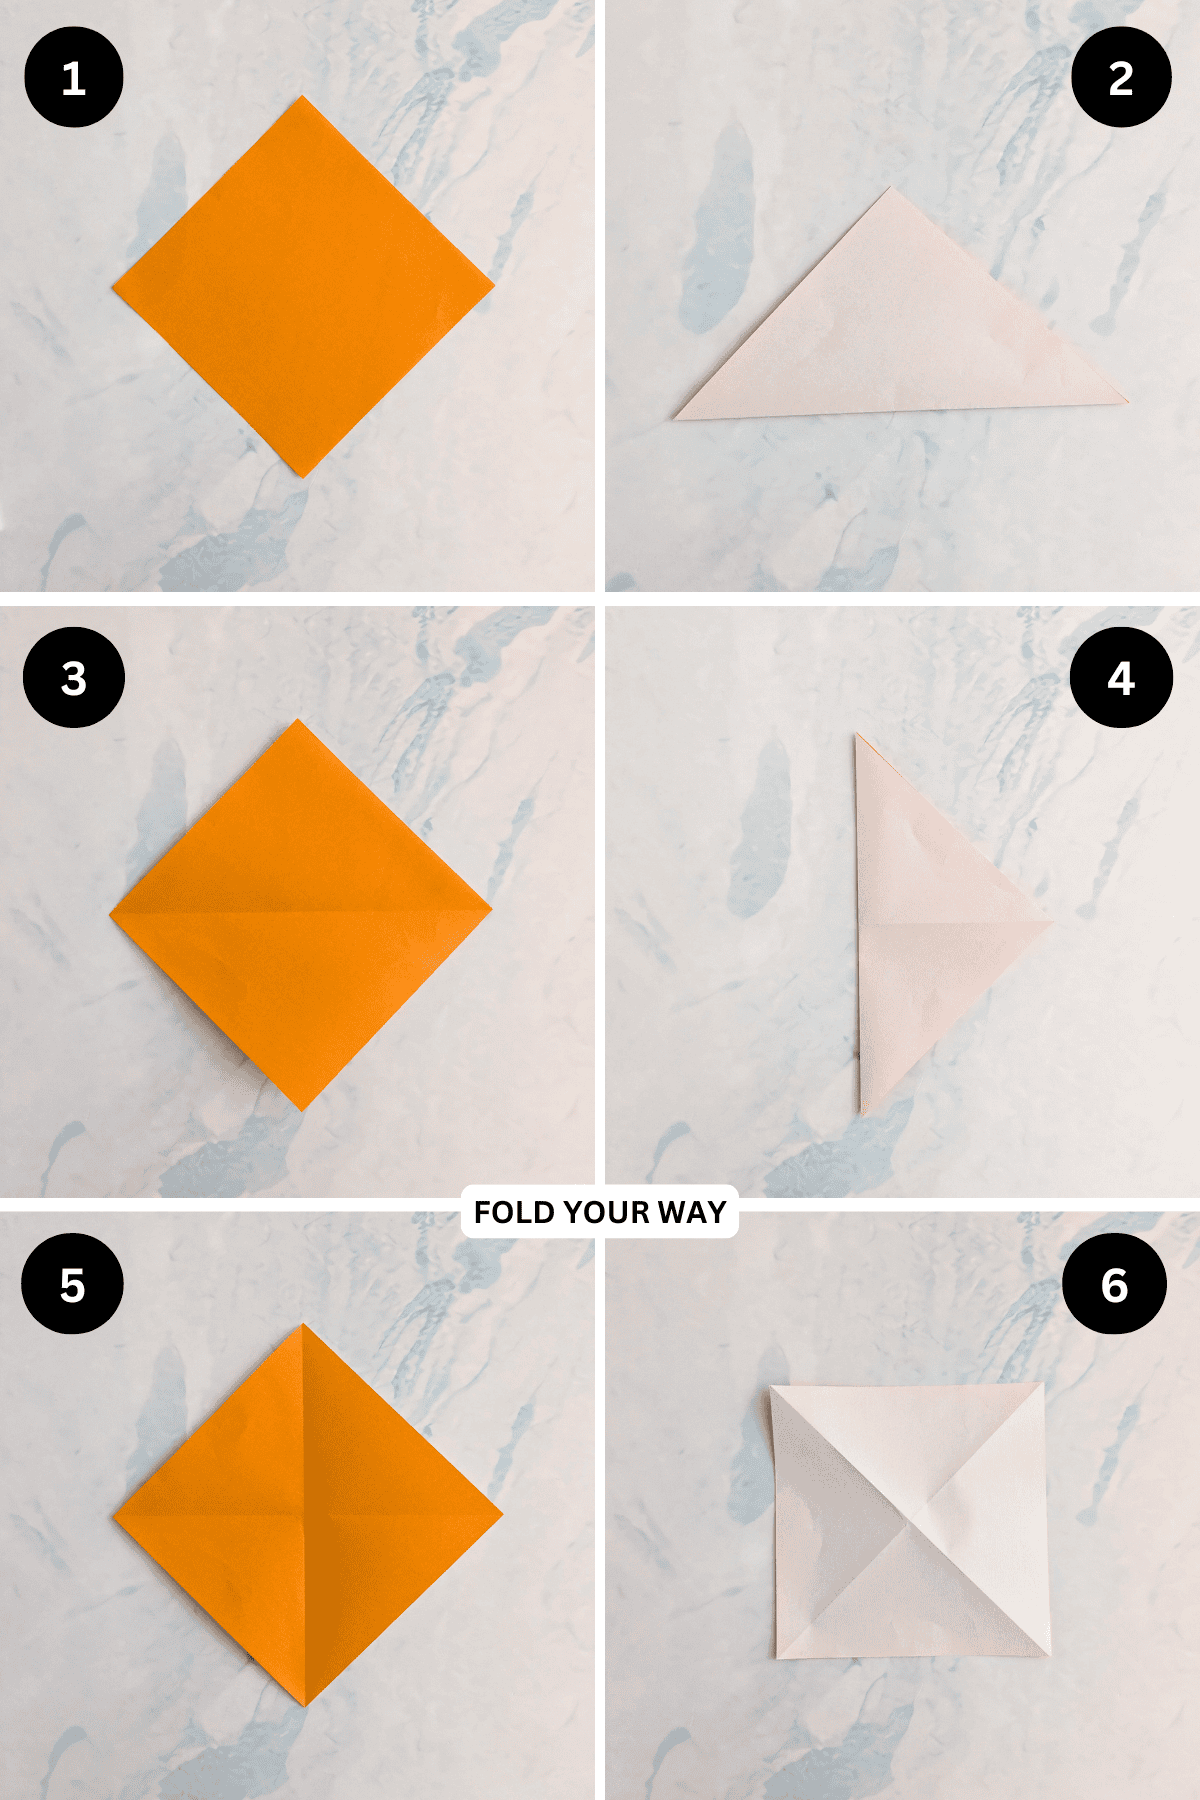
Step 1: Start with the color you want on the inside of your box facing up. Arrange the paper to sit like a diamond.
Step 2: Fold the bottom point up to meet the top point.
Step 3: Unfold previous step.
Step 4: Fold the left point to meet the right point.
Step 5: Unfold previous step.
Step 6: Flip your paper over from left to right and arrange it to sit as shown.
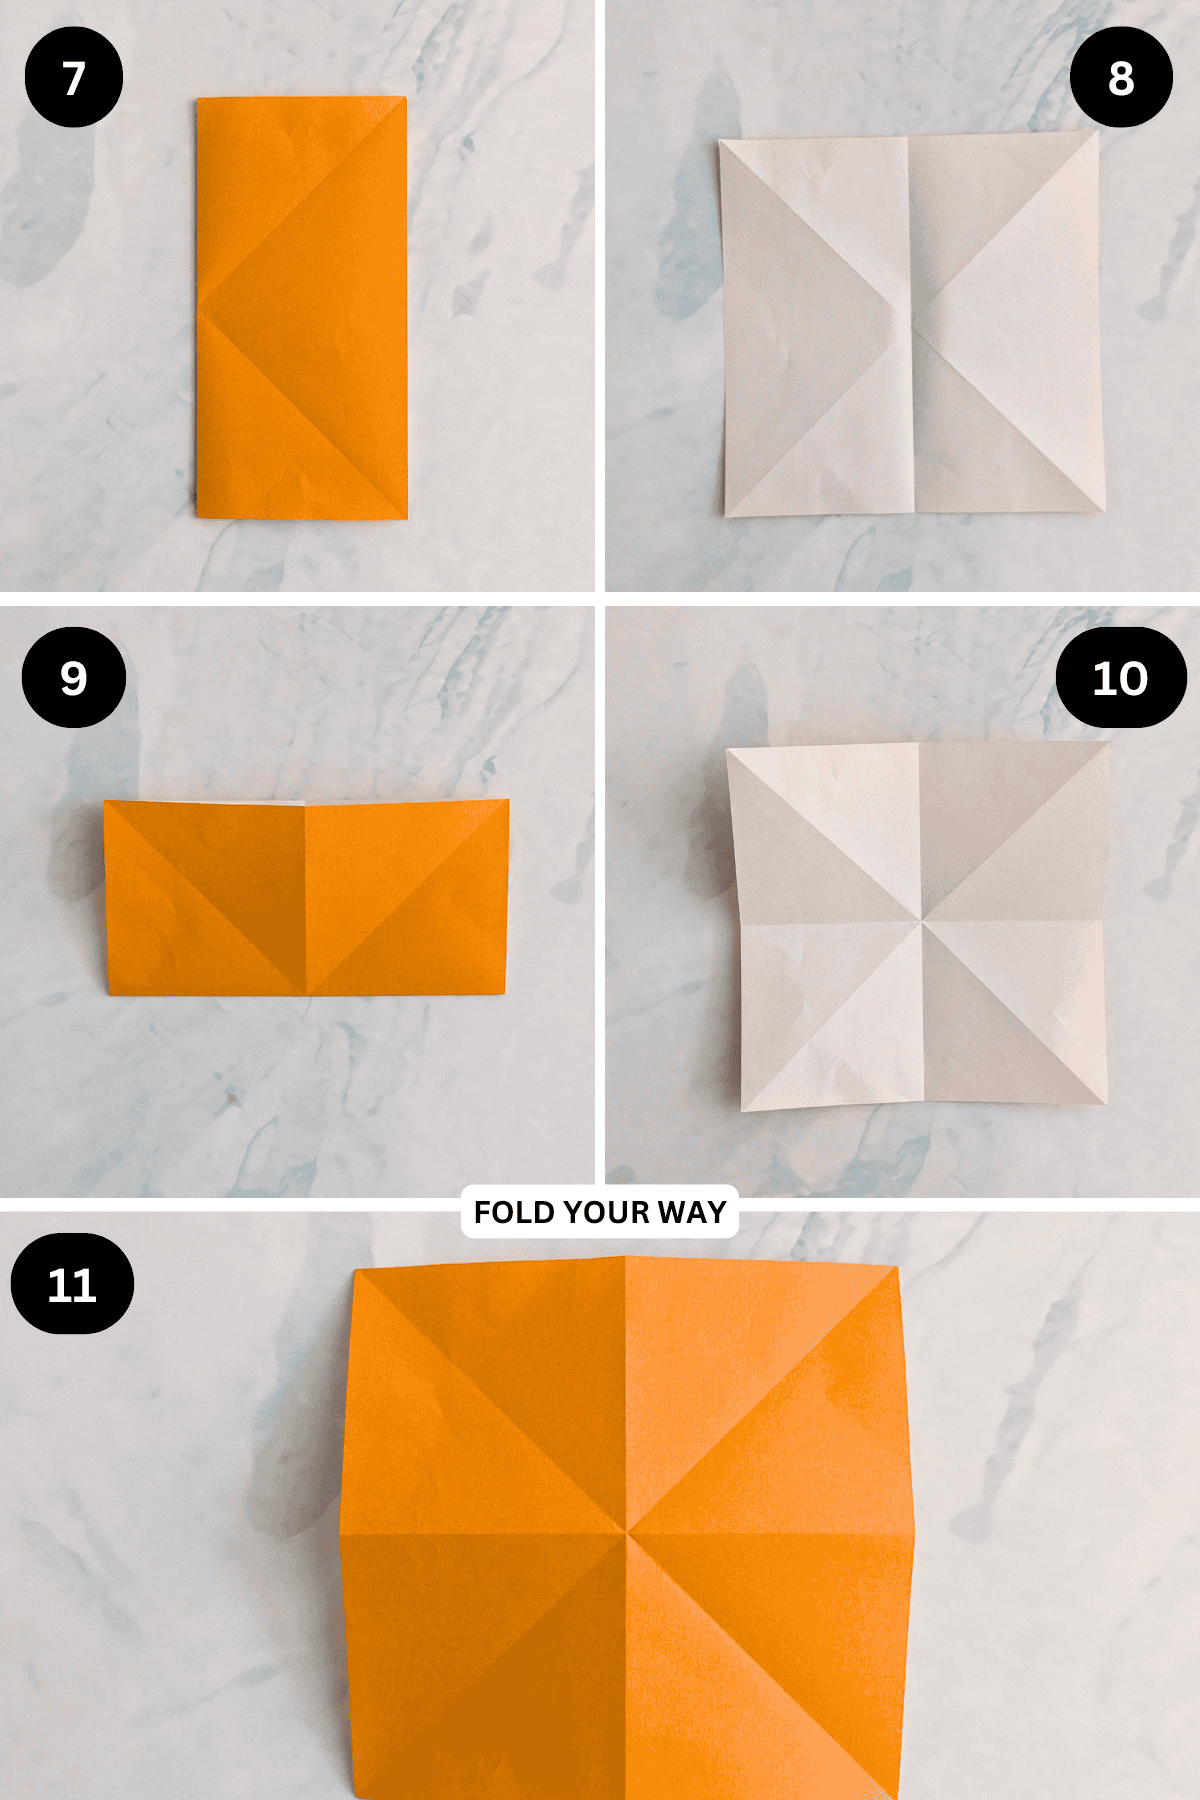
Step 7: Fold the left edge to meet the right edge.
Step 8: Unfold previous step.
Step 9: Fold the bottom edge up to meet the top edge.
Step 10: Unfold previous step.
Step 11: Flip your paper over from left to right.
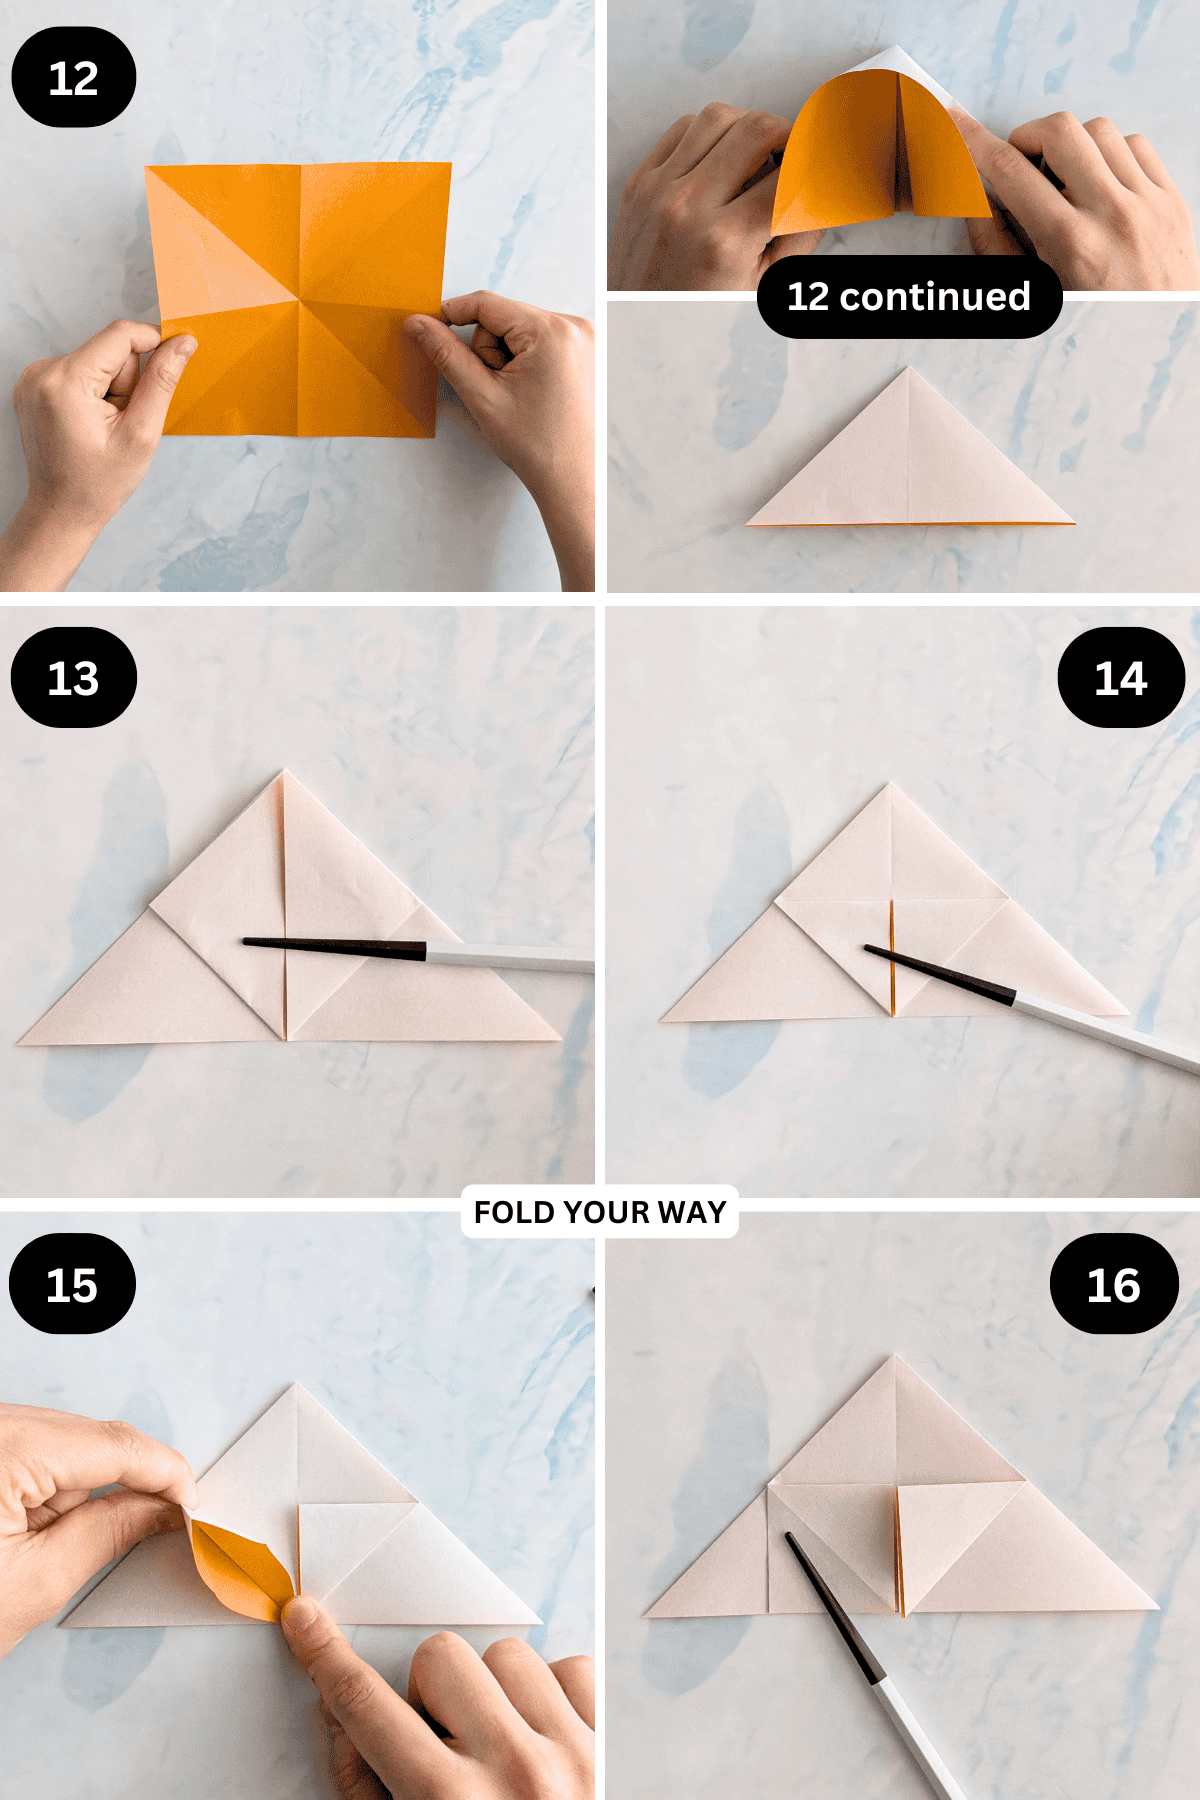
Step 12: Hold the sides of the paper as shown, push in the centre of the paper where the folds meet and then bring the sides towards the bottom edge, allowing the paper to collapse onto itself to form a triangle shape.
Step 13: Fold both the bottom left and bottom right points (top layer only) up to meet the top point.
Step 14: Fold those same points down to meet the bottom edge as shown.
Step 15: Open out the top left flap as shown
Step 16: Still working on the top left flap, flatten it down to form a square shape.
✨ You're almost there! ✨
To unlock the final steps and complete your pattern, create a free account with Grow.me. below.
Make sure you tick the box to subscribe to our newsletter and stay up to date with the latest patterns, tips, and more!
Once you're signed up, you'll get instant access to finish your project and enjoy exclusive content in the future.
Already signed up? Hit the button below and select ‘Switch to Log In’ to pick up where you left off and finish your project!
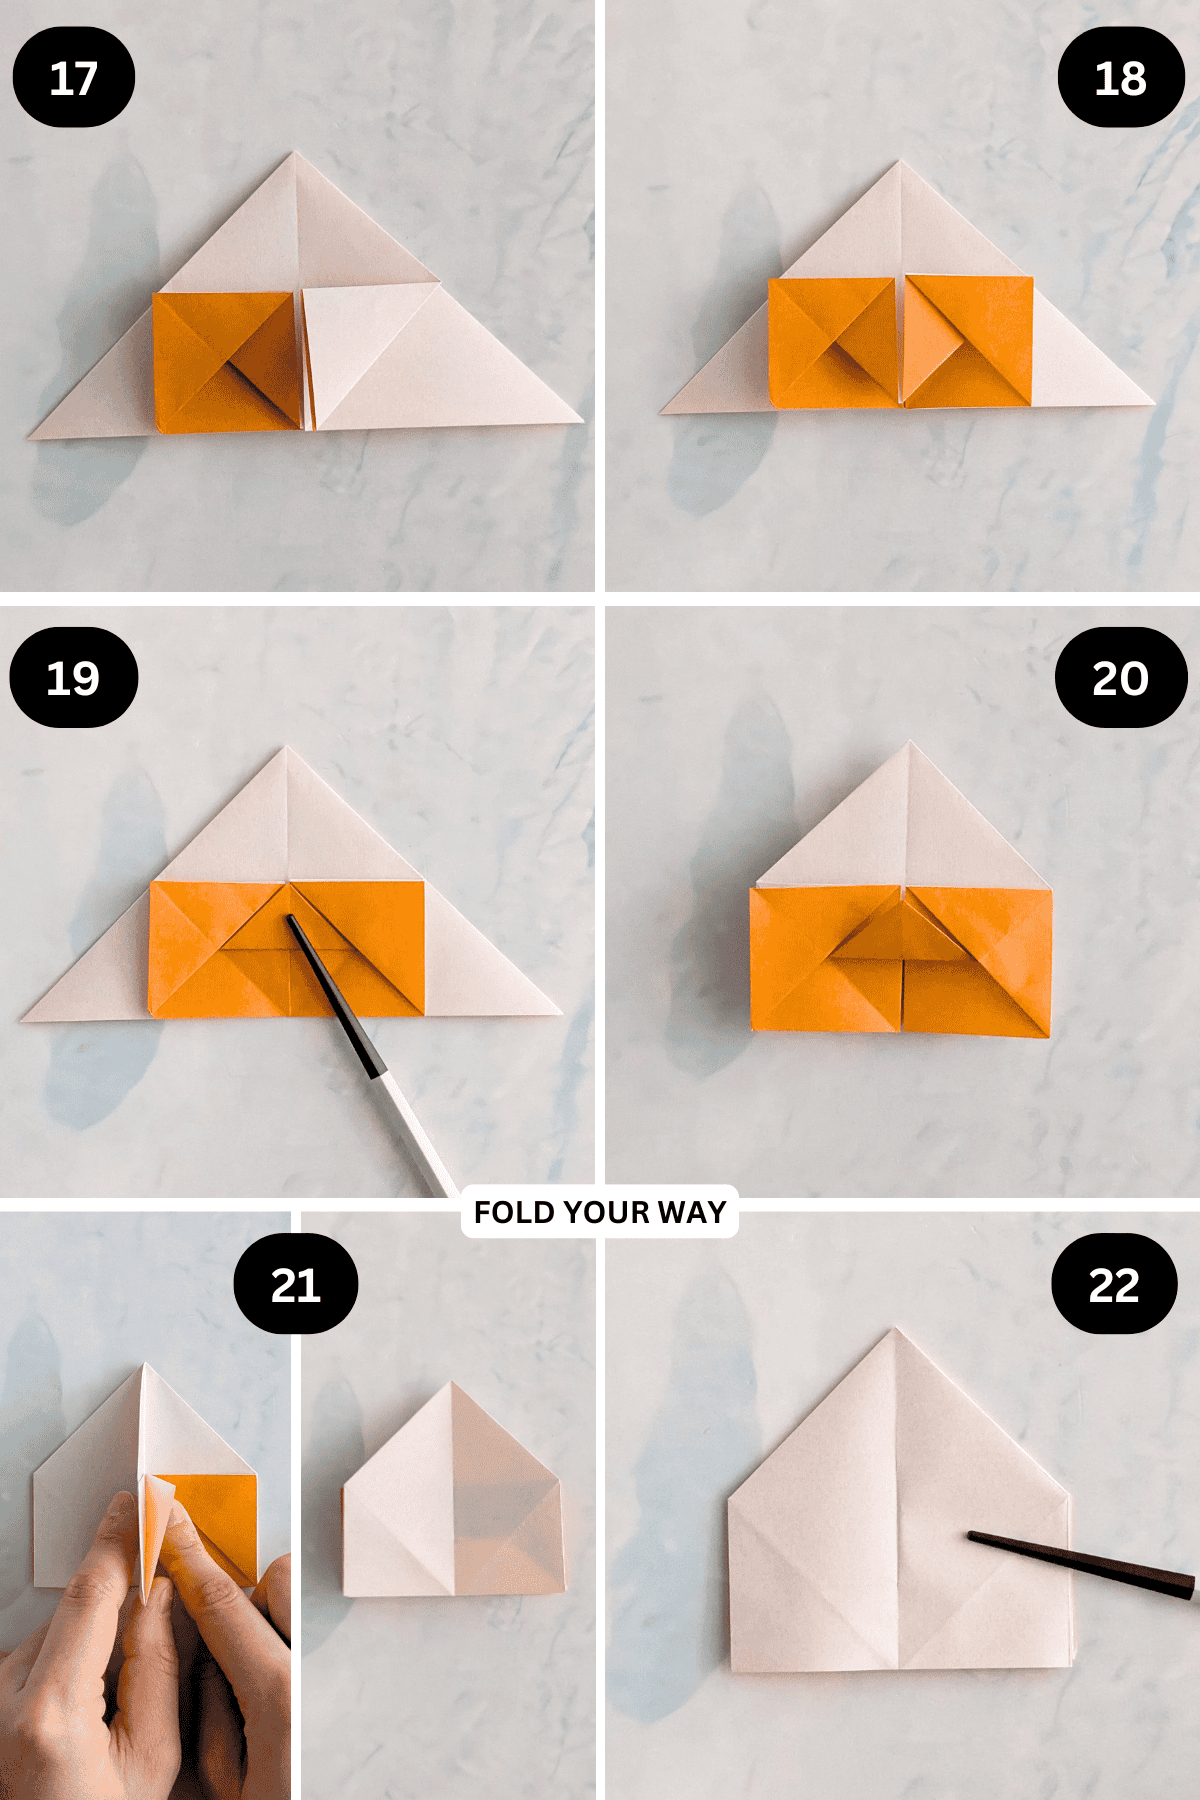
Step 17: Still working on the top left flap, fold the top layer out on a diagonal towards the left.
Step 18: Repeat steps 15, 16, and 17 for the right side.
Step 19: Fold the inner triangle flap found in the middle up as shown.
Step 20: Flip your paper over from left to right and repeat steps 13 to 19.
Step 21: Fold the left side of the paper (top layer only) towards the right like turning a page in a book.
Step 22: Repeat previous step for the other side.
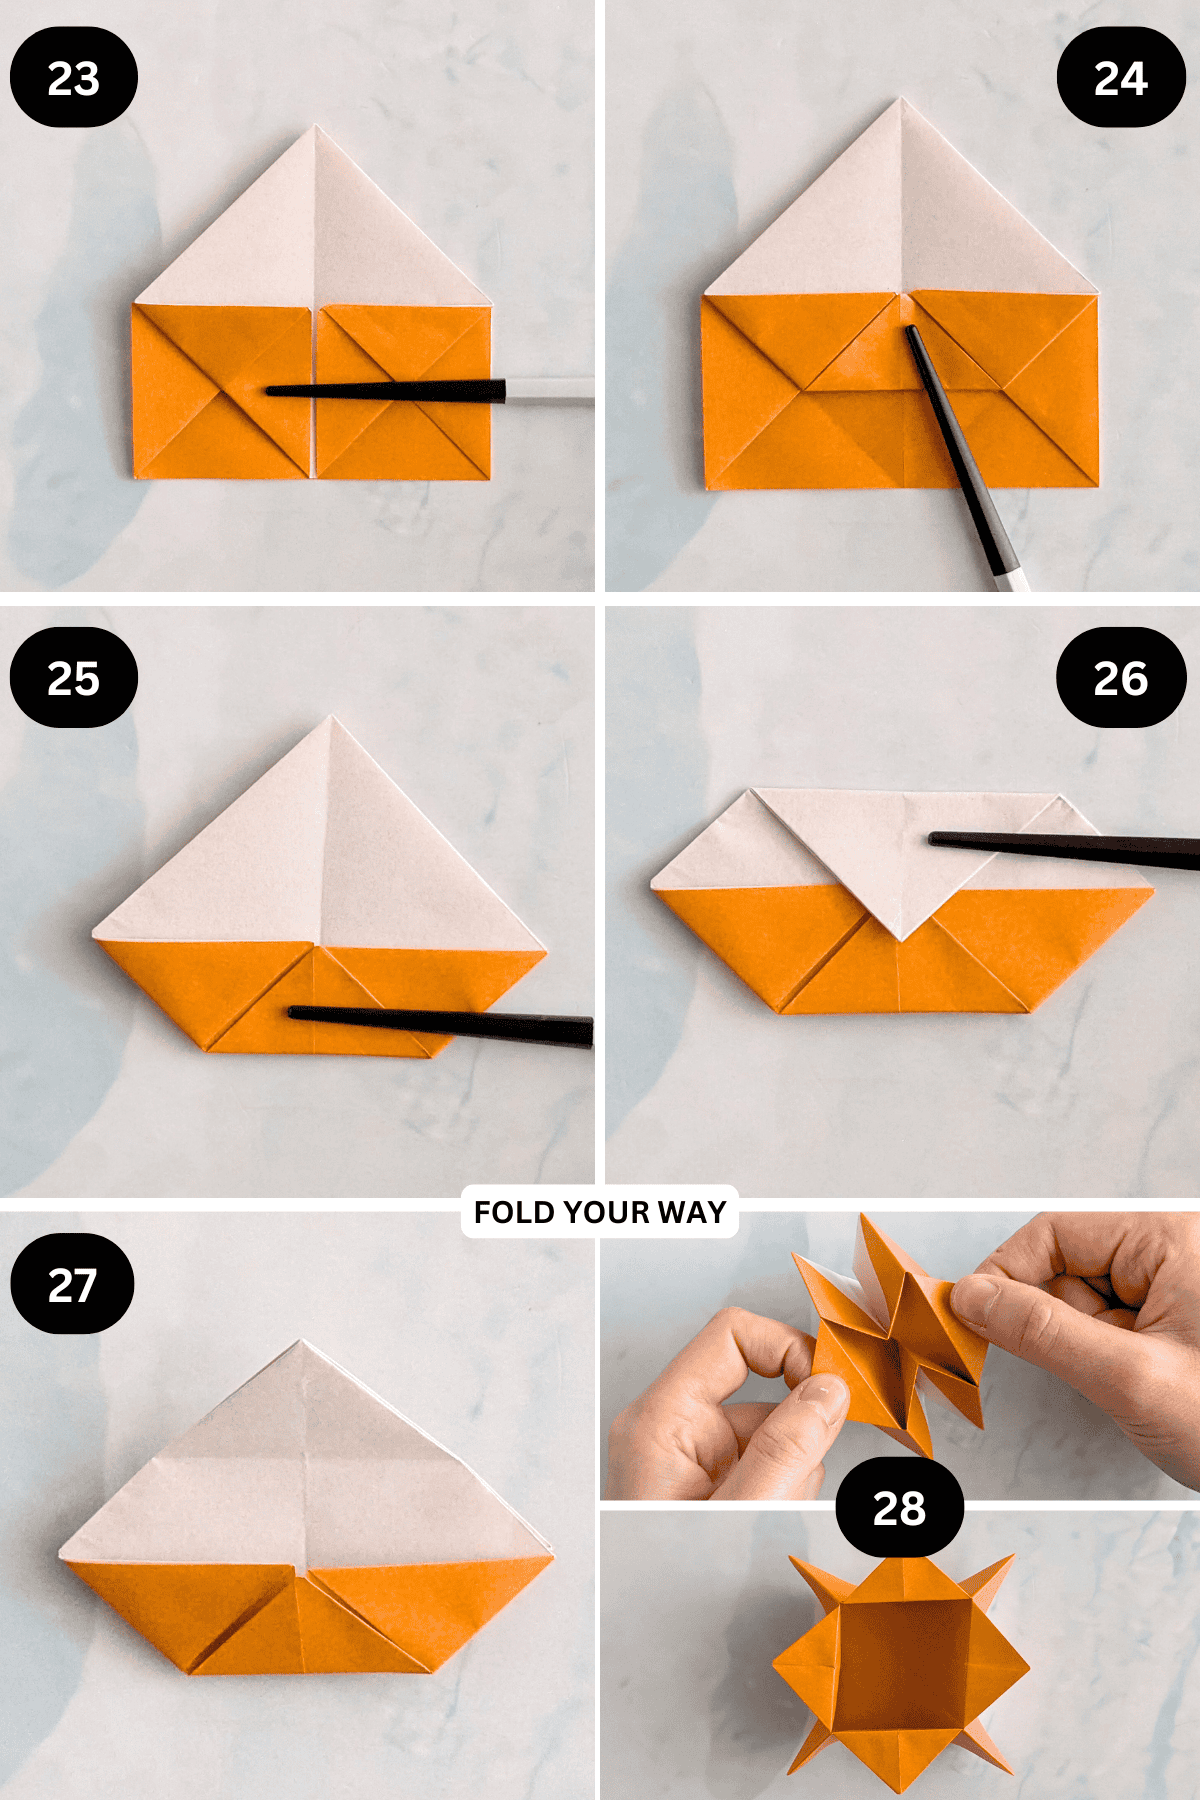
Step 23: Fold both the bottom left and bottom right corners (top layer only) in to meet the middle.
Step 24: Fold the inner triangle flap found in the middle up as shown.
Step 25: Flip your paper over and repeat steps 23 to 24.
Step 26: Fold the top point down slightly. This will determine how tall your box will be. If you fold the tip all the way down to the bottom edge your box will be quite shallow. If you want a taller box, fold the tip to about the middle of the paper.
Step 27: Unfold previous step.
Step 28: Gently open out your box, adjusting and re-creasing the sides and bottom as needed. Completed box.
Tips For Success
- Use slightly thicker paper for sturdier boxes that hold shape well.
- Fold precisely to keep star points sharp and the box stable.
- Experiment with different paper sizes to make mini or large boxes.
- Customize with holiday or party-themed paper for special occasions.
- To make the box taller, adjust the depth folds as described in the tutorial.
Color, Paper Ideas, and Variations
- Solid bright colors for cheerful, everyday use
- Metallic or glitter paper for festive celebrations
- Patterned paper with stars, stripes, or florals for a decorative touch
- Kraft paper for a rustic, natural look
- Smaller sheets for desk organizers or jewelry trays
- Recycled paper for eco-conscious crafting
FAQ
Yes, cut it into a square first; heavier paper folds better but standard paper works.
Adjust the folding depth as described in the instructions to customize the box height.
Absolutely, this step by step guide makes it easy to follow and fold.
Other Paper Crafts You Might Like To Try:
Helpful Tips and Common Mistakes For Paper Crafts
Paper crafting and origami can be hard sometimes. Which is why we've made this printable PDF just for you.
It outlines helpful tips so that you can successfully complete your craft, and some of the most common mistakes people come across.
You can download the helpful tips and common mistakes for paper crafts printable PDF here.
Stay Connected
Made this pattern? Let us know how it went in the comments below!
Pin this post - Pin now to take your paper crafting skills to the next level.
Share on Instagram or Facebook - Capture the beauty of your finished paper craft project and share it on Instagram or Facebook! Tag us @foldyourway so we can see your work!
Other Patterns You Might Like To Try:
Looking for other easy patterns like this? Try these:


Comments
No Comments