
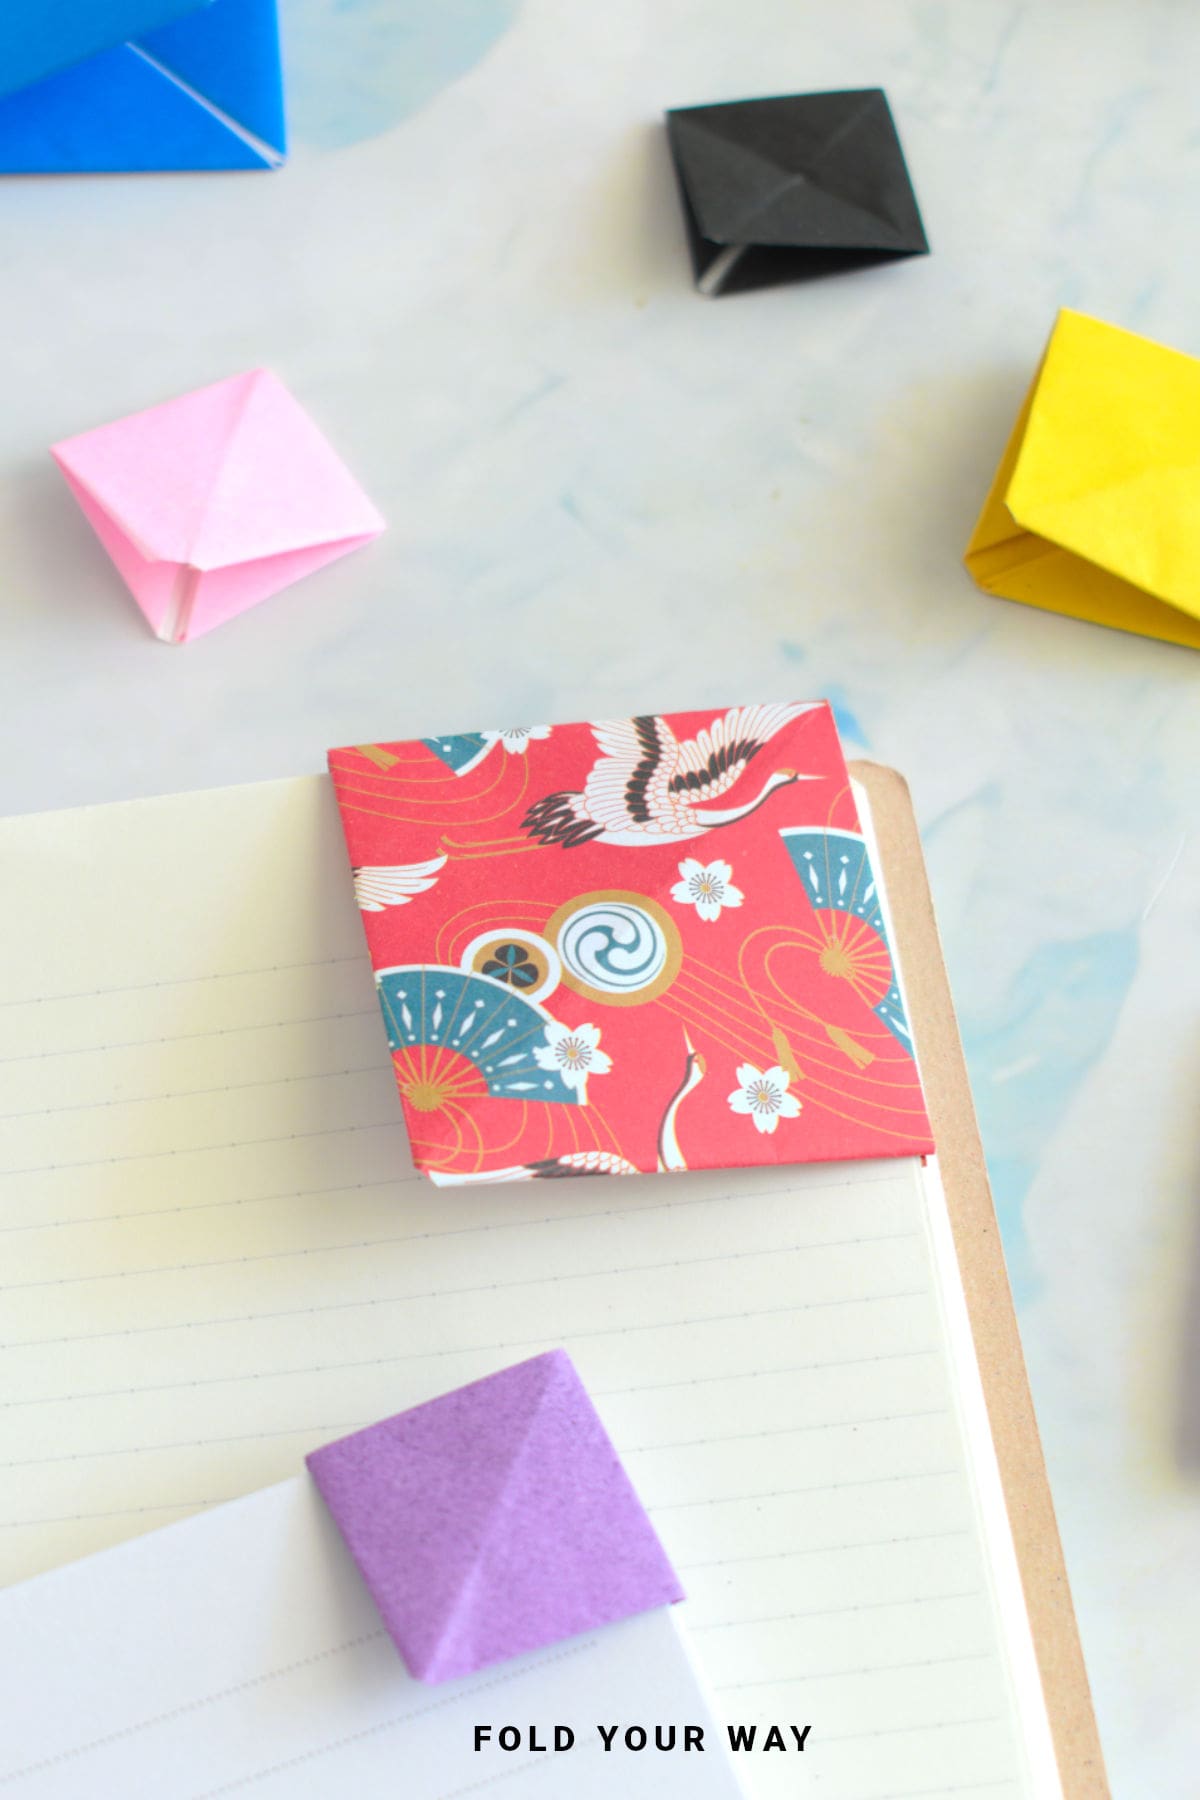
This square corner origami bookmark is the perfect beginner-friendly project that’s both fun and practical.
It only takes one square of paper and a few folds to create a handy little bookmark that slides neatly onto any page—great for readers of all ages!
Jump to:
Looking for a quick and easy paper craft that’s actually useful?
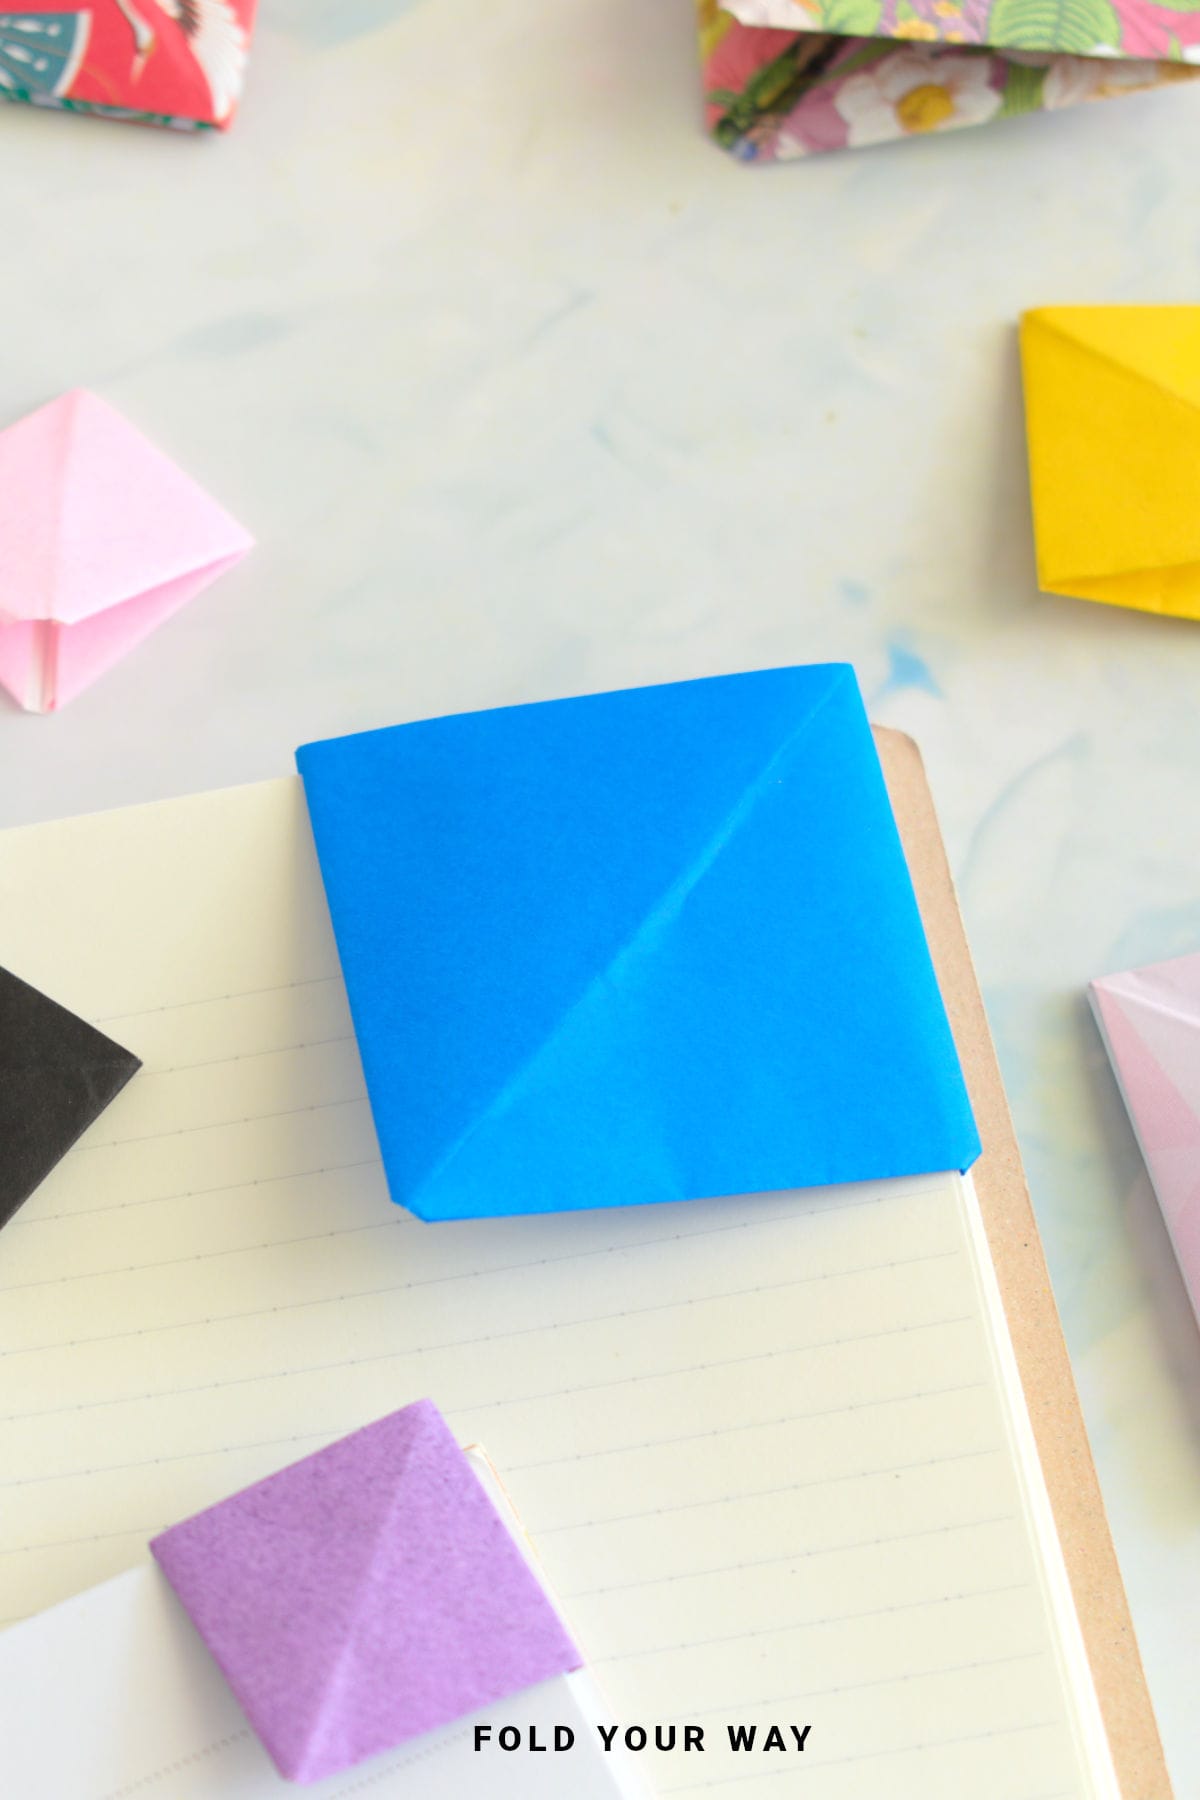
The square corner origami bookmark is a simple, satisfying fold that turns a single square of paper into a clever corner pocket. It’s a great project for beginners, and ideal for kids, classroom activities, or just a quiet afternoon craft.
Once folded, the triangle slips over the corner of any page, saving your spot without damaging the book.
It’s a fantastic project for book lovers and makes a lovely little handmade touch to pair with a gift. Think Christmas, Easter, Mother’s Day, Valentine’s, or birthday presents—especially when you’re gifting a book or journal.
Because it’s so easy to personalize with paper colors, stickers, or drawings, it’s also fun for craft parties or themed events. Whether you're looking for an easy craft idea, a DIY gift, or a simple origami tutorial, this one ticks all the boxes.
One of the best things about this project is just how simple it is to get started.
All you need is a square piece of paper and a few folds to create something both practical and fun. This easy origami bookmark is a fantastic entry point for anyone new to paper folding or looking for a quick, satisfying result.
Whether you’re crafting with kids, prepping for a themed party, or just enjoying a quiet afternoon, this bookmark DIY is a great way to turn scraps of paper into something useful.
It’s especially popular for school projects, book clubs, or as an extra thoughtful touch when gifting a novel or journal.
Because it slides neatly over the corner of a page, it’s often referred to as a corner bookmark—and that’s exactly what makes it so appealing.
It won’t fall out like traditional bookmarks, and it doesn’t damage pages either. Plus, you can decorate it in countless ways, from simple color combinations to themed designs for holidays or characters.
If you're looking for crafts that are beginner-friendly and don’t require special tools, this one’s hard to beat.
You can use plain paper, patterned origami sheets, or even repurpose old magazines or wrapping paper.
With just one square piece of paper and a little creativity, you’ve got a charming little bookmark that’s both handmade and memorable.
Ready to fold? Let’s get to it!
Why You'll Love This Pattern
- Quick to make – Finished in just a few folds
- Great for kids and adults – Easy enough for beginners
- Perfect gift topper – Tuck into books or planners
- Customizable – Use any colors or decorations
- No mess – No glue, no scissors, just folding
- Ideal for group settings – Great for classrooms, parties, or craft clubs
Skill Level
★☆☆☆☆ (Very Easy)
Materials Needed
- 1 square sheet of origami paper
| Paper Size | Final Bookmark Size | |
| Small Square Origami Bookmark | 3 inches x 3 inches (7.5 cm x 7.5 cm) | 1.10 inches x 1.10 inches (3 cm x 3 cm) |
| Medium Square Origami Bookmark | 4 inches x 4 inches (10 cm x 10 cm) | 1.3 inches x 1.3 inches (3.5 cm x 3.5 cm) |
| Large Square Origami Bookmark | 6 inches x 6 inches (15 cm x 15 cm) | 2 inches x 1 inches (5.5 cm 5.5 cm) |
Instructions
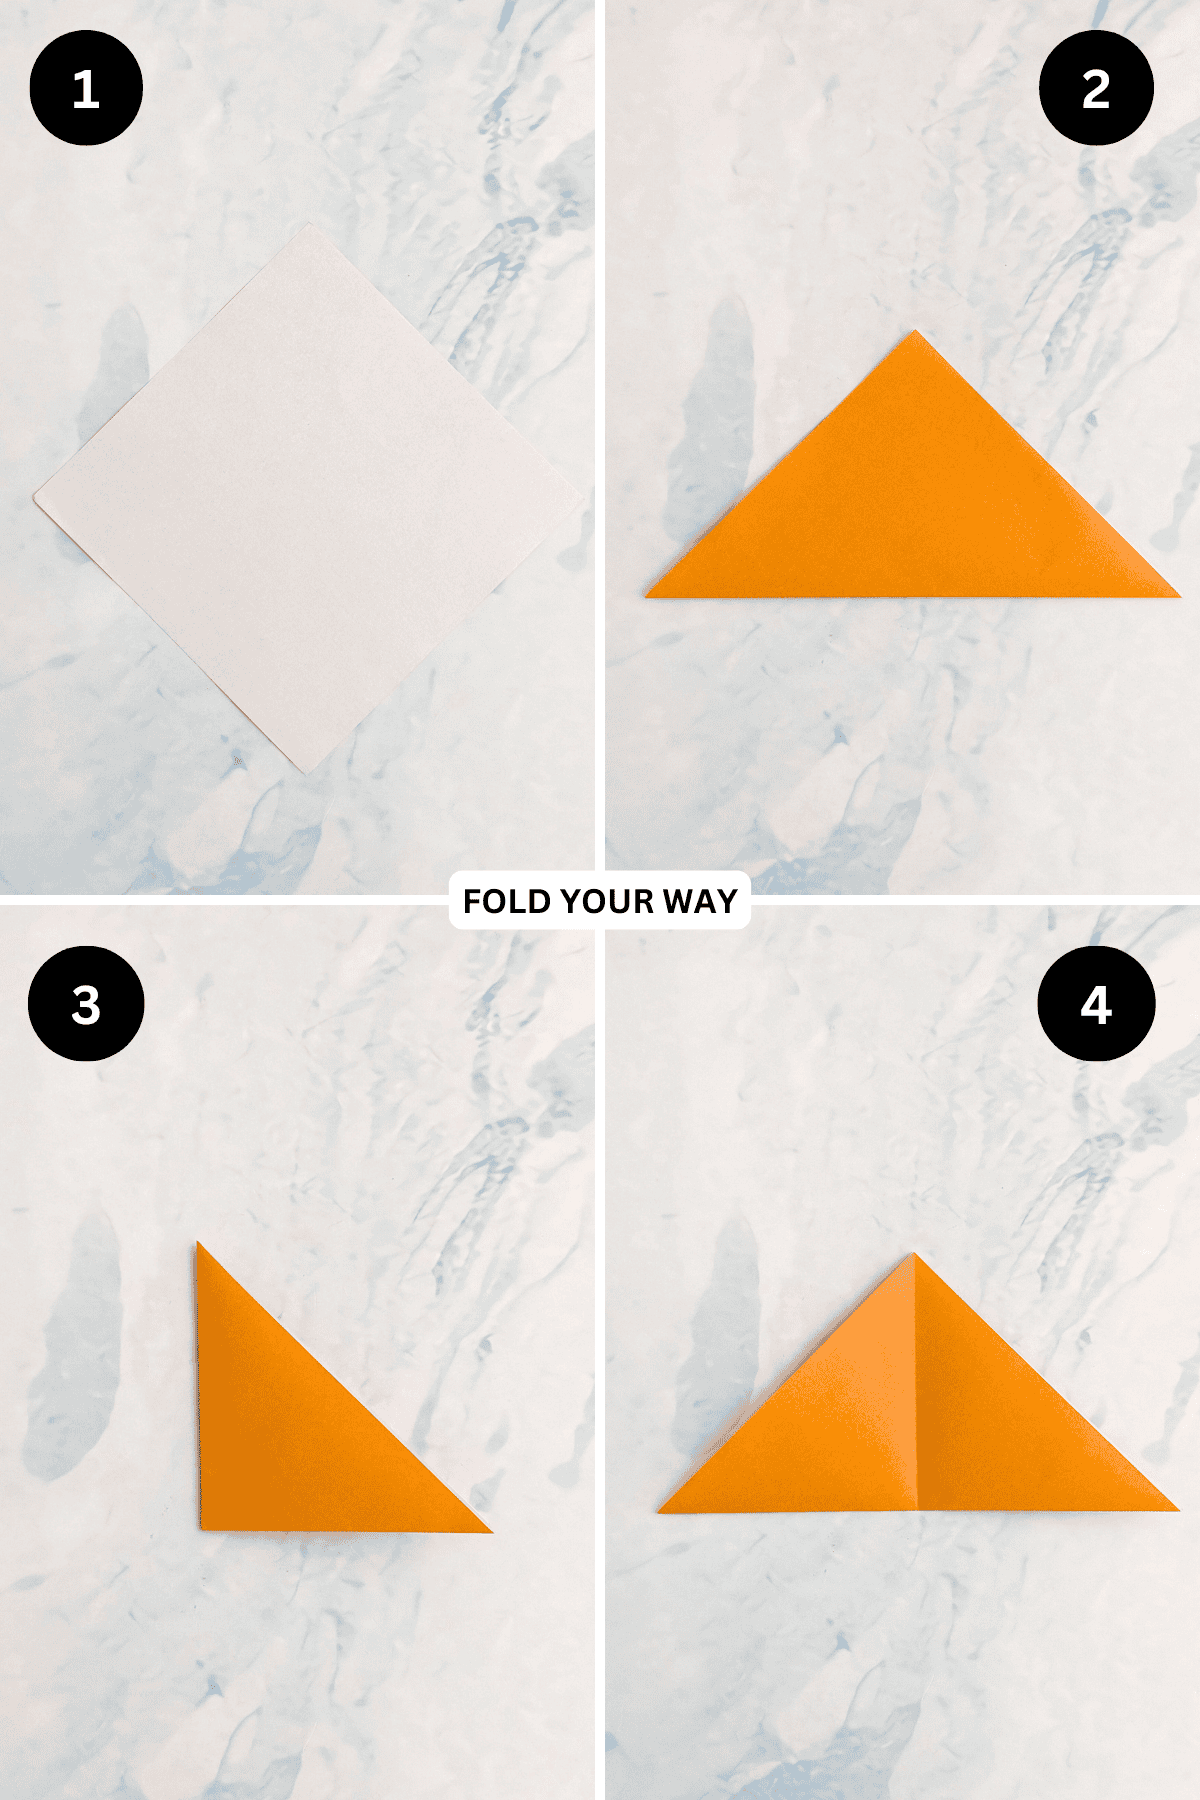
Step 1: Start with the color you want your bookmark to be facing down. Arrange your paper to sit like a diamond shape.
Step 2: Fold the bottom point up to meet the top point.
Step 3: Fold the left point to meet the right point.
Step 4: Unfold previous step.
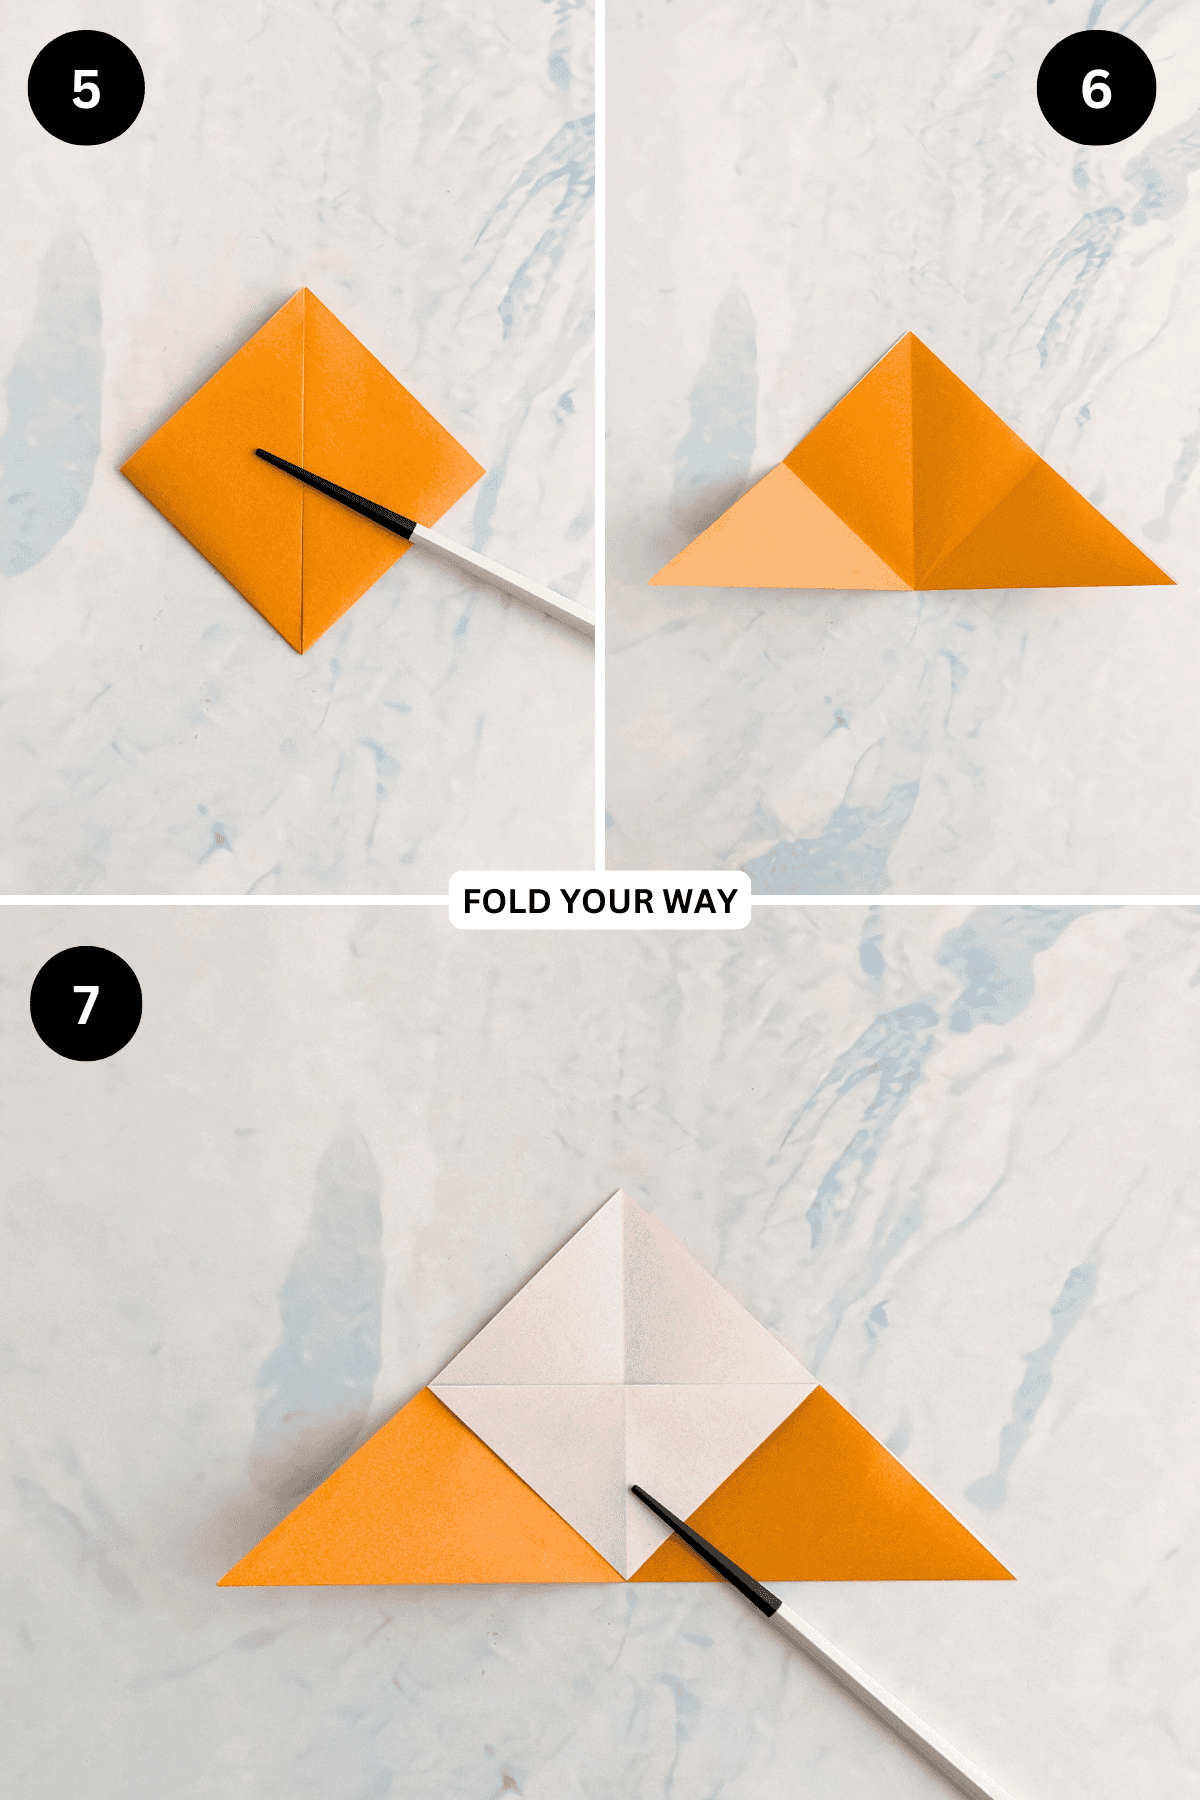
Step 5: Fold both the bottom left and bottom right corners up to meet the top point.
Step 6: Unfold previous step.
Step 7: Fold the top point down (top layer only) to meet the bottom edge.
✨ You're almost there! ✨
To unlock the final steps and complete your pattern, create a free account with Grow.me. below.
Make sure you tick the box to subscribe to our newsletter and stay up to date with the latest patterns, tips, and more!
Once you're signed up, you'll get instant access to finish your project and enjoy exclusive content in the future.
Already signed up? Hit the button below and select ‘Switch to Log In’ to pick up where you left off and finish your project!
Step 8: Take the bottom right corner and fold it up again, then tuck it into the pocket you made in the previous step. Crease and press flat. Then repeat with the bottom left corner.
Step 9: Tuck the top point into the pocket.
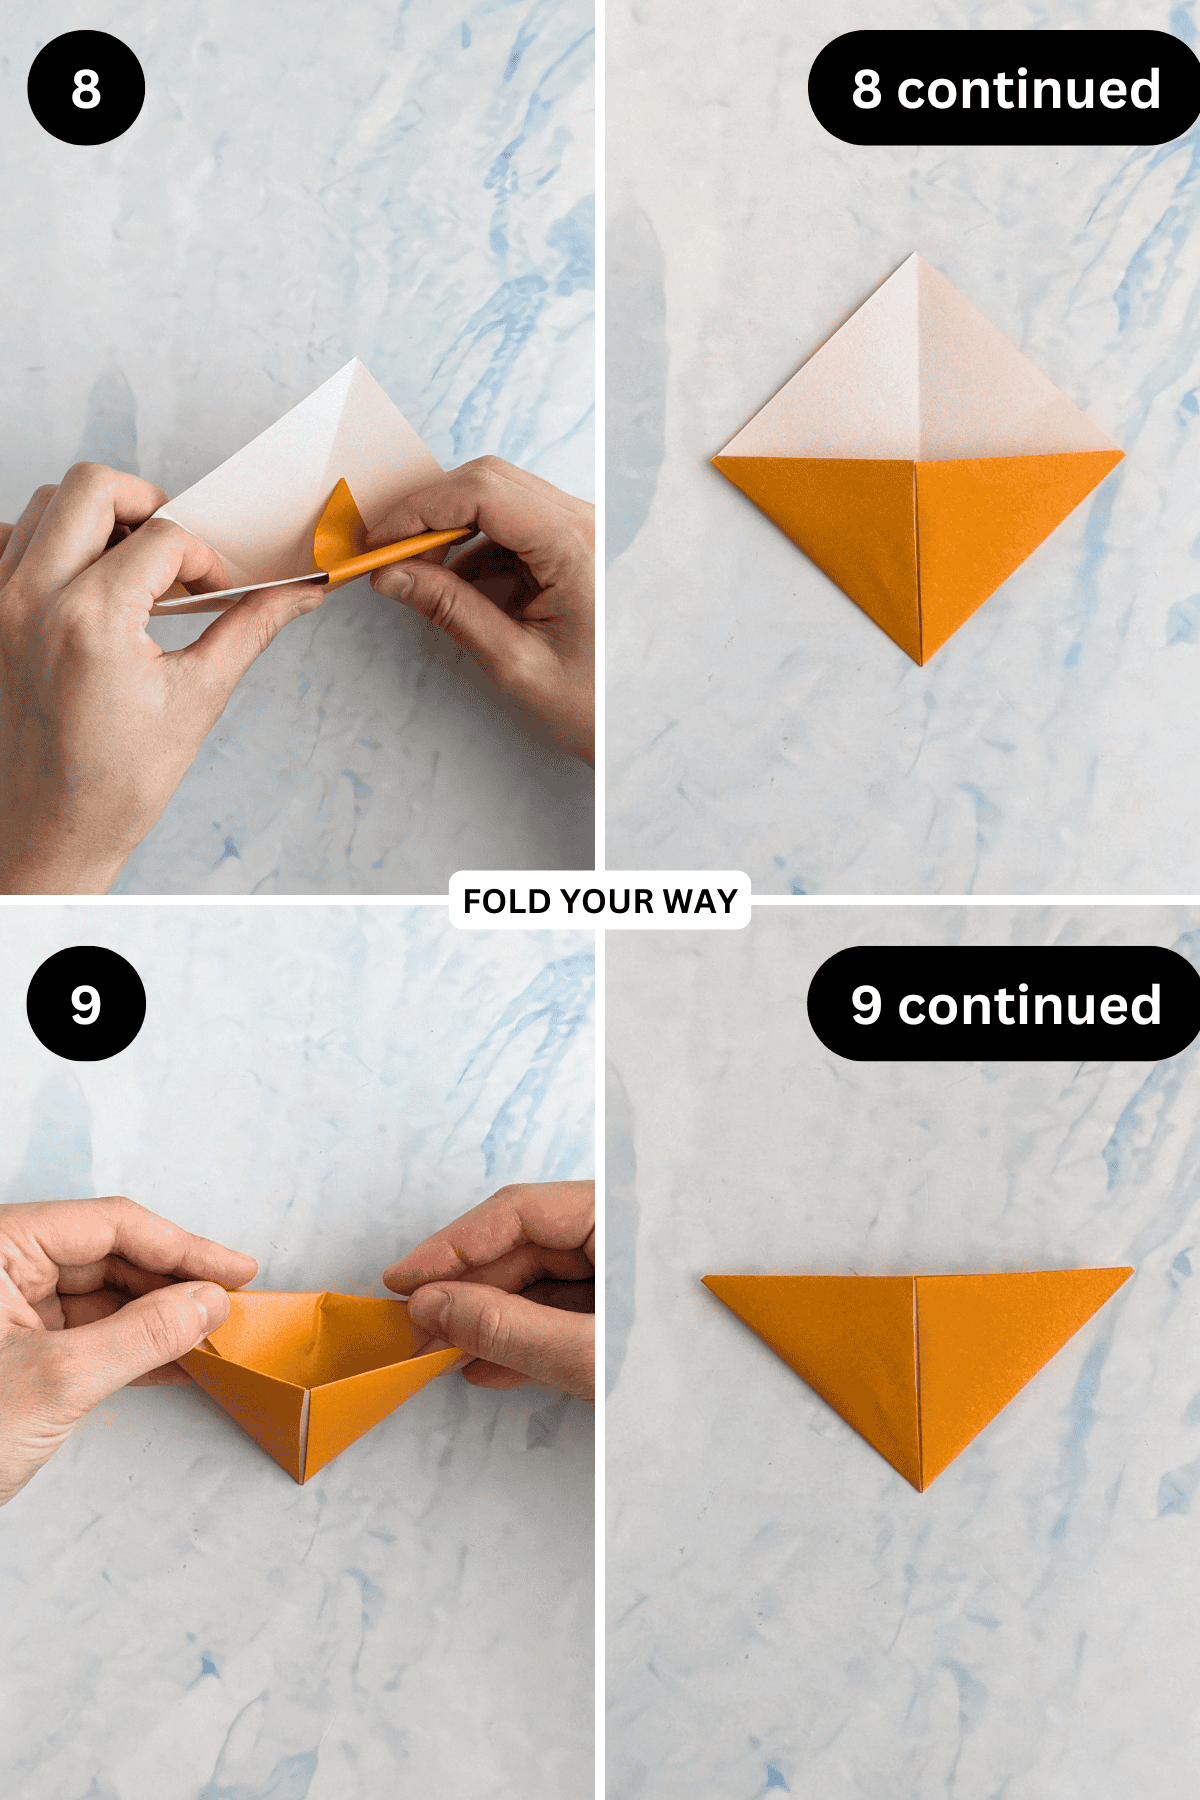
Step 10: Hold the paper on both sides as shown. Then bring the left and right points in to meet each other. Re crease along the edges.
Step 11: Completed square origami corner bookmark.

Tips For Success
- Use thinner paper for easier folds and a slim finish
- Decorate after folding so you don’t smudge your artwork
- Test with scrap paper first if trying new shapes or sizes
Common Mistakes & How To Avoid Them
- Crooked folds – Line up edges carefully before creasing
- Paper too thick – Stick with lightweight paper for crisp results
- Rushing through folds – Take your time for a neat finish
- Too bulky for small books – Try a smaller square for compact reads
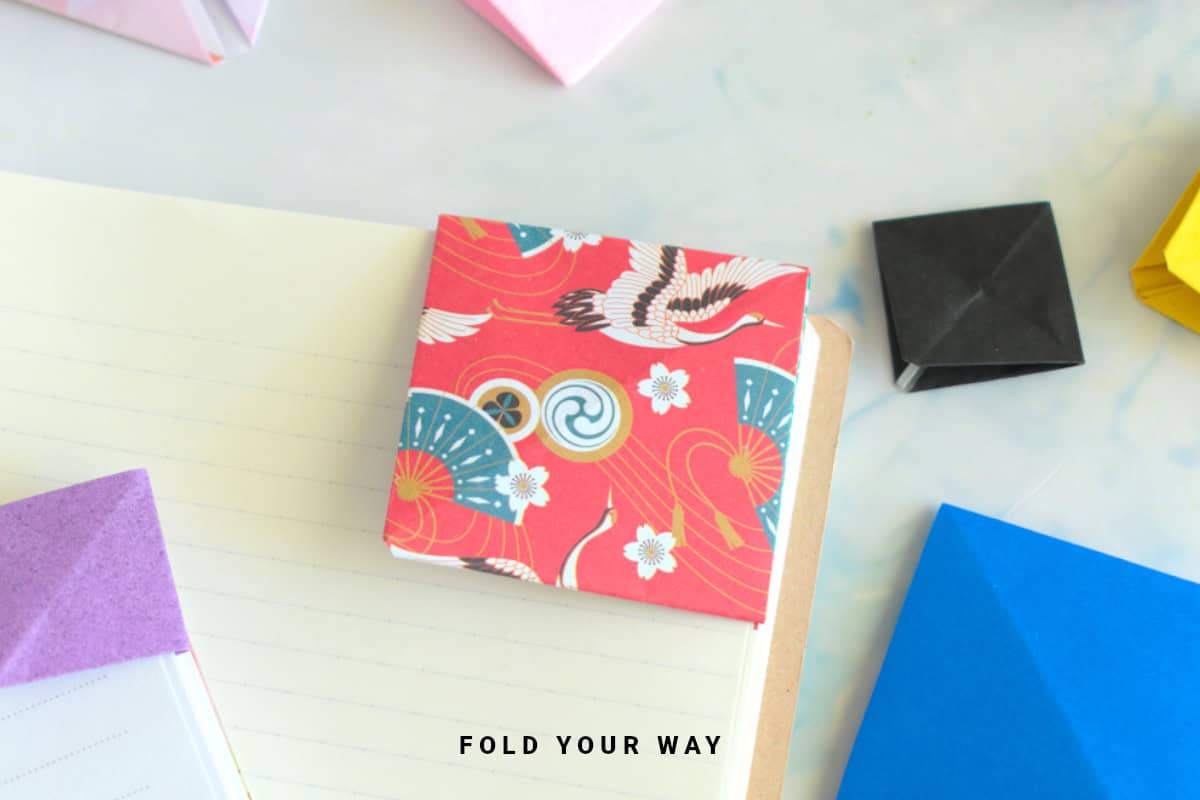
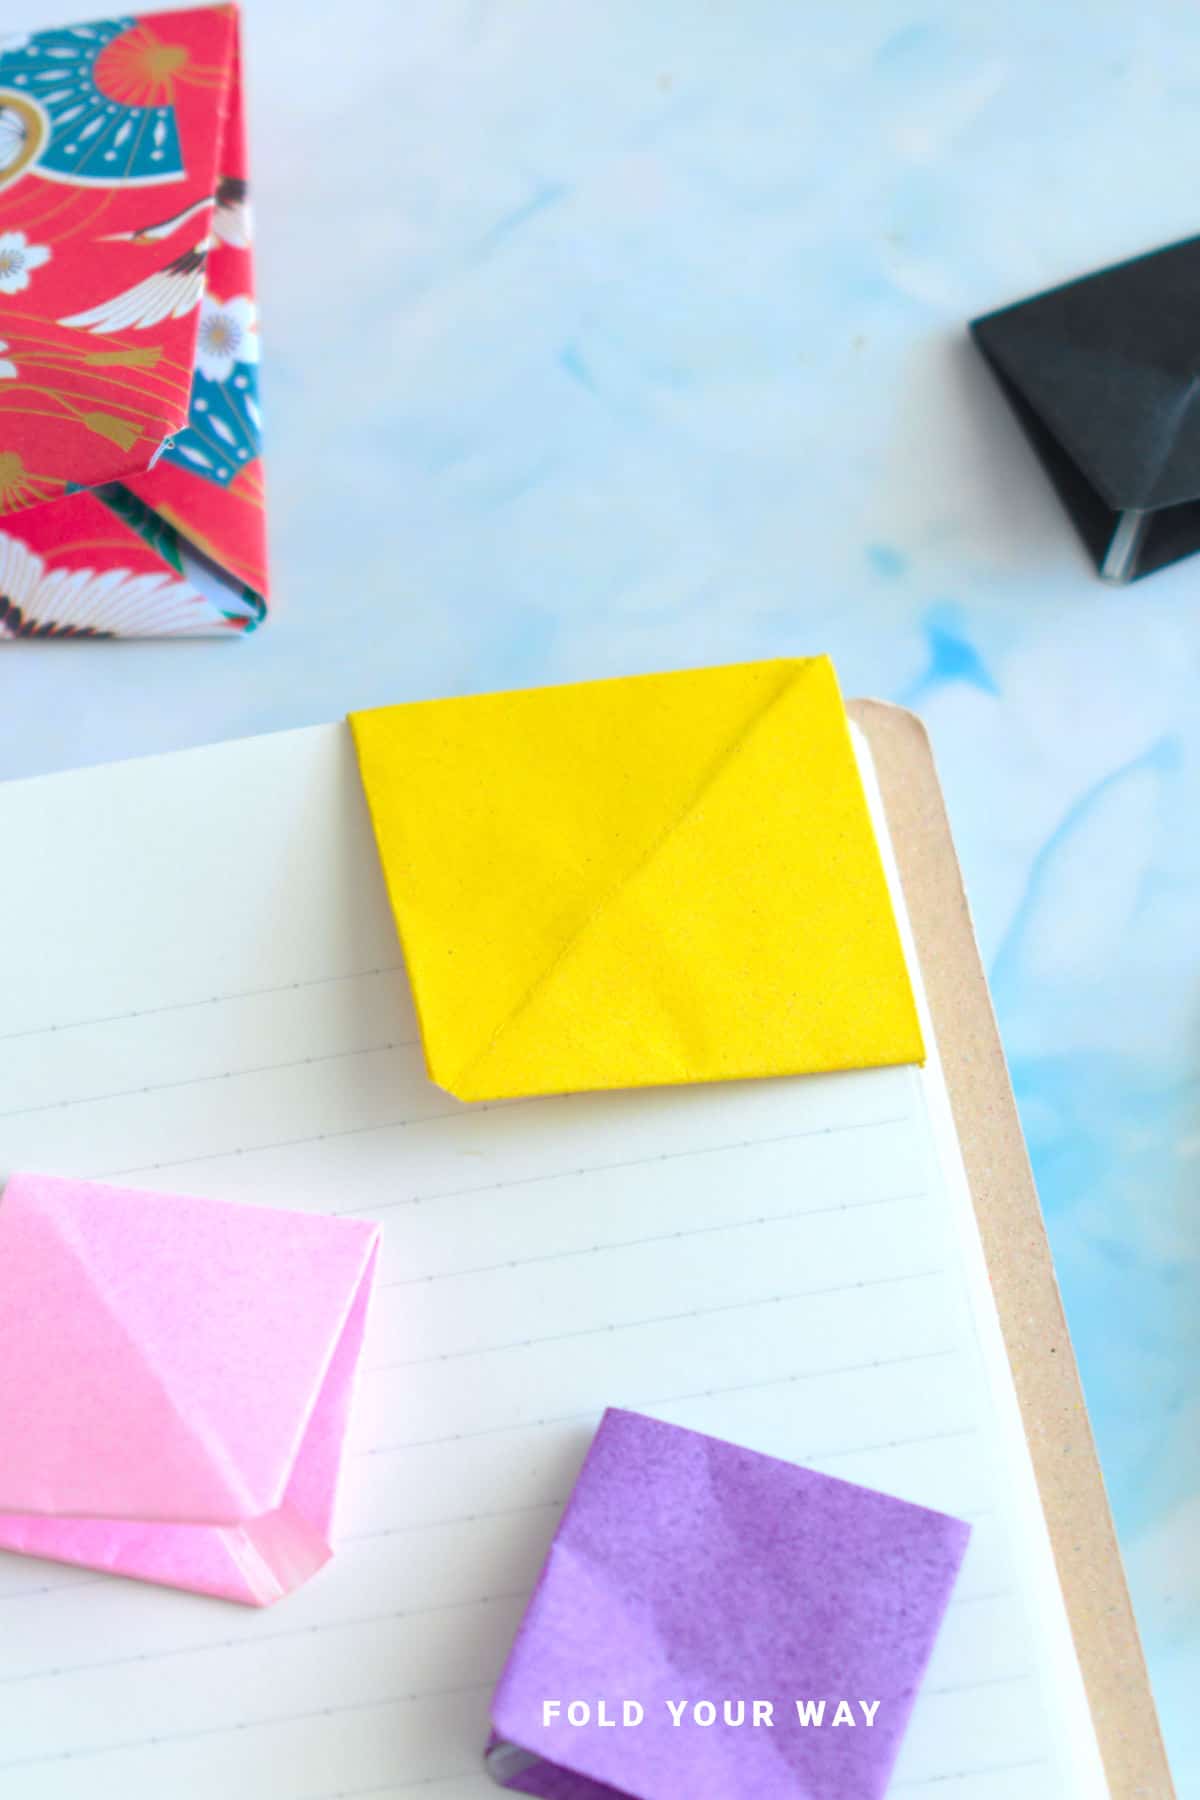
Color, Paper Ideas, and Variations
- Bright solid colors – Make a cheerful set for your bookshelf
- Patterned or textured paper – Use scrapbook paper, wrapping paper, or recycled envelopes
- Animal or character faces – Turn your triangle into a frog, monster, or kitty
- Seasonal themes – Hearts for Valentine’s, pumpkins for Halloween, stars for Christmas
- Mini bookmarks – Great for planners or pocket notebooks
FAQ
Absolutely—it's beginner friendly and perfect for all ages.
Lightweight paper like origami paper or regular printer paper works best.
Yes! Add doodles, stickers, or faces after folding for a fun touch.
Nope! It slides gently over the page corner and keeps your place without marking the paper.
Definitely—pair it with a book or notebook for an easy handmade touch.
Other Paper Crafts You Might Like To Try:
Stay Connected
Made this pattern? Let us know how it went in the comments below!
Pin this post - Pin now to take your paper crafting skills to the next level.
Share on Instagram or Facebook - Capture the beauty of your finished paper craft project and share it on Instagram or Facebook! Tag us @foldyourway so we can see your work!
Other Patterns You Might Like To Try:
Looking for other easy patterns like this? Try these:


Comments
No Comments