
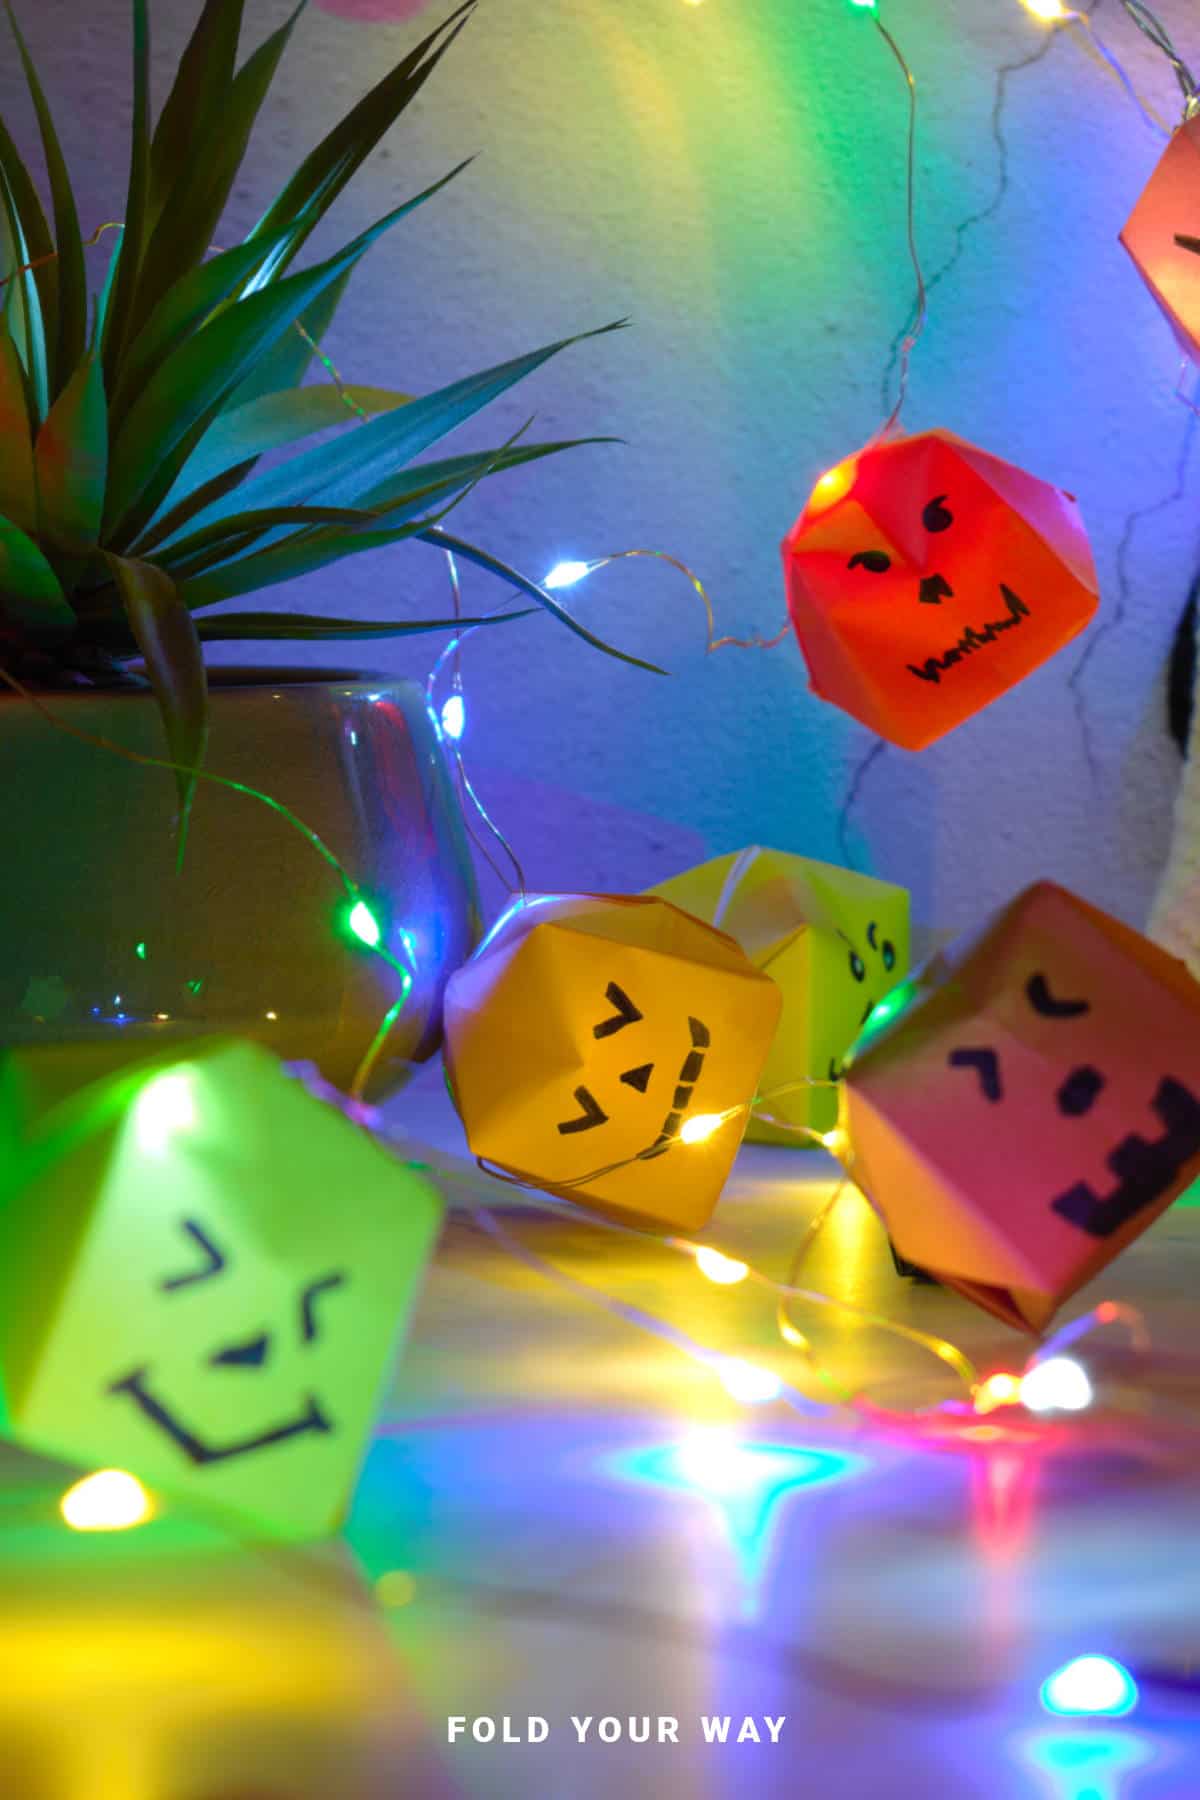
This 3D origami pumpkin garland with string lights is the perfect Halloween or fall decoration.
Made using inflatable origami pumpkins, this garland combines craft and festive fun.
Add a little glow with string lights and create a warm, cozy atmosphere at home or for your Halloween party!
Jump to:
Looking for a unique and festive way to light up your home this Halloween or autumn season?
This origami pumpkin garland with string lights is a creative and easy way to add warmth and charm to your space.
Using inflatable origami pumpkins as the base, you can attach them onto string lights (fairy lights) to create an enchanting glow that’s perfect for your Halloween party, fall gathering, or just adding some seasonal cheer to your living room.
The best part? This project is simple to make, doesn’t require any special tools or skills, and will leave you with a fun, customizable decoration.
Whether you’re crafting for a Halloween party, a Thanksgiving celebration, or just for a cozy, autumn vibe, this project will make your space feel festive and inviting.
It's also an ideal project for kids, crafting groups, or a DIY home decor project.
You can make the origami pumpkins ahead of time (they’re easy to create) and then simply attach them to string lights for an instant, glowing display.
This garland works great on mantels, around windows, along a staircase railing, or even draped across a dining table for a spooky touch.
If you want to make it even more fun, add faces to the pumpkins or use different colors and patterns of paper.

Why You'll Love This Pattern
- Easy and fun to make with just paper and string lights
- Inflatable pumpkins add a unique 3D touch
- Ideal for Halloween, Thanksgiving, or autumn decorations
- Works as a perfect table decoration or wall hanging
- Customizable—you can draw faces, use different colors, or even mix in other seasonal themes like fall leaves
- Perfect to make in advance or last minute.
- Perfect for DIY enthusiasts, kids, or party hosts
Skill Level
★☆☆☆☆ (Very Easy)
Materials Needed
- Origami paper – we recommend using thinner origami paper so that the light can really shine through the pumpkin. Best to use paper that is white on one side and colored/patterned on the other.
- String lights (fairy lights or small LED lights)
- Tape to attach the pumpkins
- Markers (optional, for drawing faces or extra details)
Great starting size for your pumpkins: 6 inches x 6 inches (15 cm x 15 cm) paper.
Instructions
Making The Pumpkins
Step 1: Start with the color you want your pumpkin to be facing up.
Step 2: Fold the left side to meet the right side.
Step 3: Unfold previous step.
Step 4: Fold the bottom edge up to meet the top edge.
Step 5: Unfold previous step.
Step 6: Flip your paper over from left to right.

Step 7: Fold the bottom left corner to meet the top right corner.
Step 8: Unfold previous step.
Step 9: Fold the bottom right corner up to meet the top left corner.
Step 10: Unfold previous step.
Step 11: Hold the left and right sides of the paper and bring the sides inwards and then down. Flatten the paper into a triangle shape. This is known as an origami water bomb base.

Step 12: Fold the bottom left and right corners (top layer only) up to meet the top point.
Step 13: Fold the top left flap down to meet the bottom edge, making a small crease only in the centre.
Step 14: Unfold previous step.
Step 15: Fold the left and right points of the inner flaps to meet the crease you made in step 13.
Step 16: Fold the top 2 points down to align with the flaps your made in the previous step.
Step 17: Fold the same flaps outward on a diagonal.

✨ You're almost there! ✨
To unlock the final steps and complete your pattern, create a free account with Grow.me. below.
Make sure you tick the box to subscribe to our newsletter and stay up to date with the latest patterns, tips, and more!
Once you're signed up, you'll get instant access to finish your project and enjoy exclusive content in the future.
Already signed up? Hit the button below and select ‘Switch to Log In’ to pick up where you left off and finish your project!
Step 18: Unfold previous step.
Step 19: Tuck the top left loose flap into the pocket of the left triangular flap.
Step 20: Repeat previous step for the top right flap.
Step 21: Flip your paper over from left to right. Then repeat steps 15 to 20.
Step 22: Fold the left side of the paper over to the right like turning a page in a book.
Step 23: Repeat previous step for the other side.

Step 24: Rotate your pumpkin 180 degrees. This will ensure you have a small hole at the top tip of your pumpkin.
Step 25: Fold the bottom point up as shown.
Step 26: Unfold previous step.
Step 27: Draw a face on your pumpkin using a marker. Do not go below the crease line you made in step 25. Keep the face as centered as possible.
Step 28: Pick up your pumpkin. You will notice on the top of the pumpkin there will be a small hole. Gently open out the pumpkin slightly as shown. Then, blow through the hole in the pumpkin to inflate it. We recommend not putting your mouth directly onto the paper as it can become soggy. You could alternatively use a straw.
Step 29: Once inflated, adjust the folds as you like. Completed pumpkin. Repeat previous steps to make as many pumpkins as you need. You might also like to make pumpkins of varying size.

Putting the Garland Together
Step 1: Unwind your lights and lay they out on your workspace.
Step 2: Take one of the pumpkins and use some tape to attach it to the light. Depending on the type of lights you are using you might be able to fully put a light bulb into the hole at the top of the pumpkin. If not, just tape the light bulb in as much as it can.
Step 3: Repeat previous step for as many light bulbs and pumpkins as you desire. Completed garland.

Tips For Success
- Use battery-operated LED string lights to avoid long cords and keep it safer for indoors.
- Use strong tape or glue dots to secure the pumpkins onto the string lights, but make sure the tape doesn’t cover the bulbs to avoid overheating.
- When using string lights with your origami pumpkins, make sure to follow the safety instructions provided with the lights. Always handle them carefully, especially around water or damp areas.

Common Mistakes & How To Avoid Them
- Pumpkins falling off the string lights: Make sure to securely tape the pumpkins on both sides of the paper, ensuring they hold tight.
- Pumpkin faces don’t show up well: If you're using markers to decorate, make sure the ink is dry before inflating the pumpkins to avoid smudging.
- String lights too long or too short: Plan the placement of the string lights before attaching pumpkins to avoid having too much excess wire or not enough to stretch across the space.
Color, Paper Ideas, and Variations
- Traditional orange pumpkins: Stick with the classic Halloween look for a bright, bold display.
- Patterned paper: Mix it up with fun patterns like stripes, polka dots, or even spooky designs like skulls or bats for a unique twist.
- Glowing pumpkins: If your string lights are colored, try matching your pumpkin colors (green for a spooky effect, yellow for a warm glow)
- Mini pumpkins: Use smaller paper sizes to make mini pumpkins for a more intricate garland, or mix large and small pumpkins for variety.
- Glow-in-the-dark paper: Choose glow-in-the-dark origami paper for a spooky, glowing effect when the lights are off.
FAQ
Yes! Lightweight paper like origami paper is best, but you can also use gift wrap, colored printer paper, or recycled paper.
No, you can use any kind of string lights! LED fairy lights work best because they stay cool and are easy to attach.
It depends on the length of your string lights! Typically, 10-15 pumpkins work well for a standard garland length.
Absolutely! Try mixing in origami leaves, bats, or ghosts to create a more festive Halloween garland.
Other Paper Crafts You Might Like To Try:
Stay Connected
Made this pattern? Let us know how it went in the comments below!
Pin this post - Pin now to take your paper crafting skills to the next level.
Share on Instagram or Facebook - Capture the beauty of your finished paper craft project and share it on Instagram or Facebook! Tag us @foldyourway so we can see your work!

Other Patterns You Might Like To Try:
Looking for other easy patterns like this? Try these:


Comments
No Comments