
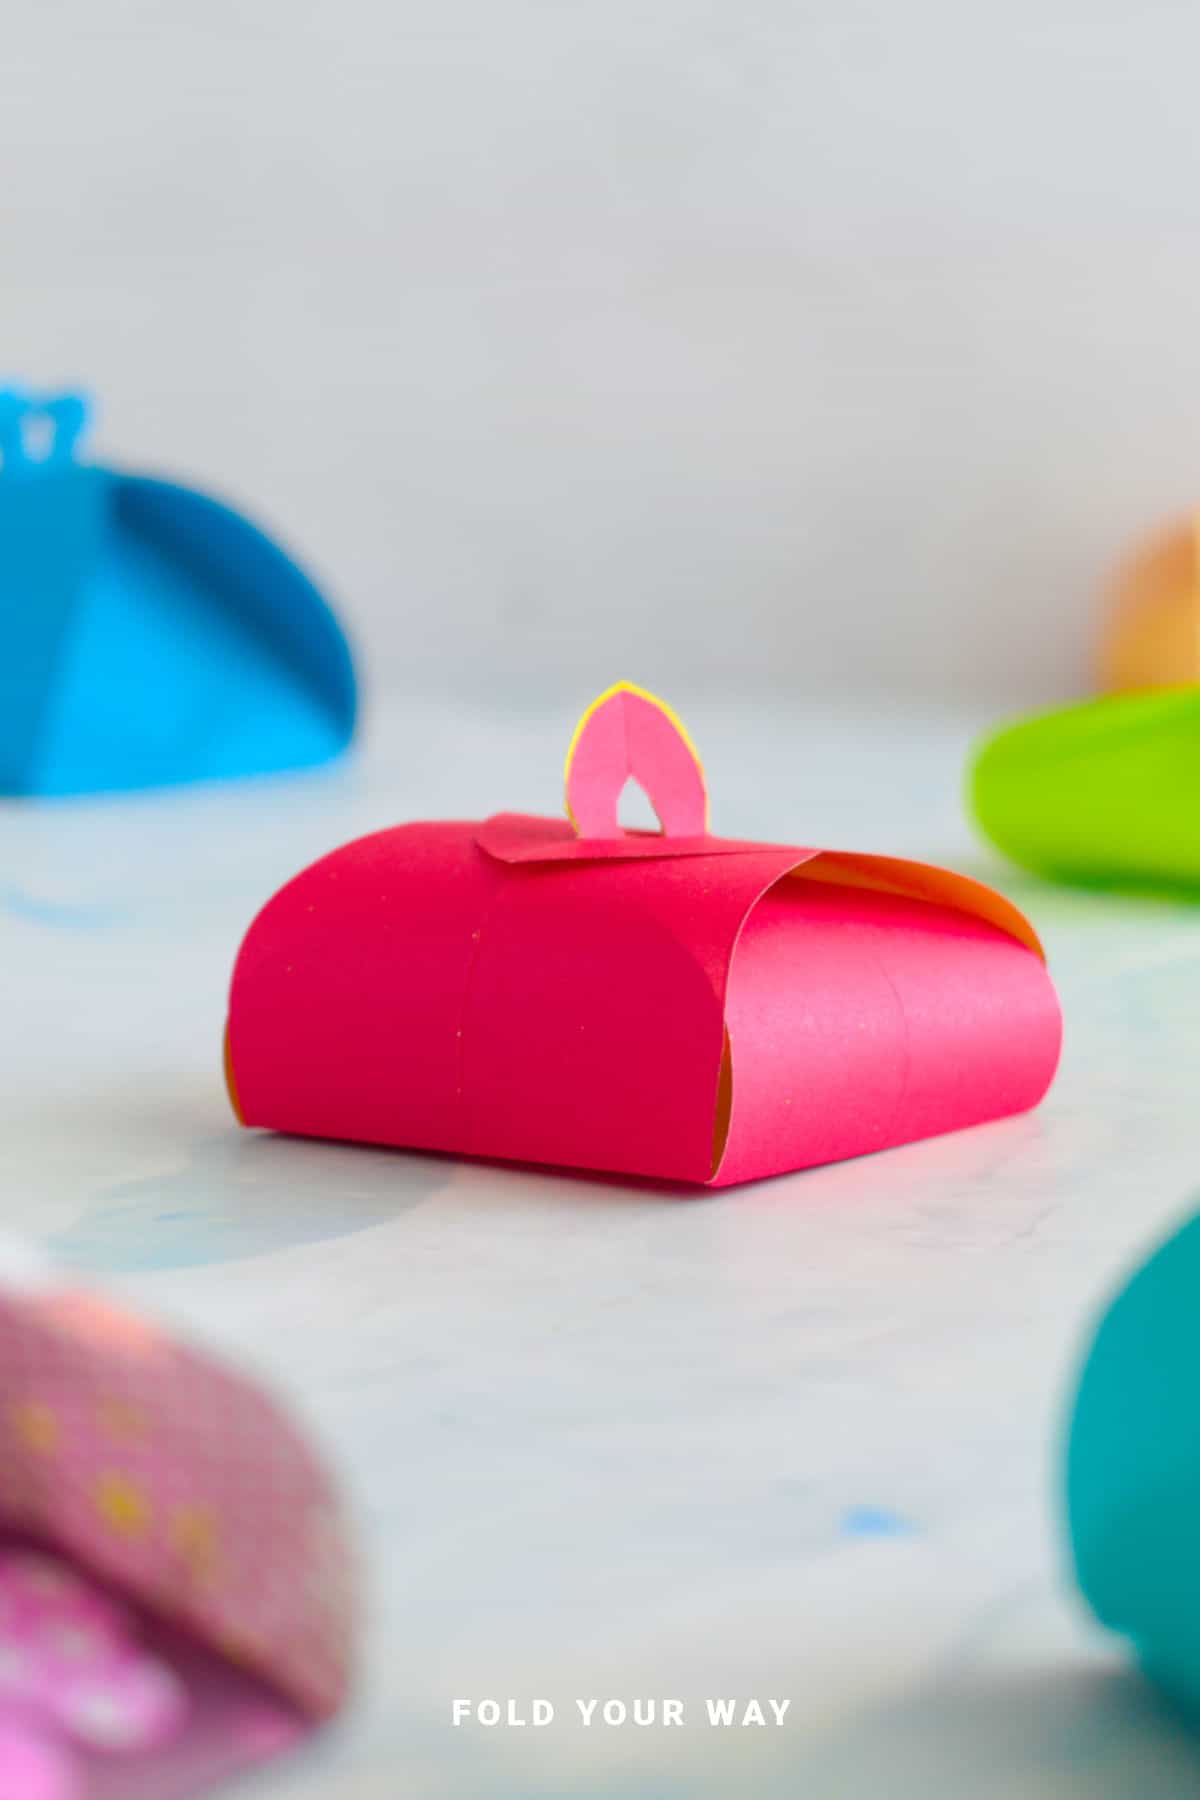
Create an adorable easy DIY self-closing gift box perfect for all kinds of celebrations!
Whether you're gifting for Christmas, Easter, Valentine’s Day, or even creating teacher gifts, this simple and fun paper craft requires just scissors, a pencil, and square paper.
Ideal for small treats, candies, jewelry, or other goodies, it’s the perfect solution for unique party favors and more!
Jump to:
Looking for a simple and quick way to create custom gift boxes for any occasion? This easy DIY self-closing gift box is the perfect solution!
Whether you’re preparing small gifts for Christmas, Easter, Halloween, Valentine's Day, or even teacher appreciation gifts, this self-closing box is versatile enough to hold just about anything—chocolates, candies, trinkets, jewelry, and more!
Made with just a square sheet of paper, scissors, and a pencil, this project doesn’t require any fancy tools, making it perfect for beginners and a fun activity for kids and adults alike.
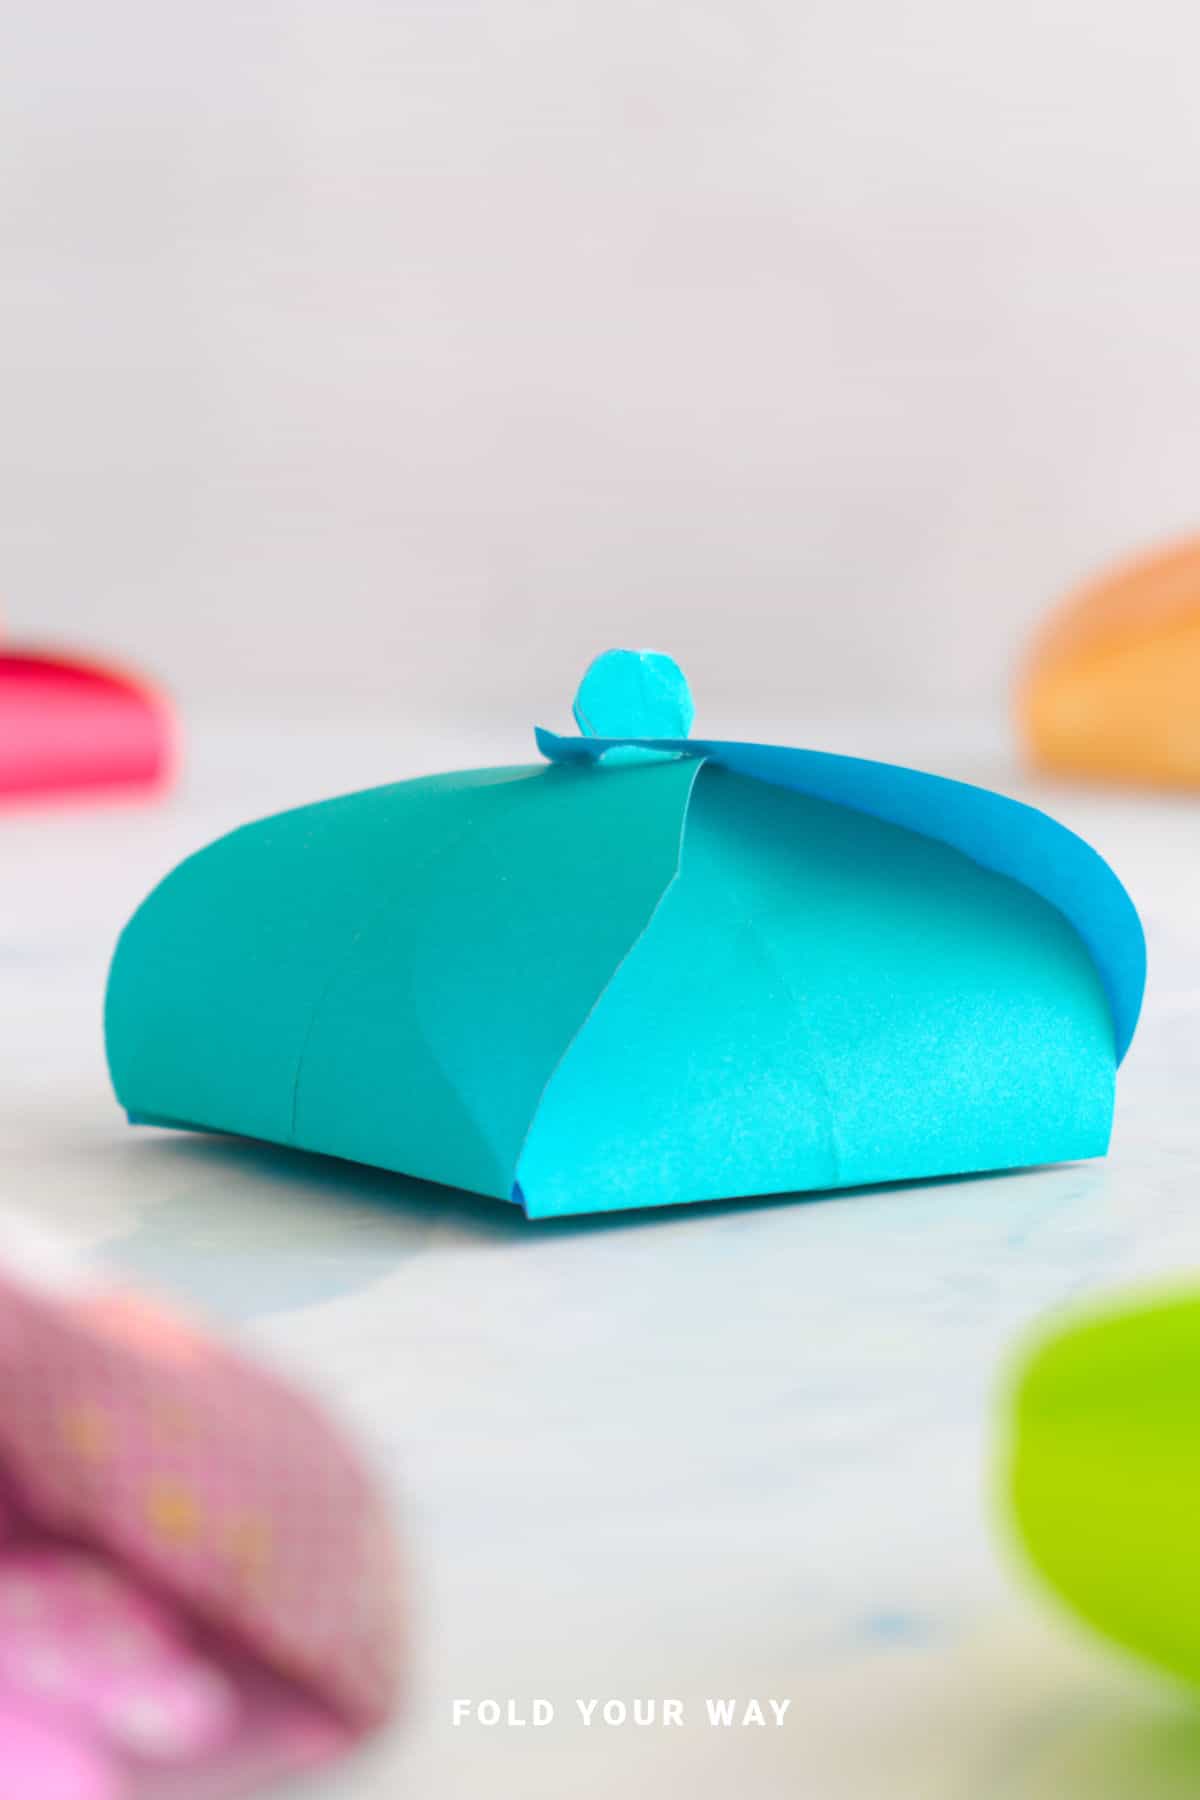
With just a few folds, you’ll have a charming gift box that closes itself without the need for glue, tape, or complicated techniques.
You can personalize these boxes with your favorite colors, patterns, and paper types to suit any theme or occasion.
Whether you need a quick gift box for a last-minute present or are preparing for a big event like a birthday party or baby shower, this DIY gift box will be a hit!
Why You'll Love This Pattern
- Quick and Simple – Easy to make, even for beginners.
- No Glue or Tape Required – Self-closing feature means no extra adhesives are necessary.
- Great for Any Occasion – Perfect for Christmas, Easter, Valentine’s Day, teacher gifts, and more.
- Perfect for Small Treats – Ideal for chocolates, candies, small jewelry, and trinkets.
- Customizable – Use different paper types and colors to match your theme.
- Eco-Friendly – Made from paper, this gift box is an environmentally friendly option compared to plastic packaging.
Skill Level
★☆☆☆☆ (Very Easy)
Materials Needed
- 1 square sheet of paper (recommended size: 6 inch x 6 inch [15 cm x 15 cm])
- Pencil
- Scissors
Instructions
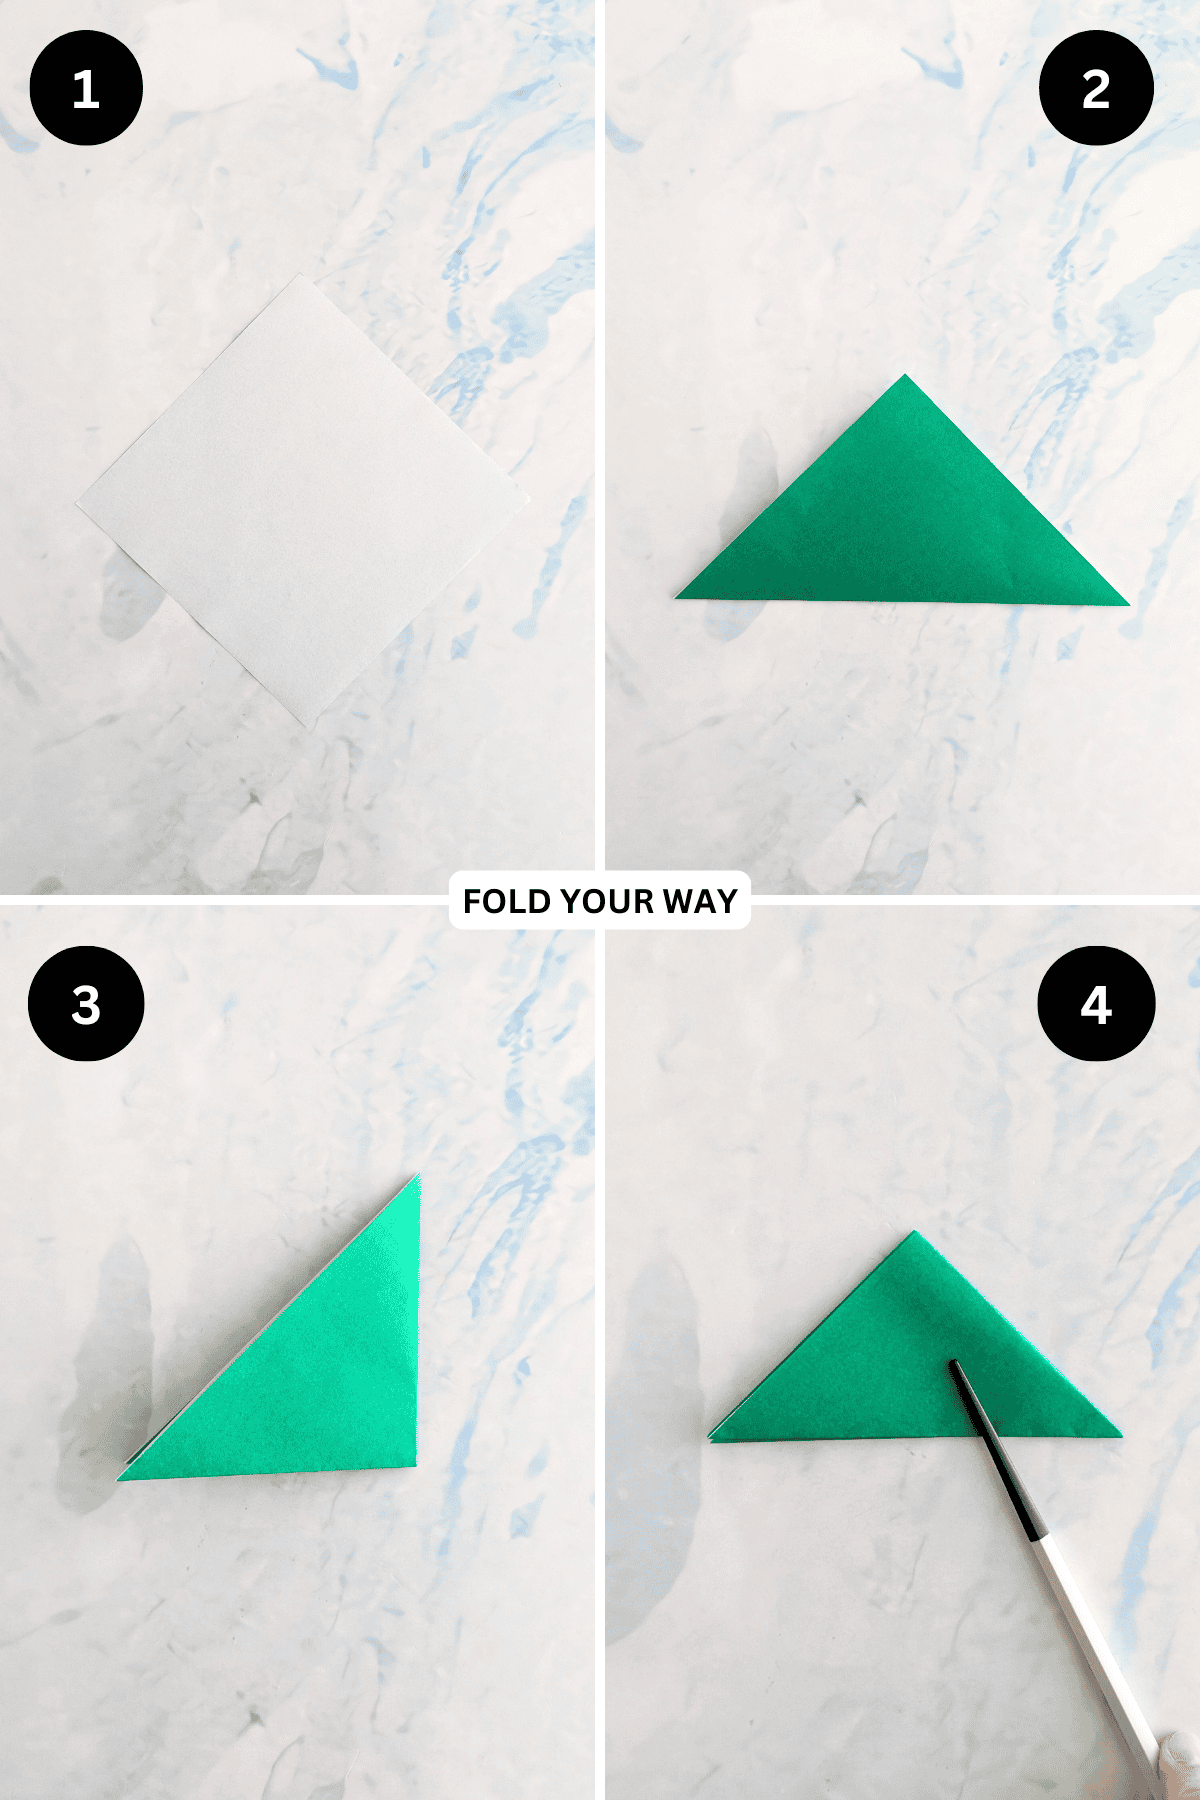
Step 1: Start with the color you want your box to be facing down. Arrange your paper to sit like a diamond shape.
Step 2: Fold the bottom point up to meet the top point.
Step 3: Fold the right point to meet the left point.
Step 4: Fold the top point down to meet the bottom left point.
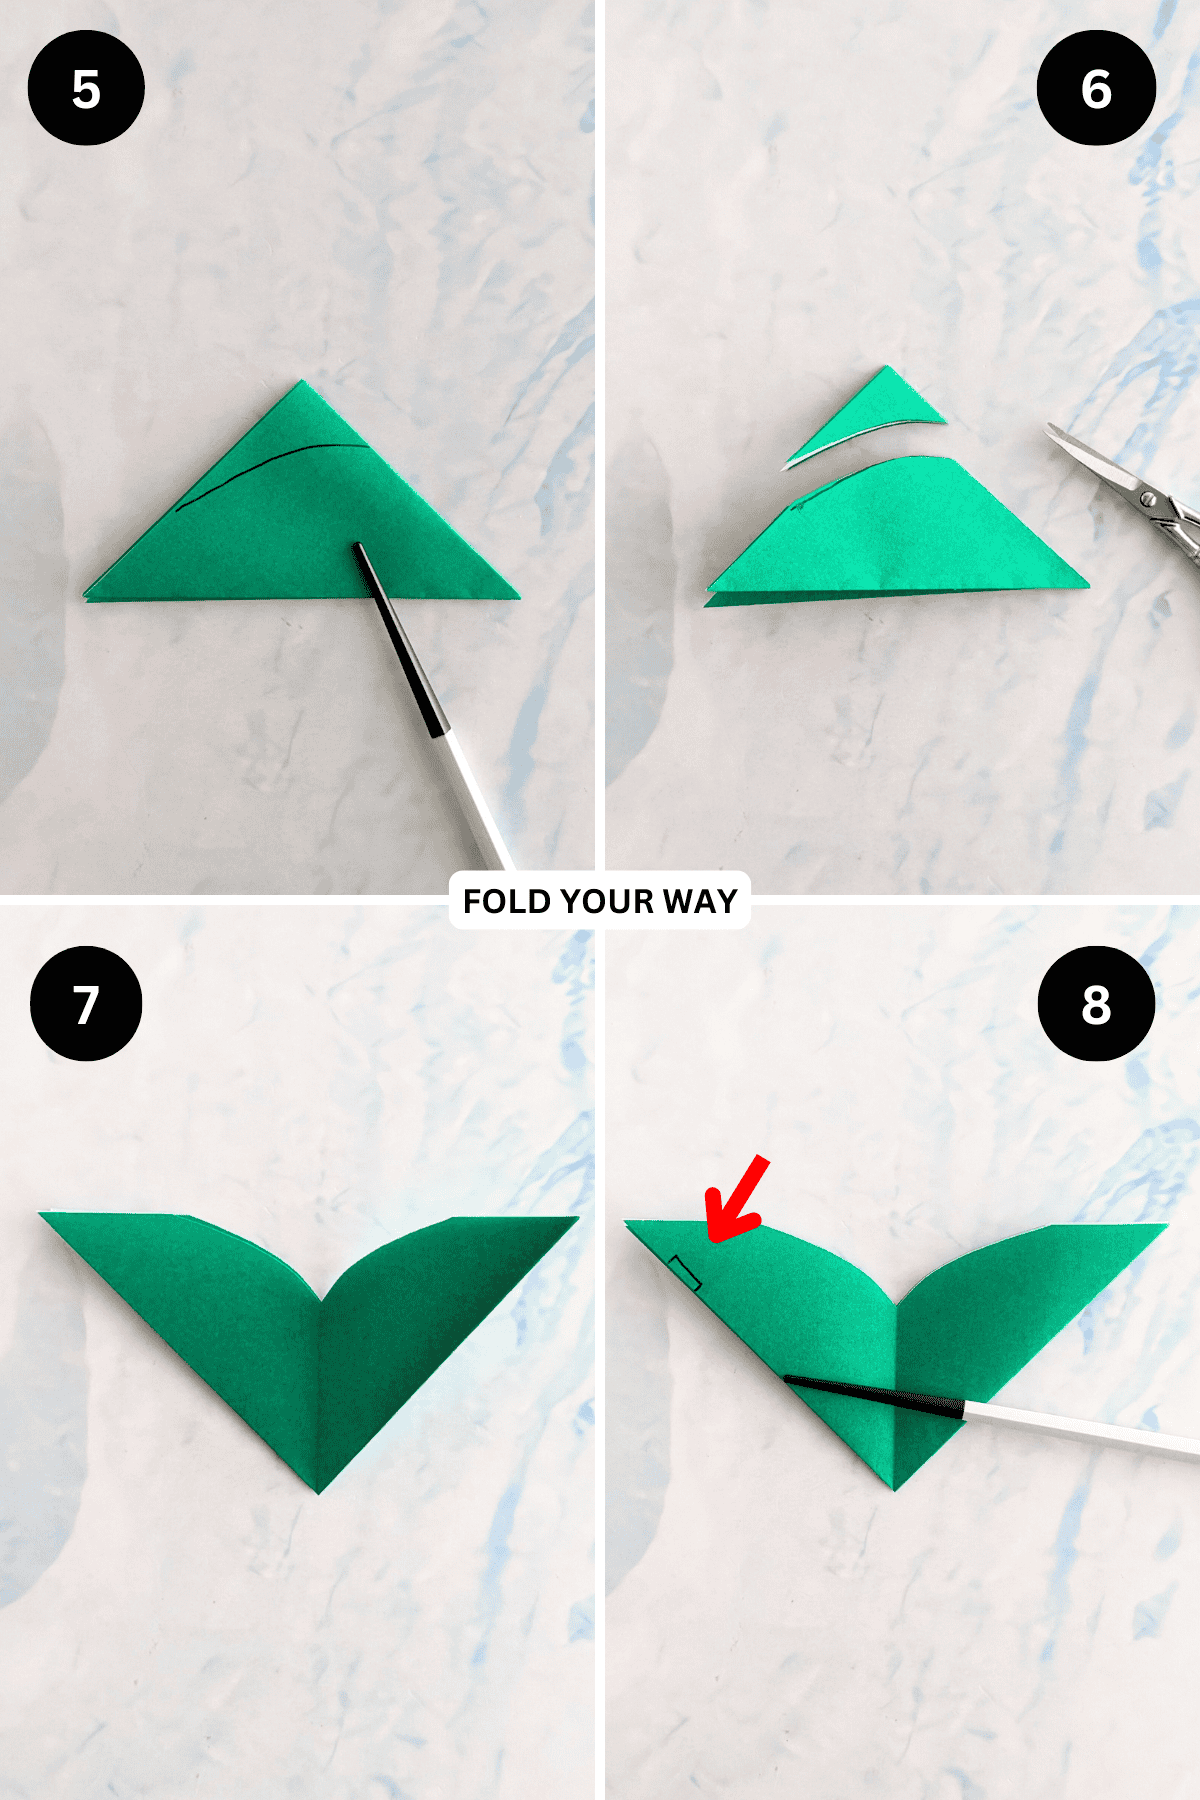
Step 5: Draw a curve along your paper as shown. Tip: the longer and flatter you make your curve, the shorter your final box will be.
Step 6: Cut along the curve.
Step 7: Unfold your paper so it sits as shown.
Step 8: Draw a small rectangle on the top left of the paper.
✨ You're almost there! ✨
To unlock the final steps and complete your pattern, create a free account with Grow.me. below.
Make sure you tick the box to subscribe to our newsletter and stay up to date with the latest patterns, tips, and more!
Once you're signed up, you'll get instant access to finish your project and enjoy exclusive content in the future.
Already signed up? Hit the button below and select ‘Switch to Log In’ to pick up where you left off and finish your project!
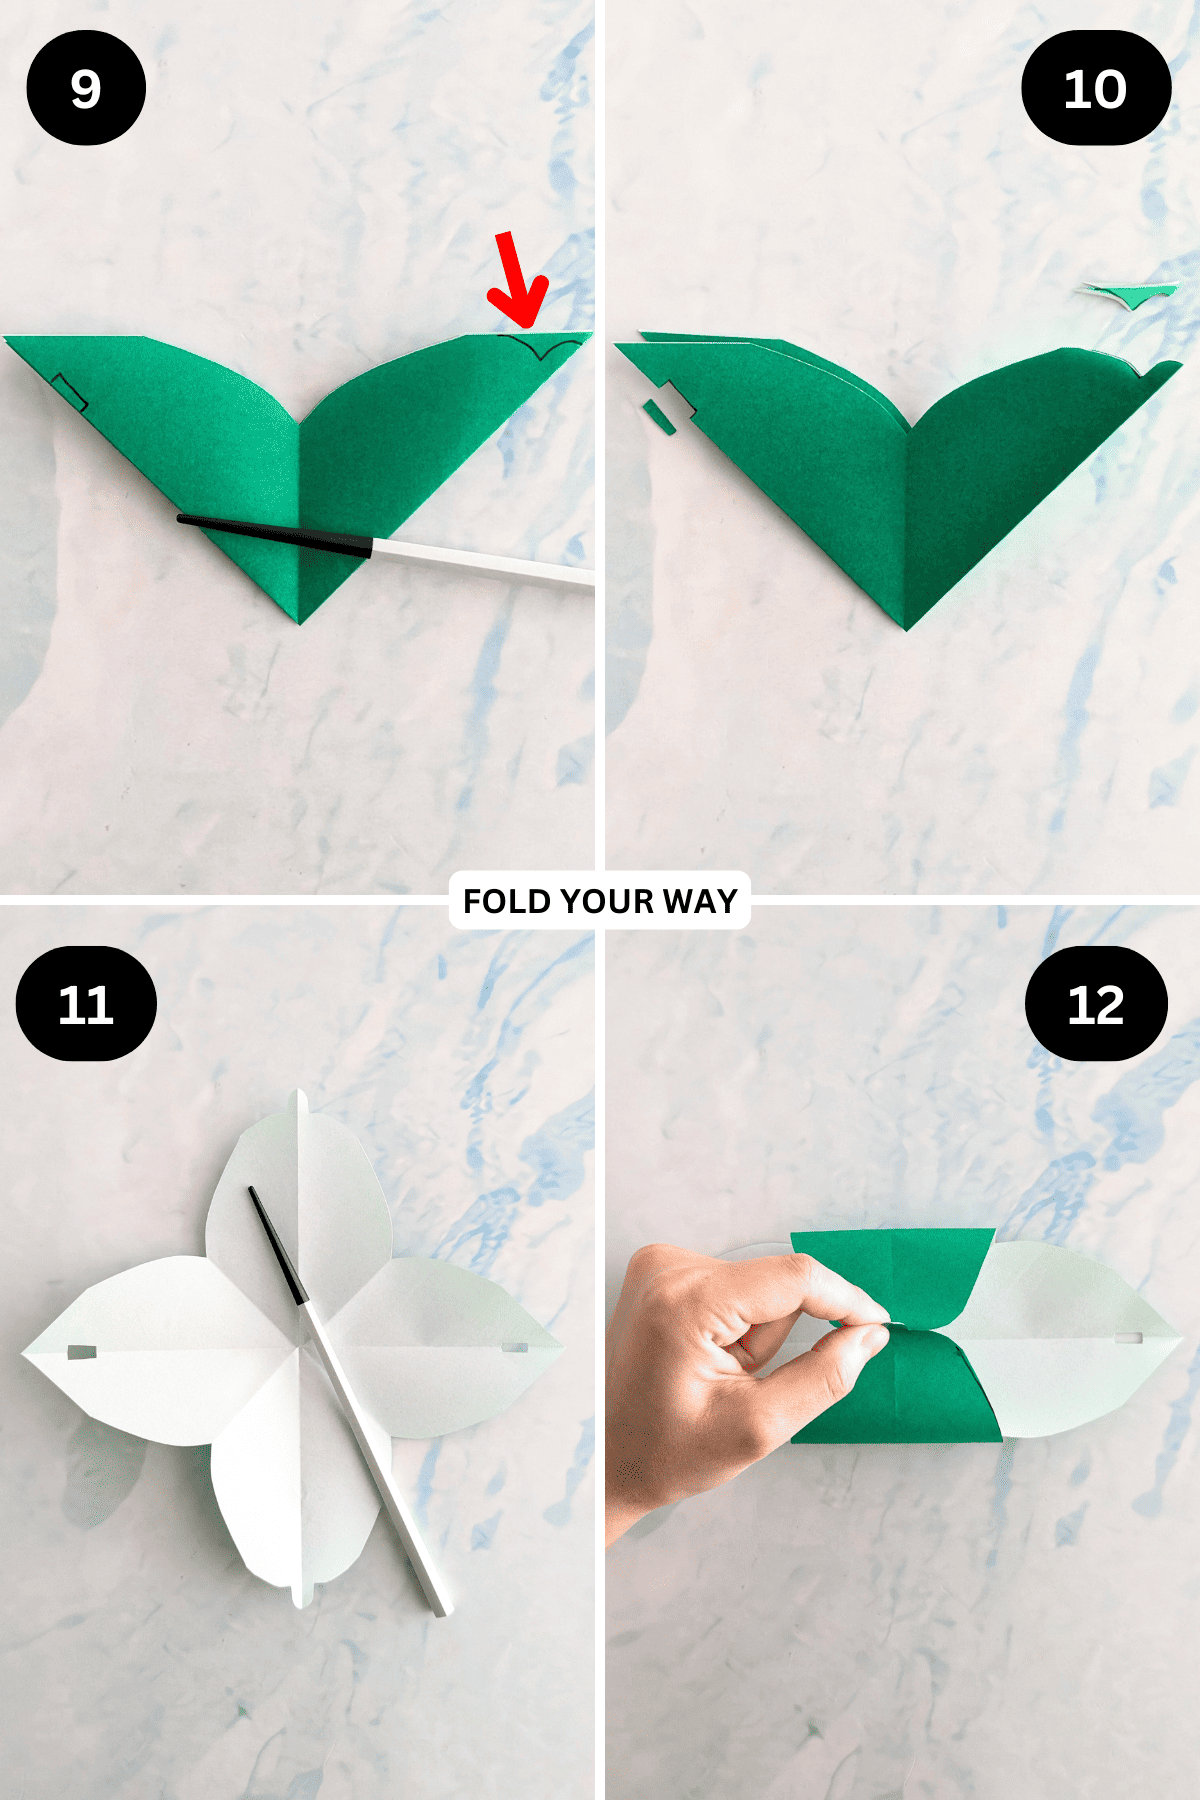
Step 9: On the top right, at about the same height as the rectangle you drew on the left, draw a shape as shown.
This will become the handle of your box. You can experiment with the curve to get different shapes.
It is important that you make the rectangle shape slightly longer than the shape you draw on the right side of the paper.
This is because the shape you drawn on the right side of the paper will be inserted into the small rectangle once it is cut out.
Step 10: Cut out your paper along the lines you just drew.
Step 11: Unfold your paper completely.
Step 12: Take the two opposite sides that you drew the curve on in step 9 hold them together as shown.
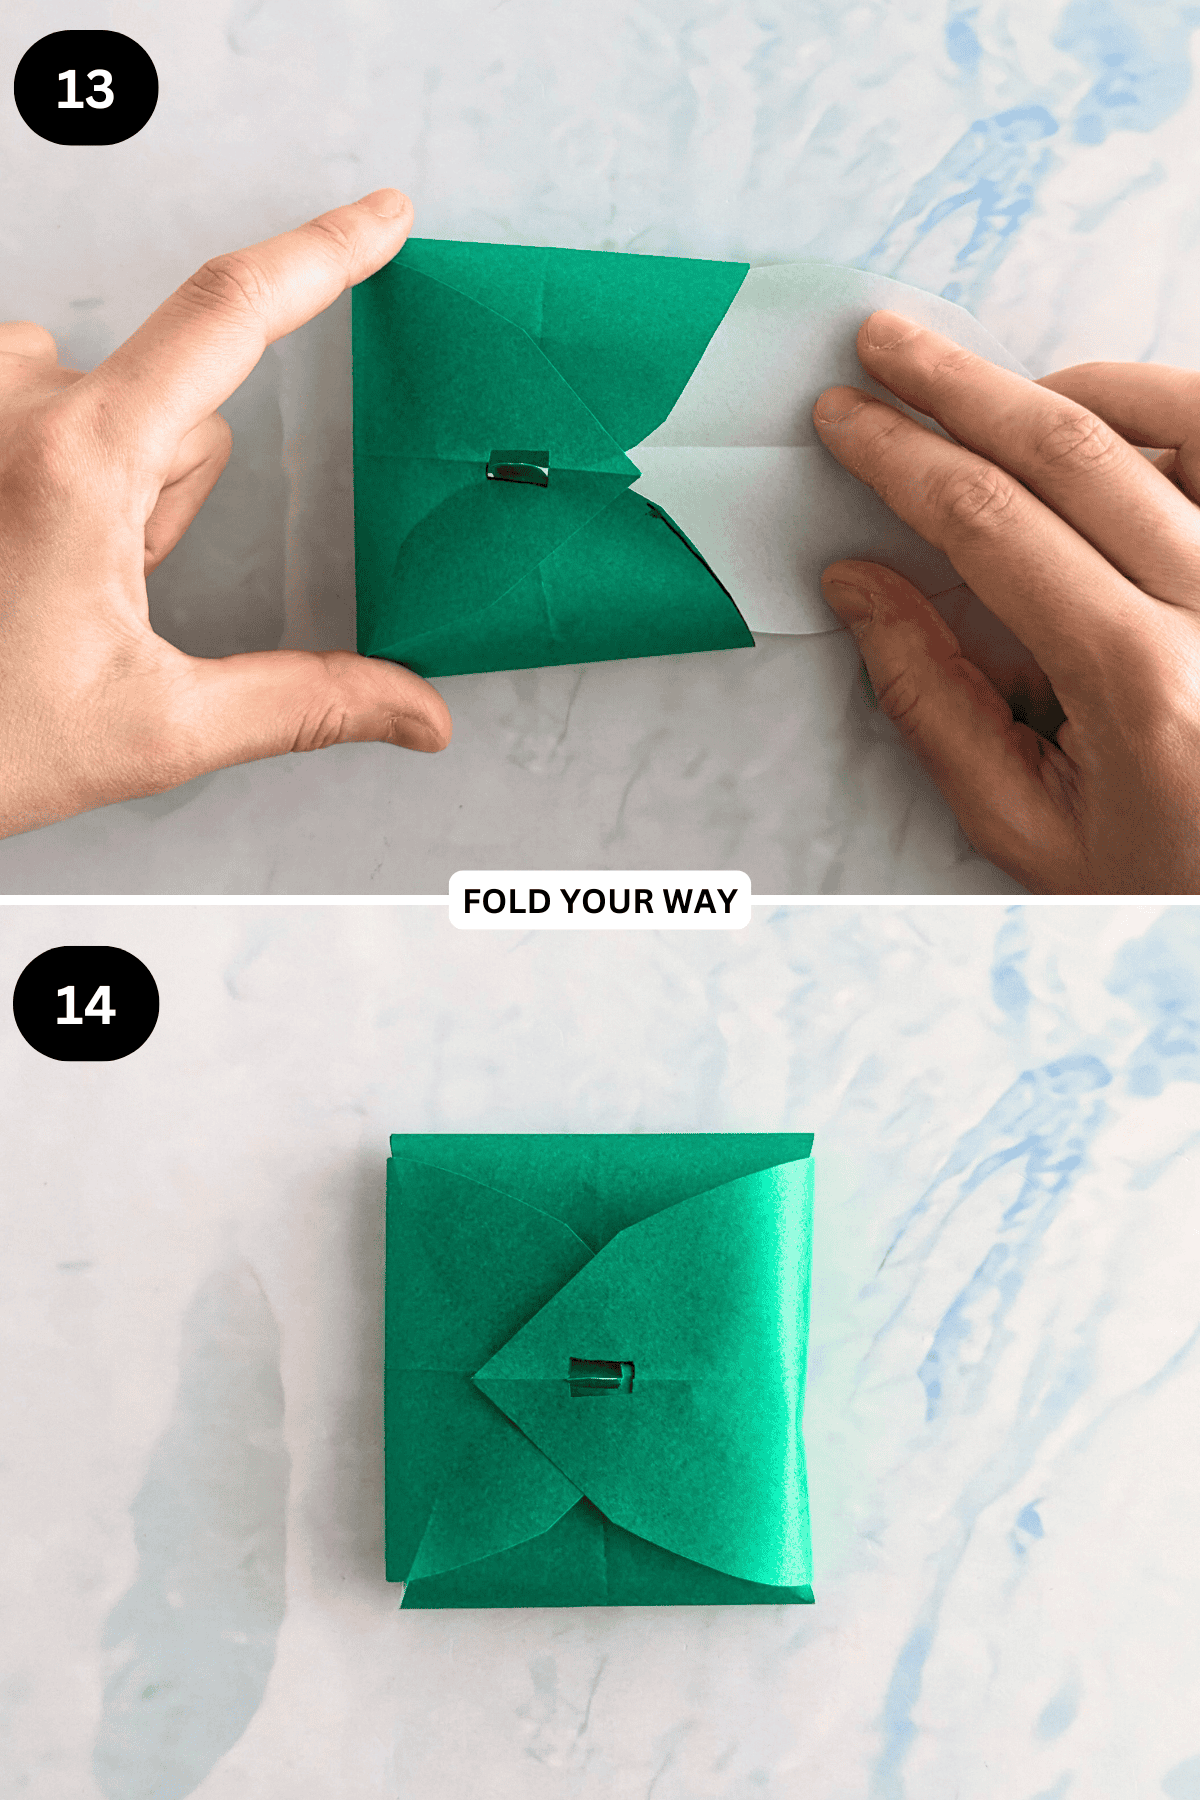
Step 13: Insert those sides into one of the other sides which has a hole.
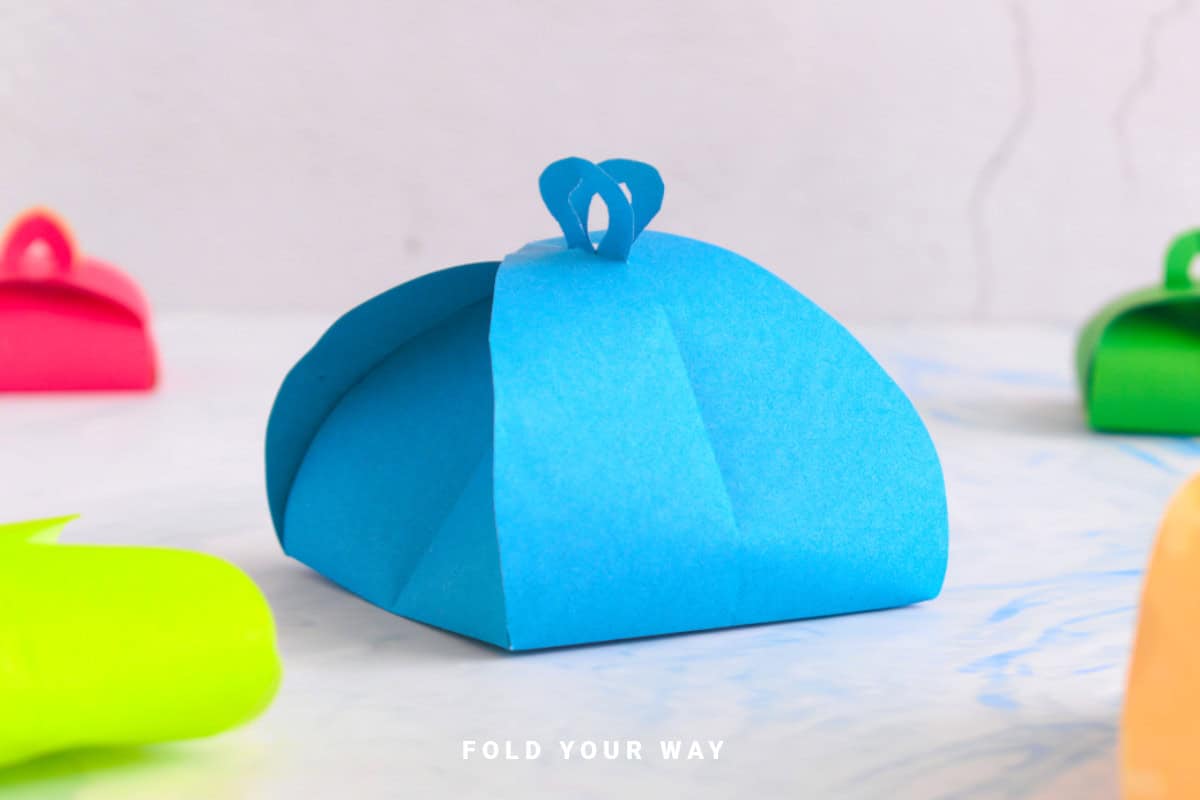
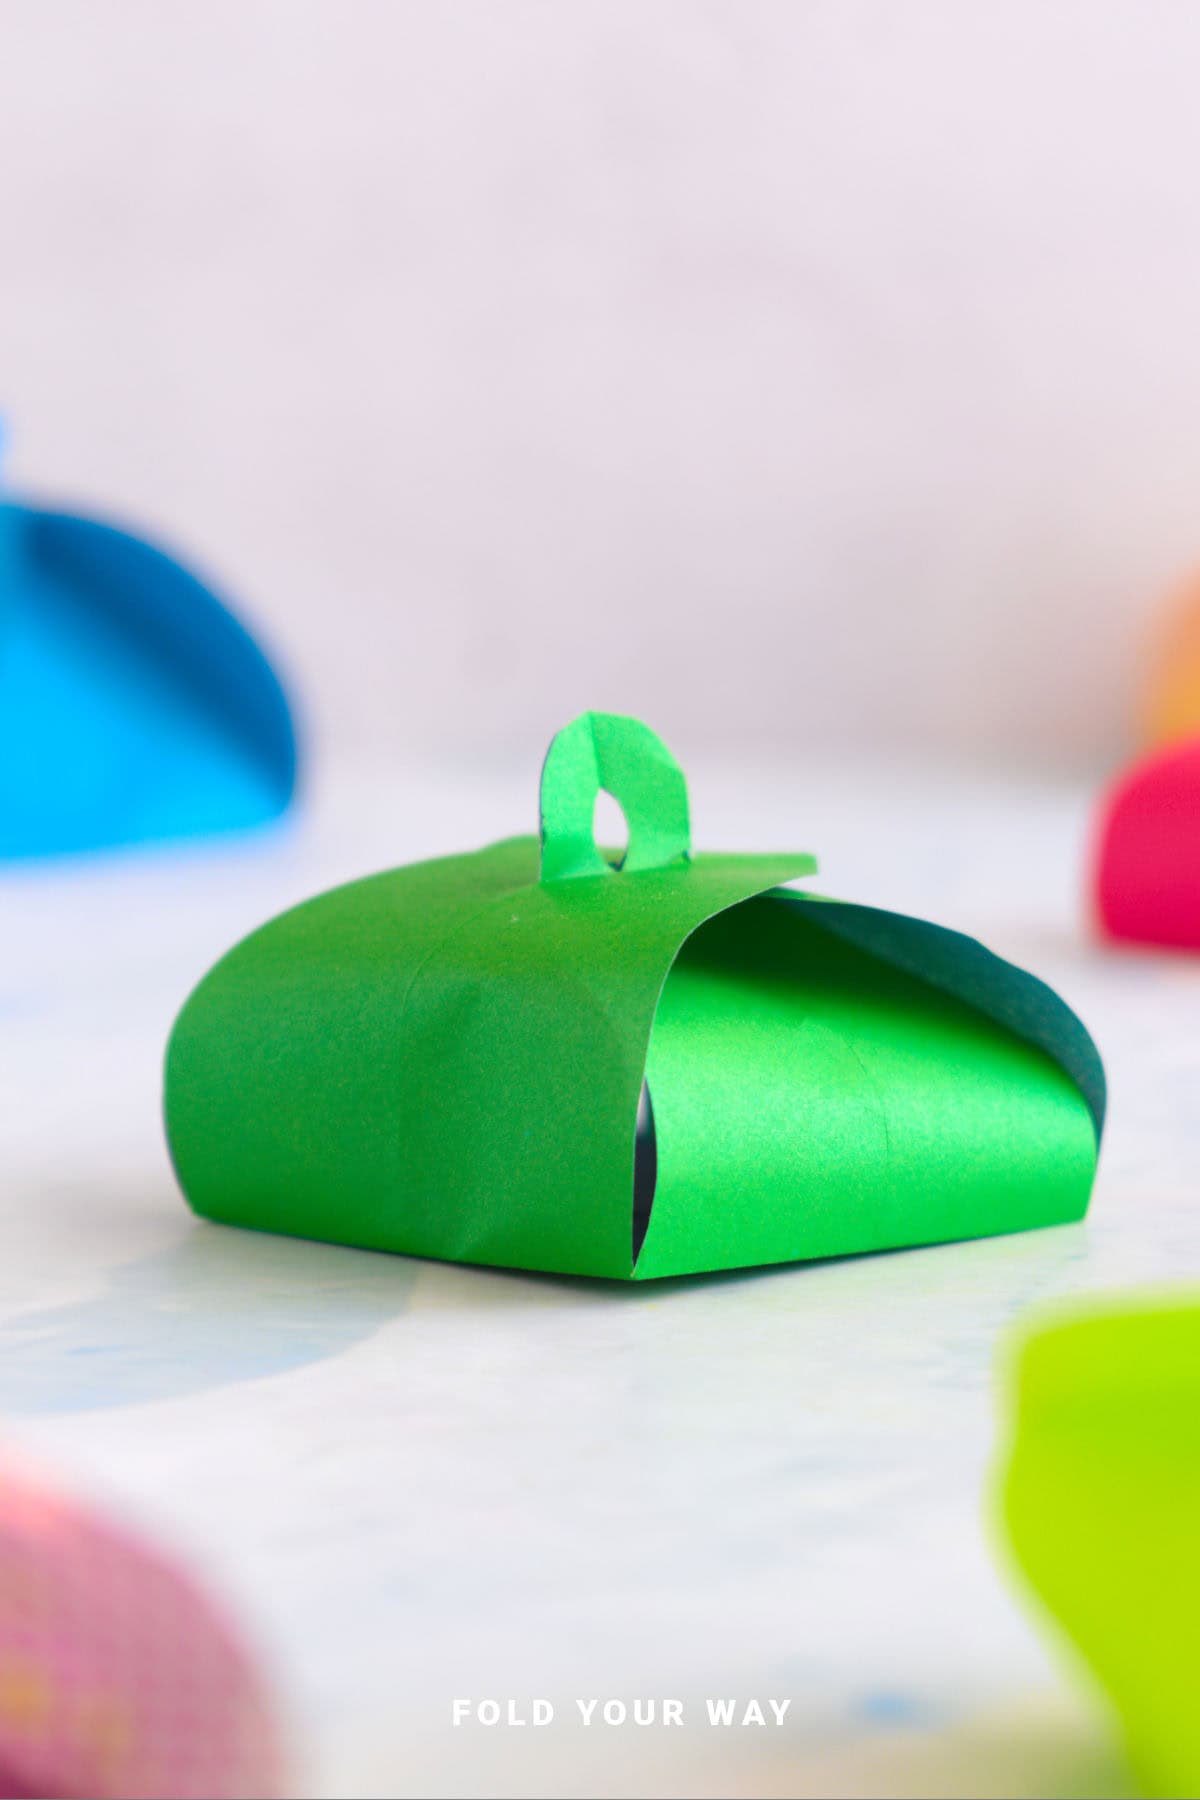
Step 14: Place anything you want inside your box, then close the box by inserting the open side into the other sides as you did in the previous step. Completed box.
Tip: if you are having trouble closing your box, you may need to trim down the sides. Or, if your rectangle shape is not wide/long enough, you may need to widen it a bit more.
Tips For Success
- Choose the Right Paper – Use thicker paper like scrapbook paper or cardstock for sturdier boxes, or opt for origami paper for a more delicate finish.
- Make Sharp Creases – For clean folds, use a bone folder or your fingernail to press down hard on the creases.
- Personalize Your Box – Try using colored paper or patterned designs to match the occasion—festive for Christmas, sweet for Valentine’s, or spooky for Halloween!
- Add a Ribbon – For an extra touch, you can tie a ribbon around the box or add a personalized label on top.
- Small Treats – This box is perfect for party favors, like candies, small jewelry items.
Common Mistakes & How To Avoid Them
- Box doesn’t close properly? Ensure your folds are symmetrical, and make sure the paper edges are lined up perfectly.
- Paper is too thin? Try using a slightly thicker paper for a sturdier box that holds its shape better.
Color, Paper Ideas, and Variations
- Christmas– Try red, green, gold, or silver paper for a festive feel.
- Easter– Opt for pastel-colored papers like light blue, lavender, or soft pink.
- Halloween Vibes – Use black, orange, and purple paper to match the spooky season.
- Valentine’s Day – Pick pink, red, and white paper and add a sweet heart sticker or ribbon for extra charm.
- Teacher Gifts – Customize with school-themed paper or teacher-inspired colors to make your gift special.
FAQ
Yes! Simply use a larger paper to make a bigger box. Just remember to keep the proportions equal for the folds to align correctly.
The box is ideal for small, lightweight gifts. For heavier items, consider using thicker paper or reinforcing the folds with a bit of tape on the inside.
Absolutely! These boxes make perfect party favors for any event, from birthday parties to weddings. You can even add a small thank-you note inside.
Other Crafts You Might Like To Try:
Stay Connected
Made this pattern? Let us know how it went in the comments below!
Pin this post - Pin now to take your paper crafting skills to the next level.
Share on Instagram or Facebook - Capture the beauty of your finished paper craft project and share it on Instagram or Facebook! Tag us @foldyourway so we can see your work!
Other Patterns You Might Like To Try:
Looking for other easy patterns like this? Try these:


Comments
No Comments