
Looking for a simple yet beautiful paper craft?
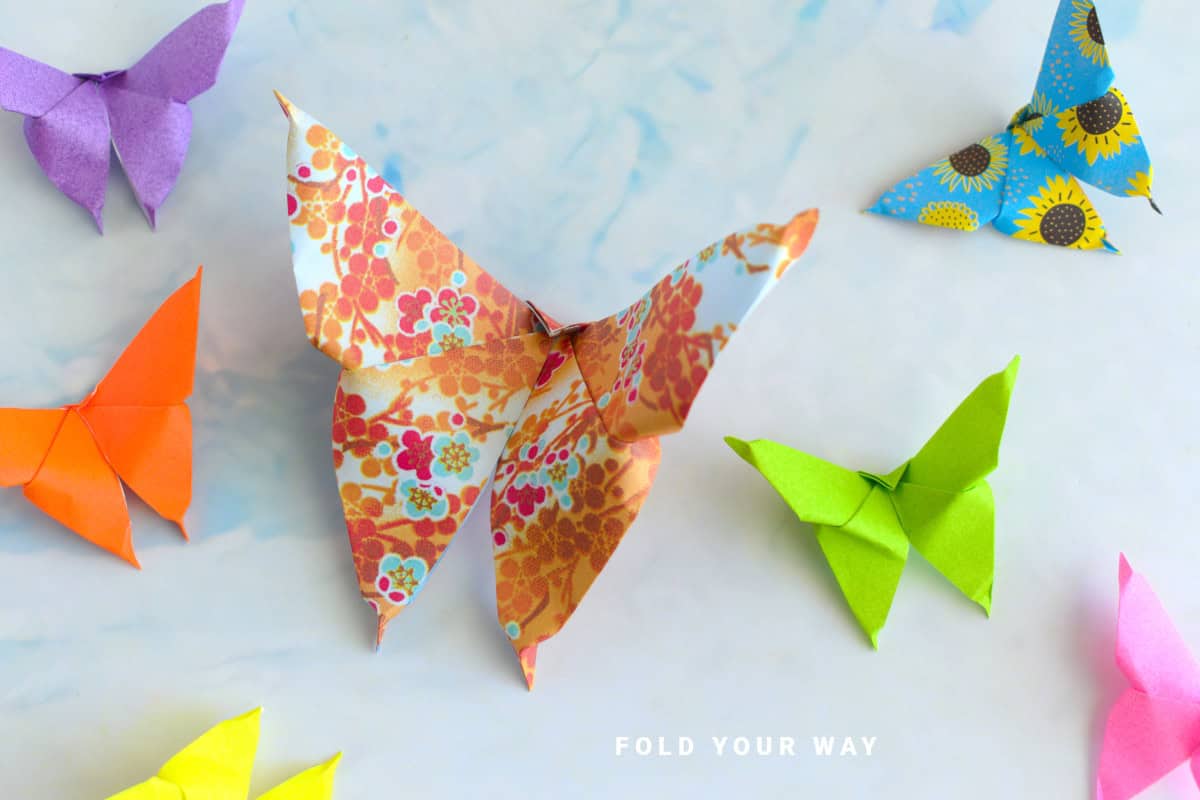
This easy origami butterfly is a lovely way to add a delicate decorative touch to gifts, garlands, wall art, or spring-inspired crafts.
Whether you're making them for Easter, Mother’s Day, birthdays, or just for fun, these fluttery paper butterflies are quick to fold and endlessly versatile!
Jump to:
Origami butterflies are a timeless craft that always brings a bit of joy and beauty into your space.
Whether you’re a seasoned folder or just getting started, this simple paper butterfly is a fun and approachable project you can complete in minutes.
You only need one square piece of paper—no scissors, no glue—just folds!
These butterflies are perfect for decorating a child’s room, making colorful spring or Easter garlands, using as gift toppers, or even creating cute party place cards.
You can hang them from a mobile, attach them to toothpicks for cupcakes, or add a magnet on the back for the fridge.
It’s a lovely craft for any age, and because it comes together so quickly, it’s easy to make a whole bunch in different colors and sizes.
Whether you're decorating for a birthday party, spring picnic, or just looking for a relaxing hands-on activity, these paper butterflies are the perfect choice.
Why You'll Love This Pattern
- Beginner-friendly and quick
- No tools or glue required
- Super versatile for decoration or gifting
- Looks beautiful in patterned or pastel paper
- Perfect for spring, Easter, birthdays, and more
Skill Level
★☆☆☆☆ (Very Easy)
Materials Needed
1 sheet of square origami paper (any size)
Instructions
Step 1: Start with the color you want your butterfly to be facing down.
Step 2: Fold the top right corner down to meet the bottom left corner.
Step 3: Unfold previous step.
Step 4: Fold the top left corner to meet the bottom right corner.
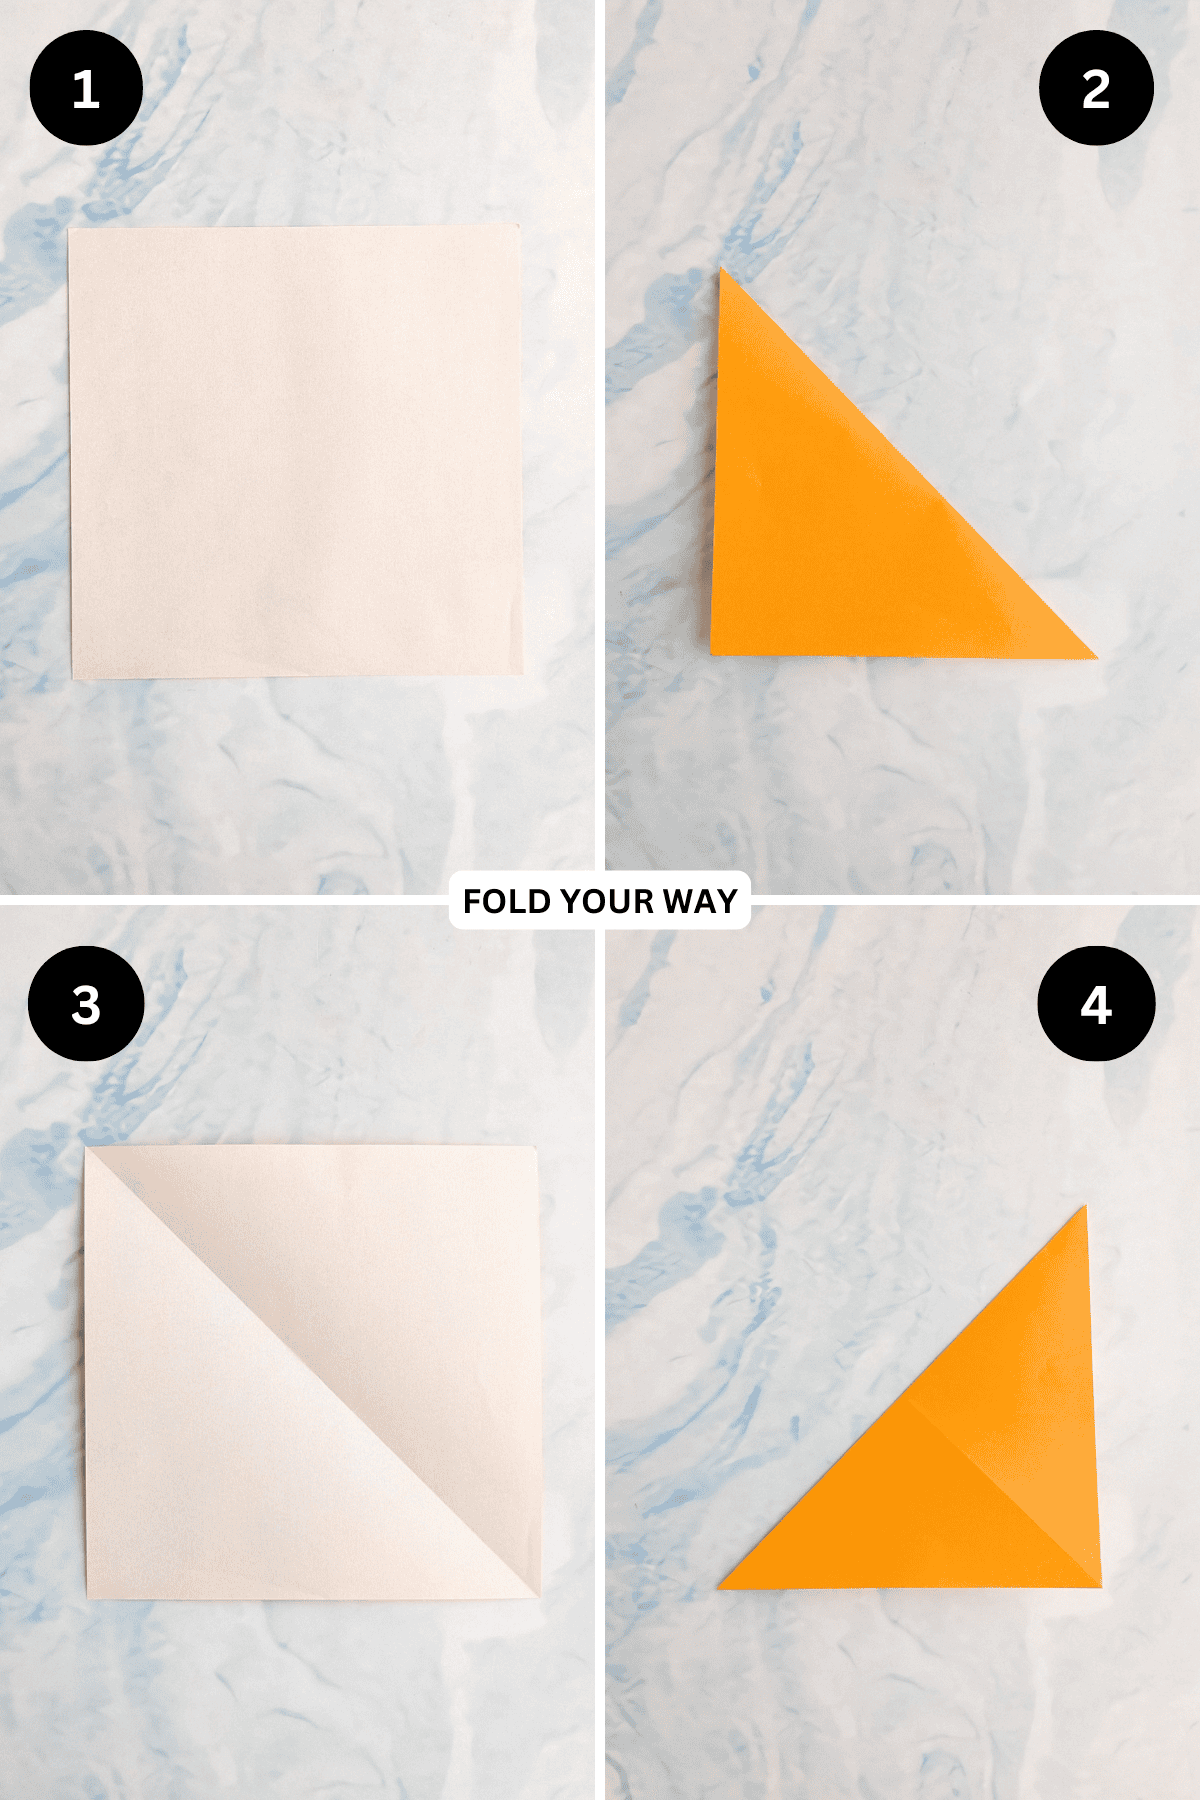
Step 5: Unfold previous step.
Step 6: Flip your paper over.
Step 7: Fold the top edge down to the bottom edge.
Step 8: Unfold previous step.
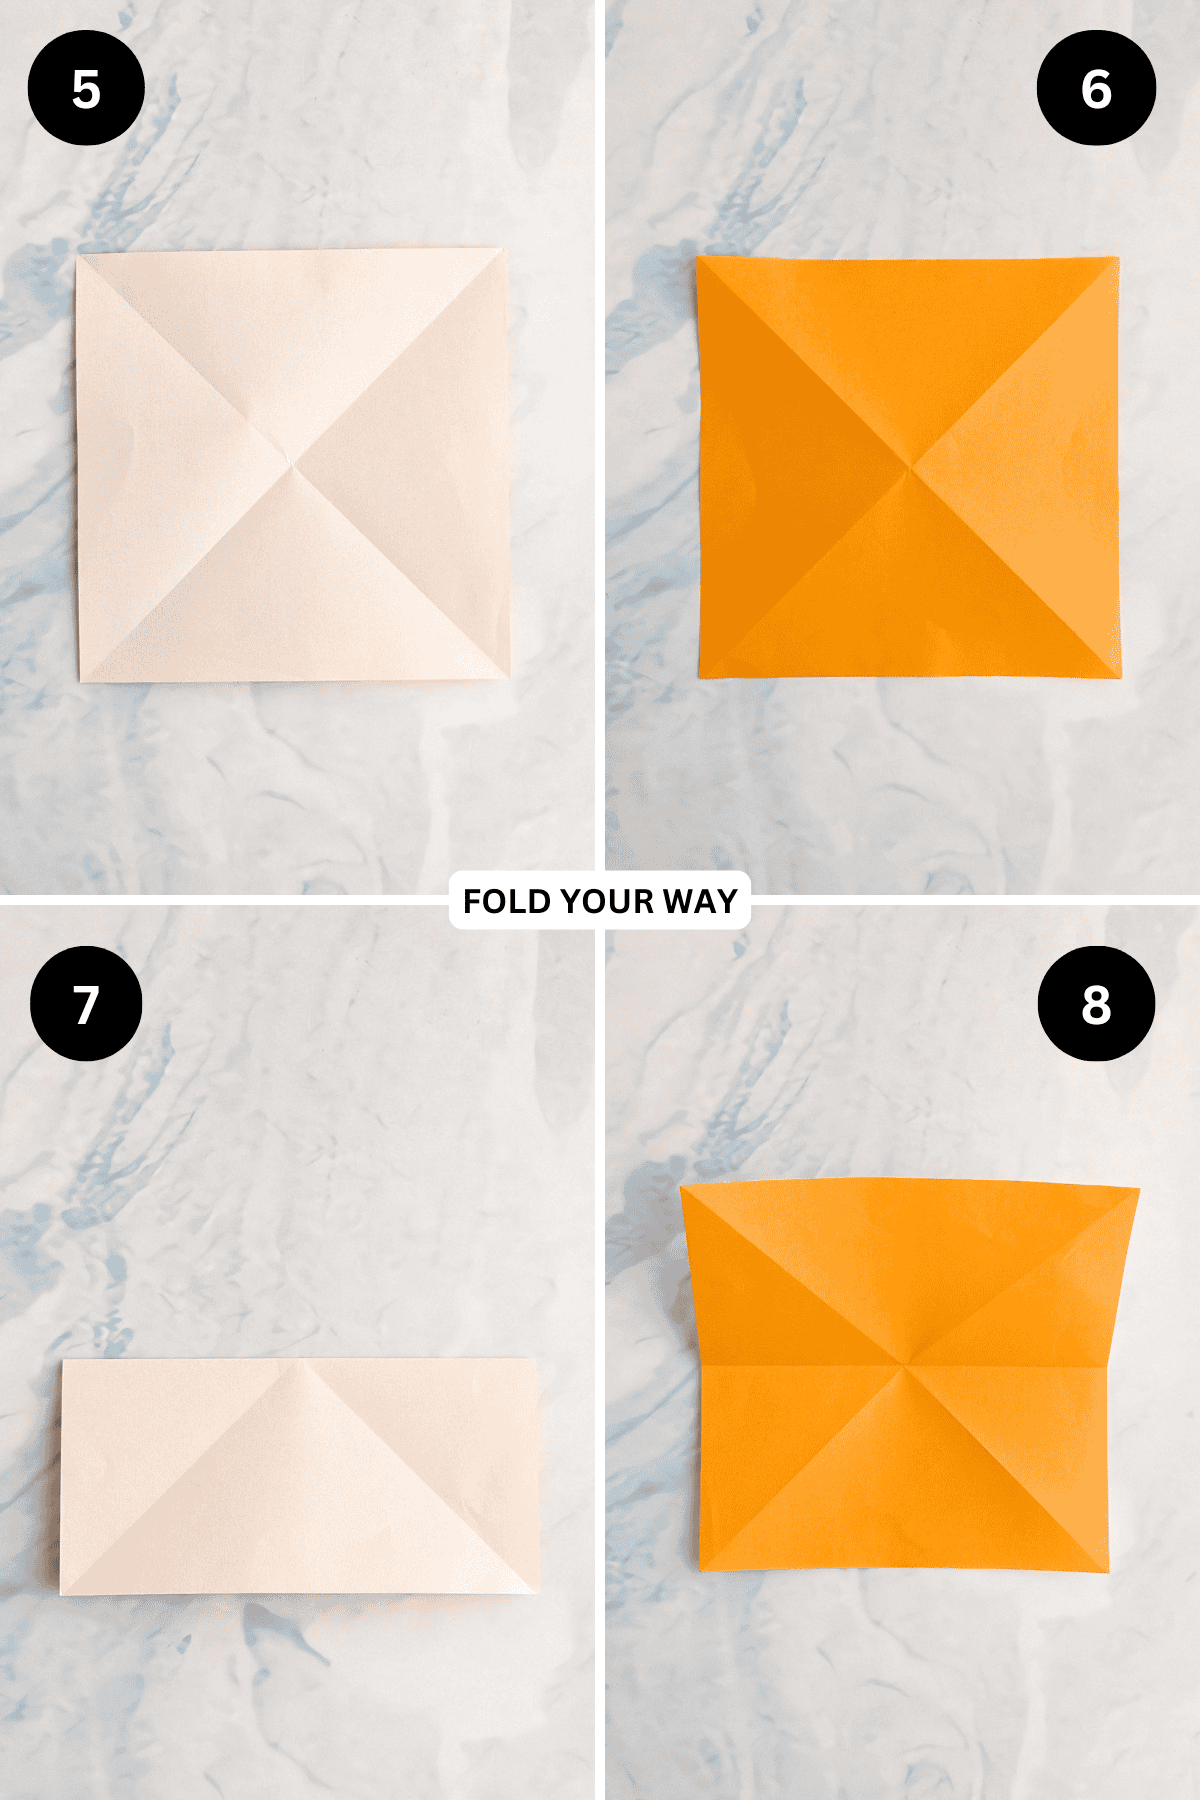
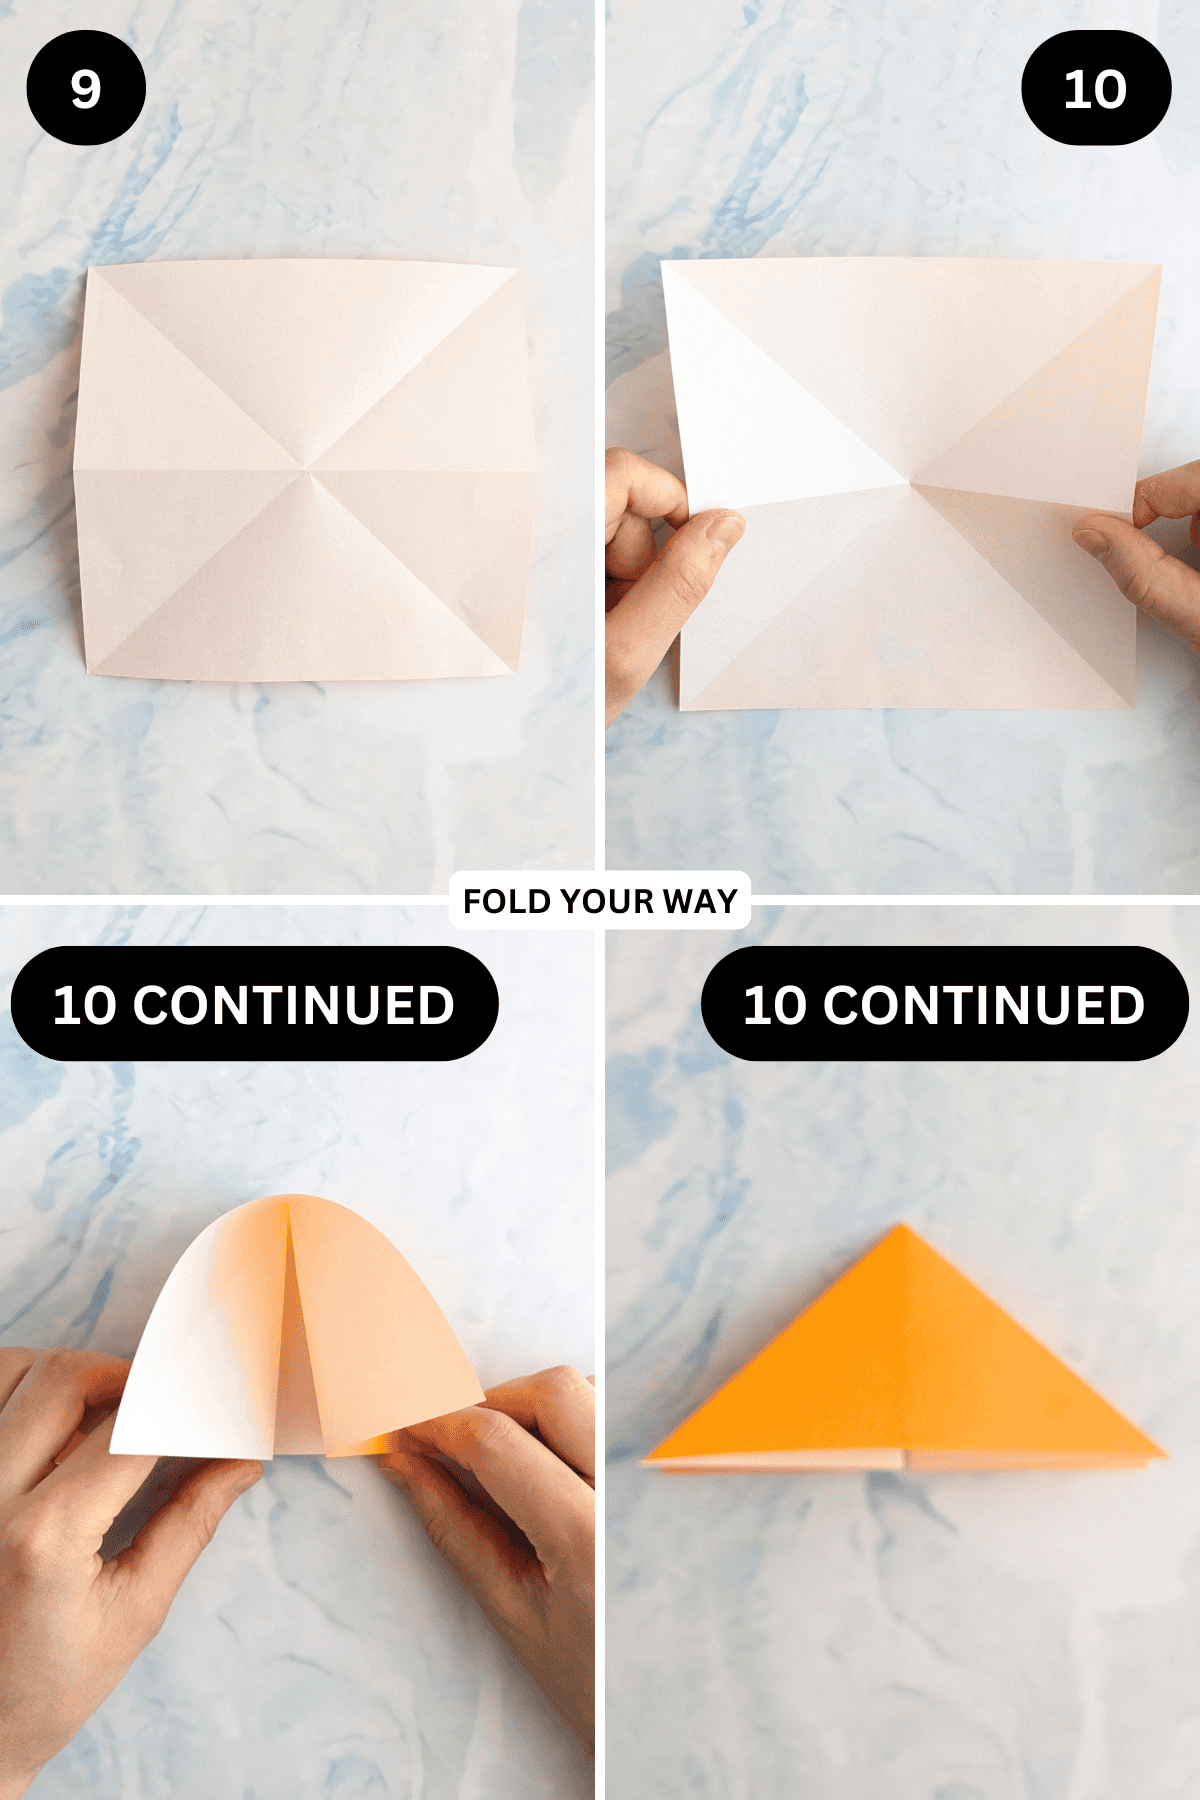
Step 9: Flip your paper over from top to bottom.
Step 10: Push the centre of the paper in where all the creases meet. Next, hold both sides of the paper and push the sides of the paper in. The paper should naturally fold in on itself and flatten into a triangle.
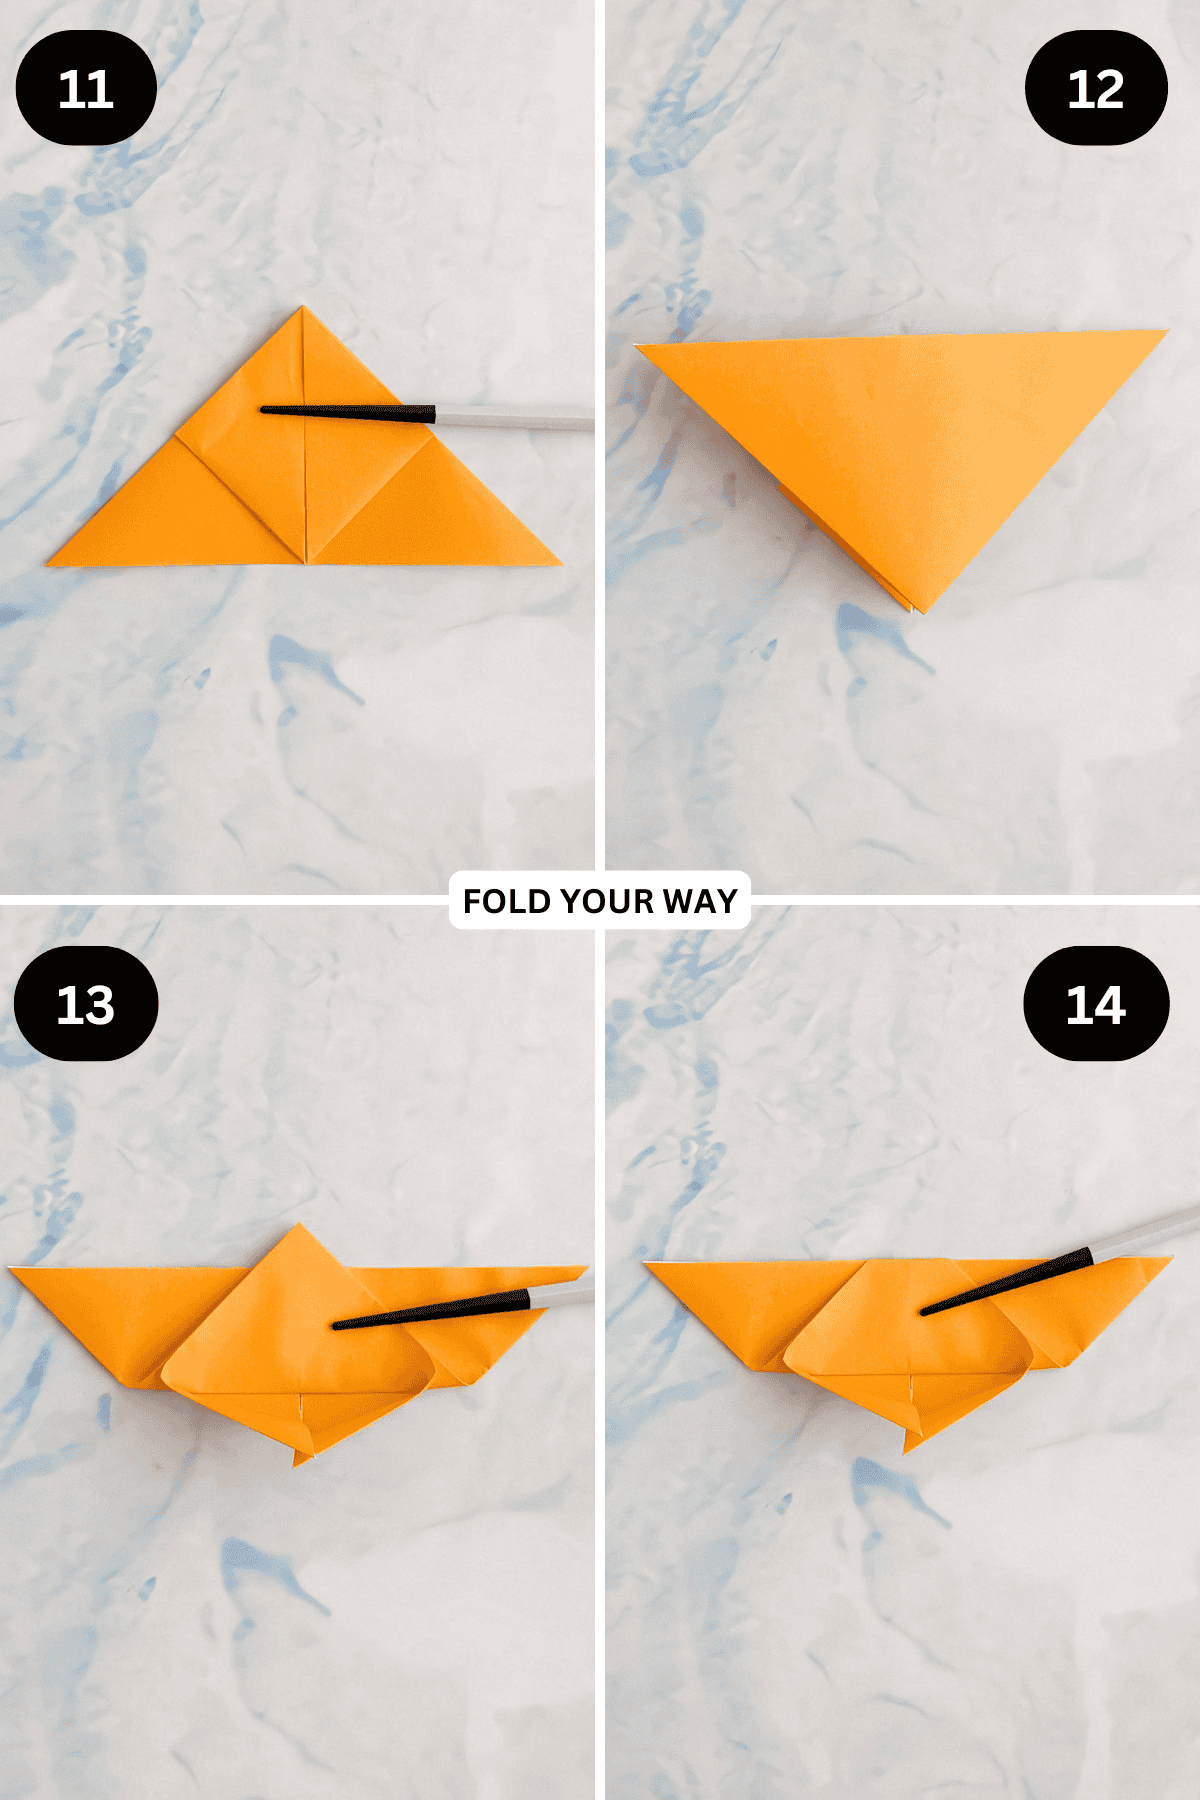
Step 11: Fold the bottom left and right points (top layer only) to meet the top point.
Step 12: Flip your paper over from top to bottom.
Step 13: Fold the bottom point up (top layer only) so that it sits above the top edge. Crease only along the middle of the paper.
Step 14: Fold the top point behind.
✨ You're almost there! ✨
To unlock the final steps and complete your pattern, create a free account with Grow.me. below.
Make sure you tick the box to subscribe to our newsletter and stay up to date with the latest patterns, tips, and more!
Once you're signed up, you'll get instant access to finish your project and enjoy exclusive content in the future.
Already signed up? Hit the button below and select ‘Switch to Log In’ to pick up where you left off and finish your project!
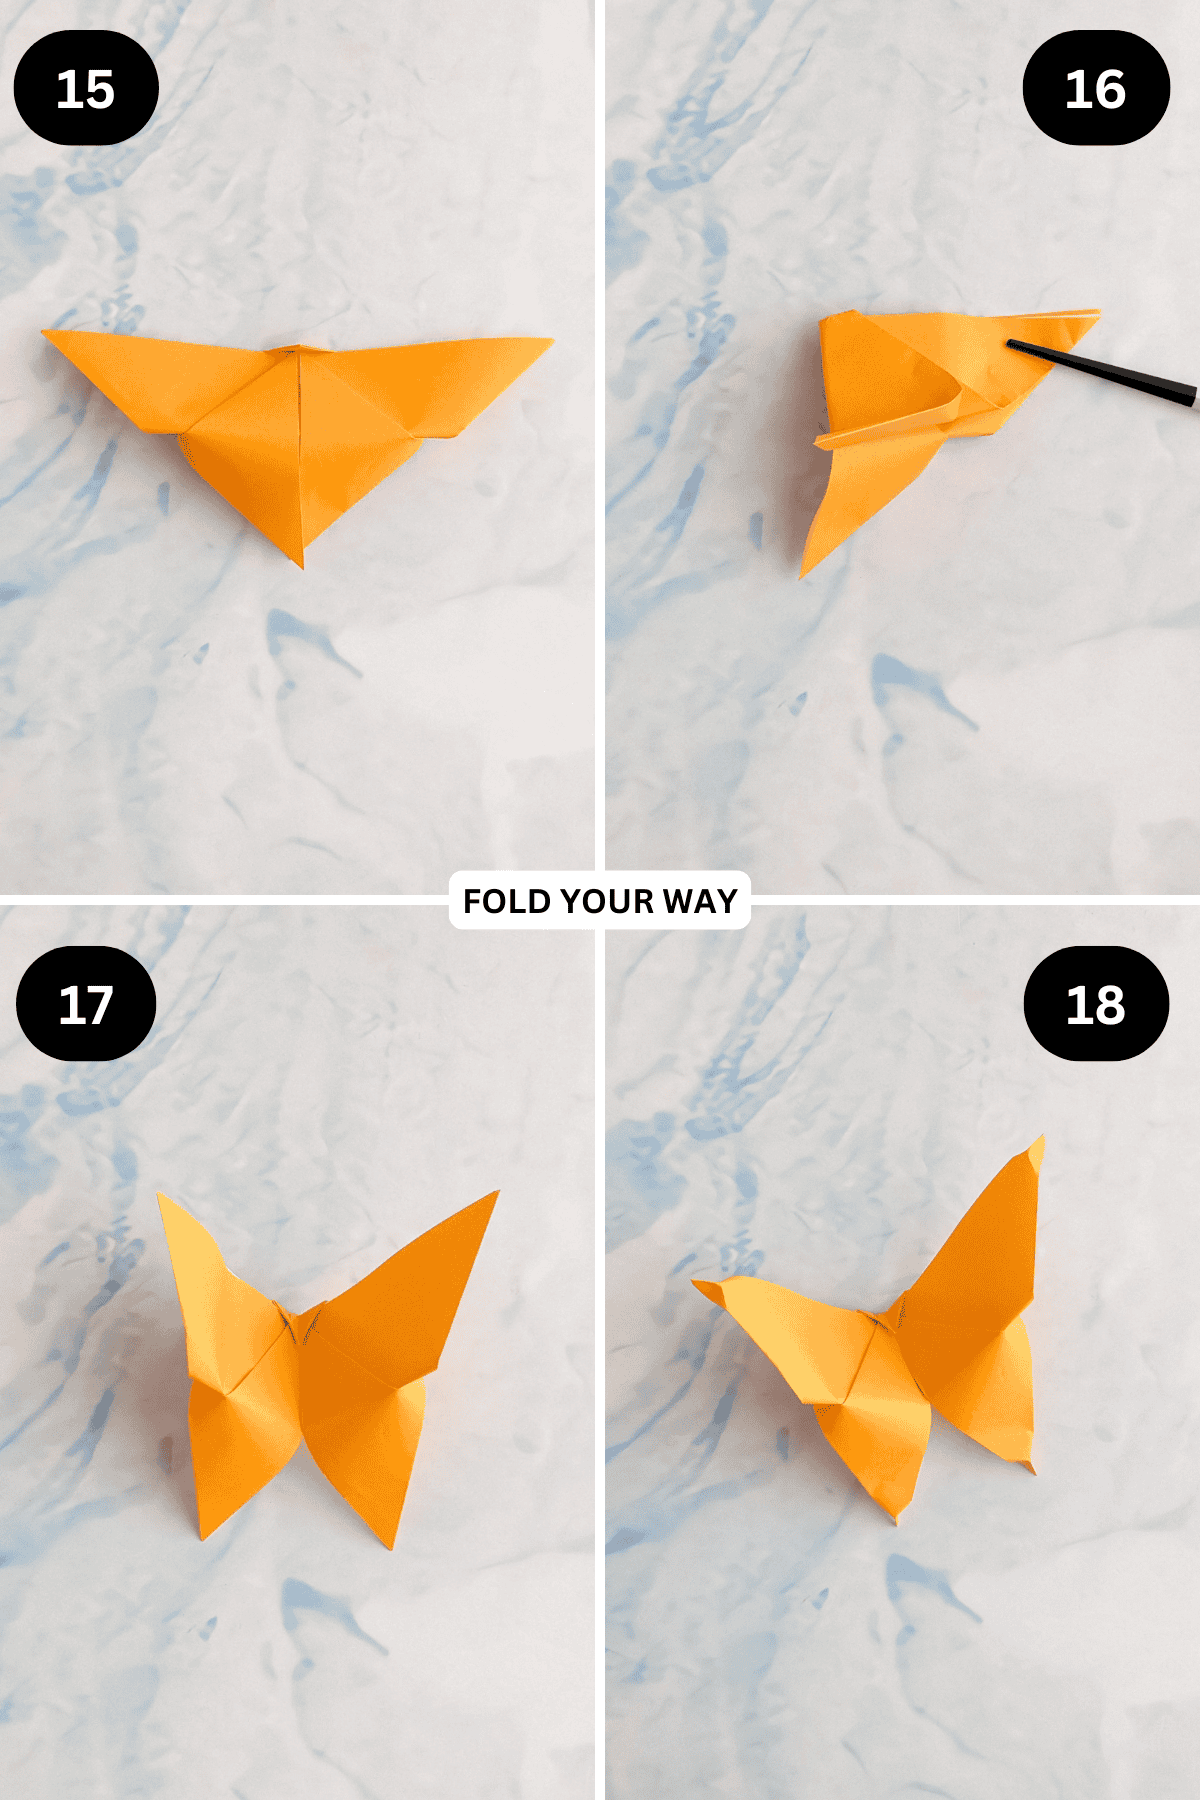
Step 15: Flip your paper over from left to right.
Step 16: Fold your paper in half from left to right.
Step 17: Carefully open out your butterfly.
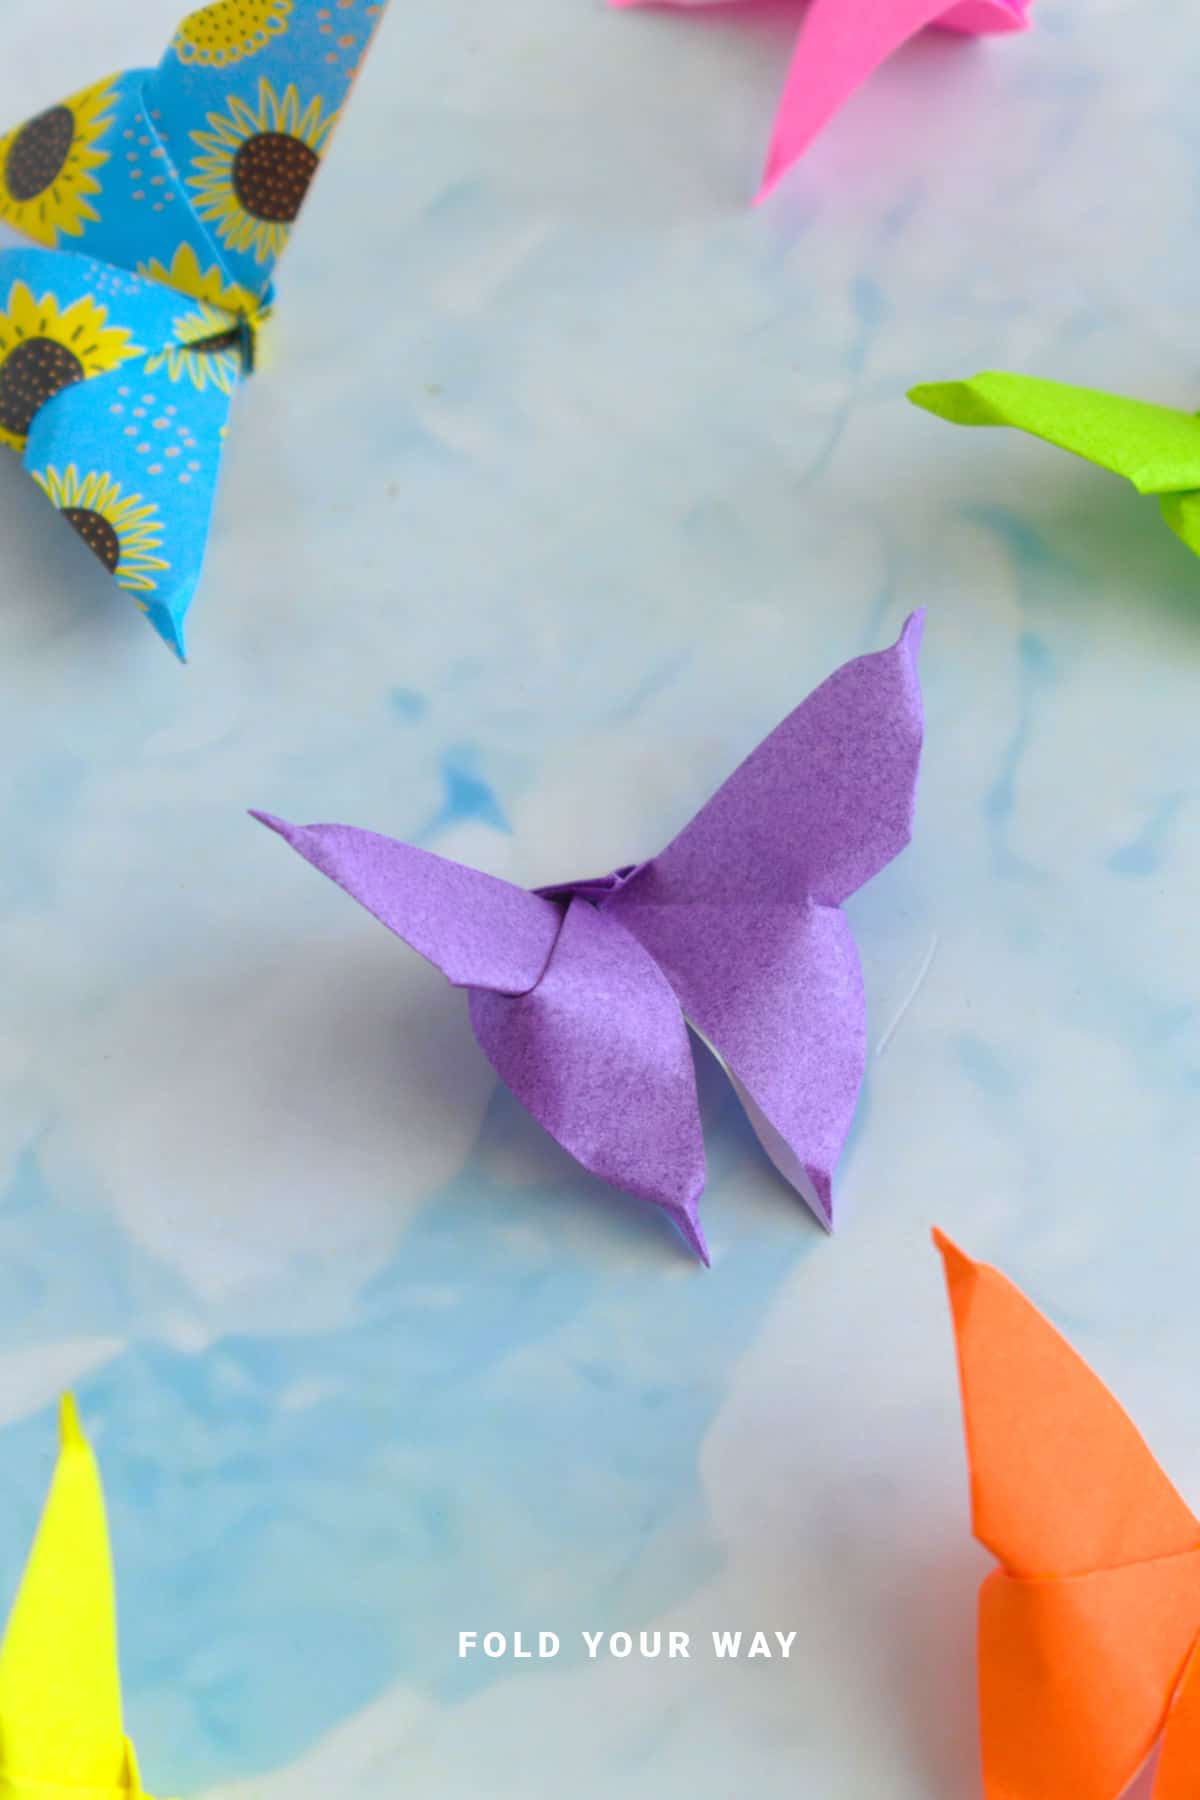
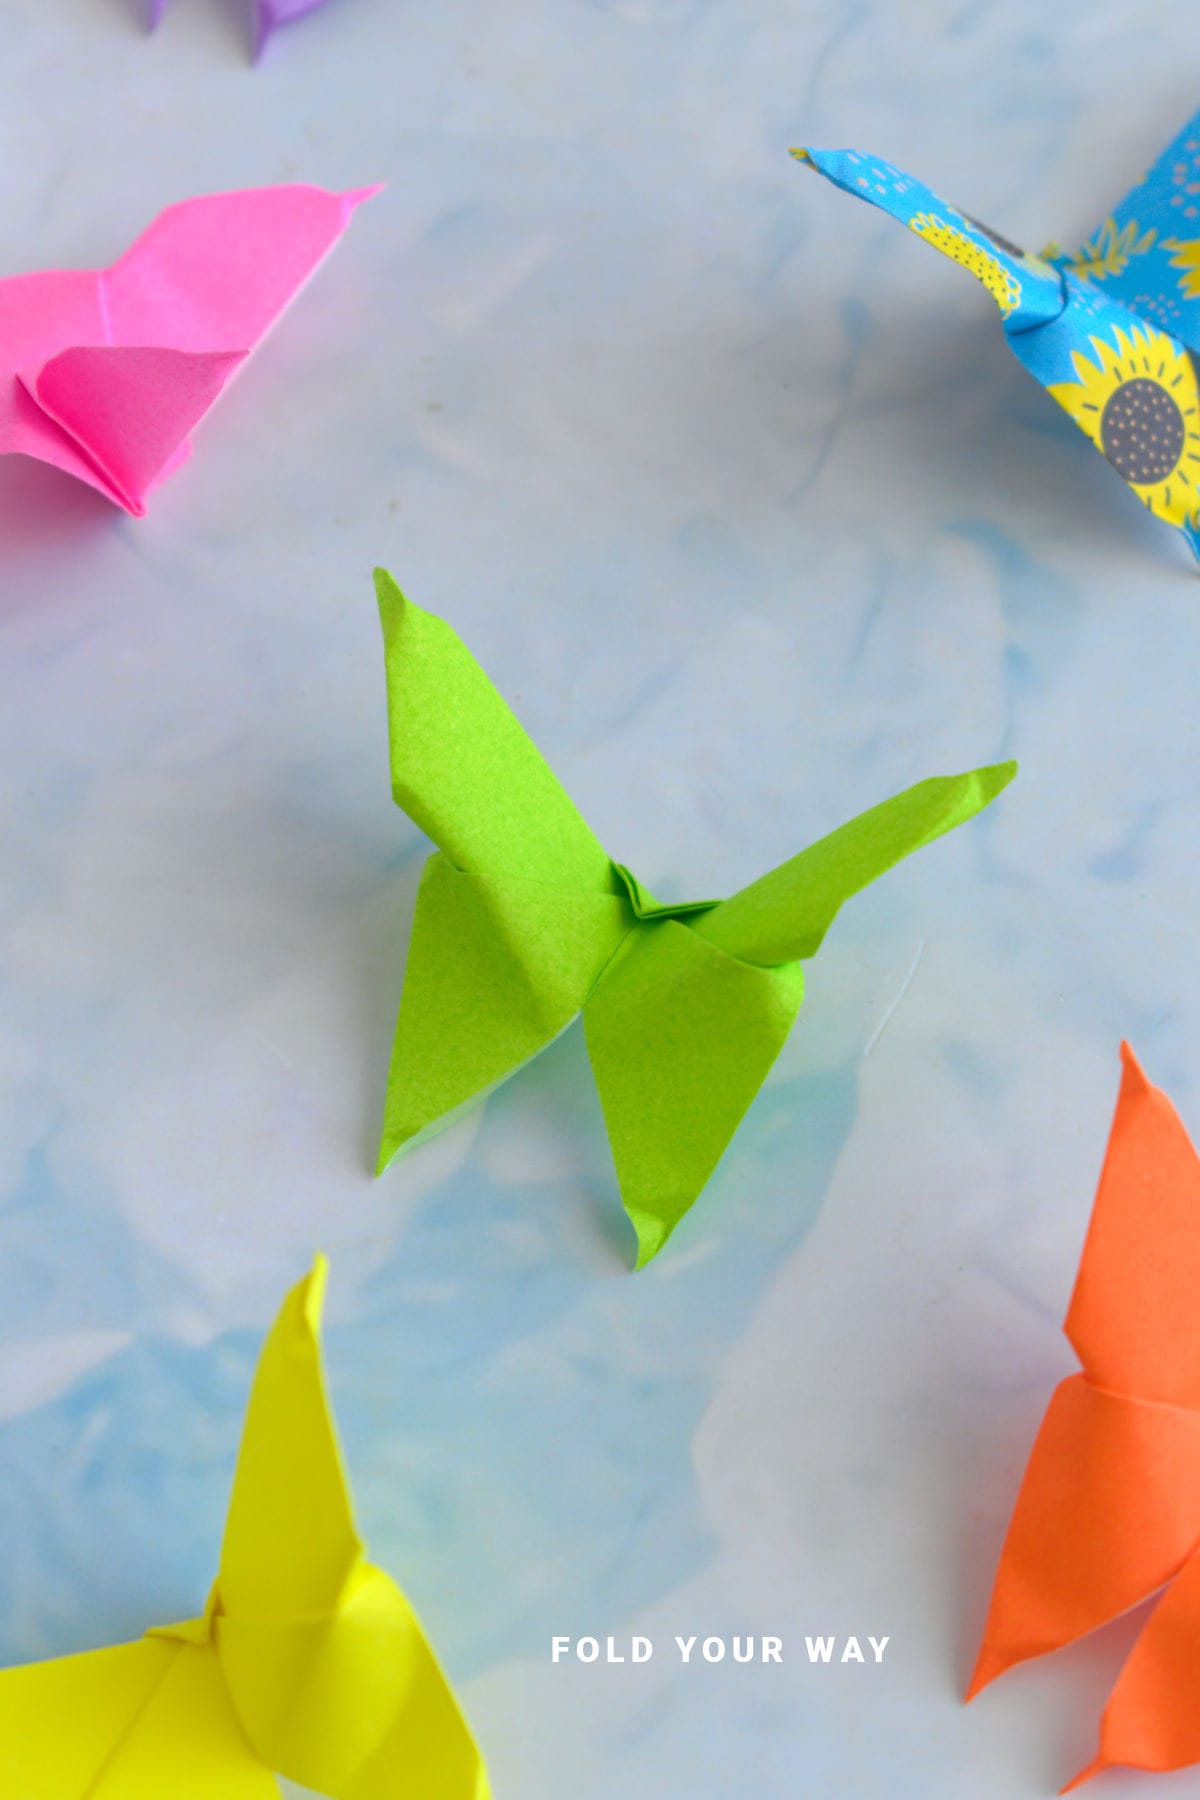
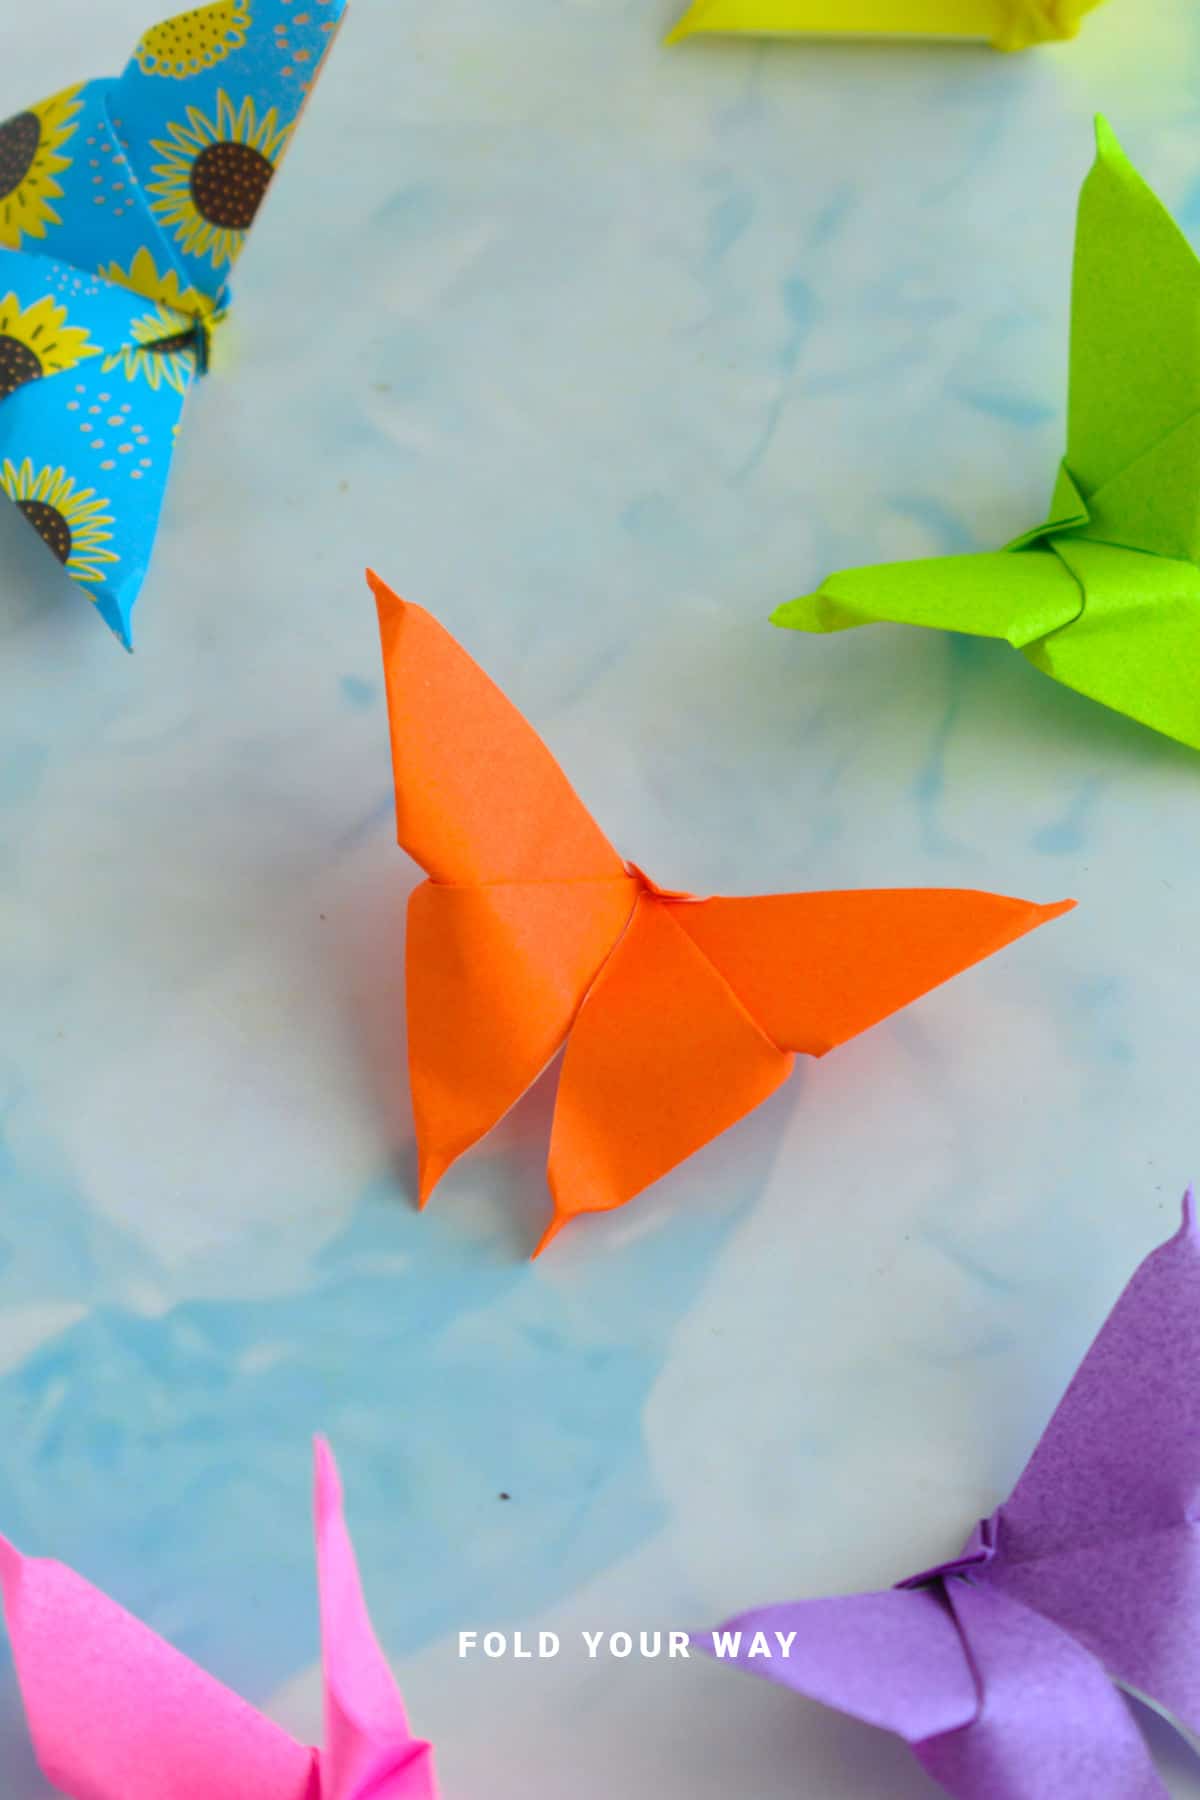
Step 18: Using your fingers, pinch the tips of the butterfly.Completed easy origami butterfly.
Tips For Success
- Crease sharply for clean wings.
- Decorate wings with markers or stickers.
Common Mistakes & How To Avoid Them
- Wings uneven? Make sure your diagonal folds are aligned.
- Paper too thick? Stick to lighter paper for smooth folding.
Color, Paper Ideas, and Variations
- Use pastels or floral prints for springtime decor
- Try glitter or foil paper for extra shimmer
- Add antennae with thin wire or string
- Glue onto gift boxes or attach to birthday cards
- String several butterflies into a mobile or garland
FAQ
Yes! Just punch a hole or tape thread to the back.
Absolutely. They're a great intro to origami for children 6 and up.
You can, but lightweight origami paper is easier to fold neatly, especially if you are making a small butterfly.
Other Crafts You Might Like To Try:
Stay Connected
Made this pattern? Let us know how it went in the comments below!
Pin this post - Pin now to take your paper crafting skills to the next level.
Share on Instagram or Facebook - Capture the beauty of your finished paper craft project and share it on Instagram or Facebook! Tag us @foldyourway so we can see your work!
Other Patterns You Might Like To Try:
Looking for other easy patterns like this? Try these:


Comments
No Comments