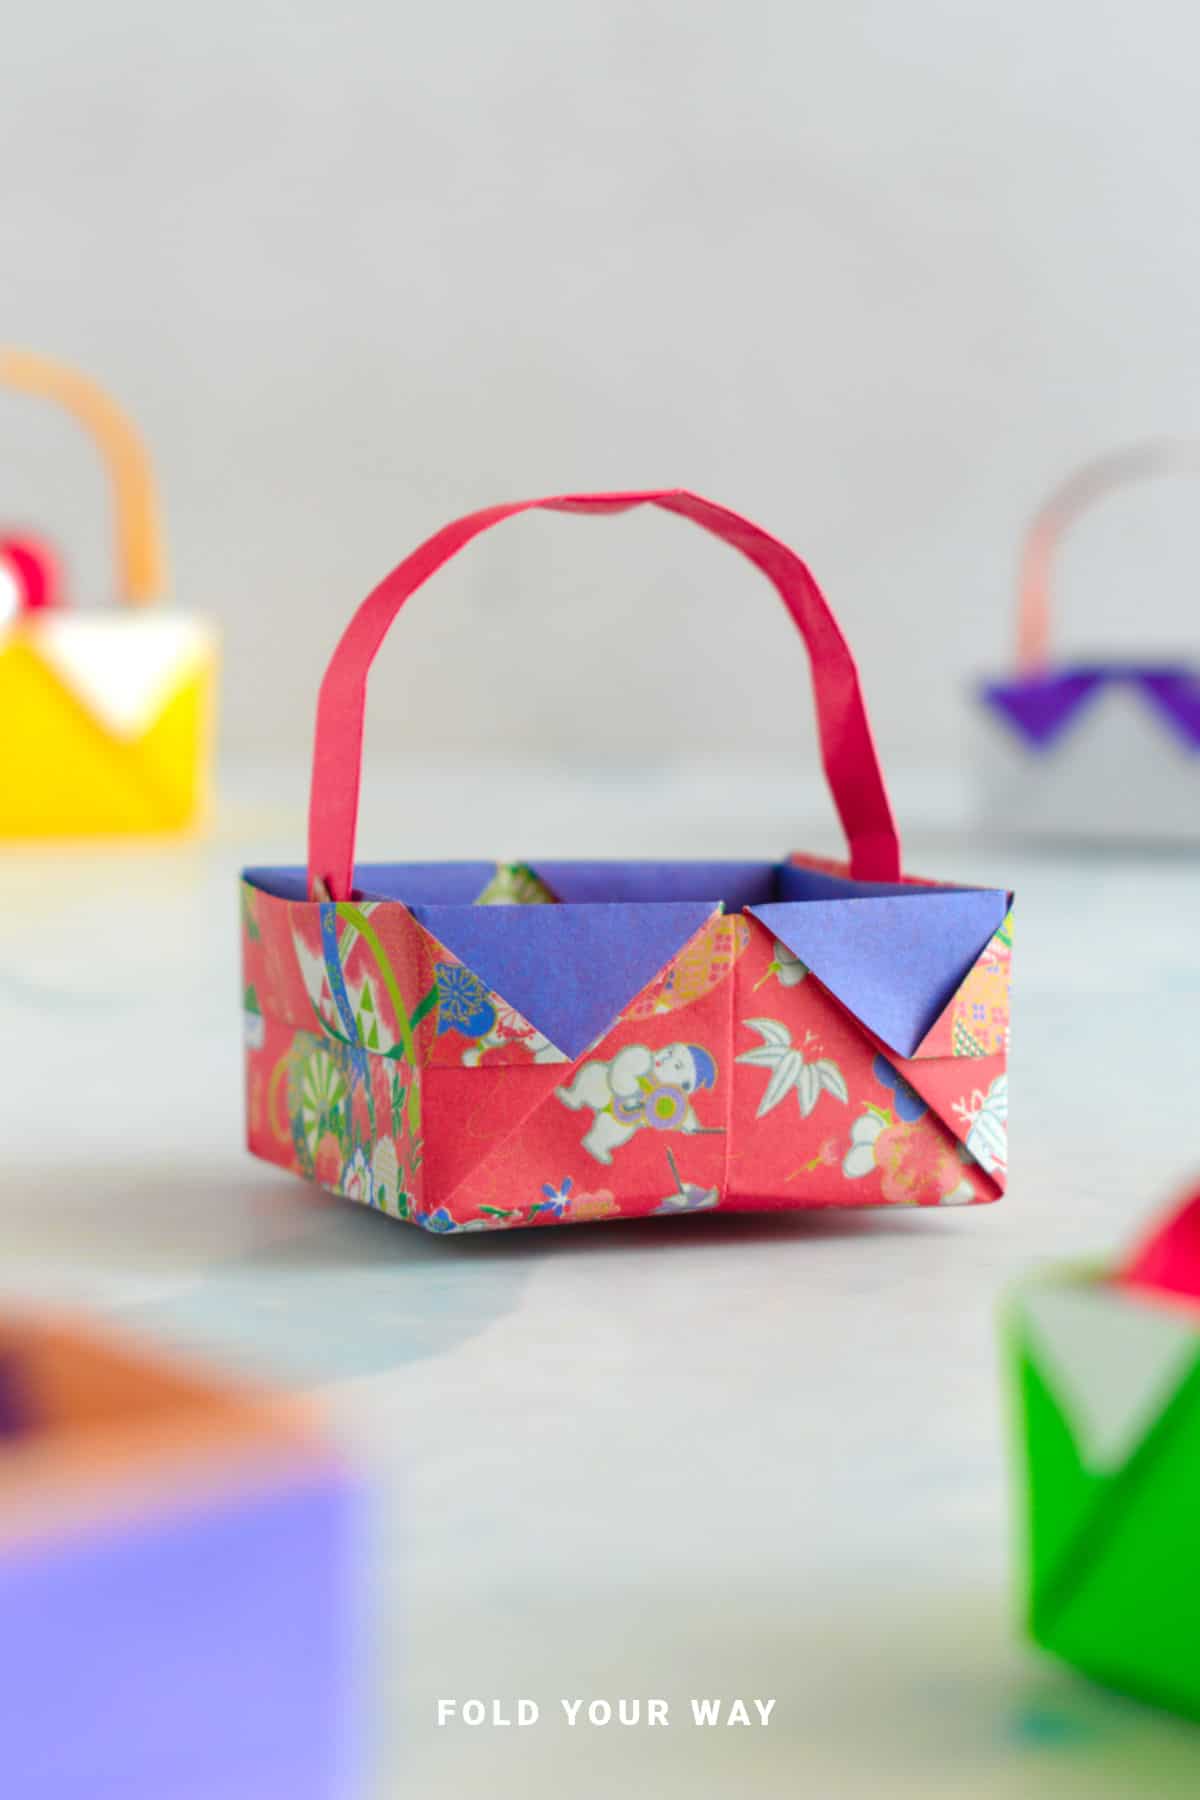
This traditional origami basket with a handle is a charming and practical DIY paper craft perfect for Easter, weddings, parties, and gift-giving.
Made from just one square sheet of paper and a small strip for the handle, this origami tutorial is easy to follow and requires no cutting or glue.
Use it to hold treats, small gifts, or decorative items for any occasion!
Jump to:
- Why You'll Love This Pattern
- Skill Level
- Materials Needed
- Instructions
- Tips For Success
- Common Mistakes & How To Avoid Them
- Color, Paper Ideas, and Variations
- FAQ
- Other Paper Crafts You Might Like To Try:
- Helpful Tips and Common Mistakes For Paper Crafts
- Stay Connected
- Other Patterns You Might Like To Try:
- Comments
Looking for a fun and creative way to present small gifts or treats?
This traditional origami basket with a handle is the perfect solution!
Made from just one square sheet of paper and a small strip for the handle, this easy DIY paper craft can be used for all kinds of occasions, from Easter and Christmas to Halloween, birthdays and weddings.
Whether you're looking for party favors, gift containers, or a decorative centerpiece, this origami basket adds a personal touch to any celebration.
This basket is simple to make, but the results are truly charming.
Its versatility makes it suitable for handing out sweets at Easter, holding small trinkets for Christmas, or serving as a wedding favor holder. You can also use it as a mini gift basket for birthdays or baby showers.
The best part? It requires no glue or cutting (except for the small handle strip), making it an eco-friendly and fun activity for both kids and adults.
With its customizable size and the option to use different colors or patterns, this basket can match any color palette and theme, whether it’s vibrant and festive or soft and elegant. Ready to try your hand at this easy origami project?
Let’s dive into the simple steps that will have you folding your very own paper basket in no time!

Why You'll Love This Pattern
- Great for all occasions – Perfect for Easter, weddings, birthdays, baby showers, and party favors.
- Beginner-friendly – Simple folds make this an easy craft idea for all skill levels.
- No cutting or glue required – Except for the small handle strip, the basket is folded from one piece of paper.
- Customizable – Use different colors, patterns, and textures to suit any theme.
- Practical and decorative – Ideal for holding small gifts, candies, jewelry, or table decorations.
- Fun for all ages – A great DIY paper craft for both kids and adults!
Skill Level
★☆☆☆☆ (Easy)
Materials Needed
- 1 square sheet of paper (see below for size guide)
- 1 strip of paper (see below for size guide)
| Basket Paper Size | Handle Paper Size | Final Basket Size (size does not include handle height | |
| Small Origami Basket | 4.5 inches x 4.5 inches (11.5 cm x 11.5 cm) | 4.5 inches x 1.2 inches (11.5 cm x 2.5 cm) | 1.5 inches x 0.75 inches (4 cm x 2 cm) |
| Medium Origami Basket | 6 inches x 6 inches (15 cm x 15 cm) | 6 inches x 1.5 inches (15 cm x 3.5 cm) | 2 inches x 1.2 inches (5.5 cm x 3 cm) |
| Large Origami Basket | 8 inches x 8 inches (21 cm x 21 cm) | 8 inches x 2 inches (21 cm x 5 cm) | 3 inches x 1.5 inches (7 cm x 3.5 cm) |
Instructions
Making The Handle
Using your strip of paper.
Step 1: Start with the color you want your handle to be facing down. Arrange the paper to sit horizontally.
Step 2: Fold the bottom edge up to meet the top edge.
Step 3: Unfold previous step.
Step 4: Fold both the bottom edge and top edge in to meet the middle crease.
Step 5: Fold the bottom edge up to meet the top edge. Completed handle.

Making the basket
Step 1: Start with the color you want the outside of your basket to be facing down. Arrange your paper to sit like a diamond. In this case, the outside of our basket will be white and the inside will be purple.
Step 2: Fold the bottom point up to meet the top point.
Step 3: Unfold previous step.
Step 4: Fold the left point to meet the right point.

Step 5: Unfold previous step.
Step 6: Flip your paper over from left to right, arrange it to sit as shown.
Step 7: Fold the bottom edge up to meet the top edge.
Step 8: Unfold previous step.

Step 9: Fold the left edge to meet the right edge.
Step 10: Unfold previous step.
Step 11: Fold all 4 corners in to meet the middle.
Step 12: Fold all of the inner corners out to meet the edges as shown.

Step 13: Unfold the paper completely.
Step 14: Flip your paper over and arrange it to sit like a diamond shape.
Step 15: Hold the paper on the left and right points as shown. Then, bring the points down to meet the bottom point. You will find the paper will naturally collapse onto itself and form a square when flattened.

Step 16: Fold the bottom point up (top layer only) to meet the top point.
Step 17: Fold the right side of the paper (top layer only) to the left like turning a page in a book.
Step 18: Flip your paper over from left to right and repeat previous 2 steps.
Step 19: Fold both the left and right points (top layer only) in to meet the middle.

✨ You're almost there! ✨
To unlock the final steps and complete your pattern, create a free account with Grow.me. below.
Make sure you tick the box to subscribe to our newsletter and stay up to date with the latest patterns, tips, and more!
Once you're signed up, you'll get instant access to finish your project and enjoy exclusive content in the future.
Already signed up? Hit the button below and select ‘Switch to Log In’ to pick up where you left off and finish your project!
Tips For Success
- Use sturdy paper – This will help your basket hold its shape.
- Make sharp creases – A bone folder or ruler helps with precision.
- Choose matching paper for the handle – A different color or pattern can add contrast.
- Secure the handle if needed – While the traditional method tucks it into folds, you can also use a dab of glue for extra stability.
- Experiment with sizes – Try making a set of baskets in different sizes for a beautiful display.

Common Mistakes & How To Avoid Them
- Basket too floppy? Use thicker paper better structure.
- Handle not staying in place? Fold the ends slightly before inserting or secure with a tiny glue dot.
- Paper tearing at folds? Avoid using stiff cardstock and fold gently.
- Basket looks uneven? Double-check your folds and align edges carefully.
Color, Paper Ideas, and Variations
- Festive Themes – Use red and gold for Christmas, pastel shades for Easter, or floral prints for spring.
- Textured Paper – Try handmade, glitter, or embossed paper for a unique effect.
- Double-Sided Paper – A contrasting inside color adds a stylish touch.
- Ribbon Handle – Replace the paper handle with a thin ribbon or twine for a delicate look.
- Mini & Maxi Baskets – Create tiny baskets for table décor or large baskets for holding multiple treats.
FAQ
Origami paper, scrapbook paper, or lightweight cardstock works best.
Avoid thin printer paper, as it may not hold the shape well.
Yes! The handle is optional, and the basket still looks great without it.
Yes! Just start with a larger square of paper, and adjust the handle strip length accordingly.
The paper handle is sturdy enough for lightweight items, but if you plan to carry heavier treats, consider reinforcing it with tape or using ribbon.
Absolutely! This is an easy craft idea for kids, though younger ones may need help with precise folds.
Other Paper Crafts You Might Like To Try:
Helpful Tips and Common Mistakes For Paper Crafts
Paper crafting and origami can be hard sometimes. Which is why we've made this printable PDF just for you.
It outlines helpful tips so that you can successfully complete your craft, and some of the most common mistakes people come across.
You can download the helpful tips and common mistakes for paper crafts printable PDF here.
Stay Connected
Made this pattern? Let us know how it went in the comments below!
Pin this post - Pin now to take your paper crafting skills to the next level.
Share on Instagram or Facebook - Capture the beauty of your finished paper craft project and share it on Instagram or Facebook! Tag us @foldyourway so we can see your work!

Other Patterns You Might Like To Try:
Looking for other easy patterns like this? Try these:


Comments
No Comments