
This beautiful crane origami box combines the elegance of the classic origami crane with the function of a small open box—perfect for storing trinkets, serving treats, or gifting something special.
Jump to:
If you love traditional origami with a twist, this crane origami box is a must-try. Combining the iconic origami crane with a practical, open-base container, this project is both decorative and functional.
You’ll only need one square sheet of paper—no glue, scissors, or special tools—making it an easy and rewarding craft to fold whenever inspiration strikes.
This design is ideal for small gifts or favors, like wrapped sweets, jewelry, or notes.
Its unique shape makes it a beautiful handmade accent for birthdays, weddings, baby showers, Easter, Christmas, or even Mother’s Day. Use patterned paper for a festive touch, or keep it minimal with solid colors for a more elegant look.
It’s also great as a desk or home accessory—a creative way to hold rings, paper clips, or even dried petals.
Whether you’re new to origami or an experienced folder looking for something lovely and useful, this DIY craft is a delightful project you’ll enjoy making again and again.
Why You'll Love This Pattern
- Made with just one square sheet of paper
- Combines classic origami with a practical purpose
- No cutting or glue needed
- Great for small gifts, jewelry, candies, or table decor
- Looks stunning with patterned or solid paper
- Works for many occasions: Christmas, Easter, weddings, and more
Skill Level
★☆☆☆☆ (Easy)
Materials Needed
- 1 sheet of square paper, e.g. origami paper or lightweight cardstock
| Paper Size | Final Paper Crane Box Size | |
| Small Origami Crane Box Size | 3 inches x 3 inches (7.5 cm x 7.5 cm) | 2 inches x 1.2 inches (5 cm x 3 cm) |
| Medium Origami Crane Box Size | 6 inches x 6 inches (15 cm x 15 cm) | 4 inches x 2.5 inches (10 cm x 6.5 cm) |
| Large Origami Crane Box Size | 10 inches x 10 inches (25 cm x 25 cm) | 6 inches x 4 inches (15 cm x 11 cm) |
Instructions
Step 1: Start with the color you want your crane to be facing down. In this case, our crane will be white.
Step 2: Fold the bottom edge up to meet the top edge.
Step 3: Unfold previous step.
Step 4: Fold the left edge to meet the right edge.
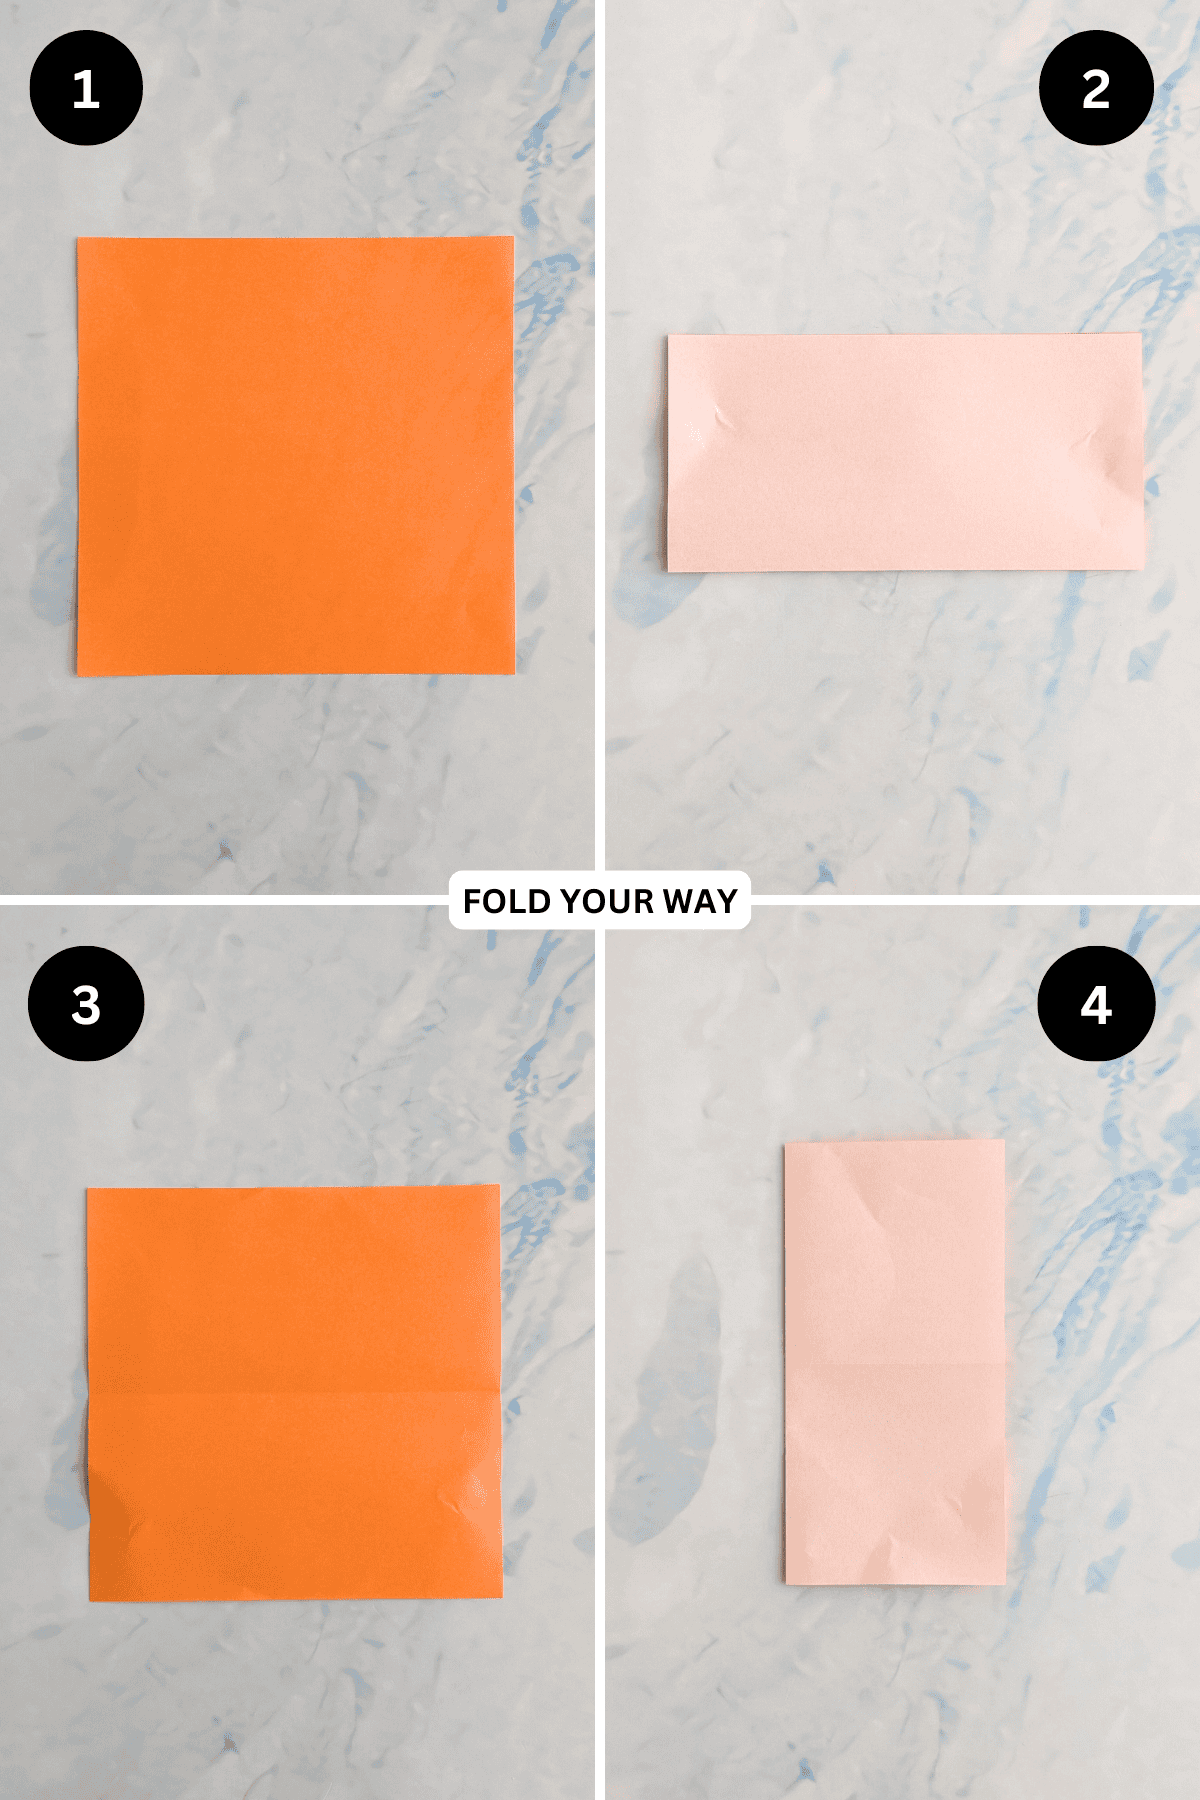
Step 5: Unfold previous step.
Step 6: Fold the bottom left point up to meet the top right point.
Step 7: Unfold previous step.
Step 8: Fold the bottom right point up to meet the top left point.
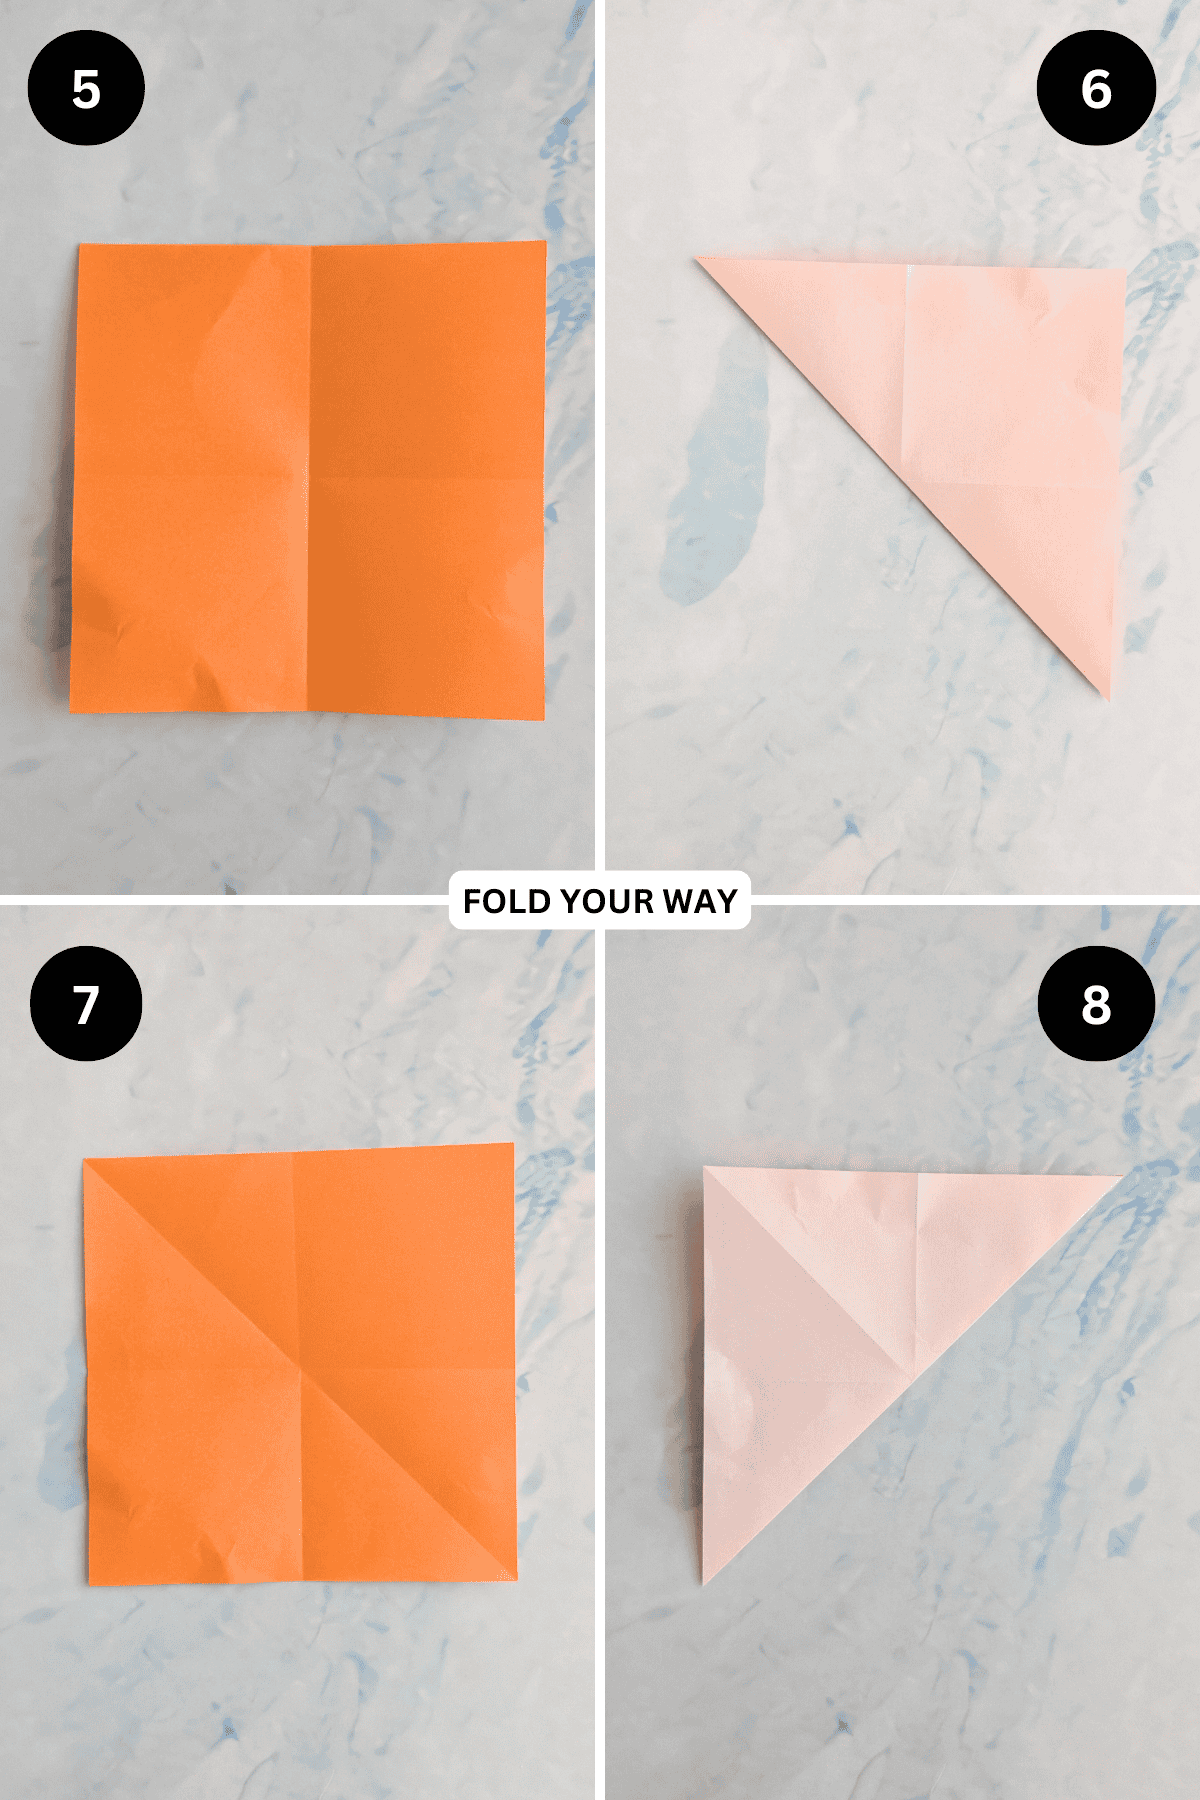
Step 9: Unfold previous step.
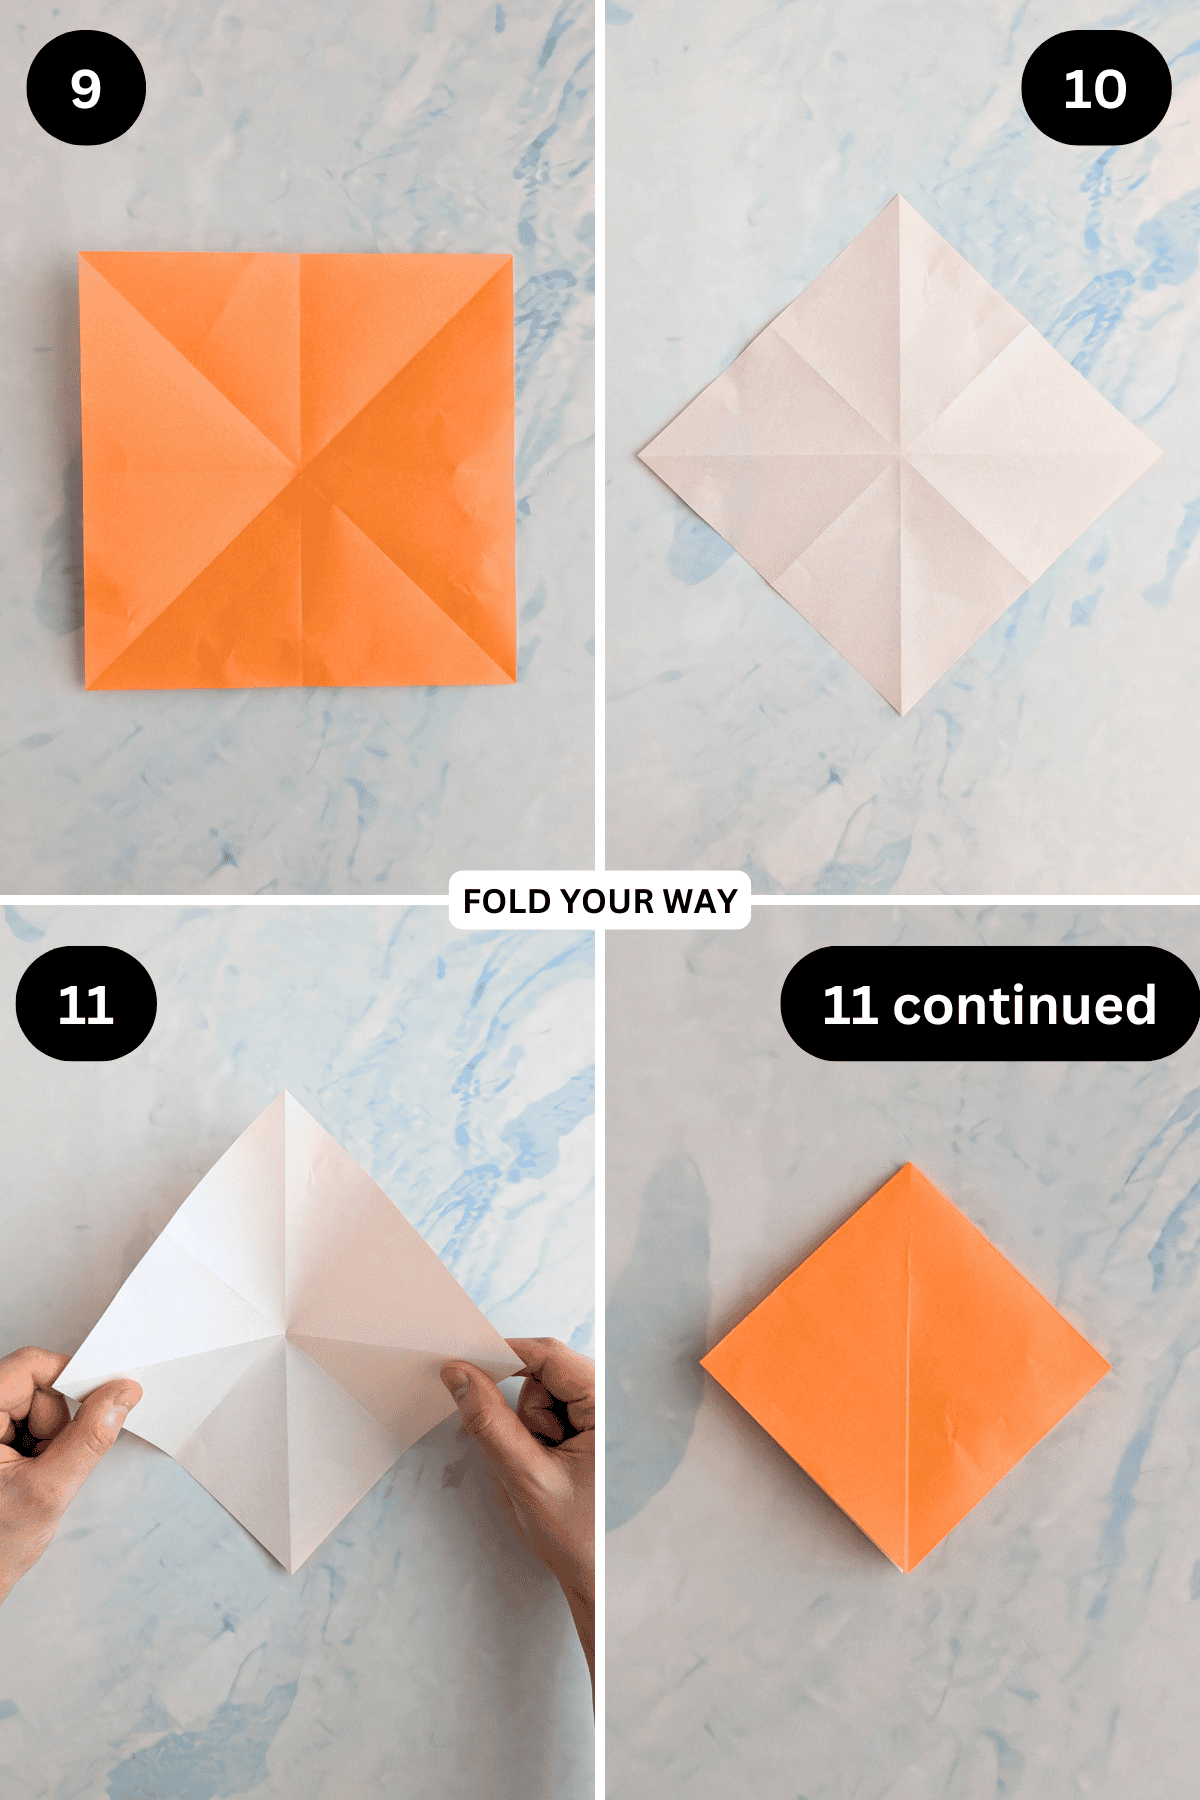
Step 10: Flip your paper over and arrange it to sit like a diamond shape.
Step 11: Holding both the left and right sides of the paper as shown, bring the left and right points down to meet the bottom point. You will find the paper will start to collapse on itself and flatten into a square.
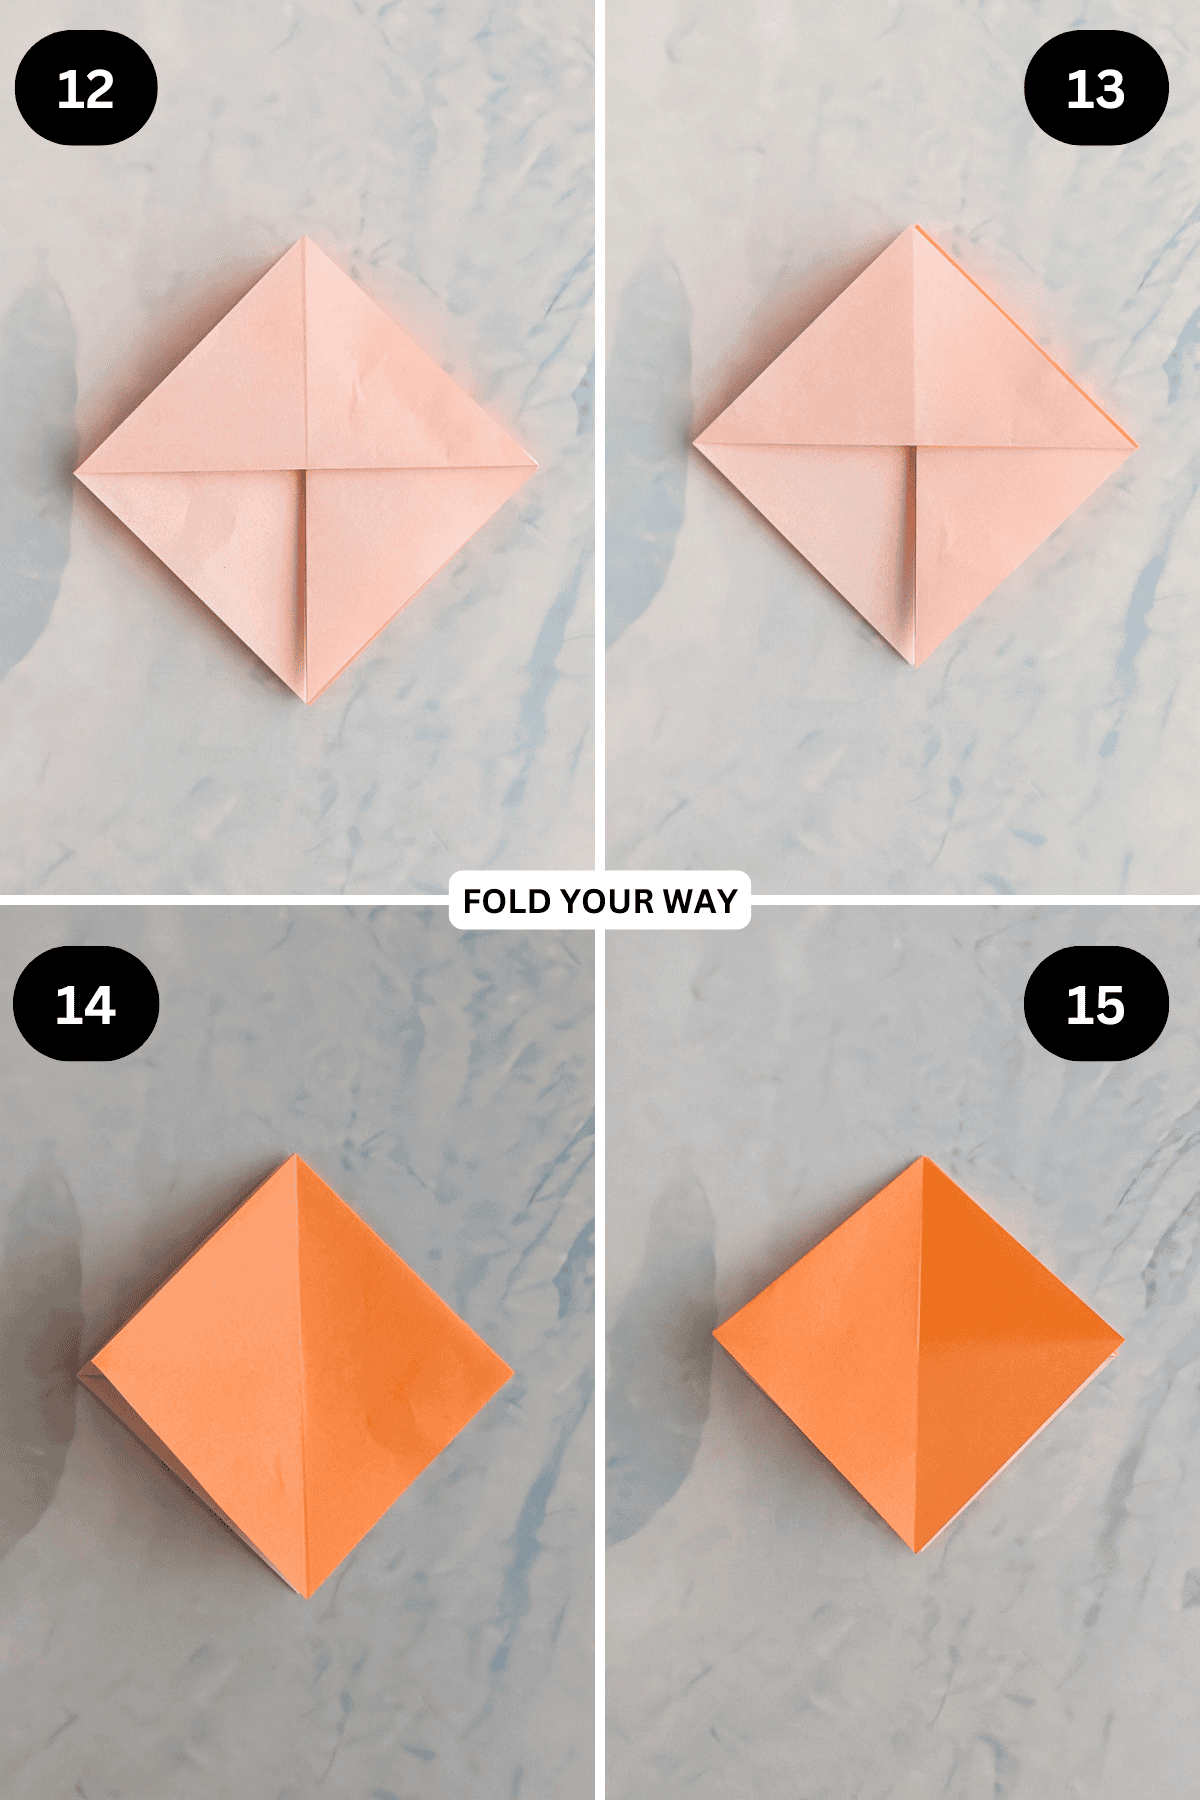
Step 12: Fold the bottom point (top layer only) up to meet the top point.
Step 13: Flip your paper over from left to right and repeat previous step.
Step 14: Fold the right edge (top layer only) to the left like turning a page in book.
Step 15: Repeat previous step for the other side.
✨ You're almost there! ✨
To unlock the final steps and complete your pattern, create a free account with Grow.me. below.
Make sure you tick the box to subscribe to our newsletter and stay up to date with the latest patterns, tips, and more!
Once you're signed up, you'll get instant access to finish your project and enjoy exclusive content in the future.
Already signed up? Hit the button below and select ‘Switch to Log In’ to pick up where you left off and finish your project!
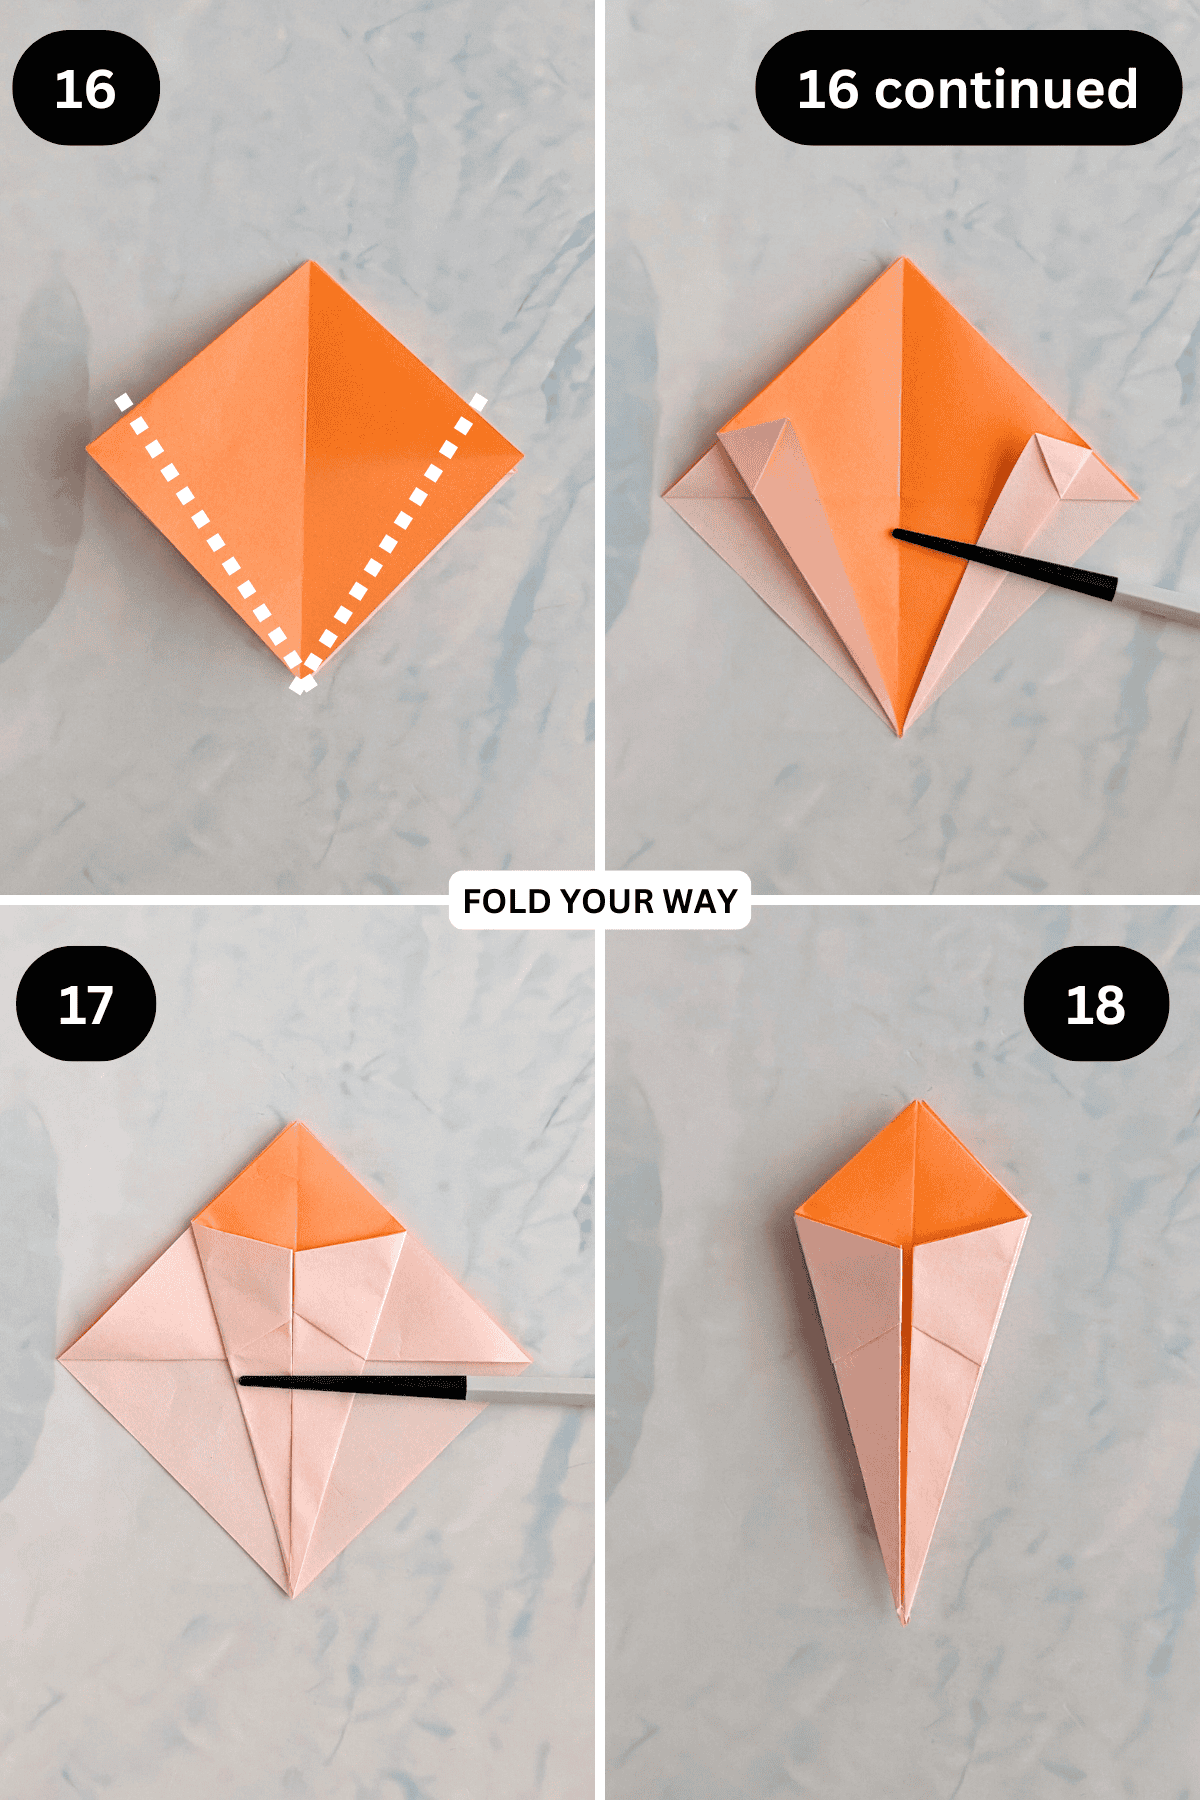
Step 16: Fold both the bottom left and bottom right edges of the paper (top layer only) in along the lines shown.
Step 17: Fold those same edges in to meet the middle crease.
Step 18: Flip your paper over from left to right and repeat steps 16 to 17.
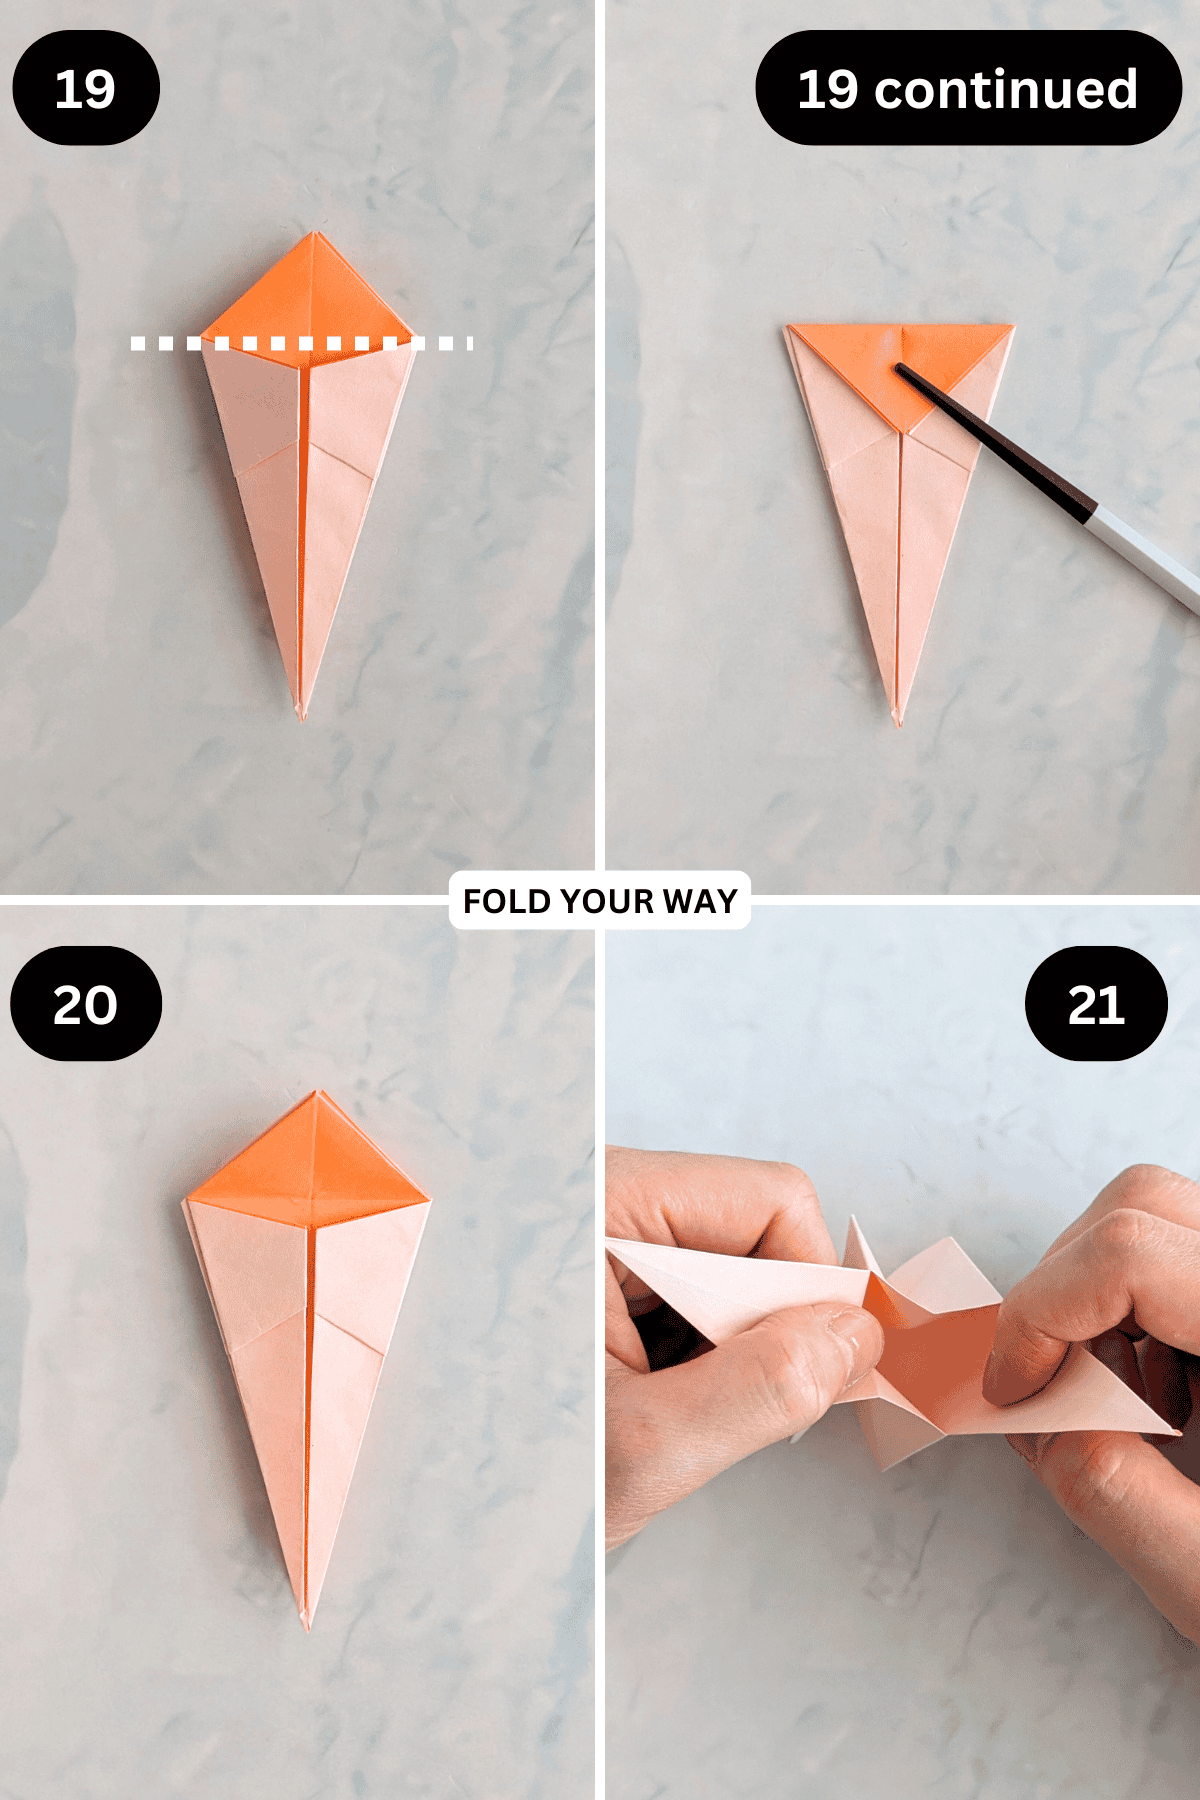
Step 19: Fold the top point down along the line shown.Crease well.
Step 20: Unfold previous step.
Step 21: Gently open out your box, re-crease the edges as needed.
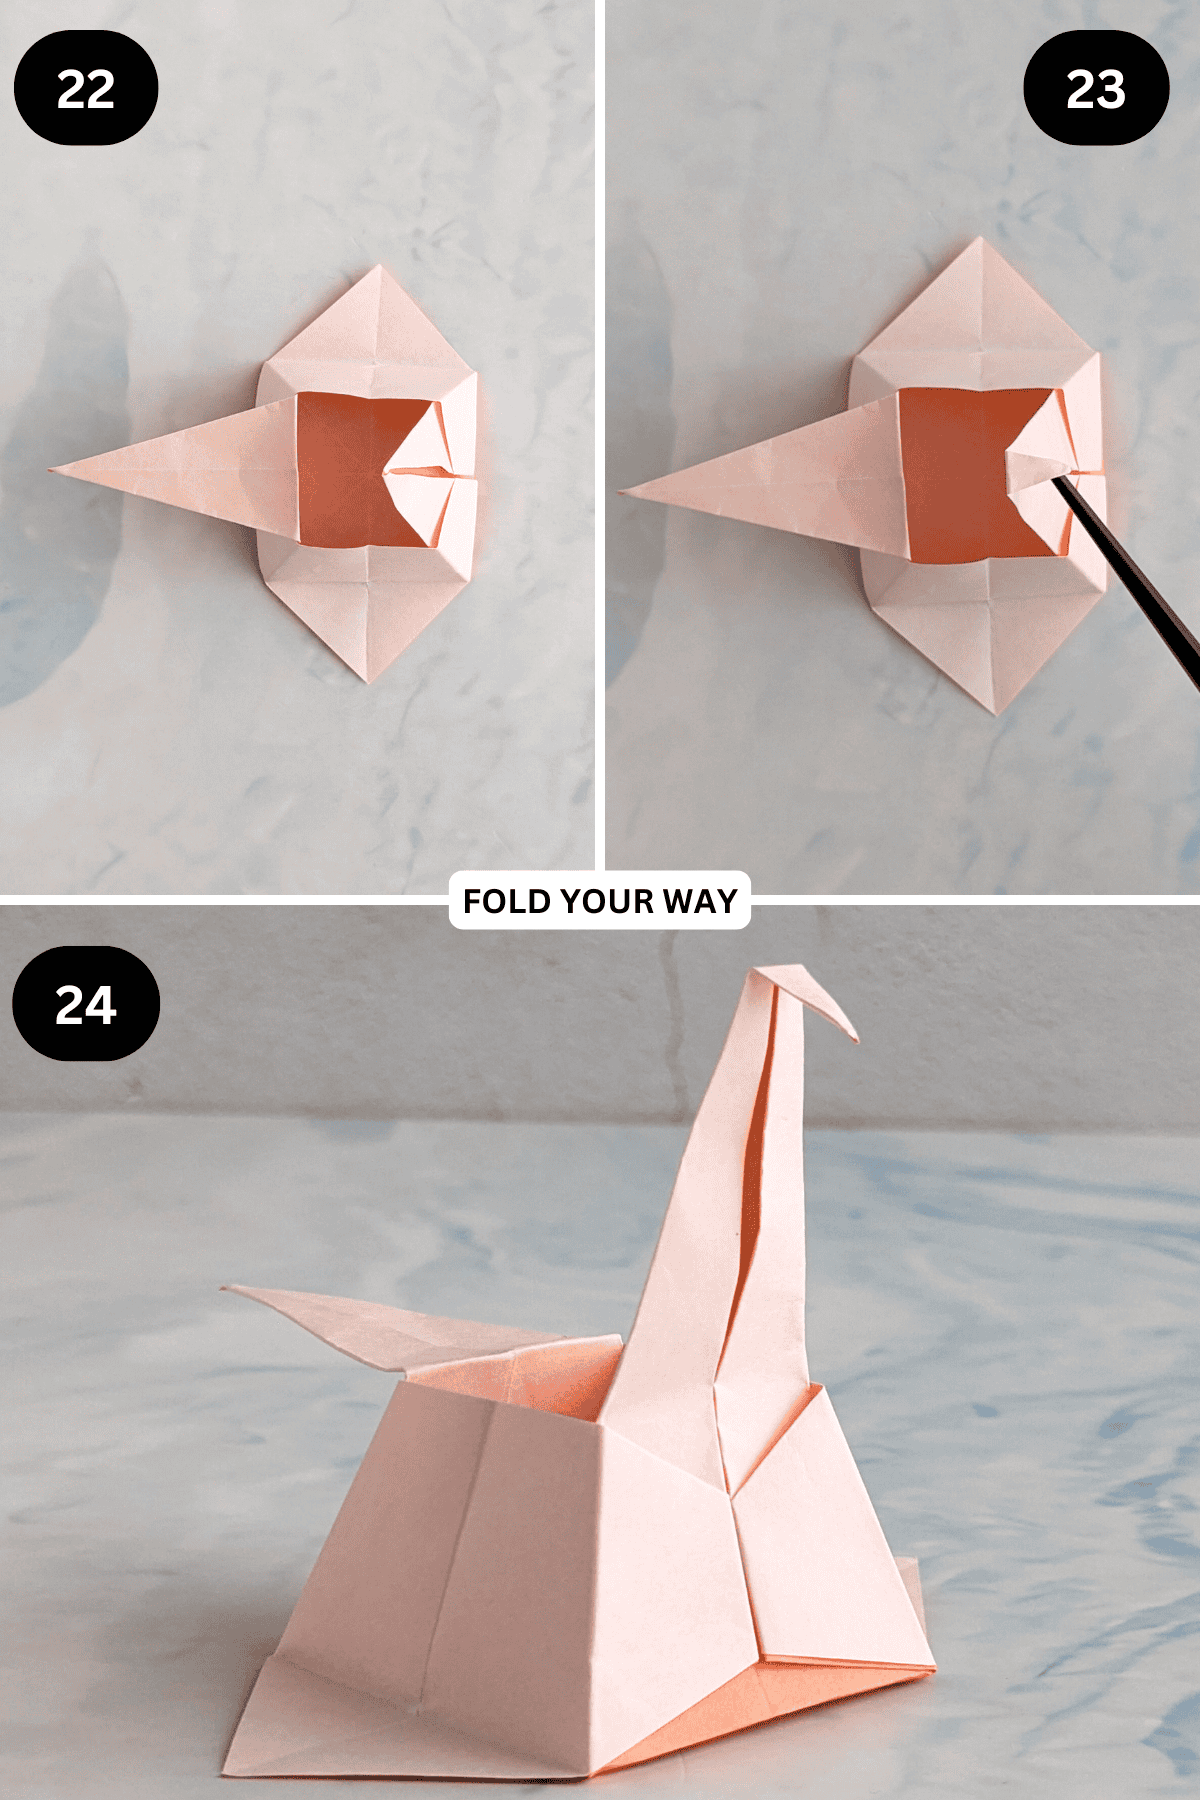
Step 22: With your box sitting as shown, fold the left thin flap down as shown. This will be the tail of the crane.
Step 23: With the other thin flap, fold the tip down slightly. This will be the crane’s head.
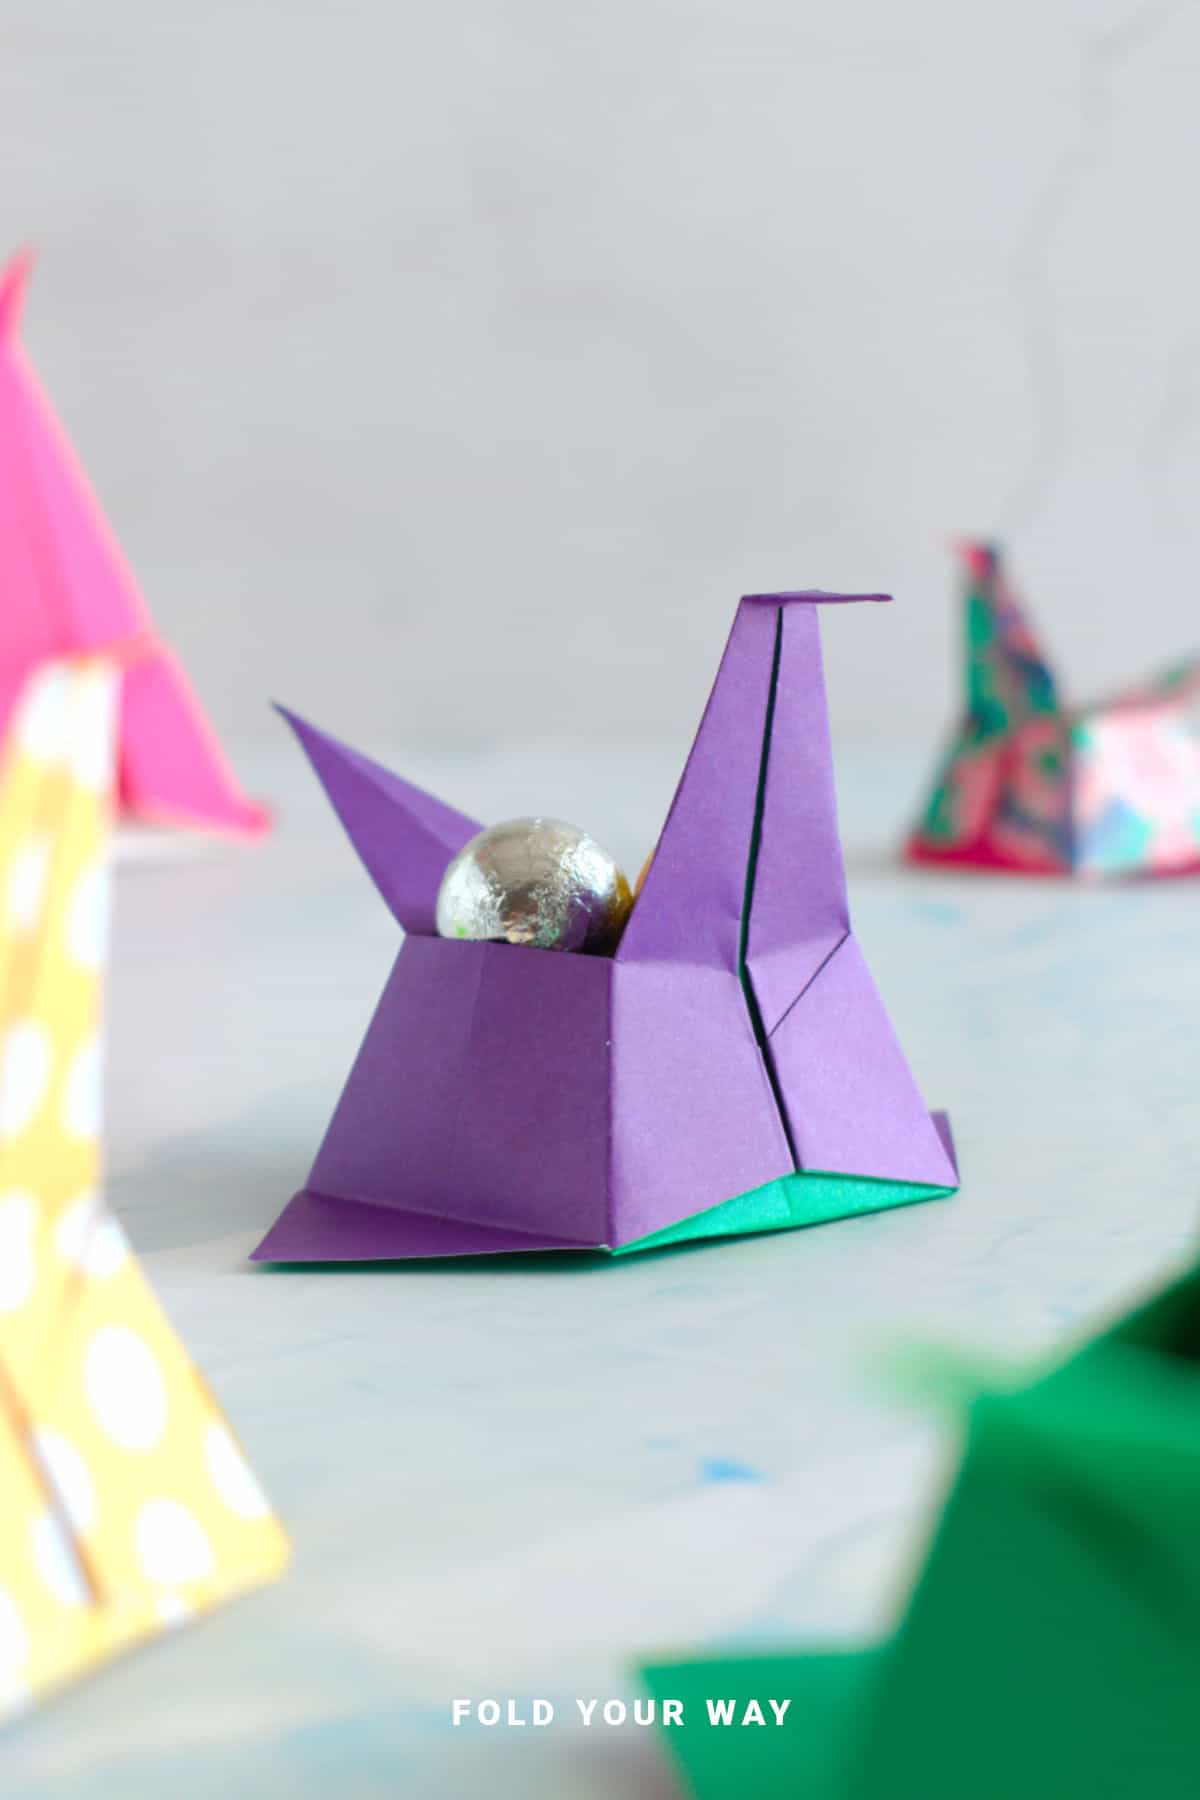
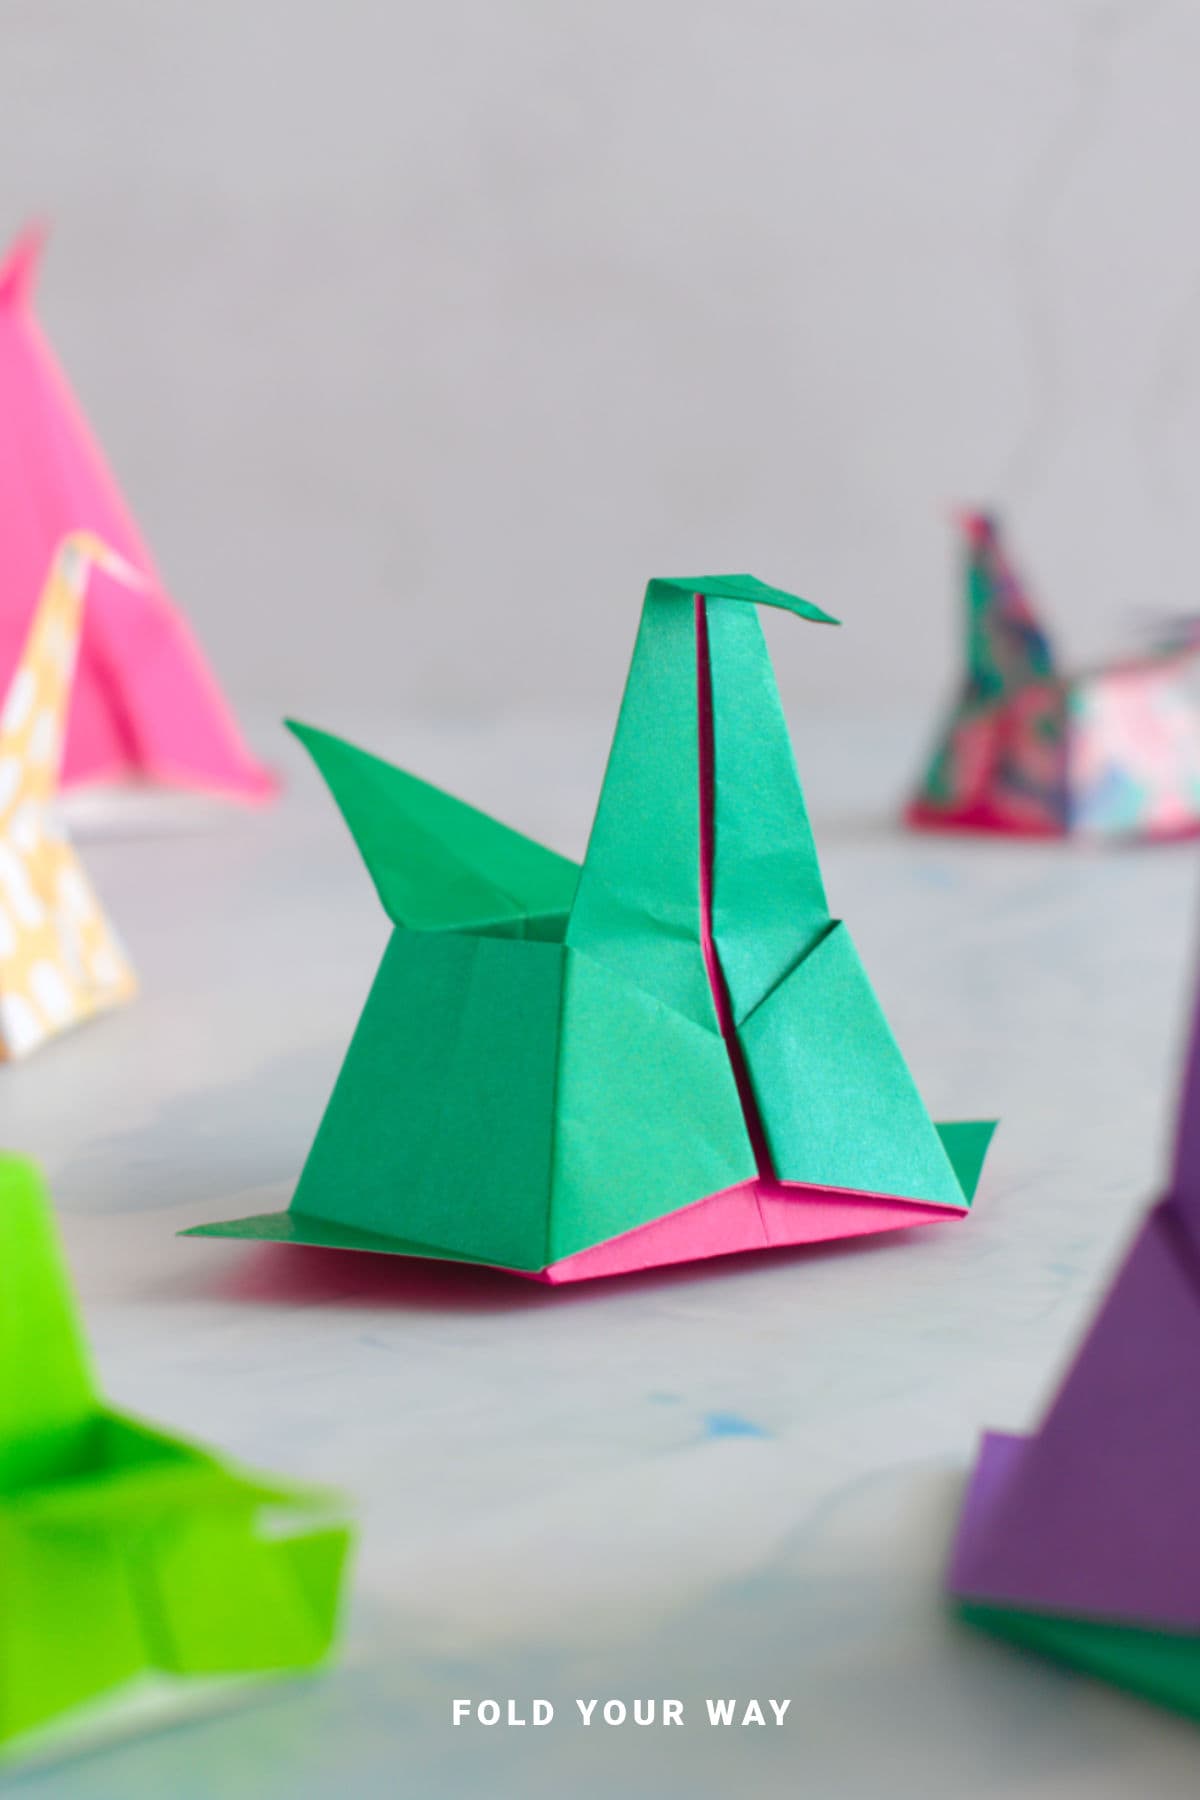
Step 24: Adjust the neck of the crane as you like. Completed crane origami box.
Tips For Success
- Use thin but sturdy paper so the crane’s wings and base hold their shape
- Be sure to crease folds sharply for neat results
- Practice with scrap paper before using decorative sheets
Common Mistakes & How To Avoid Them
Crane looks uneven: Take your time aligning corners and making precise folds
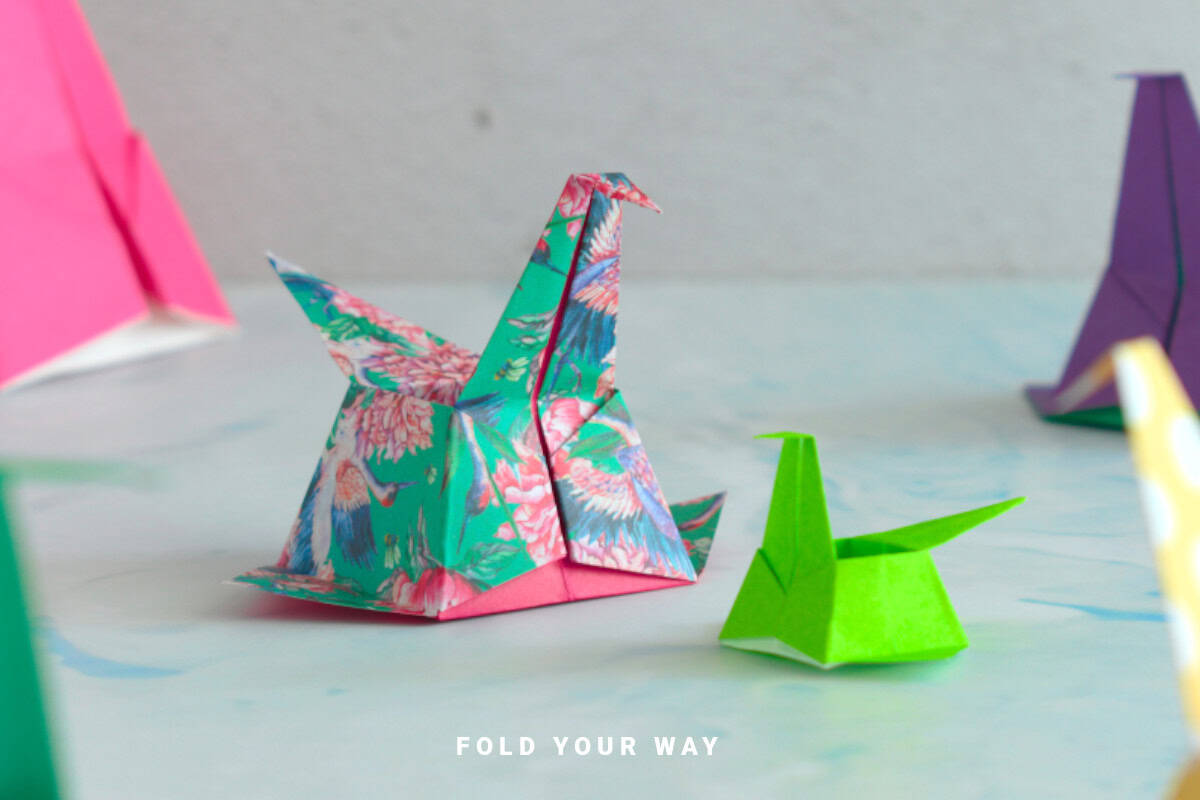
Color, Paper Ideas, and Variations
- Solid pastel paper – for soft, pretty versions perfect for spring or Mother’s Day
- Festive prints – try Christmas patterns, floral Easter paper, or metallics for wedding
- Double-sided paper – shows off both sides beautifully on the wings and box base
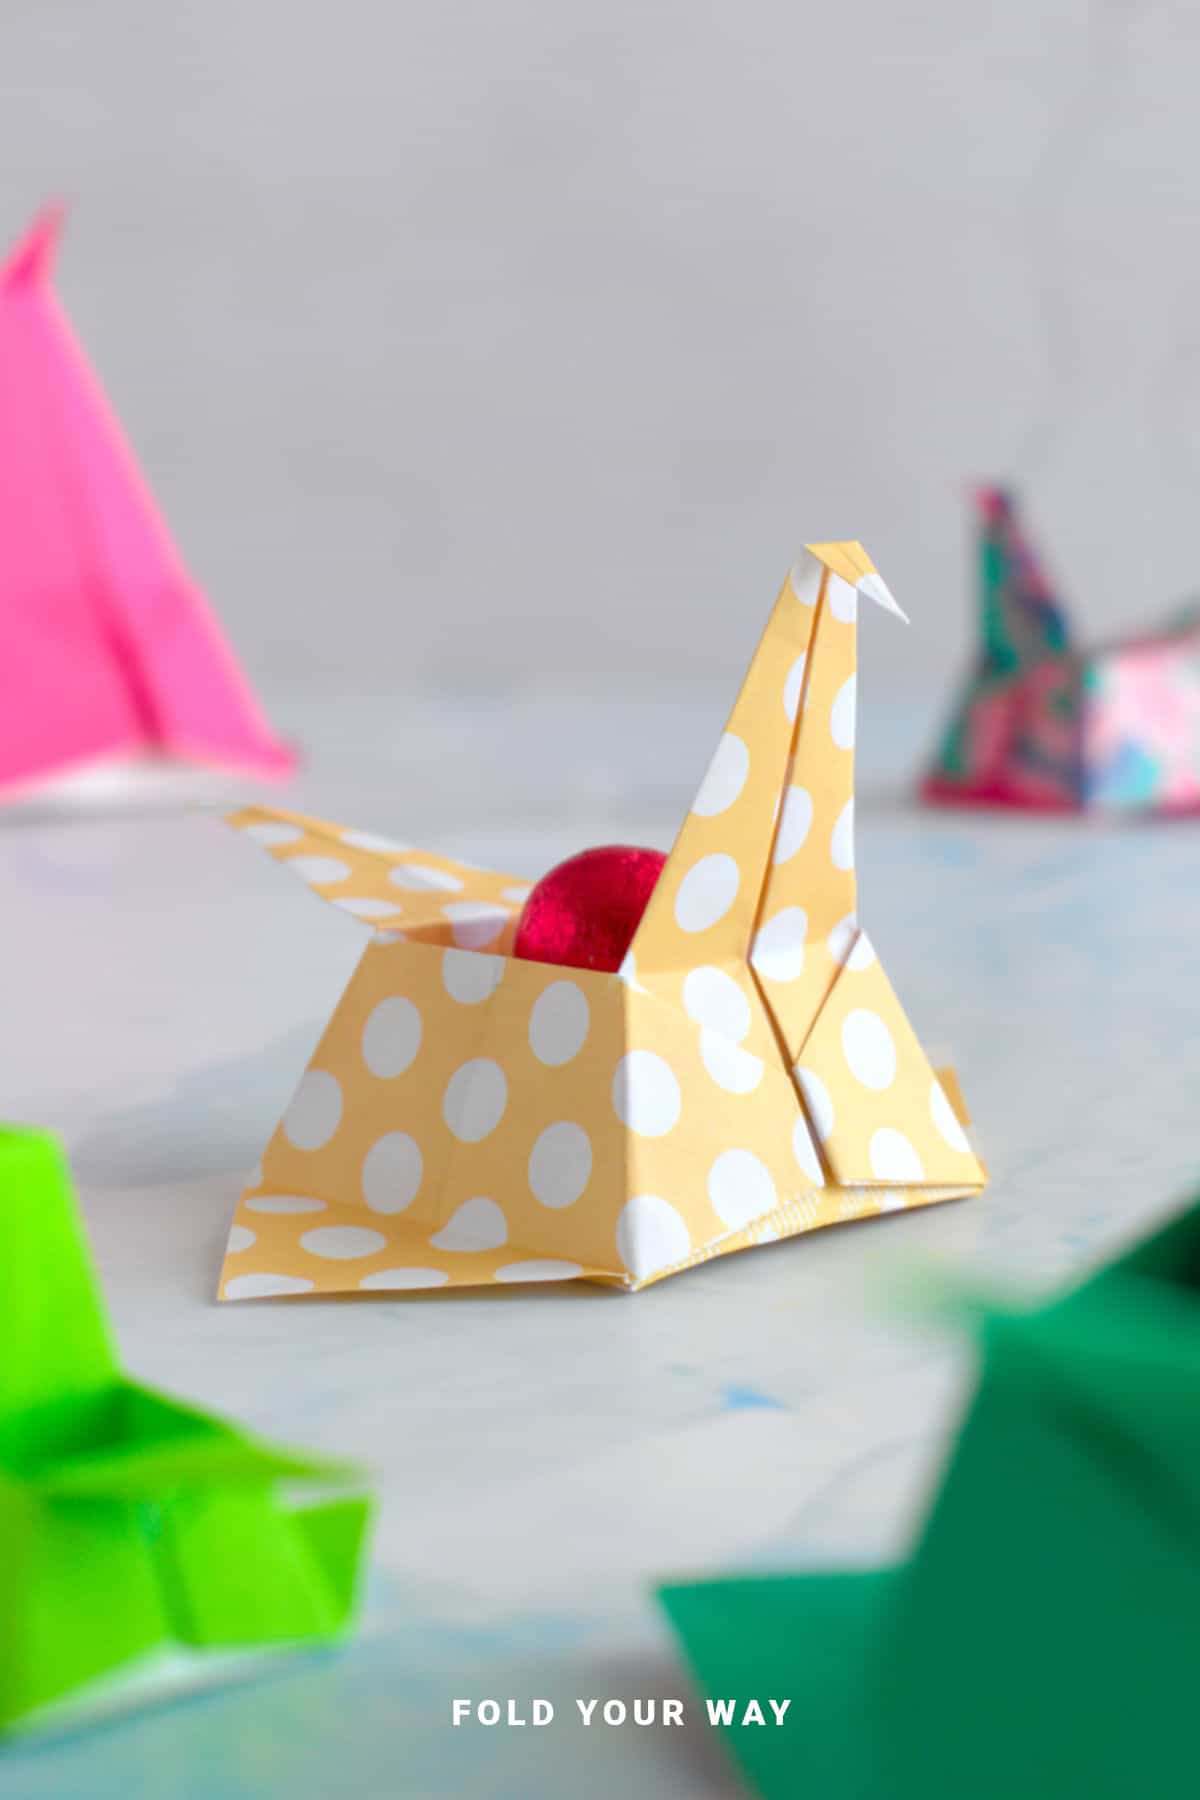
- Mini versions – great for confetti, small jewelry, or tea lights (battery-operated only)
- Use as place settings – write names on the wings or tuck a small note inside
- String for hanging – thread a loop through the center to hang it as a decoration or mobile
FAQ
Yes, it’s best for small, light items like jewelry, sweets, or notes.
It’s a variation that incorporates the traditional crane into a usable box base.
Stick to thinner paper—thick paper makes the folds harder and may prevent the box from sitting evenly. We only recommend thick paper for larger paper crane boxes.
Other Paper Crafts You Might Like To Try:
Stay Connected
Made this pattern? Let us know how it went in the comments below!
Pin this post - Pin now to take your paper crafting skills to the next level.
Share on Instagram or Facebook - Capture the beauty of your finished paper craft project and share it on Instagram or Facebook! Tag us @foldyourway so we can see your work!
Other Patterns You Might Like To Try:
Looking for other easy patterns like this? Try these:


Comments
No Comments