
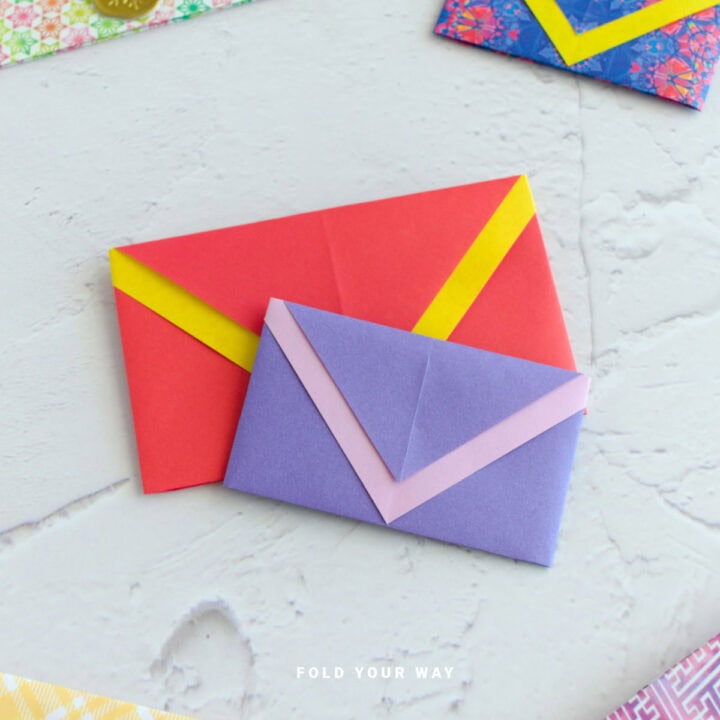
This DIY envelope with a fan-style flap is a fun and charming way to package gift cards, small notes, or little surprises.
Simple folds, a hint of tape (or glue) needed, and easy to personalize!
Use this for wedding invitations, party invites, or thank-you notes when you want something a little more decorative and memorable.
Jump to:
If you're after a unique and handmade way to present a small gift or note, this DIY envelope with fan is a perfect choice.
Using just a single sheet of paper, a bit of glue, and a few easy folds, this envelope comes together in no time—and looks far more intricate than it actually is!
The standout feature is the accordion-style fan flap, which adds a decorative and slightly dramatic touch to a simple design.
It’s a lovely way to hold gift cards, small letters, stickers, or even thin keepsakes like photos or pressed flowers.
Because it's made from just one sheet of paper—no glue, no tape—it’s a great last-minute craft for when you need something special and don’t want to run to the store.
You can make these envelopes for all kinds of occasions.
Tuck them into birthday gifts, use them for teacher thank-yous, wedding favors, or Mother’s Day notes.
They’re also perfect for Christmas stocking fillers, Easter treats, or Valentine’s Day surprises. Change the paper and you're ready for any event.
These DIY envelopes can be made with leftover wrapping paper or just ordinary paper. It’s entirely up to you.
Let’s get folding!
Why You'll Love This Pattern
- Simple but eye-catching – that fan detail is surprisingly easy but really stands out.
- Perfect for small gifts – fits gift cards, notes, and flat surprises.
- Great for any occasion – birthdays, holidays, weddings, and more.
- Customizable – switch up the paper to match your theme or recipient.
Skill Level
★☆☆☆☆ (Very Easy)
Materials Needed
- 1 sheet of lightweight paper. You could use origami paper, lightweight cardstock, colored copy paper, Kraft paper, or even leftover wrapping paper.
Recommended paper size: 7 inches x 13 inches (17.5 cm x 35 cm). Perfect size for gift cards, little notes, etc. Makes an envelope that is about 5.5 inches x 3 inches (14.5 cm x 7.5 cm).
Instructions
For this DIY envelope with fan you could use any lightweight paper you like. For example, you could use colored copy paper, lightweight cardstock, Kraft paper, or even leftover wrapping paper.
Recommended paper size: 7 inches x 13 inches (17.5 cm x 35 cm).
For this tutorial, we will be using leftover wrapping paper.
Step 1: Start with the color you want your envelope to be facing down. Arrange your paper to sit vertically.
Step 2: Fold the bottom edge up by about 0.40 inches (1 cm).
Step 3: Fold both the left and right edges in about 0.40 inches (1 cm).
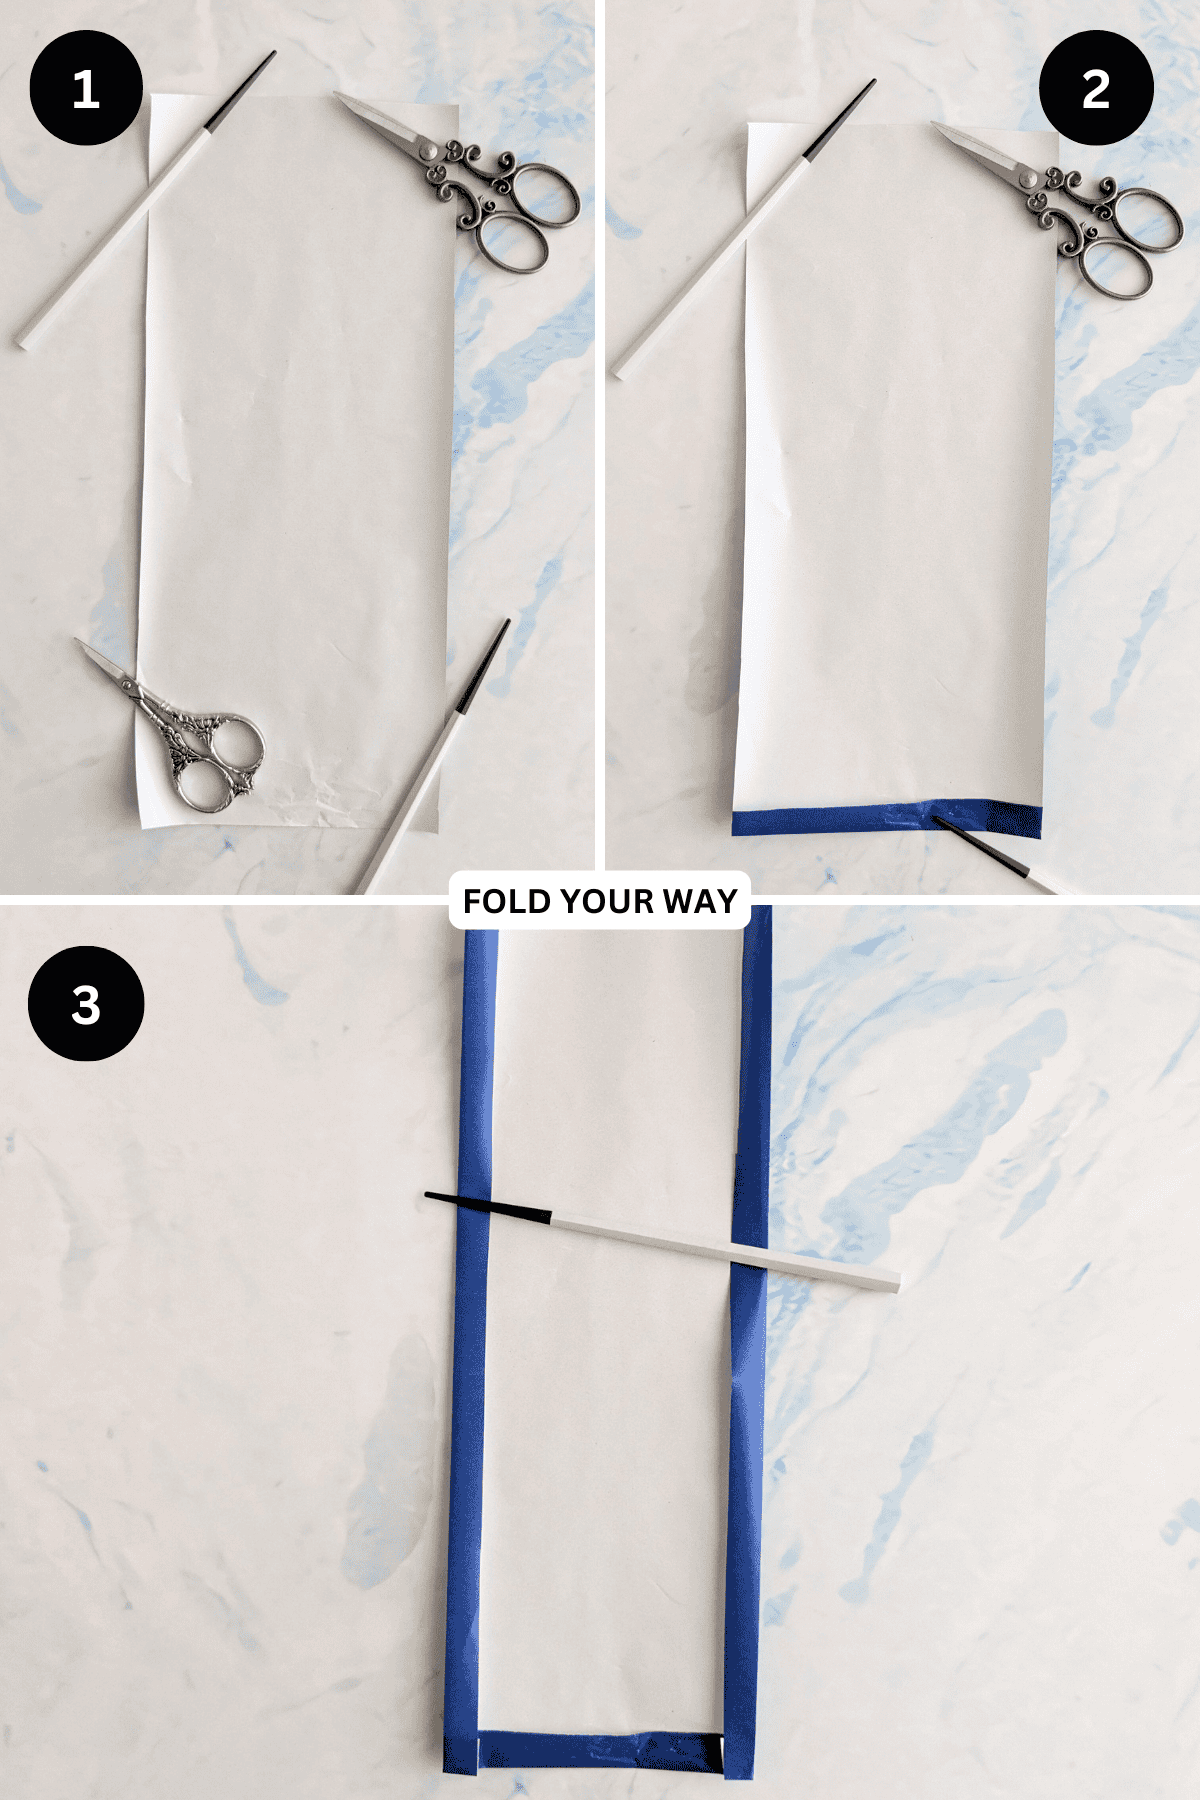
Step 4: Fold the bottom edge up once more along the line shown.
Step 5: Unfold previous step and then apply some glue to the left and right folded edges and then refold.

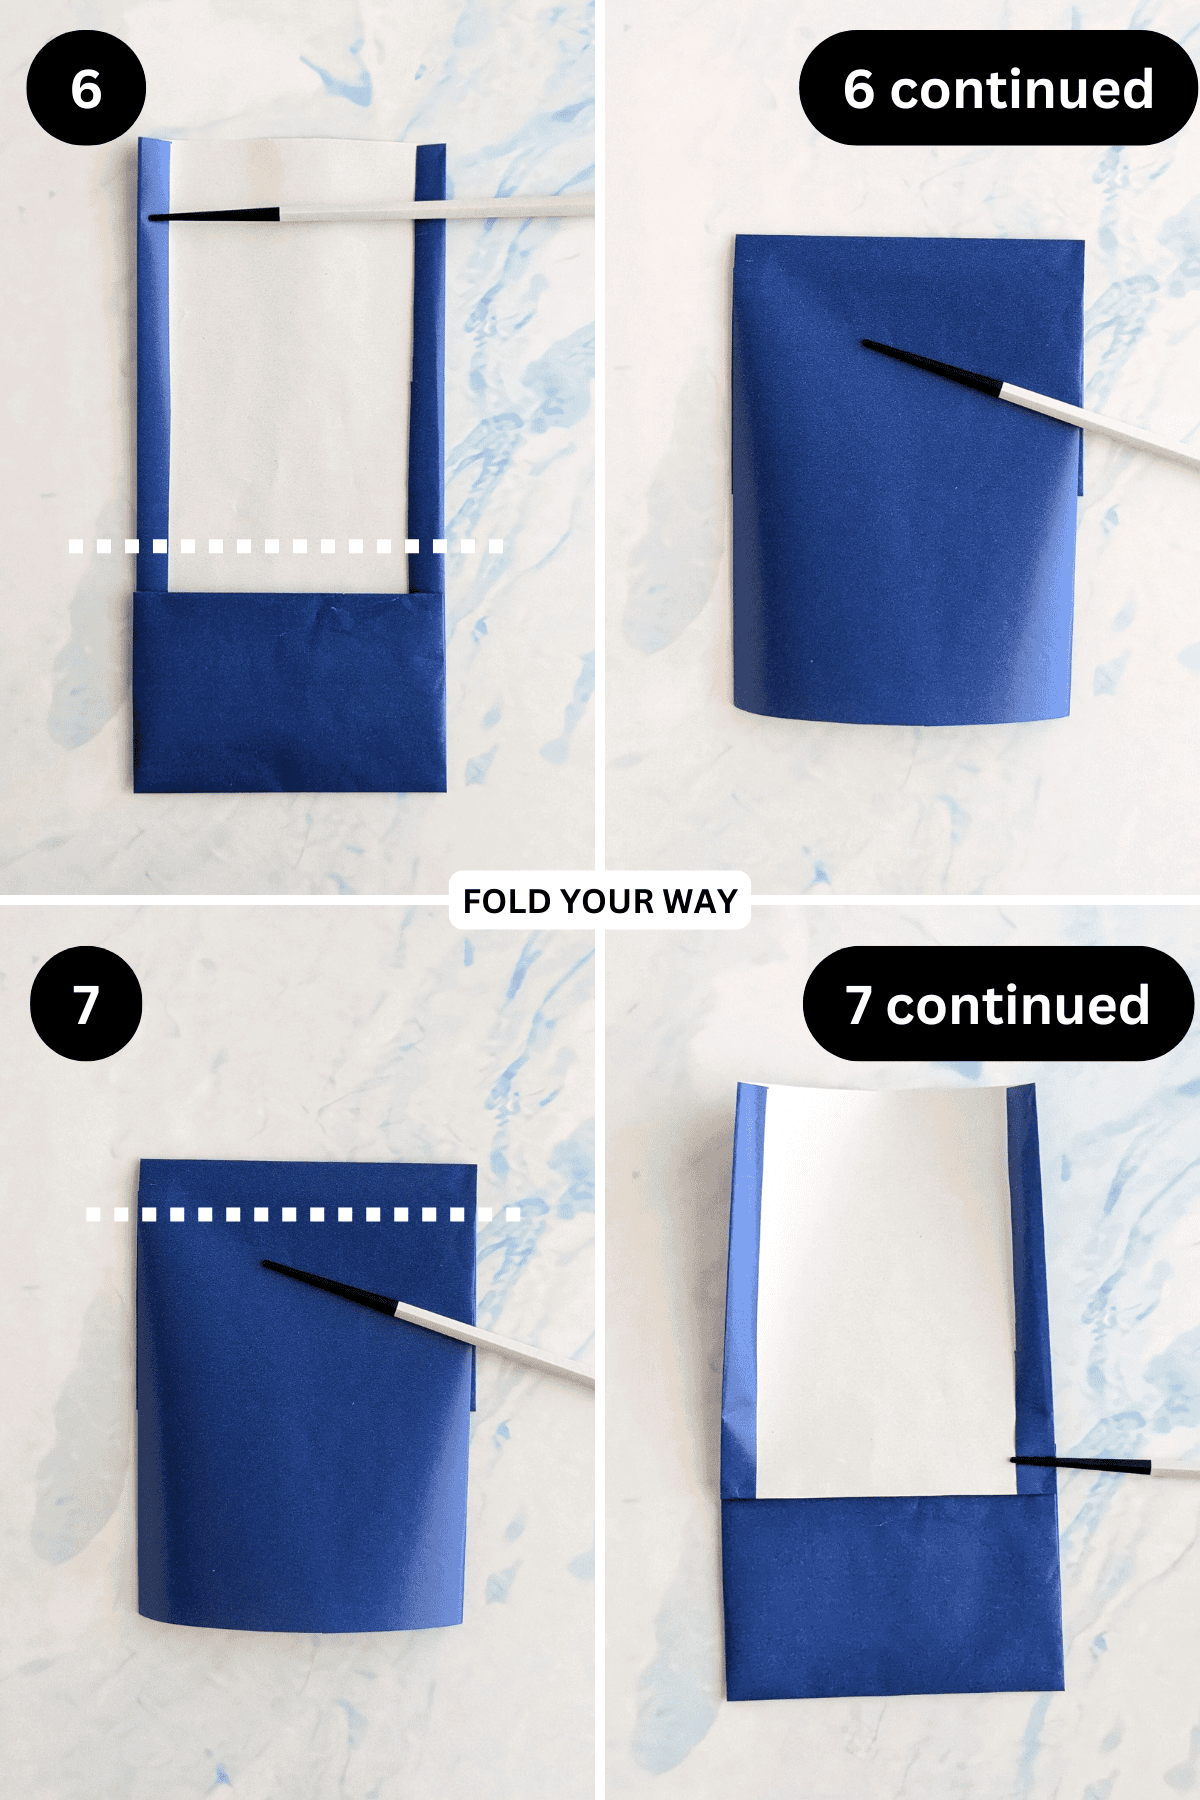
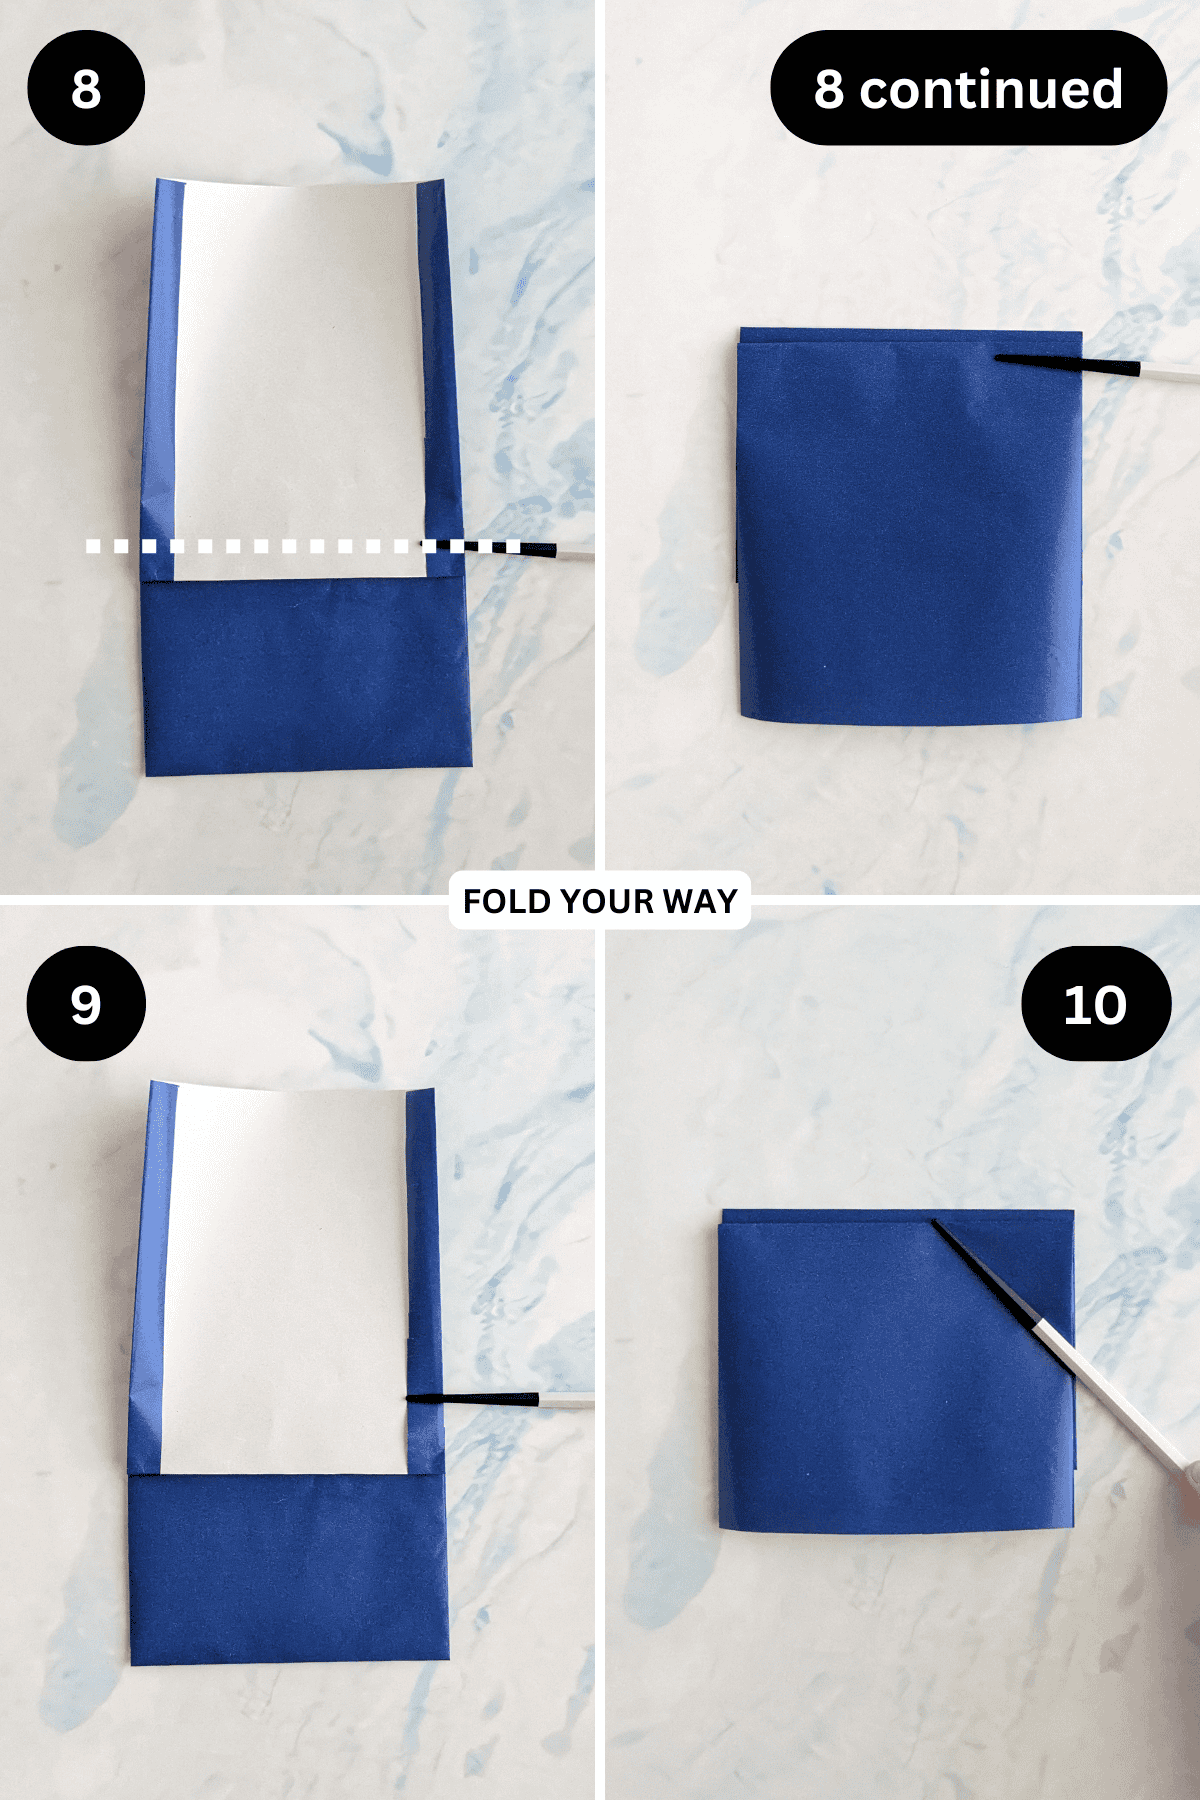
Step 6: Fold the top edge down along the line shown.
Step 7: Fold the same flap up again along the line shown.
✨ You're almost there! ✨
To unlock the final steps and complete your pattern, create a free account with Grow.me. below.
Make sure you tick the box to subscribe to our newsletter and stay up to date with the latest patterns, tips, and more!
Once you're signed up, you'll get instant access to finish your project and enjoy exclusive content in the future.
Already signed up? Hit the button below and select ‘Switch to Log In’ to pick up where you left off and finish your project!
Step 8: We will now begin to make the fan of your envelope. Fold the same flap down once again along the line shown.
Step 9: Fold the same flap back up, matching its edge with the creases below.
Step 10: Fold the same flap down again, matching its edge with the creases below.
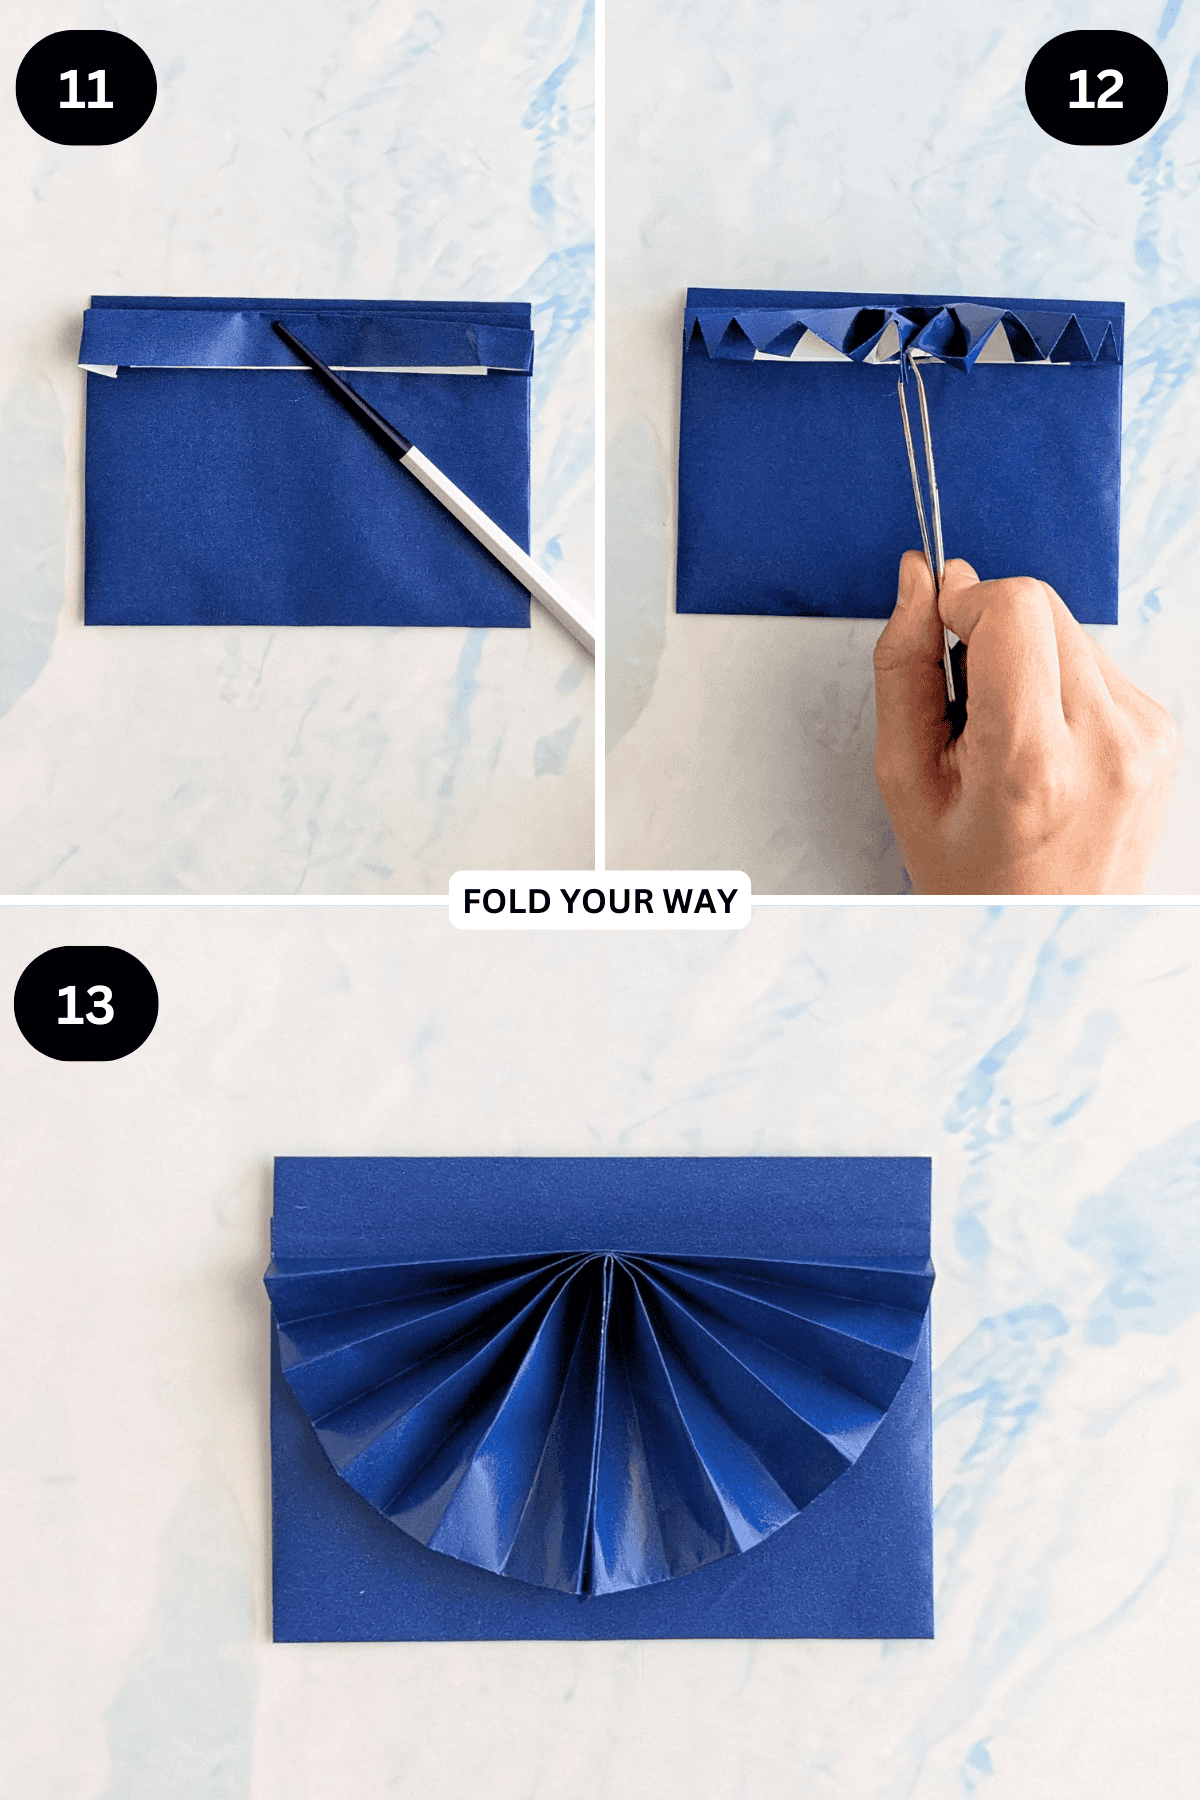
Step 11: Repeat steps 9 and 10 until you have reached the end of your flap.
Step 12: Take the left edge and right edge of the top folds and bring them together as shown, matching the edges. Crease in the middle where they meet.
Step 13: Release the folds. Apply some glue or double sided tape to the top of the folds and then bring them together again to attach them together. Once the glue is dry, place the folds down.
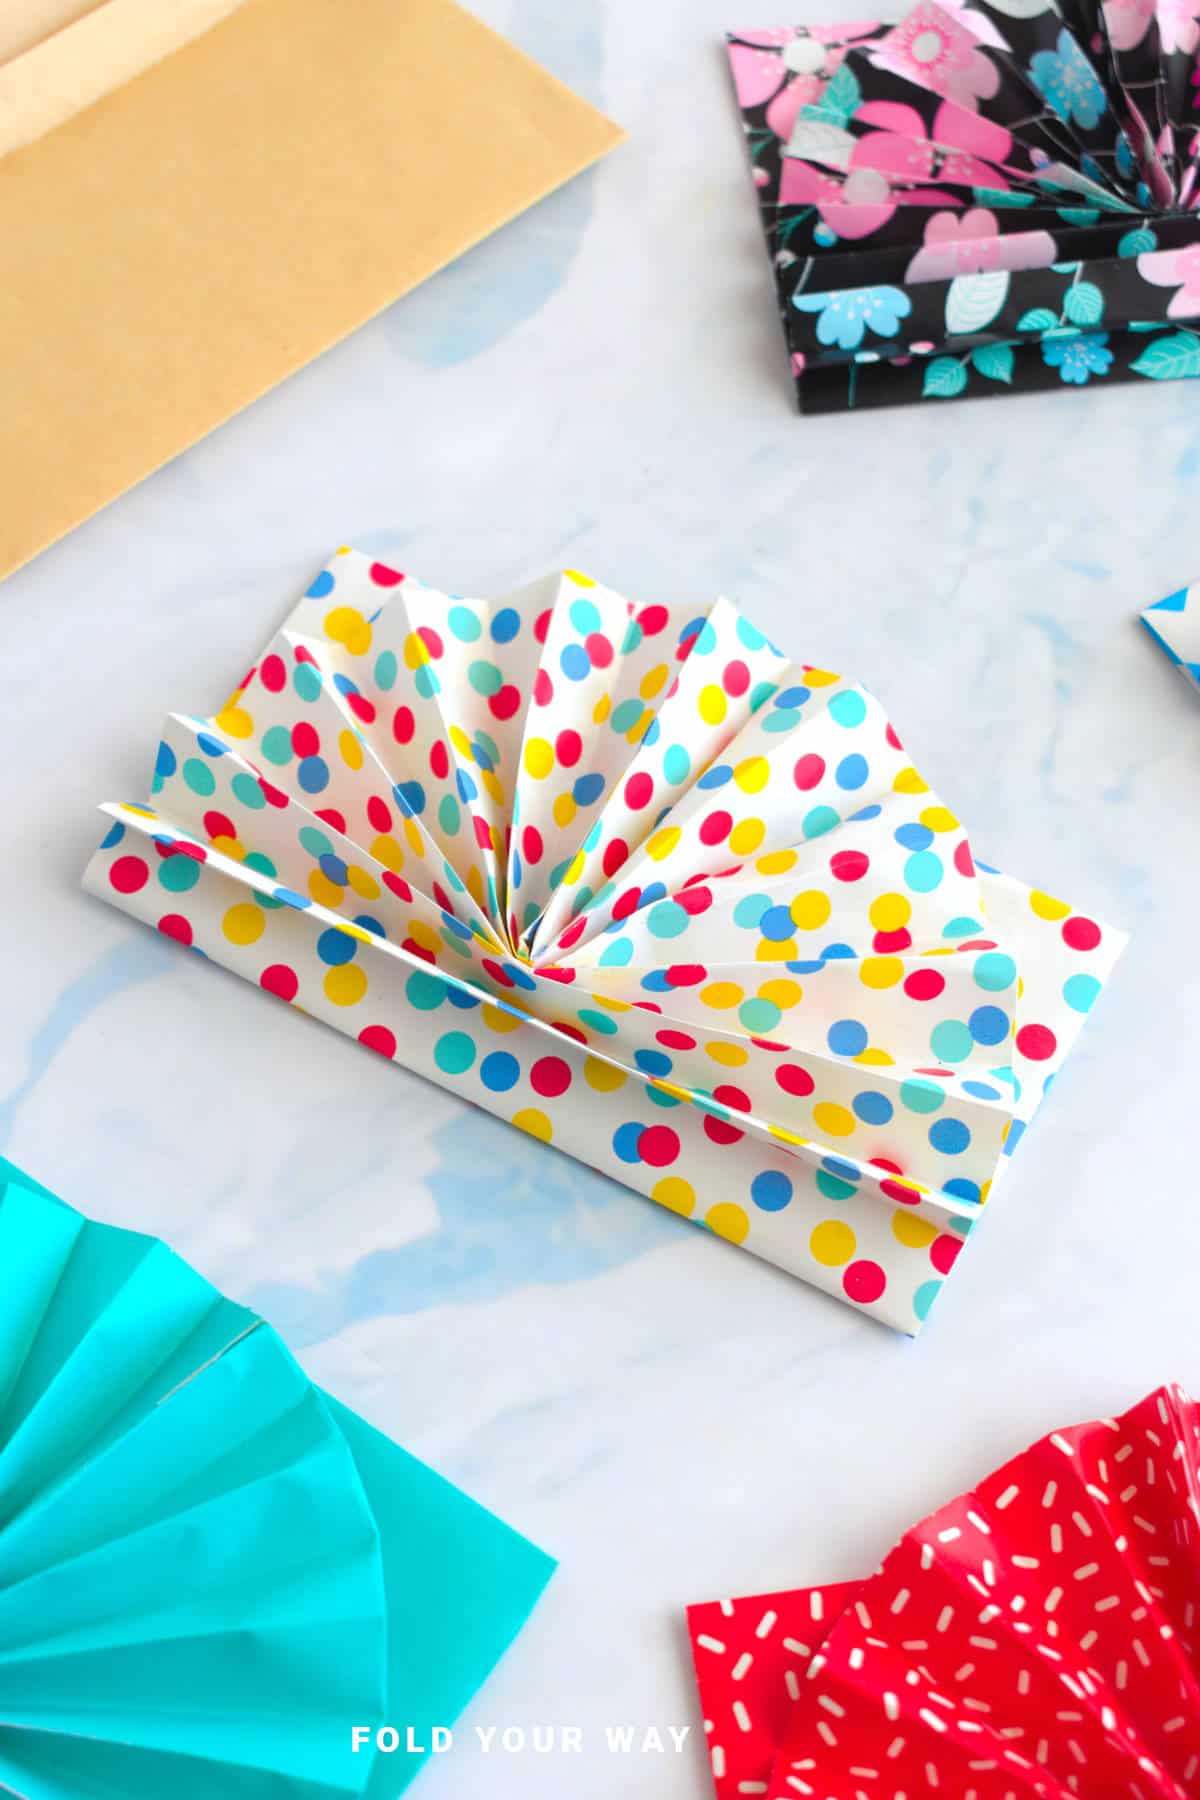
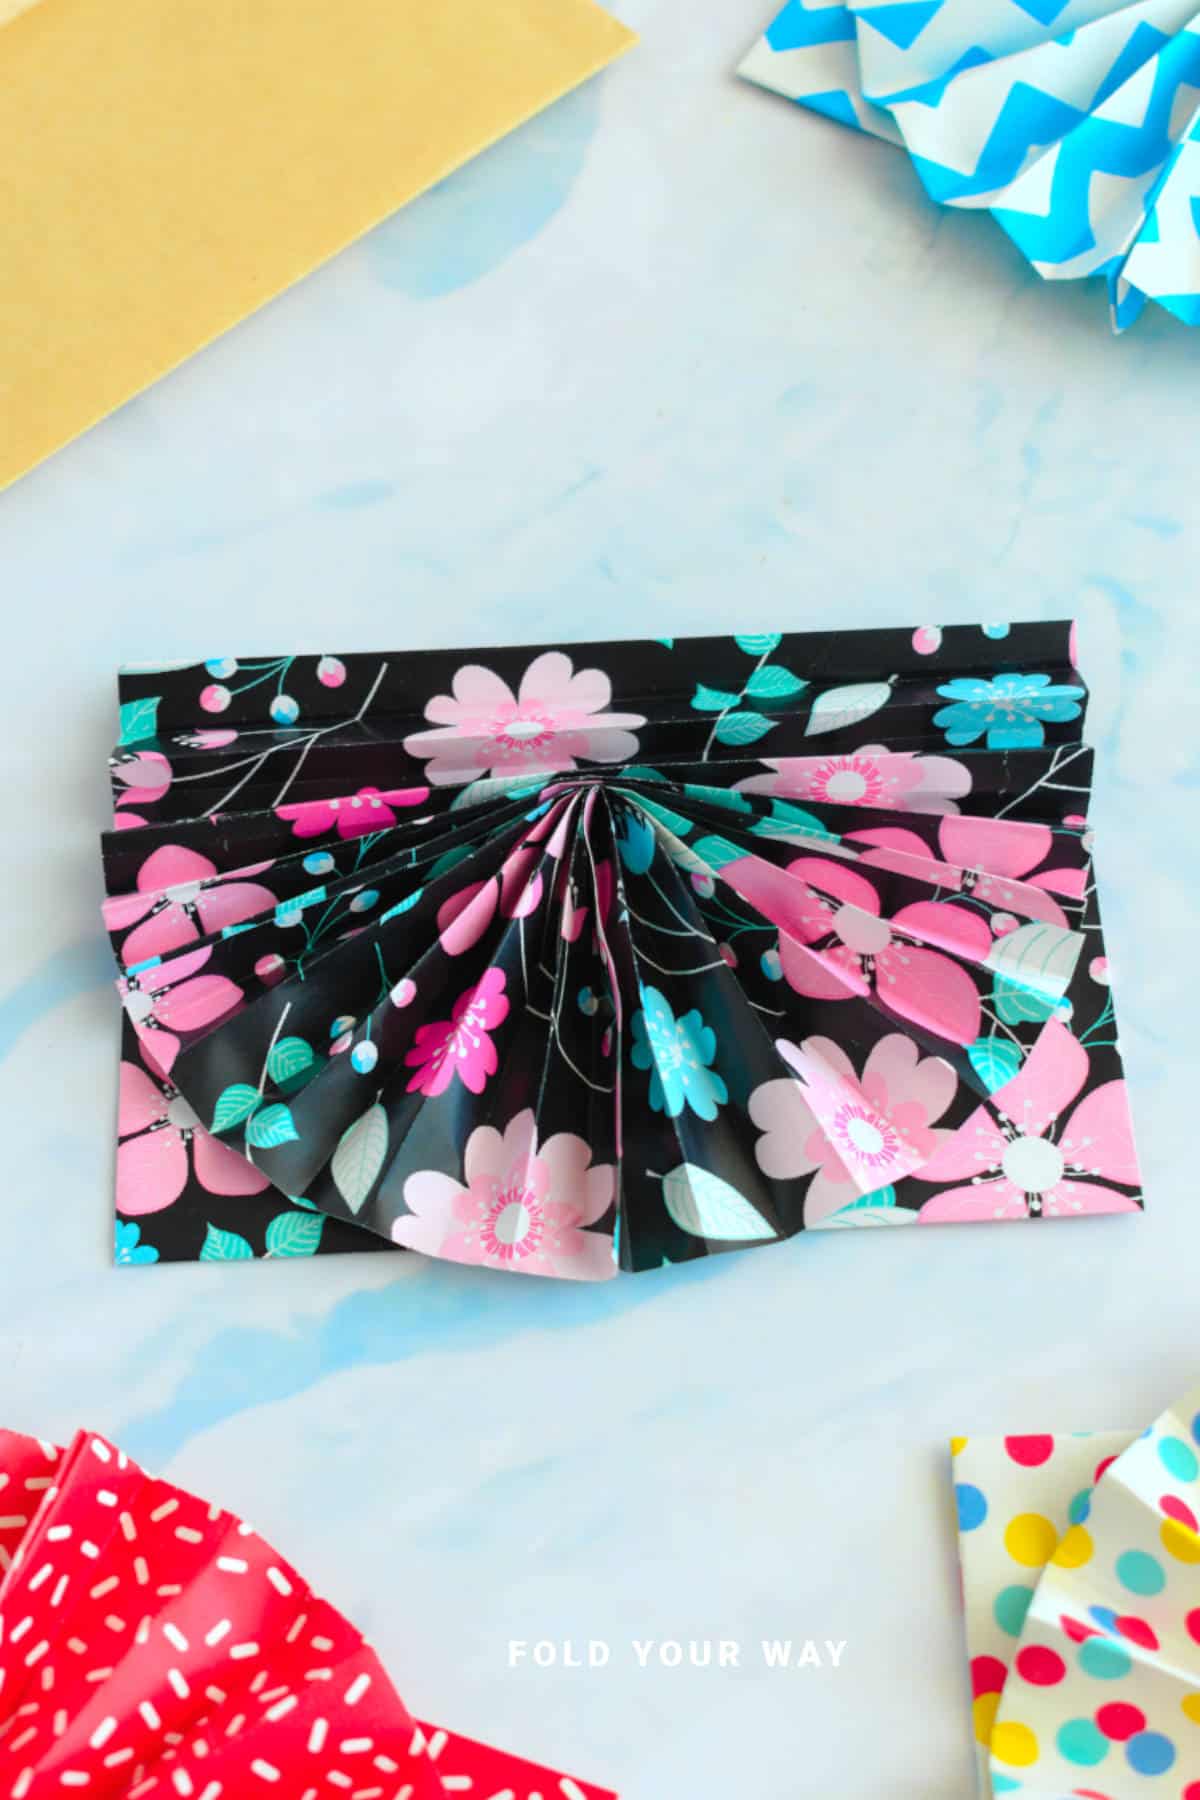
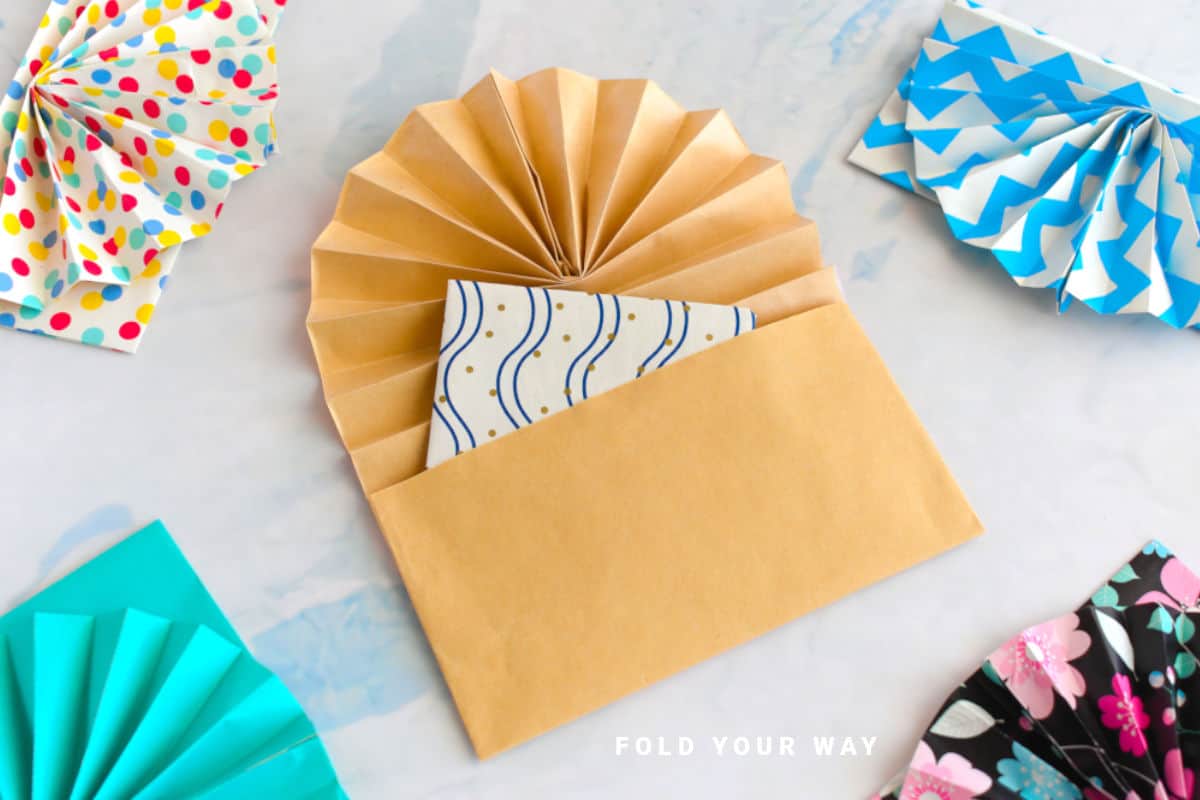
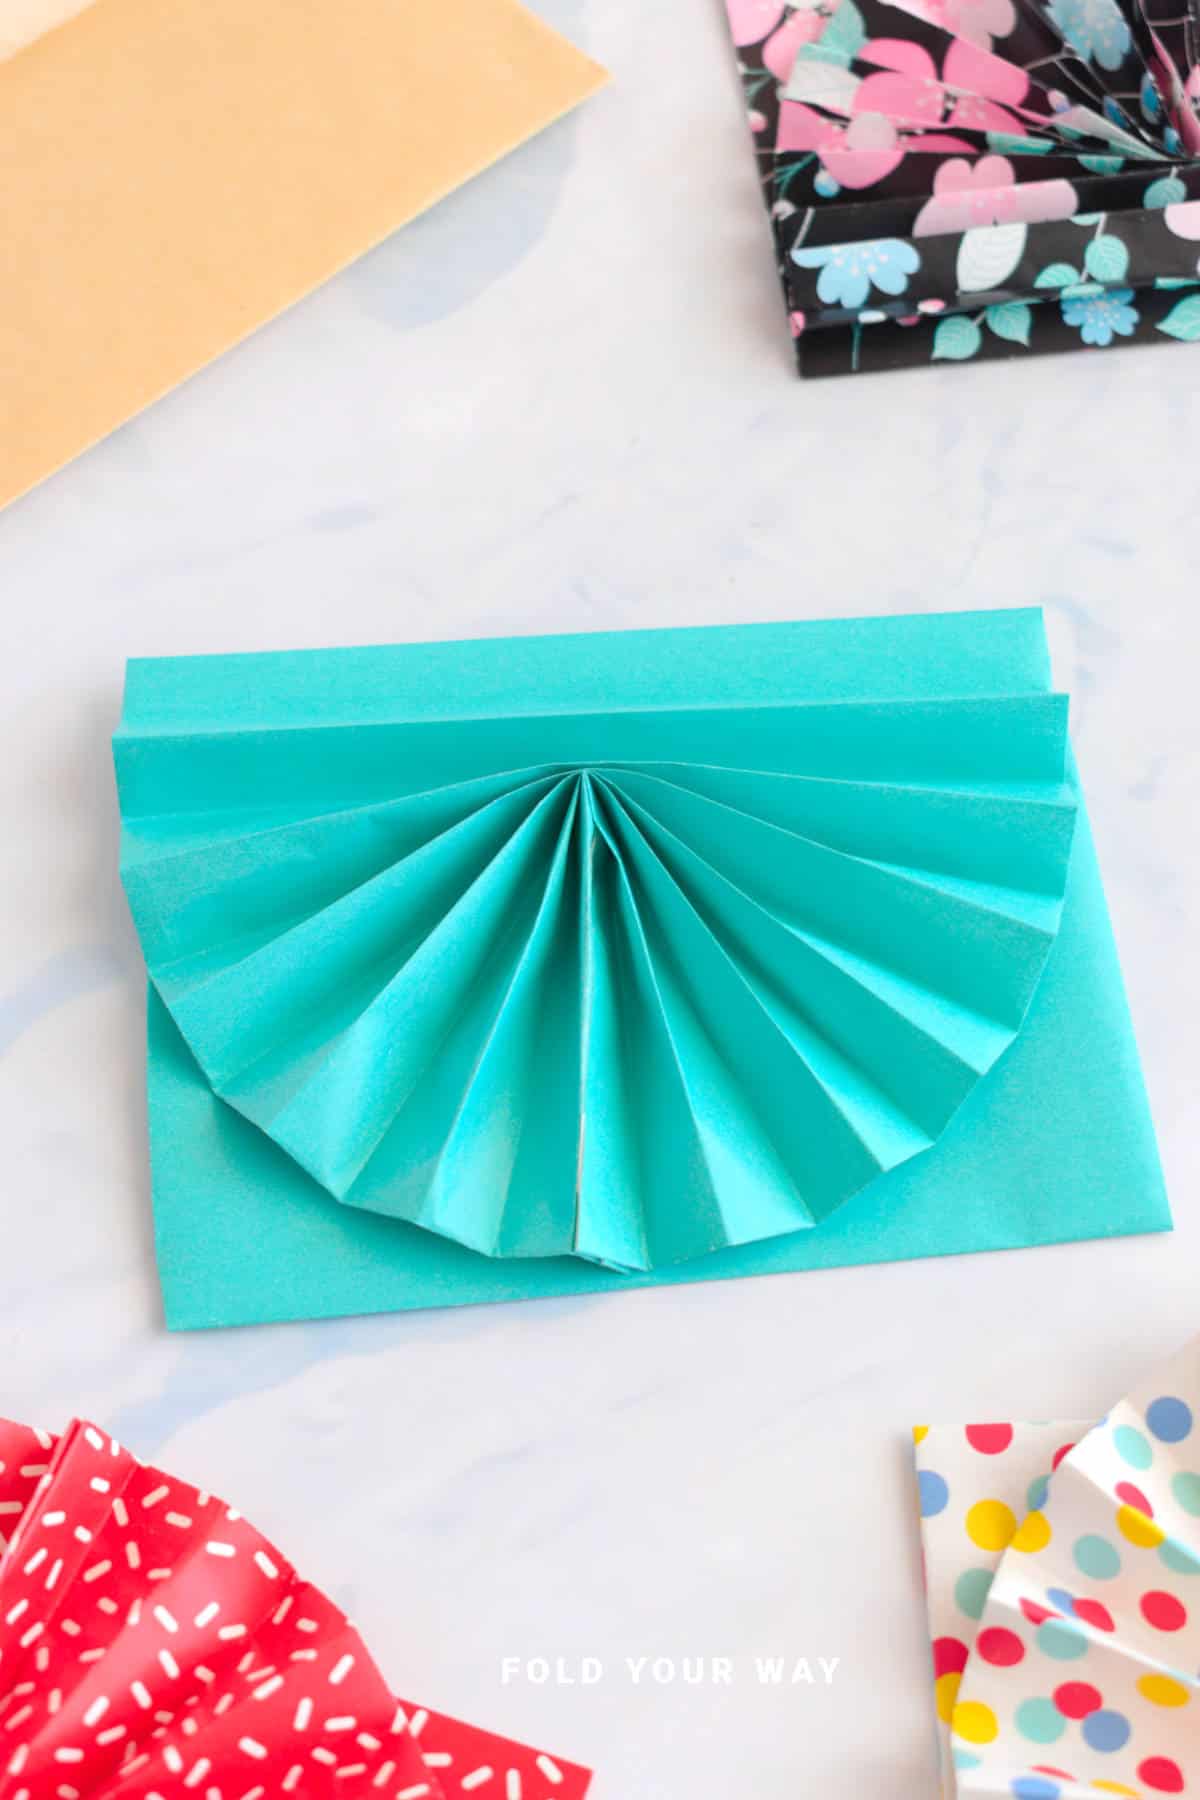
Completed envelope with fan.
Tips For Success
- Use thinner paper for easier accordion folds—origami or standard printer paper is perfect.
- To close your envelope, use a piece of double sided tape.
Color, Paper Ideas, and Variations
- Pastel or floral prints – perfect for Mother’s Day, Easter, or spring gifts.
- Kraft paper or handmade paper – gives a lovely natural look, great for rustic or neutral-themed events.
- Metallic or glitter paper – for a festive touch, ideal for Christmas or New Year’s gifts.
- Themed prints (hearts, stars, snowflakes, etc.) – match your envelope to the occasion.
- Add-on ideas: Stickers, handwritten messages, or even tiny dried flowers tucked inside make the envelope feel extra thoughtful.
Other Paper Crafts You Might Like To Try:
Helpful Tips and Common Mistakes For Paper Crafts
Paper crafting and origami can be hard sometimes. Which is why we've made this printable PDF just for you.
It outlines helpful tips so that you can successfully complete your craft, and some of the most common mistakes people come across.
You can download the helpful tips and common mistakes for paper crafts printable PDF here.
Stay Connected
Made this pattern? Let us know how it went in the comments below!
Pin this post - Pin now to take your paper crafting skills to the next level.
Share on Instagram or Facebook - Capture the beauty of your finished paper craft project and share it on Instagram or Facebook! Tag us @foldyourway so we can see your work!
Other Patterns You Might Like To Try:
Looking for other easy patterns like this? Try these:


Comments
No Comments