
Need a clever and practical paper craft?
This DIY origami toothpick holder is an easy folding project that’s both functional and fun.
With step by step instructions and no need for glue or scissors, it’s a great solution for picnics, parties, or just tidy drawer organization.
Whether you're a beginner looking for easy origami ideas or just want a simple and beautiful way to store toothpicks, this quick tutorial has you covered.
Jump to:
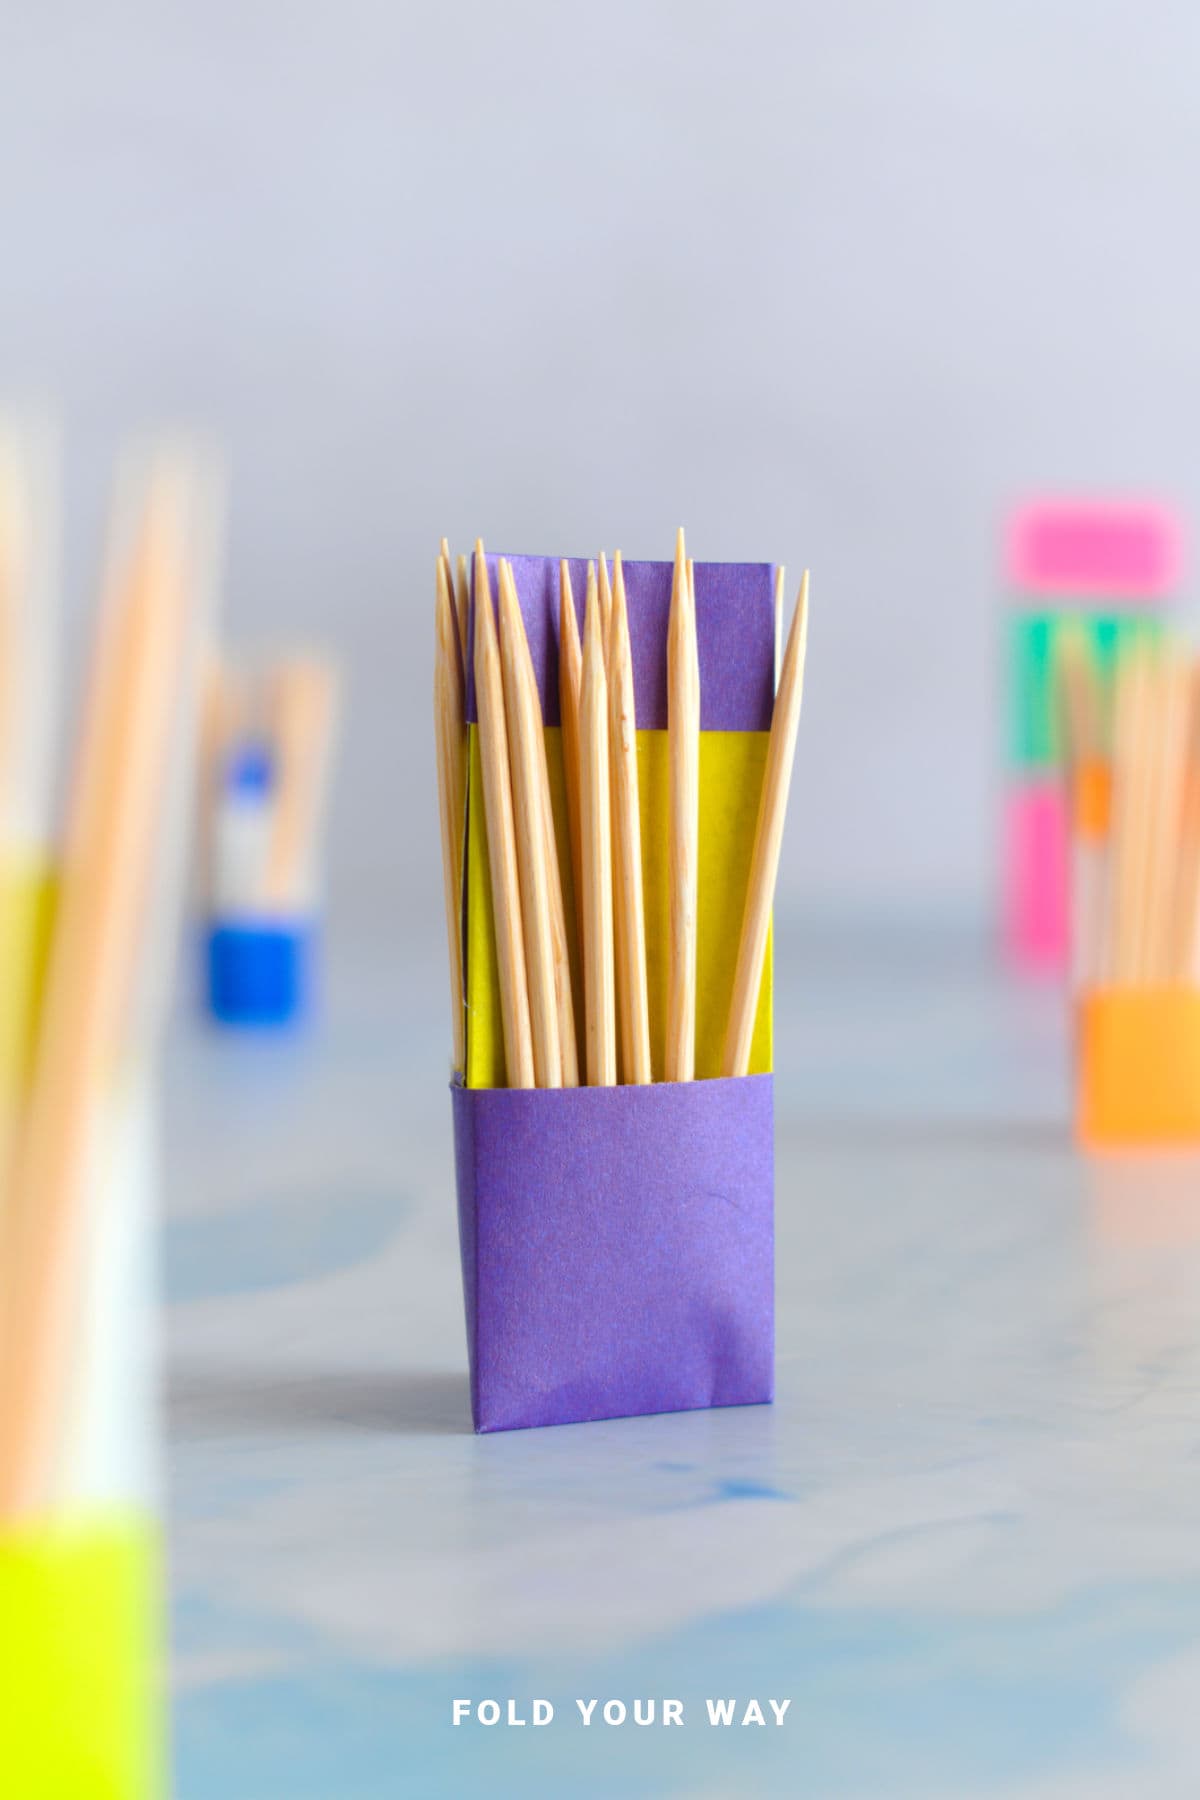
Sometimes the best DIY projects are the ones that combine simplicity with actual usefulness.
That’s exactly what you get with this paper toothpick holder—a quick origami design that doesn’t require glue, scissors, or anything beyond a square sheet of paper.
It’s neat, compact, and just clever enough to make you want to fold a few more for every corner of your kitchen or picnic basket.
At first glance, a toothpick holder might not seem like the most exciting paper craft. But once you’ve folded this one, you’ll see how satisfying it is to create something so functional from a single piece of paper.
It has a neat little pocket design that holds toothpicks securely, while still allowing easy access when you need one.
There’s no complicated folding here—just a few crisp lines and a couple of smart tucks.
This is an especially great origami project for beginners. If you're new to paper folding, this is the kind of practical, confidence-building tutorial that shows you how beautiful and useful paper craft can be.
And because there are no cuts or adhesives involved, it’s also ideal for classrooms, travel, or impromptu projects where tools aren't available.
Beyond toothpicks, you can also use this little origami container for other small items—think bobby pins, mints, or even paper clips.
Fold it in pretty patterned paper and use it as a tabletop accent at parties, especially for appetizers or cheese boards.
It also makes a thoughtful, handmade touch for lunchboxes, picnics, or tea setups.
Once you’ve tried this step by step tutorial, you might find yourself making a stack of them. They’re quick, practical, and surprisingly satisfying.
And like most good origami, they prove just how much you can do with a simple square of paper and a few folds.

Why You'll Love This Pattern
- No scissors, no glue—just one piece of paper
- Quick and easy origami idea for beginners
- Practical for parties, or kitchen storage
- Folds flat for easy transport or storage
- Great for organizing small items beyond toothpicks
- Customizable with paper size, color, or pattern
Skill Level
Difficulty: ★☆☆☆☆ (Very Easy)
Materials Needed
- 1 square sheet of paper, e.g. origami paper
| Paper Size | Final Toothpick Holder Size | |
| Small Origami Toothpick Holder | 3 inches x 3 inches (7.5 cm x 7.5 cm) | 2 inches x 0.80 inches (5 cm x 2 cm) |
| Medium Origami Toothpick Holder | 4 inches x 4 inches (10 cm x 10 cm) | 2.5 inches x 1 inch (6.5 cm x 2.5 cm) |
| Large Origami Toothpick Holder | 6 inches x 6 inches (15 cm x 15 cm) | 4 inches x 1.5 inches (9.5 cm x 4 cm) |
Instructions
Step 1: Start with the color you want your toothpick holder to be facing down.
Step 2: Fold the bottom edge up to meet the top edge.
Step 3: Unfold previous step.
Step 4: Fold the left edge to meet the right edge.
Step 5: Unfold previous step.
Step 6: Fold both the top and bottom edges in to meet the middle.

✨ You're almost there! ✨
To unlock the final steps and complete your pattern, create a free account with Grow.me. below.
Make sure you tick the box to subscribe to our newsletter and stay up to date with the latest patterns, tips, and more!
Once you're signed up, you'll get instant access to finish your project and enjoy exclusive content in the future.
Already signed up? Hit the button below and select ‘Switch to Log In’ to pick up where you left off and finish your project!
Step 7: Unfold the top edge.
Step 8: Fold the top edge down again, but this time to meet the 1st horizontal crease from the top (the crease you made in step 6).
Step 9: Flip your paper over from left to right.
Step 10: Fold both the left and right edges in to meet the middle.
Step 11: Fold the paper in half from left to right.
Step 12: Unfold previous step.

Step 13: Insert the left side of the paper into the right.
Step 14: Re-crease along the edges as needed. Completed toothpick holder.

Tips For Success
- Use slightly stiffer paper for a sturdier final result.
- Don’t over-stuff—standard toothpicks fit perfectly without bulging the folds.
- Patterned paper adds a decorative touch, especially for party use.

Color, Paper Ideas, and Variations
- Neutral kraft paper: Great for rustic or picnic-style setups.
- Bold prints: Match the theme of your party, holiday, or kitchen.
- Metallic paper: Adds a sleek, modern look—especially for events or gift baskets.
- Mini versions: Use smaller squares for portable, single-use toothpick holders.
- Washi or origami paper: Lightweight and decorative for casual use.
- Recycled paper: Magazine pages or packaging paper give an eco-friendly vibe.
FAQ
Yes, just cut it into a square. Standard printer paper works well for most sizes and holds shape without tearing.
Yes. As long as it stays dry and clean, you can reuse it several times.
Other Paper Crafts You Might Like To Try:
Stay Connected
Made this pattern? Let us know how it went in the comments below!
Pin this post - Pin now to take your paper crafting skills to the next level.
Share on Instagram or Facebook - Capture the beauty of your finished paper craft project and share it on Instagram or Facebook! Tag us @foldyourway so we can see your work!

Other Patterns You Might Like To Try:
Looking for other easy patterns like this? Try these:


Abbey says
Loved making this!