
This easy origami chicken is a fun and cheerful paper craft perfect for spring, Easter, or just for fun!
All you need is a square piece of paper and some markers to bring your chicken to life.
Jump to:
Looking for a cheerful little project that’s fun, fast, and super easy to make? This easy origami chicken ticks all the boxes.
Made from just one square piece of paper and a few simple folds, it’s a great choice for beginners, kids, or anyone looking for a lighthearted craft.
It’s the kind of project that doesn’t require any special tools—just paper and some markers to decorate your chicken’s face, wings, or feathers.
Whether you’re folding with a group or just want a five-minute distraction, this is the perfect go-to.
This is also one of those crafts that works for pretty much any season.
It’s ideal for Easter displays or springtime activities, but it could just as easily be part of a farm-themed birthday party, a classroom art project, or even a rainy day boredom buster.
You can turn it into a cute little DIY table decoration, string a bunch together as a garland or ornament, or make a whole chicken family to play with or gift. It’s quick, it’s affordable, and it’s full of personality.
This origami tutorial is especially great for those looking for an easy craft idea that requires very little prep.
With so many ways to personalize your chicken, it’s a fun blend of folding and decorating—so let your creativity run wild!
Ready to fold your first chicken?
Grab a square sheet of paper and let’s get started!
Why You'll Love This Pattern
- Looking for a cheerful little project that’s fun, fast, and super easy to make? This easy origami chicken ticks all the boxes. Made from just one square piece of paper and a few simple folds, it’s a great choice for beginners, kids, or anyone looking for a lighthearted craft. It’s the kind of project that doesn’t require any special tools—just paper and some markers to decorate your chicken’s face, wings, or feathers. Whether you’re folding with a group or just want a five-minute distraction, this is the perfect go-to.
- This is also one of those crafts that works for pretty much any season. It’s ideal for Easter displays or springtime activities, but it could just as easily be part of a farm-themed birthday party, a classroom art project, or even a rainy day boredom buster. You can turn it into a cute little DIY table decoration, string a bunch together as a garland or ornament, or make a whole chicken family to play with or gift. It’s quick, it’s affordable, and it’s full of personality.
- This origami tutorial is especially great for those looking for an easy craft idea that requires very little prep. With so many ways to personalize your chicken, it’s a fun blend of folding and decorating—so let your creativity run wild!
- Ready to fold your first chicken? Grab a square sheet of paper and let’s get started!
Skill Level
★☆☆☆☆ (Very Easy)
Materials Needed
- 1 square sheet of origami paper
- Markers to decorate your chicken
Instructions
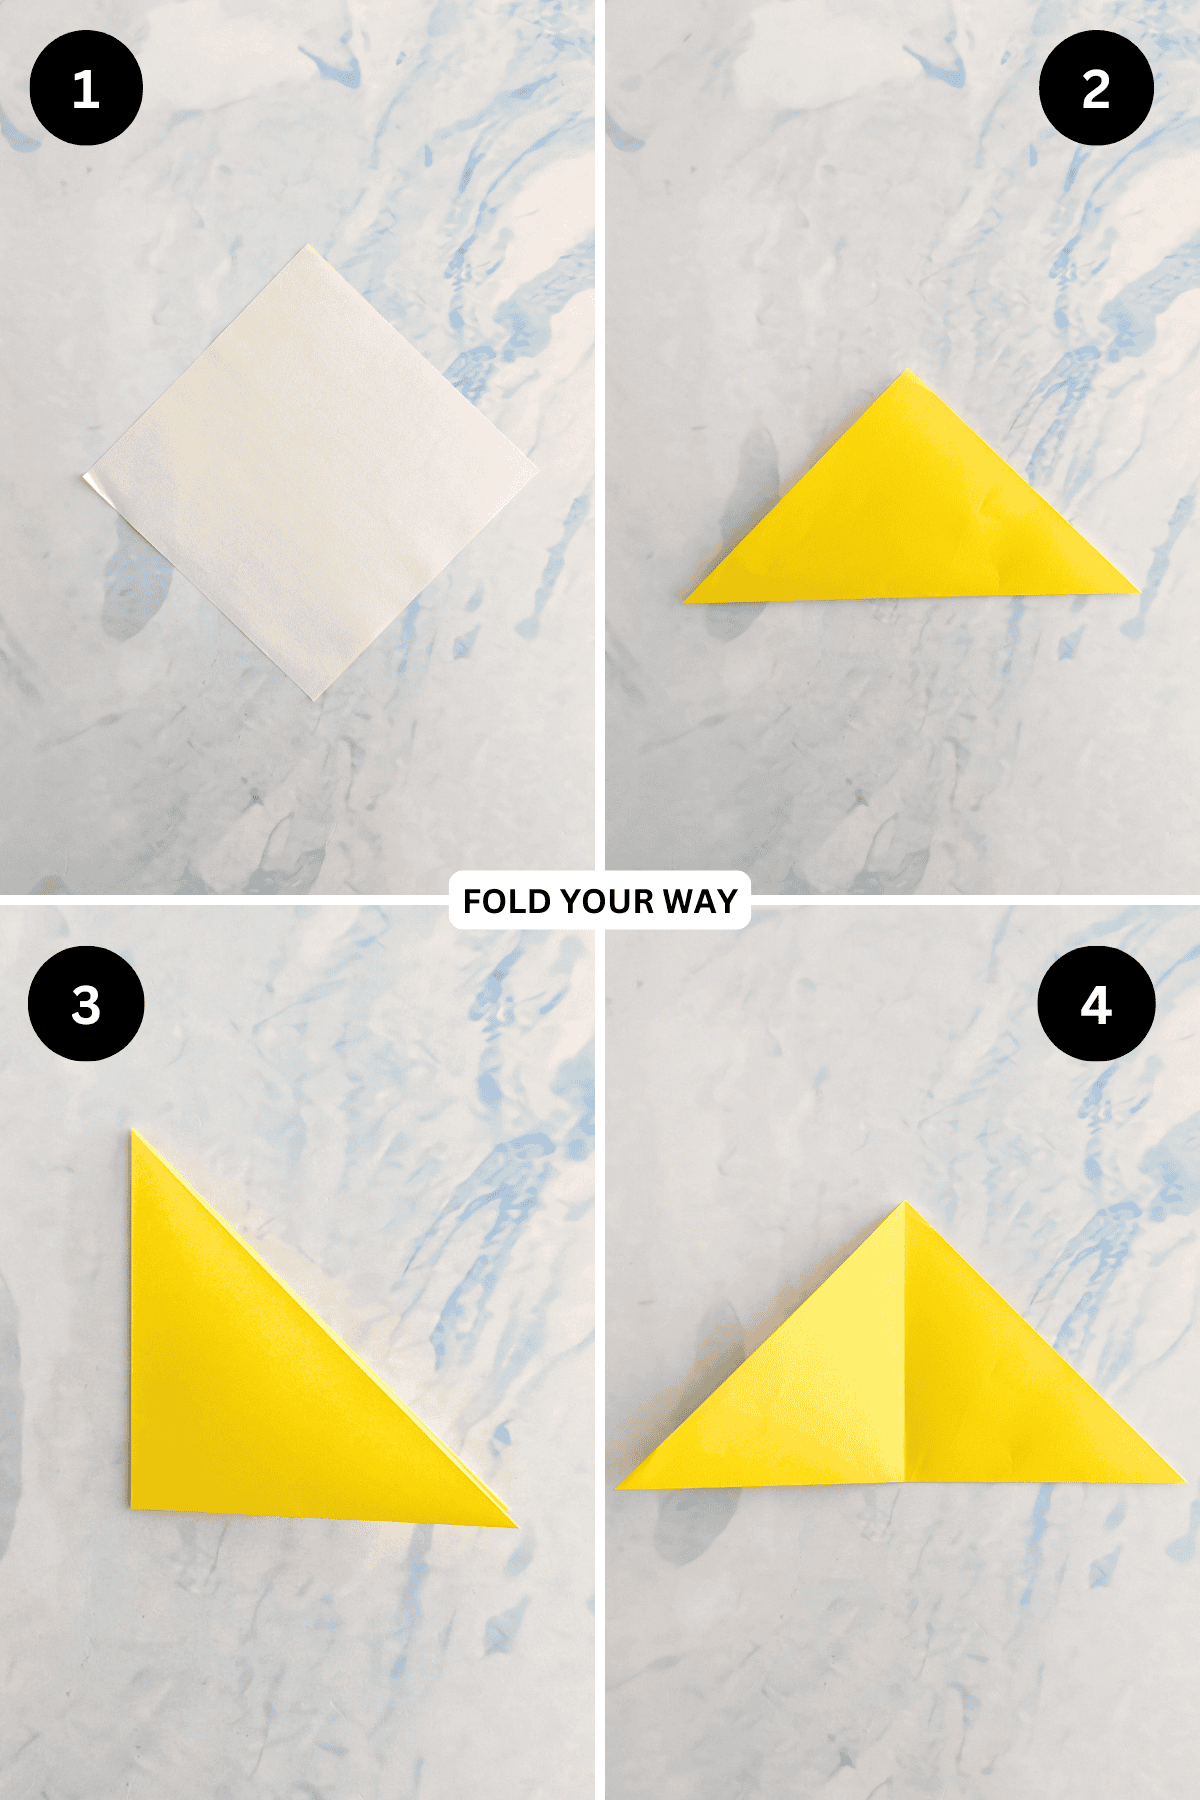
Step 1: Start with the color you want your chicken to be facing down. Arrange your paper to sit like a diamond shape.
Step 2: Fold the bottom point up to meet the top point.
Step 3: Fold the left point to meet the right point.
Step 4: Unfold previous step.
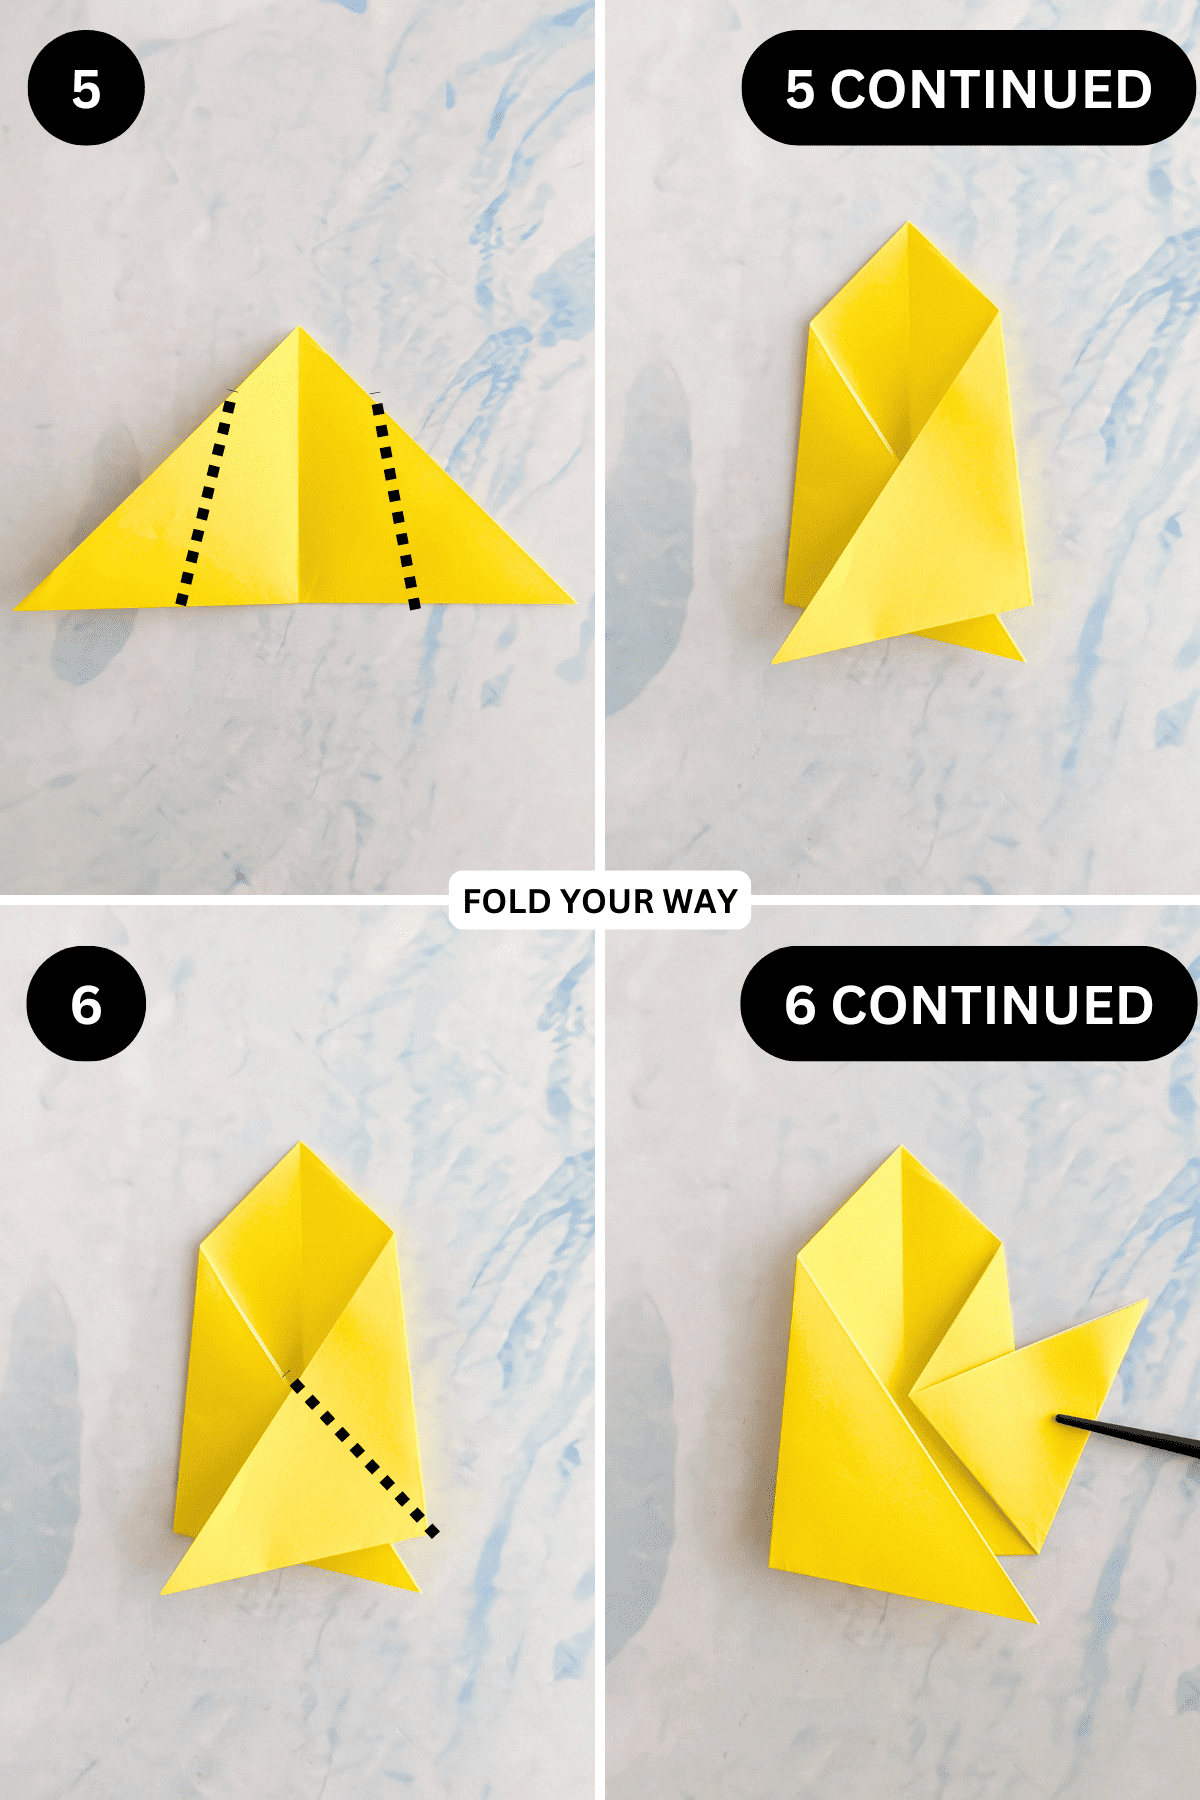
Step 5: Fold the left side of the paper along the line shown. Then, fold the right side of the paper along the other line shown. Keep these folds as symmetrical as possible.
Step 6: Fold the right flap up along the line shown.
✨ You're almost there! ✨
To unlock the final steps and complete your pattern, create a free account with Grow.me. below.
Make sure you tick the box to subscribe to our newsletter and stay up to date with the latest patterns, tips, and more!
Once you're signed up, you'll get instant access to finish your project and enjoy exclusive content in the future.
Already signed up? Hit the button below and select ‘Switch to Log In’ to pick up where you left off and finish your project!
Step 7: Fold the left flap up along the line shown.
Step 8: Fold both the bottom left and right corners inward slightly.
Step 9: Fold the top point down slightly. This will become the chicken’s head.

Step 10: Flip your chicken over from left to right.
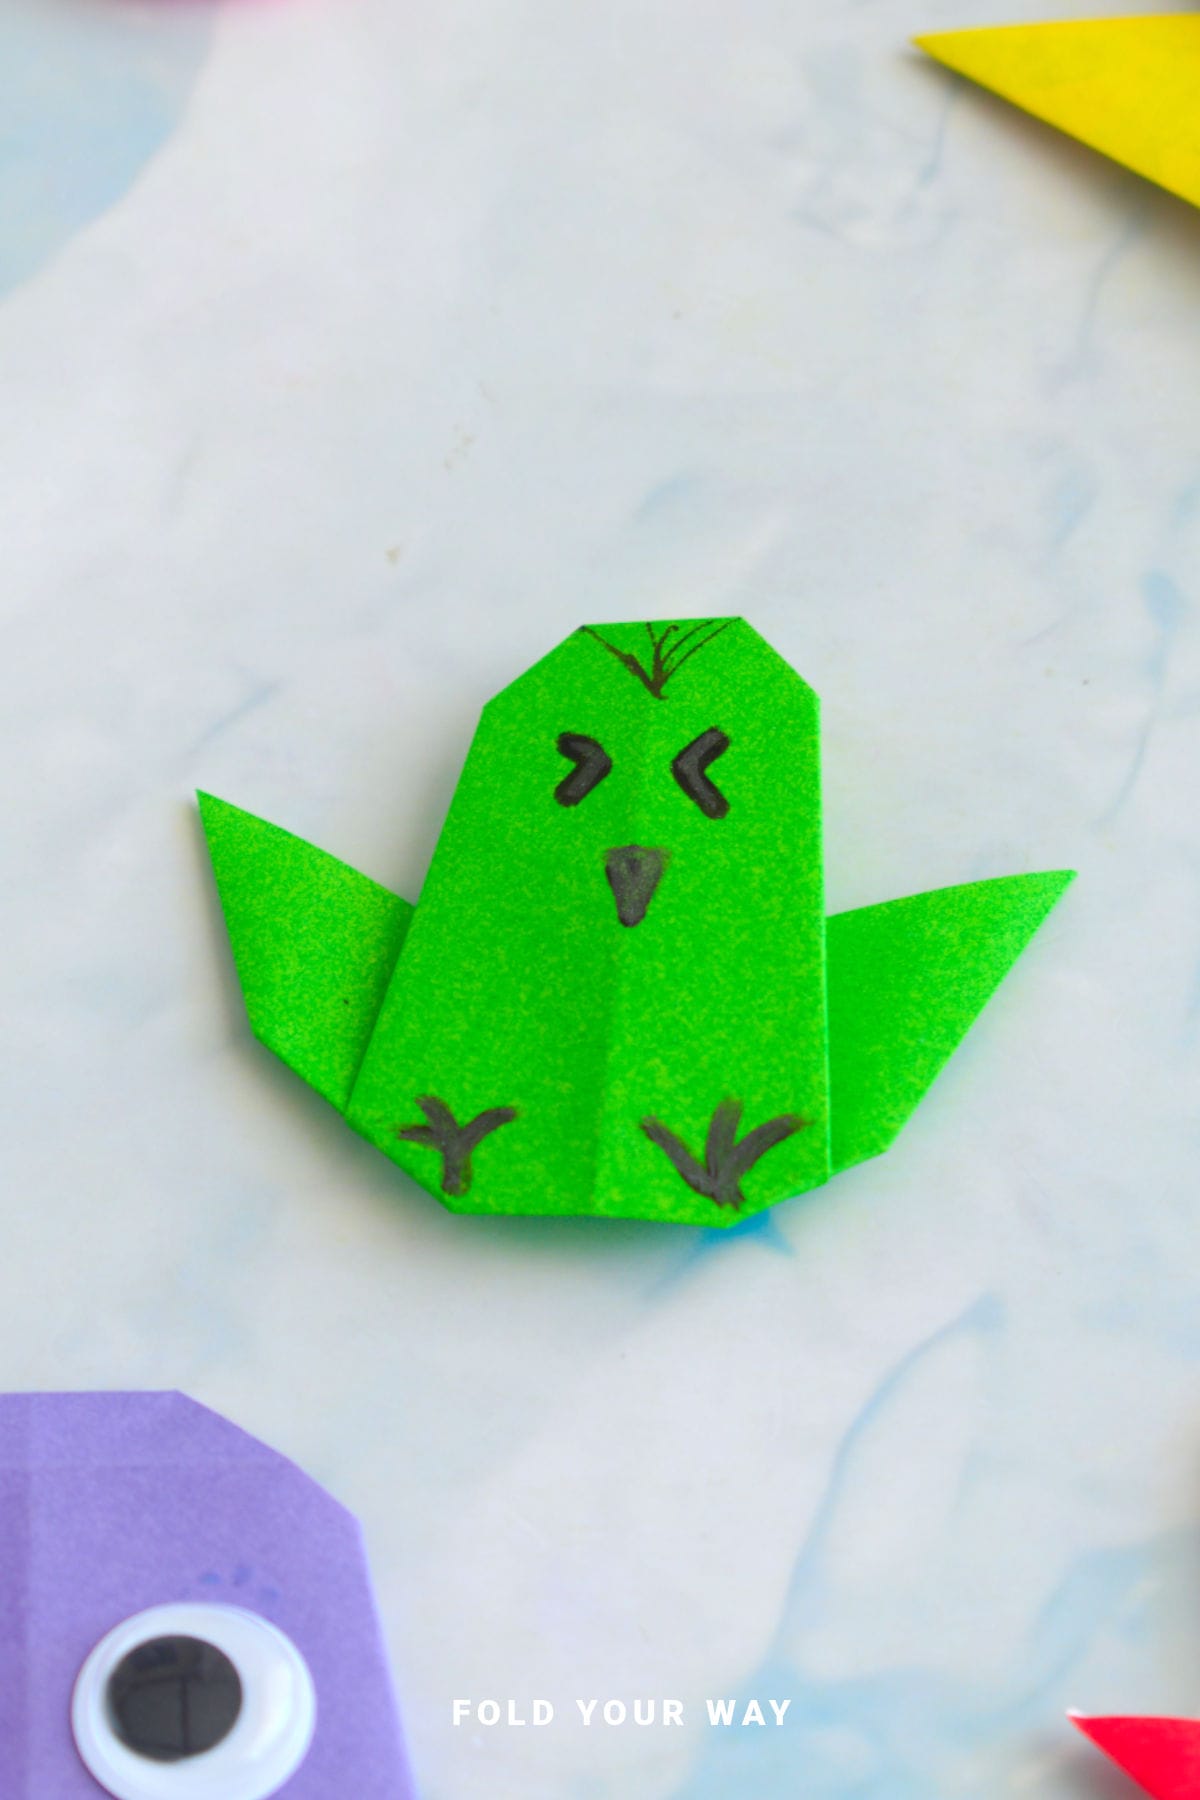
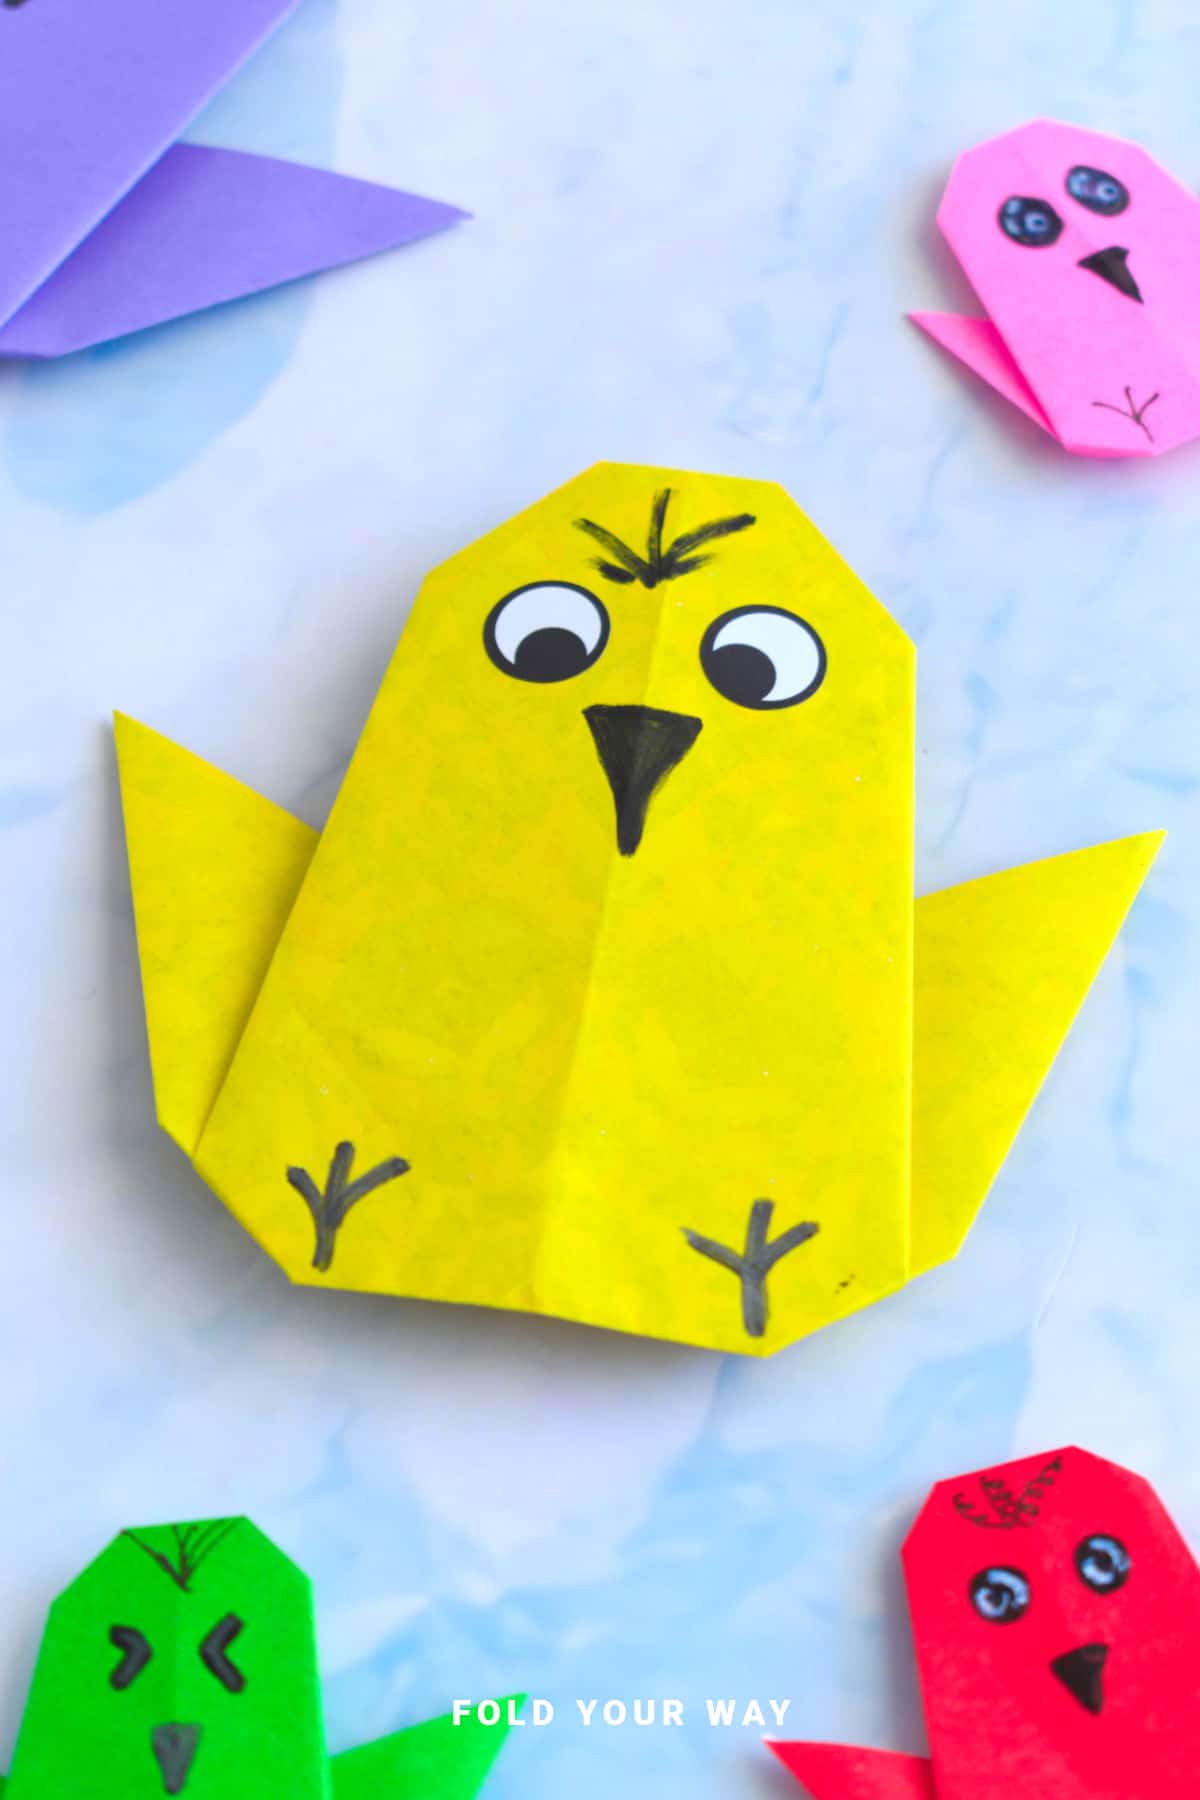
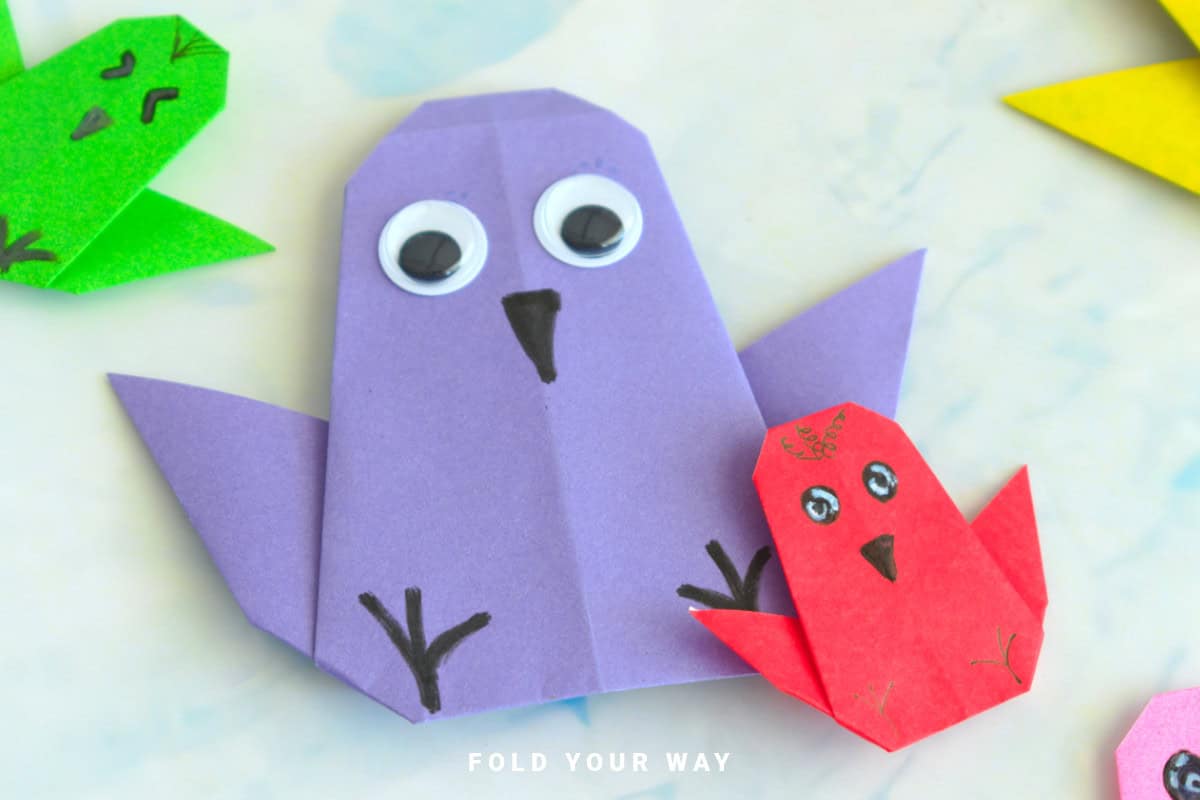
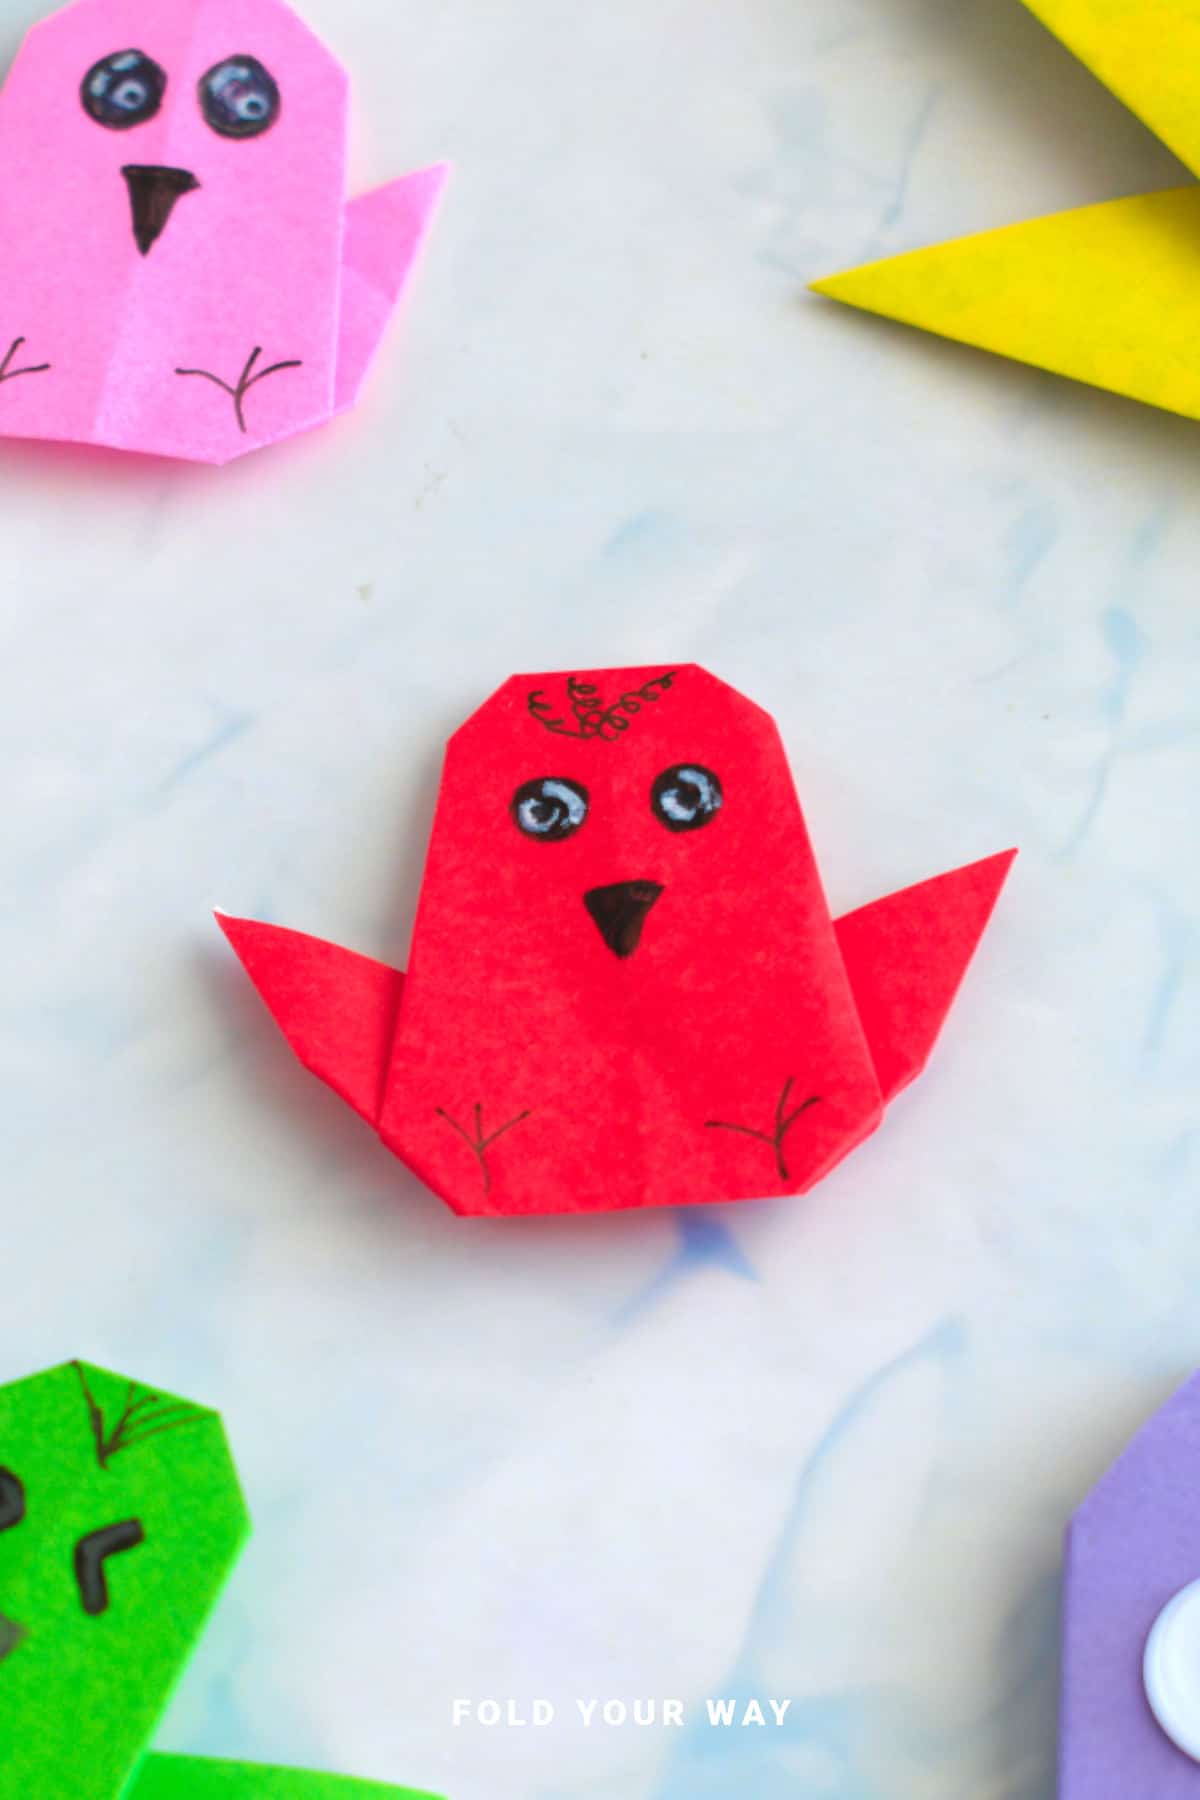
Step 11: Decorate your chicken with markers or stickers. Completed origami chicken.

Tips For Success
- Use thinner paper for easier, cleaner folds
- Draw features after folding to avoid smudging
- Use light pencil marks if you want to sketch features first
Color, Paper Ideas, and Variations
- Classic Yellow: The traditional choice for a chicken, yellow paper is perfect for Easter crafts, springtime decorations, or any farm-themed project. It's bright, cheerful, and instantly recognizable.
- Patterned Paper: Experiment with patterned or textured paper to add some personality. Floral, polka dots, or stripes can give your chicken a whimsical, fun look. Try using pastels or bright bold colors like pink, blue, or green to add a playful twist.
- For a rustic or realistic appearance, brown or white paper can make your chicken look like it’s from the farm. This is ideal for a more natural, country-themed project.
- Once you’ve folded your chicken, consider using markers to add extra details like eyes, beaks, and feathers. You could also create mini accessories, such as a bow tie or a tiny hat, for a cute, personalized touch.
- Seasonal Variations: Change up the colors depending on the occasion. For Halloween, use black paper with orange accents. For Christmas, try red, green, and gold for a festive look.
FAQ
Definitely! These chickens make cute spring or Easter table decorations.
Yes! You could attach a stick to the back.
Stay Connected
Made this pattern? Let us know how it went in the comments below!
Pin this post - Pin now to take your paper crafting skills to the next level.
Share on Instagram or Facebook - Capture the beauty of your finished paper craft project and share it on Instagram or Facebook! Tag us @foldyourway so we can see your work!
Other Patterns You Might Like To Try:
Looking for other easy patterns like this? Try these:


Comments
No Comments